Hello ROS Developers,
welcome to this new post on the “ROS In 5 Minutes” series!
In this post we are going to see how to publish the position of a robot with Python using the TransformBroadcaster. For that we are going to use Robot Ignite Academy, which is the best platform for those who want to Learn ROS Fast.
Before we start, in case you are new to ROS, remember that we have ROS Basics courses in Python and C++:
Ok, let’s get started. In order to develop our position publisher in ROS we first need to create a ROS package. Our package will be located on the src folder of the ~/catkin_ws (catkin workspace) and its name will be tutorial. Given that we will use python, we add the rospy dependency. For that we use the following commands:
mkdir ~/catkin_ws/src/ -p

cd ~/catkin_ws/src/

catkin_create_pkg tutorial rospy
Now that our package is created, let’s create a python file called broadcaster on its src folder and make it executable with the commands below:
cd ~/catkin_ws/src/tutorial/src/

touch my_broadcaster.py

chmod +x my_broadcaster.py
Now let’s add the code that publishes the positions to our my_broadcaster.py file. The content is as follows:
#! /usr/bin/env python

from tf import TransformBroadcaster
import rospy
from rospy import Time

def main():
    rospy.init_node('my_broadcaster')

    b = TransformBroadcaster()

    translation = (0.0, 0.0, 0.0)
    rotation = (0.0, 0.0, 0.0, 1.0)
    rate = rospy.Rate(5)  # 5hz

    x, y = 0.0, 0.0

    while not rospy.is_shutdown():
        if x >= 2:
            x, y = 0.0, 0.0

        x += 0.1
        y += 0.1

        translation = (x, y, 0.0)


        b.sendTransform(translation, rotation, Time.now(), 'ignite_robot', '/world')
        rate.sleep()


if __name__ == '__main__':
    main()
Now that we have everything in place, we just run our code with:
rosrun tutorial my_broadcaster.py
With the code running we don’t see any message. That is the expected behavior since we didn’t call any log functions in our code.
In order to really see the code in action we have to open RViz, which stands for ROS Visualization. For that we need to run in a different shell the following command:
rosrun rviz rviz
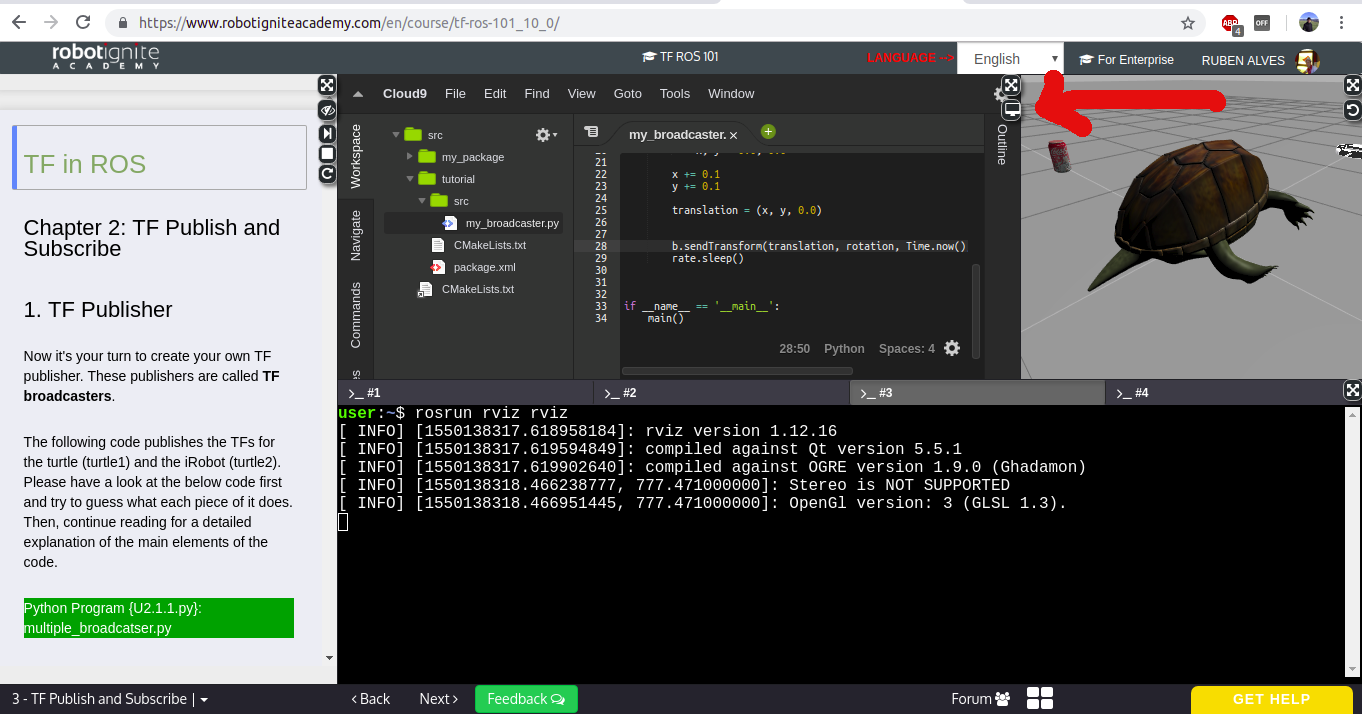
Once RViz is running, in order to see it you have to click on the Open Graphical Interface button, the one which is being pointed by a red arrow on the image below:
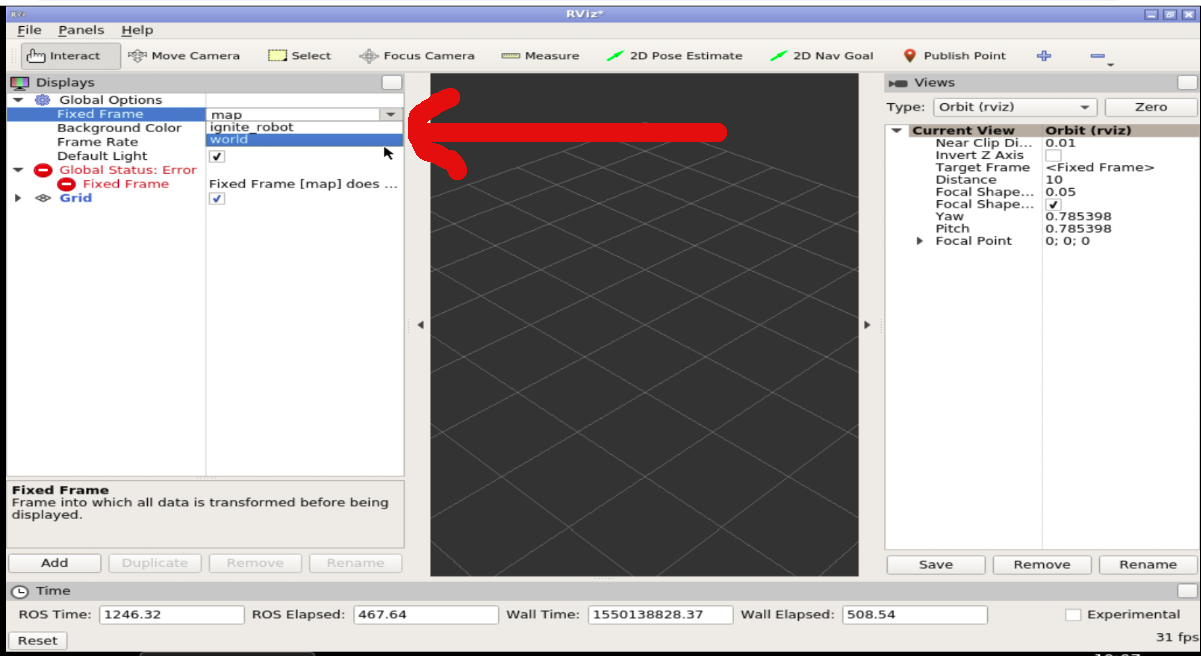
Once you click that button you will be able to see RViz. The Fixed Frame will be probably pointing to /map, so you have to change it to world as we can see on the next image:
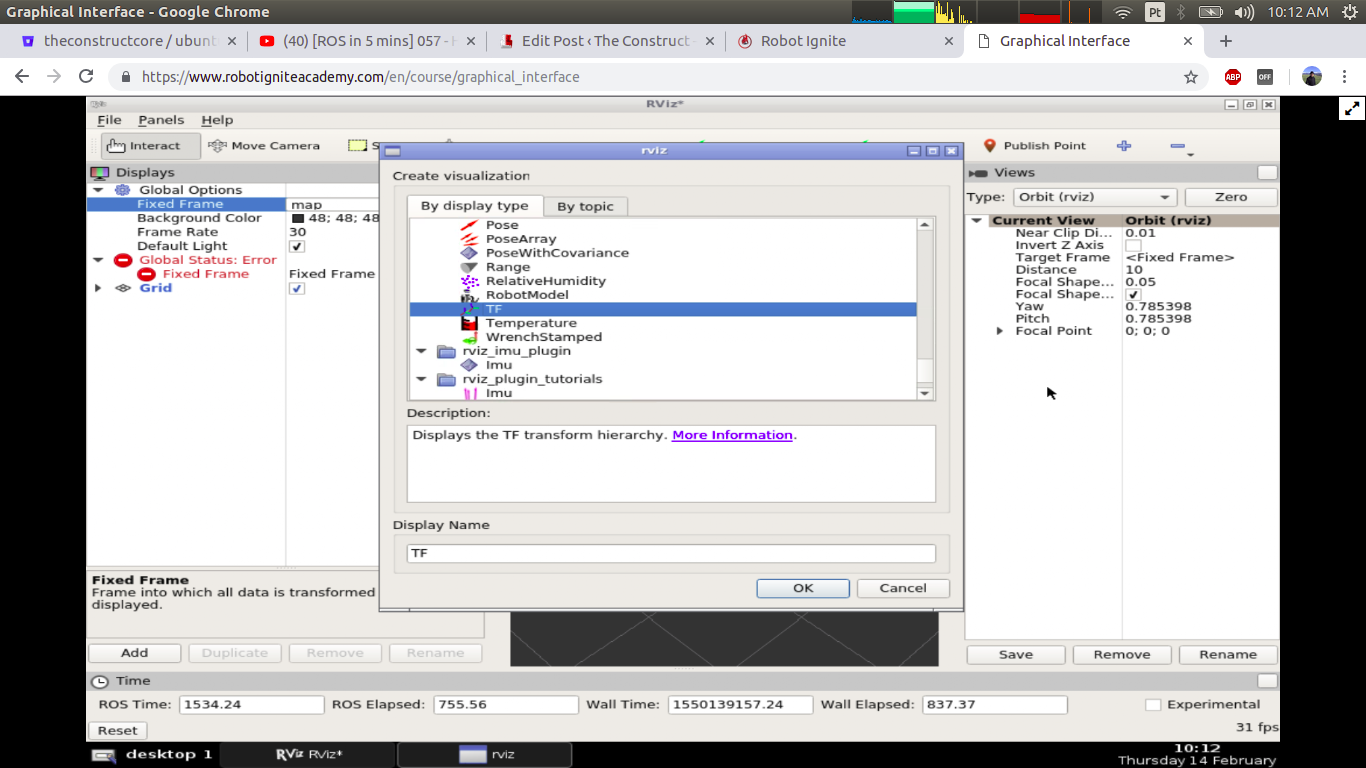
Once we selected the frame we are using as the fixed one we have to add the TF Display. If you look at the previous image you will see on the bottom left a button called “Add“. Let’s click that button and select TF, as in the image below:
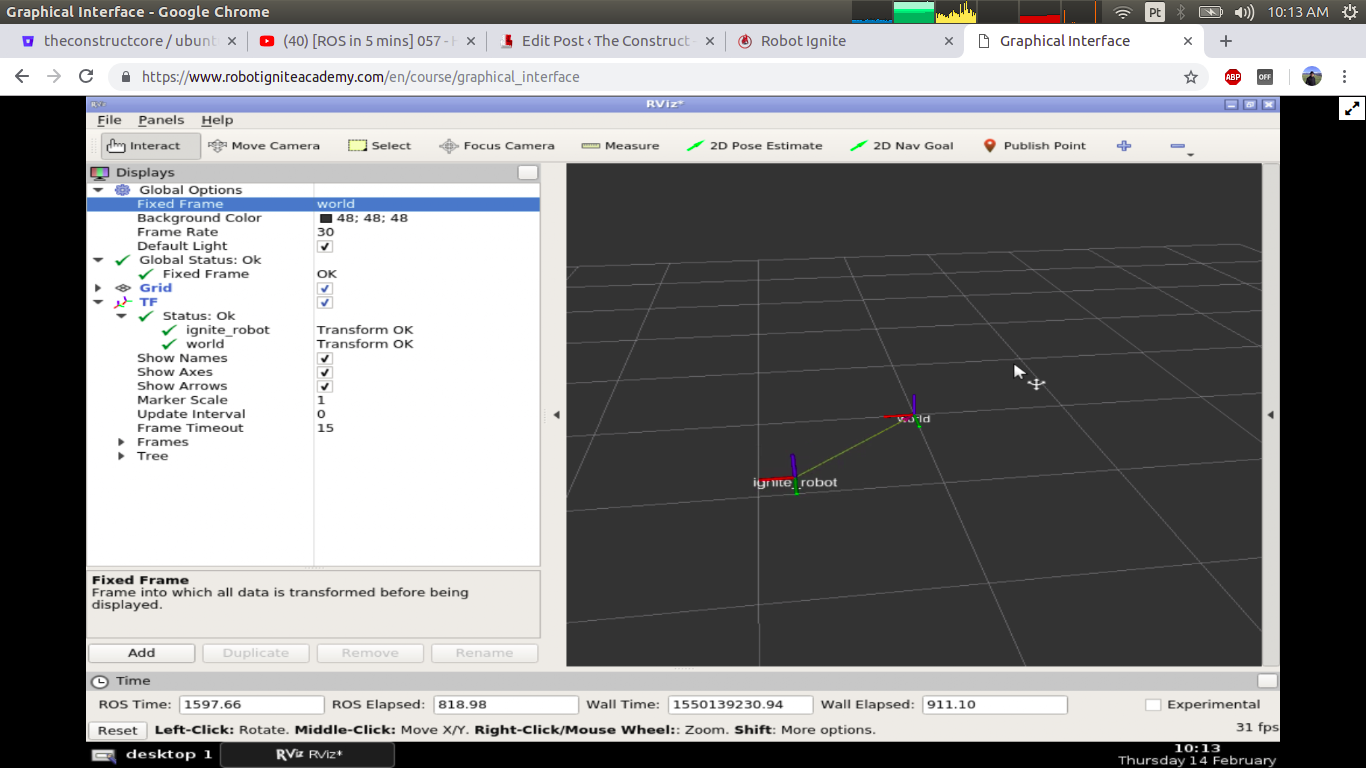
After that you should be able to see the positions of our robot being published. The image below shows that.
Remember that we also have a video on YouTube that details everything written in this post.
To conclude, I hope you have liked the post and the video. If so, please give us a thumbs up and subscribe to our channel on YouTube: https://www.youtube.com/watch?v=8U-cwv6db3U.
Also, whether you like the video or not, please leave a comment on the comments section of YouTube. Feel free also to share this content with your friends.
Keep pushing your ROS Learning.

![[ROS in 5 mins] 057 – How to publish the position of a robot using TransformBroadcaster in python [ROS in 5 mins] 057 - How to publish the position of a robot using TransformBroadcaster in python](https://www.theconstruct.ai/wp-content/uploads/2018/12/ROS-in-5-mins-057-How-to-publish-the-position-of-a-robot-using-TransformBroadcaster-in-python.png)


Dear sir,
To run the robot in gazebo , we need to send velocity to move from one position to another position and also for the orientation, is this tranformbroadcaster can used for the robot in real time or gazebo simulator instead of velocity.
Hi Sayed,
the answer for your question is YES. Although we used simulations in this POST, you can definitely publish position of real robots.
For that you first have to learn how to publish the position of the simulated robot while you move it, which is described on the TF course.
By following that course you should be able to apply the same concept on real robots.
Best regards.
Dear Sir,
can you tell me that how to save the last pose of the robot before there is any loss of data(e.g. /scan is stopped or /odom is stopped).
Hi Piyush
You can easily save on a variable or export to an external .json file without any problem.
Let us know if I misunderstood your question.
how can i make the tf robot move in a circular path
How about looping through the angles (theta) values between 0 and 2pi. Then your x translation will be [cos theta] and the y translation will be [sin theta]. That’s math, hope it make sense to you.