In this post, you will learn how to integrate the OpenCV library with a ROS2 C++ node. The example shown builds into a “hello-world” binary for ROS2 integration with OpenCV that publishes an image to the ROS network.
After going through this post, you would be able to use OpenCV to do things related to image processing and computer vision and make the results available to other ROS2 nodes. The example uses ROS2 Humble.
Step 1: Fire up a system with ROS2 installation
“Hey, do I have to install ros2 first?” Absolutely not! Just log in to The Construct to get access to virtual machines pre-installed with ROS.
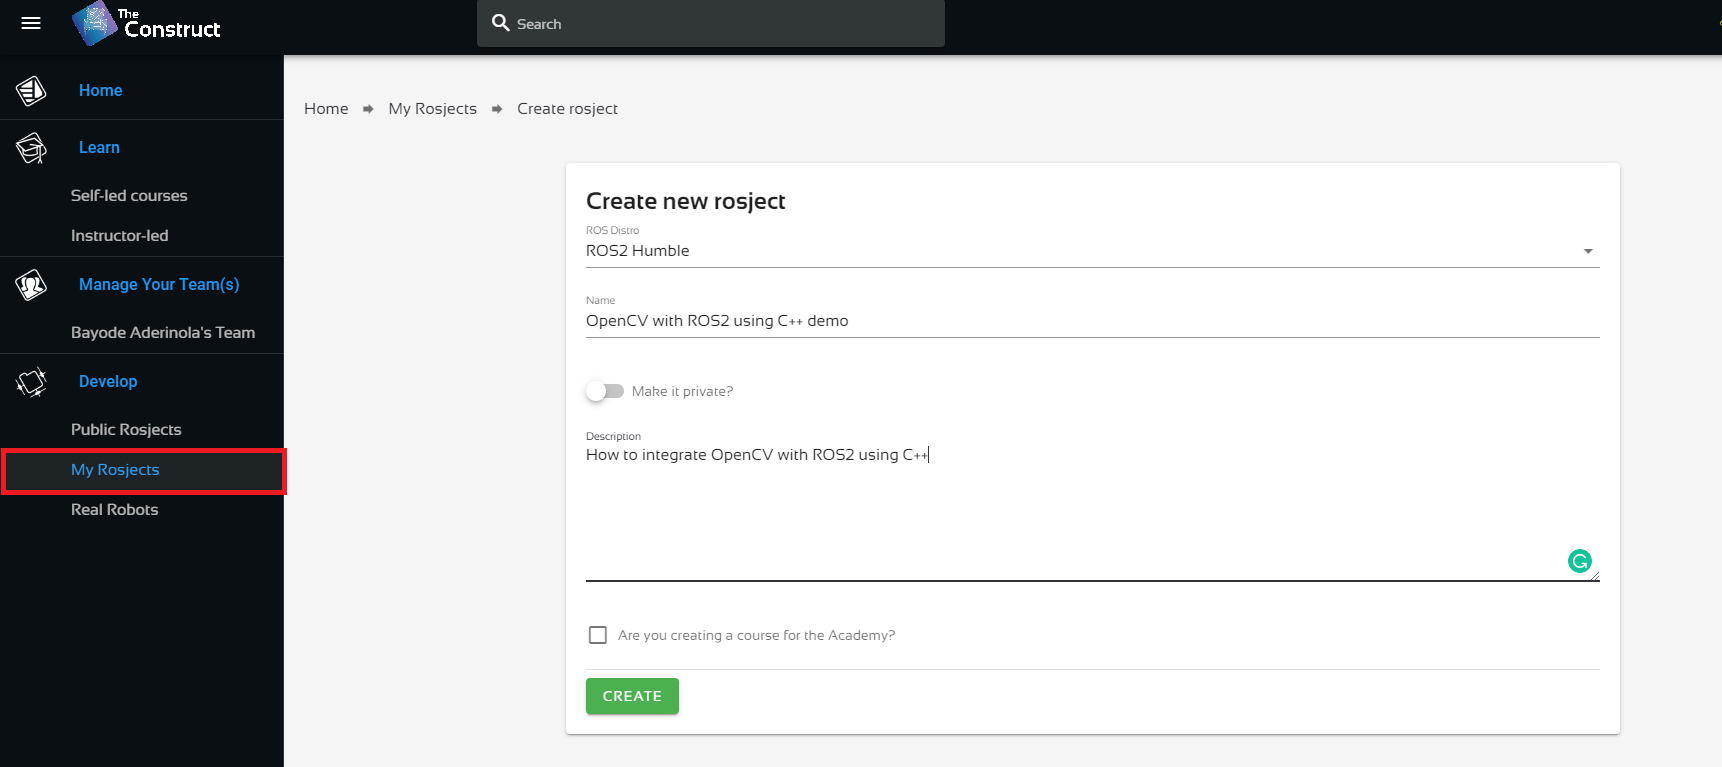
Once logged in, click on My Rosjects, then Create a New Rosject, supply the information as shown in the image below, and click Create. Then RUN the rosject.

You might also want to try this on a local PC if you have ros2 installed. However, please note that we cannot support local PCs and you will have to fix any errors you run into on your own. The rest of the instruction assumes that you are working on The Construct; please adapt them to your local PC and ros2 installation.
Step 2: Verify that OpenCV is installed
All ROS installs include OpenCV, so verify whether OpenCV has been installed.
Open a web shell and run the following command:
pkg-config --modversion opencv4
You should get a version number similar to this:
4.5.4
If the above output is similar to what you see, you are set and ready, everything should work. Otherwise, please install OpenCV using the following command:
sudo apt install libopencv-dev python3-opencv
Step 3: Create a ROS2 C++ node integrating the OpenCV library
First, we need to create a package. We need the following dependencies for the package:
- rclcpp – this is the ros2 C++ API we’ll use to create the ros2 node
- std_msgs – needed for sending message header while sending the image
- sensor_msgs – needed for sending the image itself
- cv_bridge – converts from the OpenCV image format to the ros2 image format
- image_transport – compresses the image for transport within the ros2 network
- OpenCV – generates the image we want to send
Run the following command in the terminal you used in Step 2, to create the package:
cd ~/ros2_ws/src
ros2 pkg create my_opencv_demo --dependencies rclcpp std_msgs sensor_msgs cv_bridge image_transport OpenCV
Now go to the src folder of the package you just created and create the C++ file that will define the node:
cd ~/ros2_ws/src/my_opencv_demo/src
touch minimal_opencv_ros2_node.cpp
Open the Code Editor, locate the C++ file you just created, and paste the code indicated below. Explanations are given as comments within the code.

#include "rclcpp/rclcpp.hpp"
#include "sensor_msgs/msg/image.hpp"
#include "std_msgs/msg/header.hpp"
#include <chrono>
#include <cv_bridge/cv_bridge.h> // cv_bridge converts between ROS 2 image messages and OpenCV image representations.
#include <image_transport/image_transport.hpp> // Using image_transport allows us to publish and subscribe to compressed image streams in ROS2
#include <opencv2/opencv.hpp> // We include everything about OpenCV as we don't care much about compilation time at the moment.
using namespace std::chrono_literals;
class MinimalImagePublisher : public rclcpp::Node {
public:
MinimalImagePublisher() : Node("opencv_image_publisher"), count_(0) {
publisher_ =
this->create_publisher<sensor_msgs::msg::Image>("random_image", 10);
timer_ = this->create_wall_timer(
500ms, std::bind(&MinimalImagePublisher::timer_callback, this));
}
private:
void timer_callback() {
// Create a new 640x480 image
cv::Mat my_image(cv::Size(640, 480), CV_8UC3);
// Generate an image where each pixel is a random color
cv::randu(my_image, cv::Scalar(0, 0, 0), cv::Scalar(255, 255, 255));
// Write message to be sent. Member function toImageMsg() converts a CvImage
// into a ROS image message
msg_ = cv_bridge::CvImage(std_msgs::msg::Header(), "bgr8", my_image)
.toImageMsg();
// Publish the image to the topic defined in the publisher
publisher_->publish(*msg_.get());
RCLCPP_INFO(this->get_logger(), "Image %ld published", count_);
count_++;
}
rclcpp::TimerBase::SharedPtr timer_;
sensor_msgs::msg::Image::SharedPtr msg_;
rclcpp::Publisher<sensor_msgs::msg::Image>::SharedPtr publisher_;
size_t count_;
};
int main(int argc, char *argv[]) {
rclcpp::init(argc, argv);
// create a ros2 node
auto node = std::make_shared<MinimalImagePublisher>();
// process ros2 callbacks until receiving a SIGINT (ctrl-c)
rclcpp::spin(node);
rclcpp::shutdown();
return 0;
}
Finally, edit the package’s CMakeLists.txt (~/ros2_ws/src/my_opencv_demo/CMakeLists.txt) file to recognize the node. Copy the lines of code shown below and paste them before the invocation of ament_package():
add_executable(minimal_opencv_ros2_node src/minimal_opencv_ros2_node.cpp)
ament_target_dependencies(minimal_opencv_ros2_node rclcpp std_msgs sensor_msgs cv_bridge image_transport OpenCV)
install(TARGETS
minimal_opencv_ros2_node
DESTINATION lib/${PROJECT_NAME}
)
The CMakeLists.txt file should now look like this:
cmake_minimum_required(VERSION 3.8)
project(my_opencv_demo)

if(CMAKE_COMPILER_IS_GNUCXX OR CMAKE_CXX_COMPILER_ID MATCHES "Clang")
  add_compile_options(-Wall -Wextra -Wpedantic)
endif()

# find dependencies
find_package(ament_cmake REQUIRED)
find_package(rclcpp REQUIRED)
find_package(std_msgs REQUIRED)
find_package(sensor_msgs REQUIRED)
find_package(cv_bridge REQUIRED)
find_package(image_transport REQUIRED)
find_package(OpenCV REQUIRED)

if(BUILD_TESTING)
  find_package(ament_lint_auto REQUIRED)
  # the following line skips the linter which checks for copyrights
  # comment the line when a copyright and license is added to all source files
  set(ament_cmake_copyright_FOUND TRUE)
  # the following line skips cpplint (only works in a git repo)
  # comment the line when this package is in a git repo and when
  # a copyright and license is added to all source files
  set(ament_cmake_cpplint_FOUND TRUE)
  ament_lint_auto_find_test_dependencies()
endif()

add_executable(minimal_opencv_ros2_node src/minimal_opencv_ros2_node.cpp)
ament_target_dependencies(minimal_opencv_ros2_node rclcpp std_msgs sensor_msgs cv_bridge image_transport OpenCV)

install(TARGETS
  minimal_opencv_ros2_node
  DESTINATION lib/${PROJECT_NAME}
)

ament_package()
Congratulations! You have created a ros2 C++ node integrating OpenCV. Now, we need to see if it works!
Step 4: Compile and test ROS2 C++ node integrating the OpenCV library
Generate the ros2 executable by compiling and sourcing the package:
cd ~/ros2_ws
colcon build --packages-select my_opencv_demo
source ~/ros2_ws/install/setup.bash
If you got to this point, great! Now we will run the node:
ros2 run my_opencv_demo minimal_opencv_ros2_node
You should see some output similar to this:
[INFO] [1677071986.446315963] [opencv_image_publisher]: Image 0 published
[INFO] [1677071986.941745471] [opencv_image_publisher]: Image 1 published
[INFO] [1677071987.442009334] [opencv_image_publisher]: Image 2 published
[INFO] [1677071987.941677164] [opencv_image_publisher]: Image 3 published
[INFO] [1677071988.441115565] [opencv_image_publisher]: Image 4 published
[INFO] [1677071988.940492910] [opencv_image_publisher]: Image 5 published
[INFO] [1677071989.441007118] [opencv_image_publisher]: Image 6 published
Now let’s run ros2 topic list to confirm the existence of the image topic. Leave the node running in the current terminal and run the following command in a new terminal:
source ~/ros2_ws/install/setup.bash
ros2 topic list
The output should inclide the /random_image topic:
/parameter_events
/random_image
/rosout
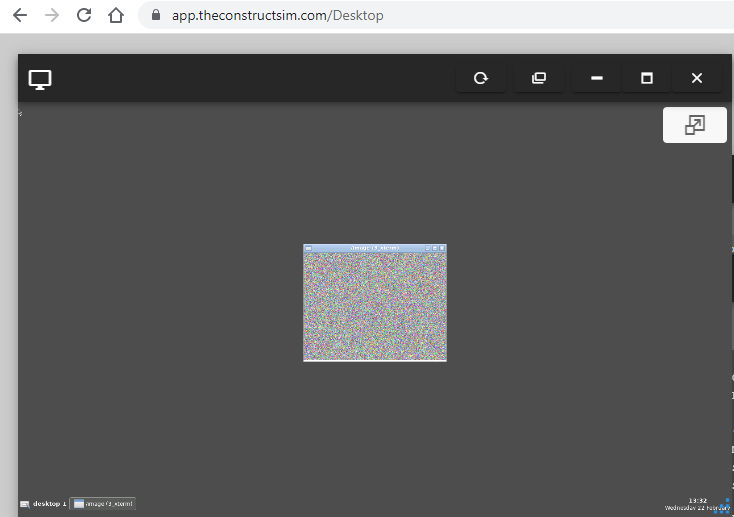
Finally lets us see what the image produced by OpenCV looks like. Run the following in the same terminal where you ran ros2 topic list. If you get the error, (image_view:8839): Gdk-ERROR **: 13:30:34.498: The program 'image_view' received an X Window System error, just run the command again.
ros2 run image_view image_view --ros-args --remap image:=/random_image
You should now see something like this pop up on your screen. Yahoo!

Great job! You have successfully created a ros2 C++ node integrating OpenCV!
Step 5: Extra: add text to the Image
Copy the lines of code shown below and paste them inside the timer callback function just before writing the message to be sent:
    // Declare the text position
    cv::Point text_position(15, 40);

    // Declare the size and color of the font
    int font_size = 1;
    cv::Scalar font_color(255, 255, 255);

    // Declare the font weight
    int font_weight = 2;

    // Put the text in the image
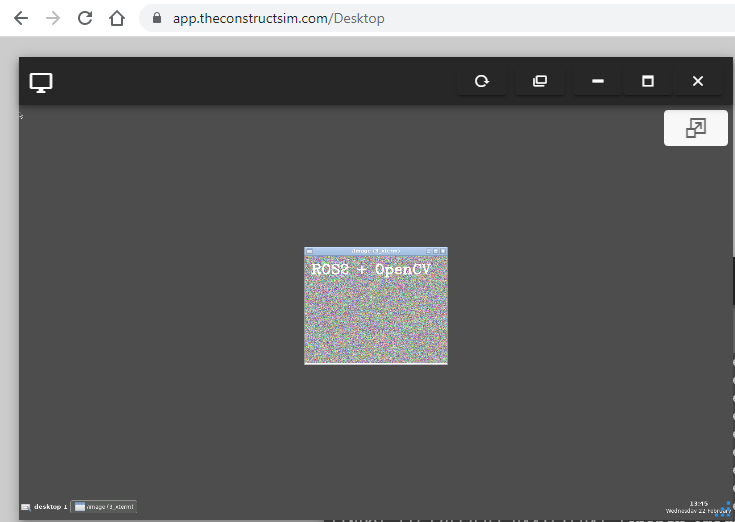
    cv::putText(my_image, "ROS2 + OpenCV", text_position, cv::FONT_HERSHEY_COMPLEX, font_size, font_color, font_weight);
Stop the currently running node, recompile and source the package, and re-run the node. You should now see something like this:

Step 6: Check your learning
Do you understand how to create a ros2 C++ node integrating OpenCV? If you don’t know it yet, please go over the post again, more carefully this time.
(Extra) Step 7: Watch the video to understand how to integrate the OpenCV library with a ROS2 C++ node
Here you go:
If you want to learn more about ROS 2 and dive deeper into robotics, check out the Robotics Developer Masterclass, where you’ll master robotics development from scratch and get 100% job-ready to work at robotics companies.

Feedback
Did you like this post? Do you have any questions about how to integrate the OpenCV library with a ROS2 C++ node? Please leave a comment in the comments section below, so we can interact and learn from each other.
If you want to learn about other ROS2 topics, please let us know in the comments area and we will do a video or post about it.


Is image_transport being used in your code? I think it’s included but not used.
— stderr: my_opencv_demo
CMake Error at CMakeLists.txt:13 (find_package):
By not providing “Findcv_bridge.cmake” in CMAKE_MODULE_PATH this project
has asked CMake to find a package configuration file provided by
“cv_bridge”, but CMake did not find one.
Could not find a package configuration file provided by “cv_bridge” with
any of the following names:
cv_bridgeConfig.cmake
cv_bridge-config.cmake
Add the installation prefix of “cv_bridge” to CMAKE_PREFIX_PATH or set
“cv_bridge_DIR” to a directory containing one of the above files. If
“cv_bridge” provides a separate development package or SDK, be sure it has
been installed.
—
Failed <<< my_opencv_demo [9.44s, exited with code 1]
Summary: 0 packages finished [15.2s]
1 package failed: my_opencv_demo
1 package had stderr output: my_opencv_demo
pkg-config –modversion opencv4
4.5.4
sudo apt-get install ros-humble-ros-base
sudo apt-get install ros-${ROS_DISTRO}-cv-bridge
sudo apt-get install ros-${ROS_DISTRO}-image-transport
okay, should solve the issue
what is & trying to do in line 19 of minimal_opencv_ros2_node.cpp?
500ms, std::bind(&MinimalImagePublisher::timer_callback, this));
what is & trying to do in line 19 of minimal_opencv_ros2_node.cpp?
500ms, std::bind(&MinimalImagePublisher::timer_callback, this));
conversion error when copying from the UI interface, it becomes & amp;
source ~/ros2_ws/install/setup.bash
ros2 run my_opencv_demo minimal_opencv_ros2_node
package ‘my_opencv_demo’ not found
either source ~/ros2_ws/install/setup.bash does not work, must change to source ./install/setup.bash or missing source /opt/ros/${ROS_DISTRO}/setup.bash then can it can find my_opencv_demo package.
I also need to sudo apt-get install ros-${ROS_DISTRO}-image-view