[ROS Q&A] 190 – Air Drag in Gazebo

[ROS Q&A] 190 – Air Drag in Gazebo

What will you learn in this post

  • How to create a Gazebo plugin to generate dragging when a model moves.
  • How to create a simple propulsion system plugin

List of resources used in this post

Start the provided ROSject

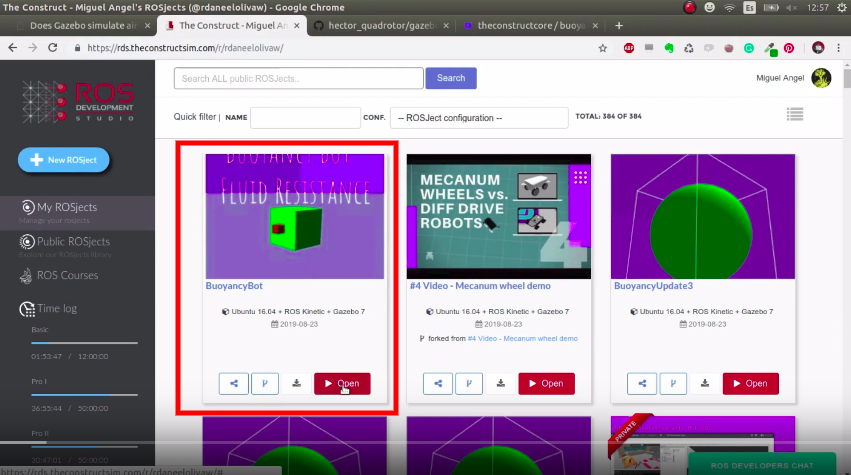
The first thing you need to do is to have a copy of the ROSject we mentioned above. Click on the link to get an automatic copy. You should now see a ROSject called BuoyancyBot on your list of ROSjects, something like the image below:

BuoyancyBot simulation on ROSDS

BuoyancyBot simulation on ROSDS

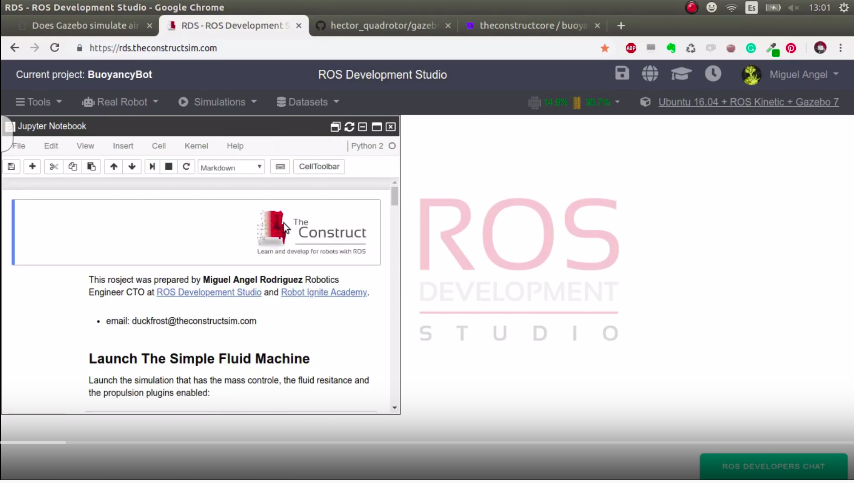
After clicking on the Open button to open the ROSject, you should have the environment like the one in the image below:

BuoyancyBot opened on ROSDS

BuoyancyBot opened on ROSDS

Finding the code

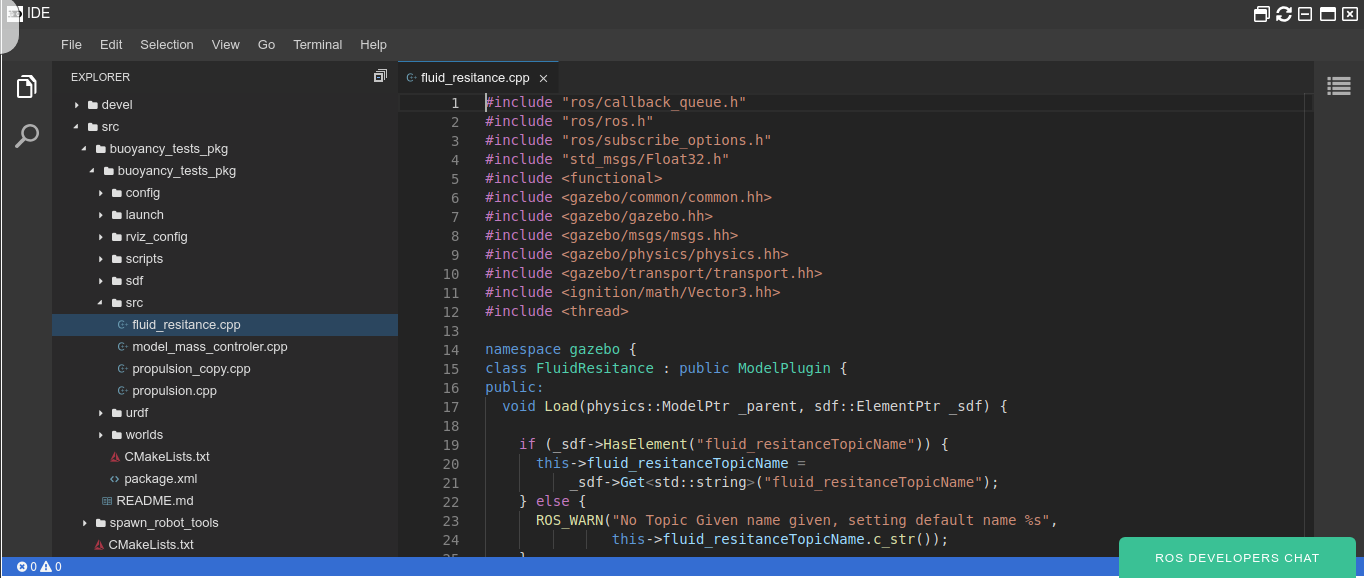
After opening the ROSject, you can see the code on the ~/simulation_ws/src folder. There you will find the folders buoyancy_tests_pkg and spawn_robot_tools. It is worth mentioning that the plugin we created is called fluid_resitance.cpp, which has the content below. Bear in mind that you can find that code on the ROSject:

#include "ros/callback_queue.h"
#include "ros/ros.h"
#include "ros/subscribe_options.h"
#include "std_msgs/Float32.h"
#include <functional>
#include <gazebo/common/common.hh>
#include <gazebo/gazebo.hh>
#include <gazebo/msgs/msgs.hh>
#include <gazebo/physics/physics.hh>
#include <gazebo/transport/transport.hh>
#include <ignition/math/Vector3.hh>
#include <thread>

namespace gazebo {
class FluidResitance : public ModelPlugin {
public:
  void Load(physics::ModelPtr _parent, sdf::ElementPtr _sdf) {

    if (_sdf->HasElement("fluid_resitanceTopicName")) {
      this->fluid_resitanceTopicName =
          _sdf->Get<std::string>("fluid_resitanceTopicName");
    } else {
      ROS_WARN("No Topic Given name given, setting default name %s",
               this->fluid_resitanceTopicName.c_str());
    }

    if (_sdf->HasElement("NameLinkToApplyResitance")) {
      this->NameLinkToApplyResitance =
          _sdf->Get<std::string>("NameLinkToApplyResitance");
    } else {
      ROS_WARN("No NameLinkToApplyResitance Given name given, setting default "
               "name %s",
               this->NameLinkToApplyResitance.c_str());
    }

    if (_sdf->HasElement("rate")) {
      this->rate = _sdf->Get<double>("rate");
    } else {
      ROS_WARN("No rate Given name given, setting default "
               "name %f",
               this->rate);
    }

    // Store the pointer to the model
    this->model = _parent;
    this->world = this->model->GetWorld();
    this->link_to_apply_resitance =
        this->model->GetLink(this->NameLinkToApplyResitance);

    // Listen to the update event. This event is broadcast every
    // simulation iteration.
    this->updateConnection = event::Events::ConnectWorldUpdateBegin(
        std::bind(&FluidResitance::OnUpdate, this));

    // Create a topic name
    // std::string fluid_resitance_index_topicName = "/fluid_resitance_index";

    // Initialize ros, if it has not already bee initialized.
    if (!ros::isInitialized()) {
      int argc = 0;
      char **argv = NULL;
      ros::init(argc, argv, "model_mas_controler_rosnode",
                ros::init_options::NoSigintHandler);
    }

    // Create our ROS node. This acts in a similar manner to
    // the Gazebo node
    this->rosNode.reset(new ros::NodeHandle("model_mas_controler_rosnode"));

#if (GAZEBO_MAJOR_VERSION >= 8)
    this->last_time = this->world->SimTime().Float();
#else
    this->last_time = this->world->GetSimTime().Float();
#endif

    // Freq
    ros::SubscribeOptions so = ros::SubscribeOptions::create<std_msgs::Float32>(
        this->fluid_resitanceTopicName, 1,
        boost::bind(&FluidResitance::OnRosMsg, this, _1), ros::VoidPtr(),
        &this->rosQueue);
    this->rosSub = this->rosNode->subscribe(so);

    // Spin up the queue helper thread.
    this->rosQueueThread =
        std::thread(std::bind(&FluidResitance::QueueThread, this));

    ROS_WARN("Loaded FluidResitance Plugin with parent...%s, With Fluid "
             "Resitance = %f "
             "Started ",
             this->model->GetName().c_str(), this->fluid_resitance_index);
  }

  // Called by the world update start event
public:
  void OnUpdate() {
    float period = 1.0 / this->rate;

    // Get simulator time
#if (GAZEBO_MAJOR_VERSION >= 8)
    float current_time = this->world->SimTime().Float();
#else
    float current_time = this->world->GetSimTime().Float();
#endif
    float dt = current_time - this->last_time;

    if (dt <= period){
        ROS_DEBUG(">>>>>>>>>>TimePassed = %f, TimePeriod =%f ",dt, period);
        return;
    }else{
        this->last_time = current_time;
        this->ApplyResitance();
    }


  }

public:
  void SetResitance(const double &_force) {
    this->fluid_resitance_index = _force;
    ROS_WARN("model_fluid_resitance_index changed >> %f",
             this->fluid_resitance_index);
  }

  void UpdateLinearVel() {
#if (GAZEBO_MAJOR_VERSION >= 8)
    this->now_lin_vel = this->model->RelativeLinearVel();
#else
    this->now_lin_vel = this->model->GetRelativeLinearVel();
#endif
  }

  void ApplyResitance() {

    this->UpdateLinearVel();

#if (GAZEBO_MAJOR_VERSION >= 8)
    ignition::math::Vector3d force, torque;
#else
    math::Vector3 force, torque;
#endif

    ROS_WARN("LinearSpeed = [%f,%f,%f] ",this->now_lin_vel.x, this->now_lin_vel.y, this->now_lin_vel.z);

    force.x = -1.0 * this->fluid_resitance_index * this->now_lin_vel.x;
    force.y = -1.0 * this->fluid_resitance_index * this->now_lin_vel.y;
    force.z = -1.0 * this->fluid_resitance_index * this->now_lin_vel.z;

    // Changing the mass
    this->link_to_apply_resitance->AddRelativeForce(force);
#if (GAZEBO_MAJOR_VERSION >= 8)
    this->link_to_apply_resitance->AddRelativeTorque(
        torque -
        this->link_to_apply_resitance->GetInertial()->CoG().Cross(force));
#else
    this->link_to_apply_resitance->AddRelativeTorque(
        torque -
        this->link_to_apply_resitance->GetInertial()->GetCoG().Cross(force));
#endif

    ROS_WARN("FluidResitanceApplying = [%f,%f,%f] ",force.x, force.y, force.z);
  }

public:
  void OnRosMsg(const std_msgs::Float32ConstPtr &_msg) {
    this->SetResitance(_msg->data);
  }

  /// \brief ROS helper function that processes messages
private:
  void QueueThread() {
    static const double timeout = 0.01;
    while (this->rosNode->ok()) {
      this->rosQueue.callAvailable(ros::WallDuration(timeout));
    }
  }

  // Pointer to the model
private:
  physics::ModelPtr model;

  // Pointer to the update event connection
private:
  event::ConnectionPtr updateConnection;

  // Mas of model
  double fluid_resitance_index = 1.0;

  /// \brief A node use for ROS transport
private:
  std::unique_ptr<ros::NodeHandle> rosNode;

  /// \brief A ROS subscriber
private:
  ros::Subscriber rosSub;
  /// \brief A ROS callbackqueue that helps process messages
private:
  ros::CallbackQueue rosQueue;
  /// \brief A thread the keeps running the rosQueue
private:
  std::thread rosQueueThread;

  /// \brief A ROS subscriber
private:
  physics::LinkPtr link_to_apply_resitance;

private:
  std::string fluid_resitanceTopicName = "fluid_resitance";

private:
  std::string NameLinkToApplyResitance = "base_link";

private:
#if (GAZEBO_MAJOR_VERSION >= 8)
  ignition::math::Vector3d now_lin_vel;
#else
  math::Vector3 now_lin_vel;
#endif

private:
  double rate = 1.0;

private:
  float last_time = 0.0;

private:
  /// \brief The parent World
  physics::WorldPtr world;
};

// Register this plugin with the simulator
GZ_REGISTER_MODEL_PLUGIN(FluidResitance)
} // namespace gazebo

Compile the plugin

Once you have the ROSject, be it on ROSDS or on your own computer, you can easily compile it with:

cd ~/simulation_ws/

catkin_make

Everything should have compiled without any problems. If compiling in your own computer raises errors, please remember running the command source /opt/ros/kinetic/setup.bash before calling catkin_make .

Using the plugin

The plugin we compiled previously has to be loaded by gazebo. We do that on the file

~/simulation_ws/src/buoyancy_tests_pkg/buoyancy_tests_pkg/urdf/simple_floating_sphere_buoyancy_control.urdf, by using the instructions below:

<!-- Add plugin Air Resistance -->
<gazebo>
    <plugin name="fluid_resitance_plugin" filename="libfluid_resitance_plugin.so">
        <fluid_resitanceTopicName>/fluid_resitance</fluid_resitanceTopicName>
        <NameLinkToApplyResitance>simple_sphere_base_link</NameLinkToApplyResitance>
        <rate>2.0</rate>
    </plugin>
</gazebo>

Lights, Camera Action

With everything in place, we can now run the simulation.  To launch the Simple Fluid Machine, we launch the simulation that has the mass control, the fluid resistance and the propulsion plugins enabled:

roslaunch buoyancy_tests_pkg main_sphere_buoyancy_control.launch

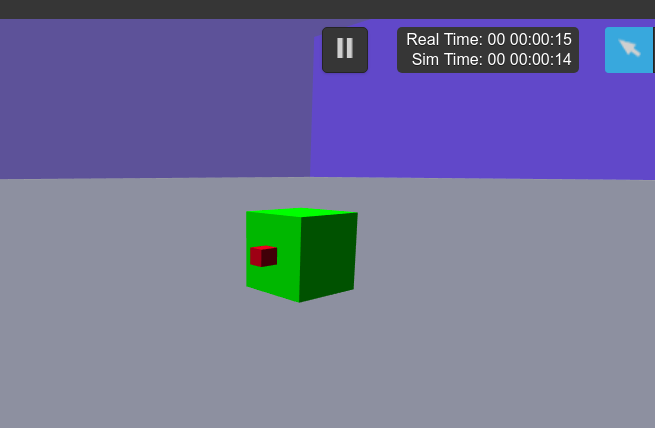
You should get something like:

buoyancy_bot

buoyancy_bot

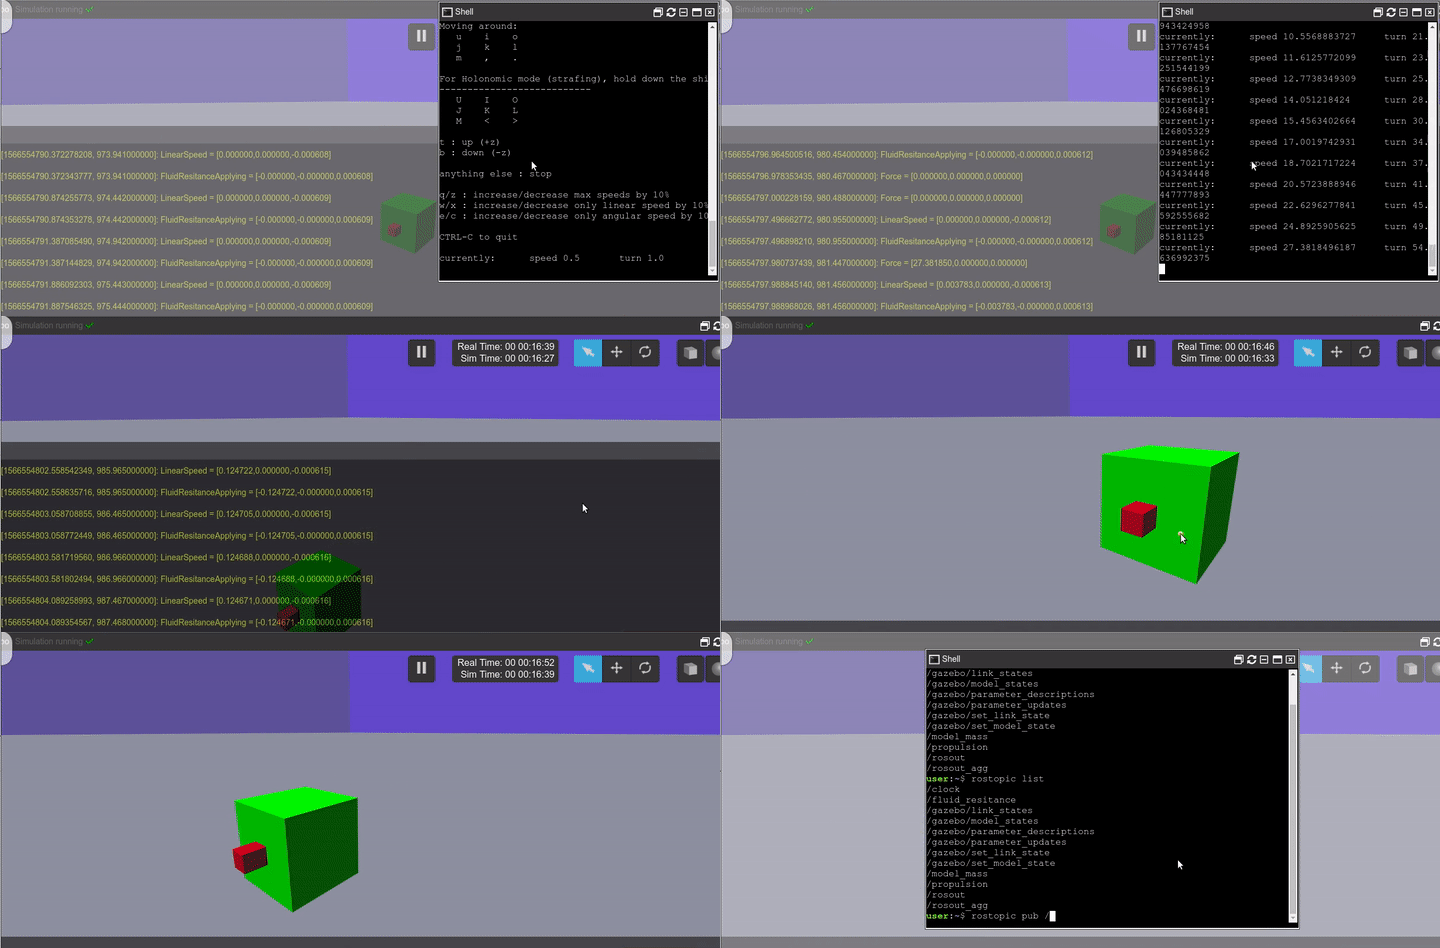
We can now start the Propulsion Control. After running the command below, you have to keep pressing the direction you want to apply force:

rosrun buoyancy_tests_pkg keyboard_propulsion.py
propulsion

propulsion


You can see all the publications of the plugins through the Gazebo Console Log.

Change the Fluid Resistance

You can change the fluid resistance anytime you want by publishing into this topic:

/fluid_resitance
For that you can do the following:
rostopic pub /fluid_resitance std_msgs/Float32 "data: 10.0"
This will apply a fluid resistance that follows this formula:
FluidResitance_X_Axis = -1* FluidResitance * LinearSpeed_X_Axis
FluidResitance_Y_Axis = -1* FluidResitance * LinearSpeed_Y_Axis
FluidResitance_Z_Axis = -1* FluidResitance * LinearSpeed_Z_Axis

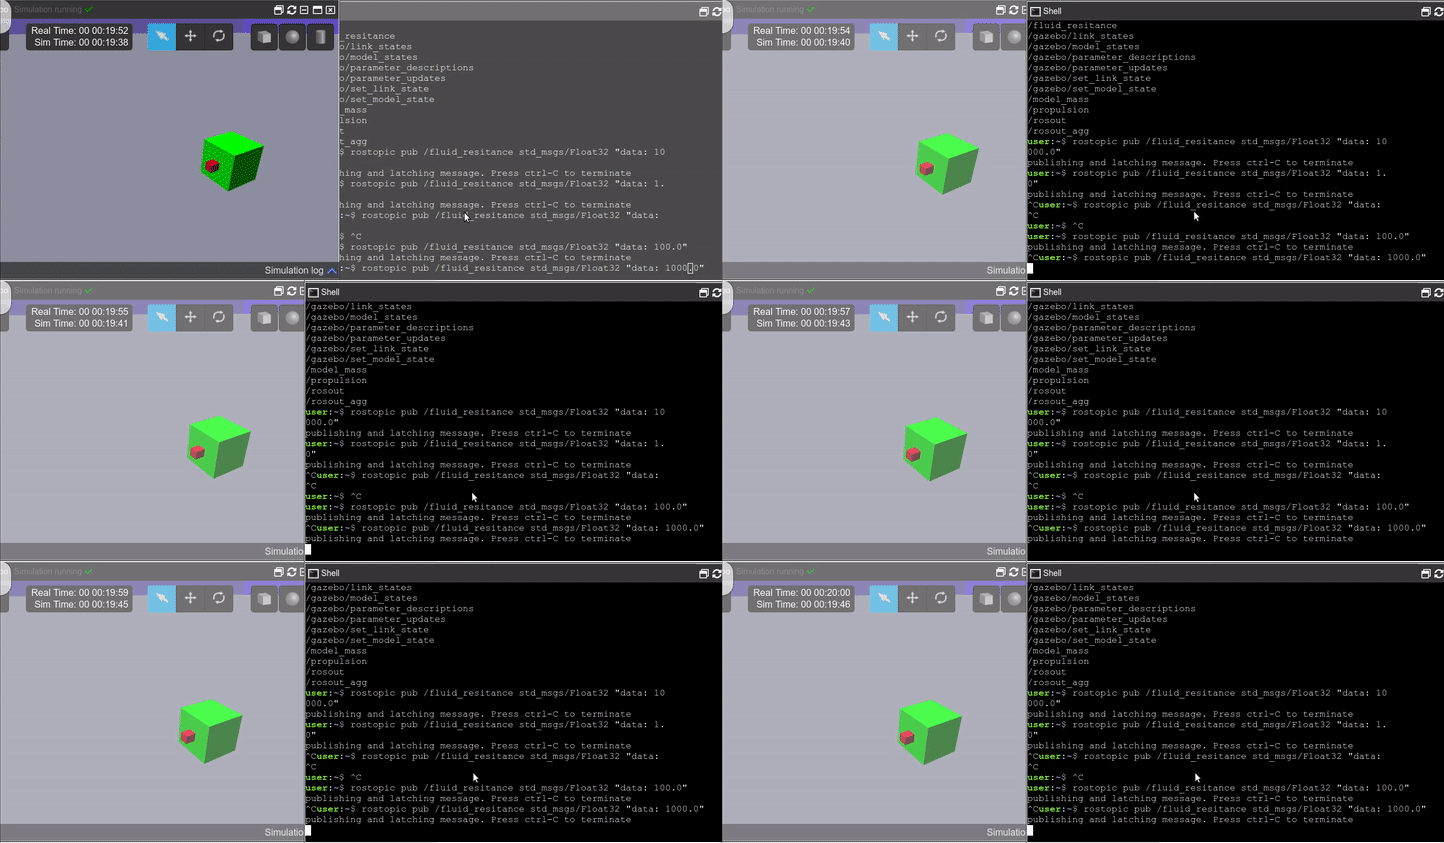
If you have applied a movement and you change the FluidResistance, you should see a variation in the time the robot takes to stop. The higher the friction, the faster it will stop its movement.

Air Dragging in Gazebo on ROSDS

Air Dragging in Gazebo on ROSDS

There is more to it but have a look at the HectorPluginsAerodinamics, in which this code is based upon.

Change the Mass or buoyancy

By changing the mass, it will change the buoyancy of the model. This is to simulate the water intake of submarines or the buoyancy system that an air flying machine like a blimp could have.

rostopic pub /model_mass std_msgs/Float32 "data: 0.0"
Mass_0 = 7.23822947387 –> Neutral buoyancy because its the mass of the object
Mass > Mass_0 –> It will sink
Mass < Mass_0 –> It will rise

This mass you can find it in the URDF of the  model: buoyancy_tests_pkg/urdf/simple_floating_sphere_buoyancy_control.urdf

<inertial>
    <origin xyz="0 0 0" rpy="0 0 0"/>
    <mass value="7.23822947387" />
    <inertia ixx="0.00576" ixy="0.0" ixz="0.0" iyy="0.00576" iyz="0.0" izz="0.00576"/>
</inertial>

See the Full code

To see the full code, open the IDE by going to the top menu and select Tools->IDE

IDE - fluidresitance on ROSDS

IDE – fluidresitance on ROSDS

You can also have a look at it from the git: https://bitbucket.org/theconstructcore/buoyancy_tests_pkg/src/master/

Bear in mind that this code is a simplification of the Hector plugins. It’s simply made easier to use. Check out the original source: https://github.com/tu-darmstadt-ros-pkg/hector_quadrotor/blob/kinetic-devel/hector_quadrotor_gazebo_plugins/src/gazebo_quadrotor_aerodynamics.cpp

So, that is the post for today. Remember that we also have a live version of this post on our YouTube channel, as can be seen on the link below. If you liked the content of this post or video, please consider subscribing to our channel and pressing the bell for a new video every single day:

Related resources:

#airdrag #fluidresitance #Simulation #Gazebo #Robot #rostutorials #Ubuntu

Post edited by Miguel, Yuhong and Ruben.

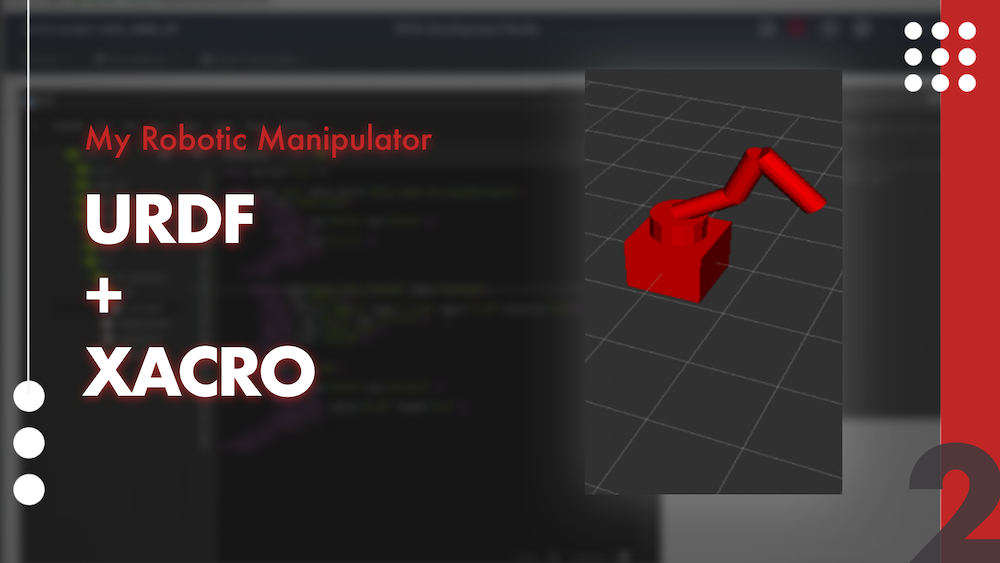
My Robotic Manipulator #02 – URDF + XACRO

My Robotic Manipulator #02 – URDF + XACRO

Updated 07 August 2023

What we are going to learn

  1. How to build a robot in a matter of minutes
  2. How to see the robot in RViz
  3. How to move the parts of the robot using Joint State Publisher

List of resources used in this post

  1. Use the rosject: https://app.theconstructsim.com/l/bc1c398/
  2. The Construct: https://app.theconstructsim.com/
  3. My Robot Manipulator repository: https://bitbucket.org/theconstructcore/my-robotic-manipulator
  4. ROS Courses:
    1. URDF for Robot modeling: https://app.theconstructsim.com/Course/13
  5. ROS2 Courses:
    1. URDF for Robot Modeling in ROS2 : https://app.theconstructsim.com/courses/83
    2. ROS2 Basics in 5 Days Humble (Python): https://app.theconstructsim.com/Course/132
    3. ROS2 Basics in 5 Days Humble (C++): https://app.theconstructsim.com/Course/133

Overview

Based on the YouTube video series, we’ll learn in this post the steps to achieve the final result of the series!

In this post number #2, I’m gonna show how to use XACROs in order to simplify a URDF file. Up to the end of the post, we’ll have the complete model of the robot, which includes 6 links in total, and visualize it in RViz!

This post is basically a continuation of what we saw in Post 1: https://www.theconstruct.ai/ros-projects-robotic-manipulator-part-1-basic-urdf-rviz/

ROS Inside!

ROS Inside

ROS Inside

Before anything else, if you want to use the logo above on your own robot or computer, feel free to download it and attach it to your robot. It is really free. Find it in the link below:

ROS Inside logo

Opening the rosject

In order to follow this tutorial, we need to have ROS installed in our system, and ideally a ROS Workspace (it can be named simulation_ws). To make your life easier, we have already prepared a rosject with a simulation for that: https://app.theconstructsim.com/l/bc1c398/.

You can download the rosject on your own computer if you want to work locally, but just by copying the rosject (clicking the link), you will have a setup already prepared for you.

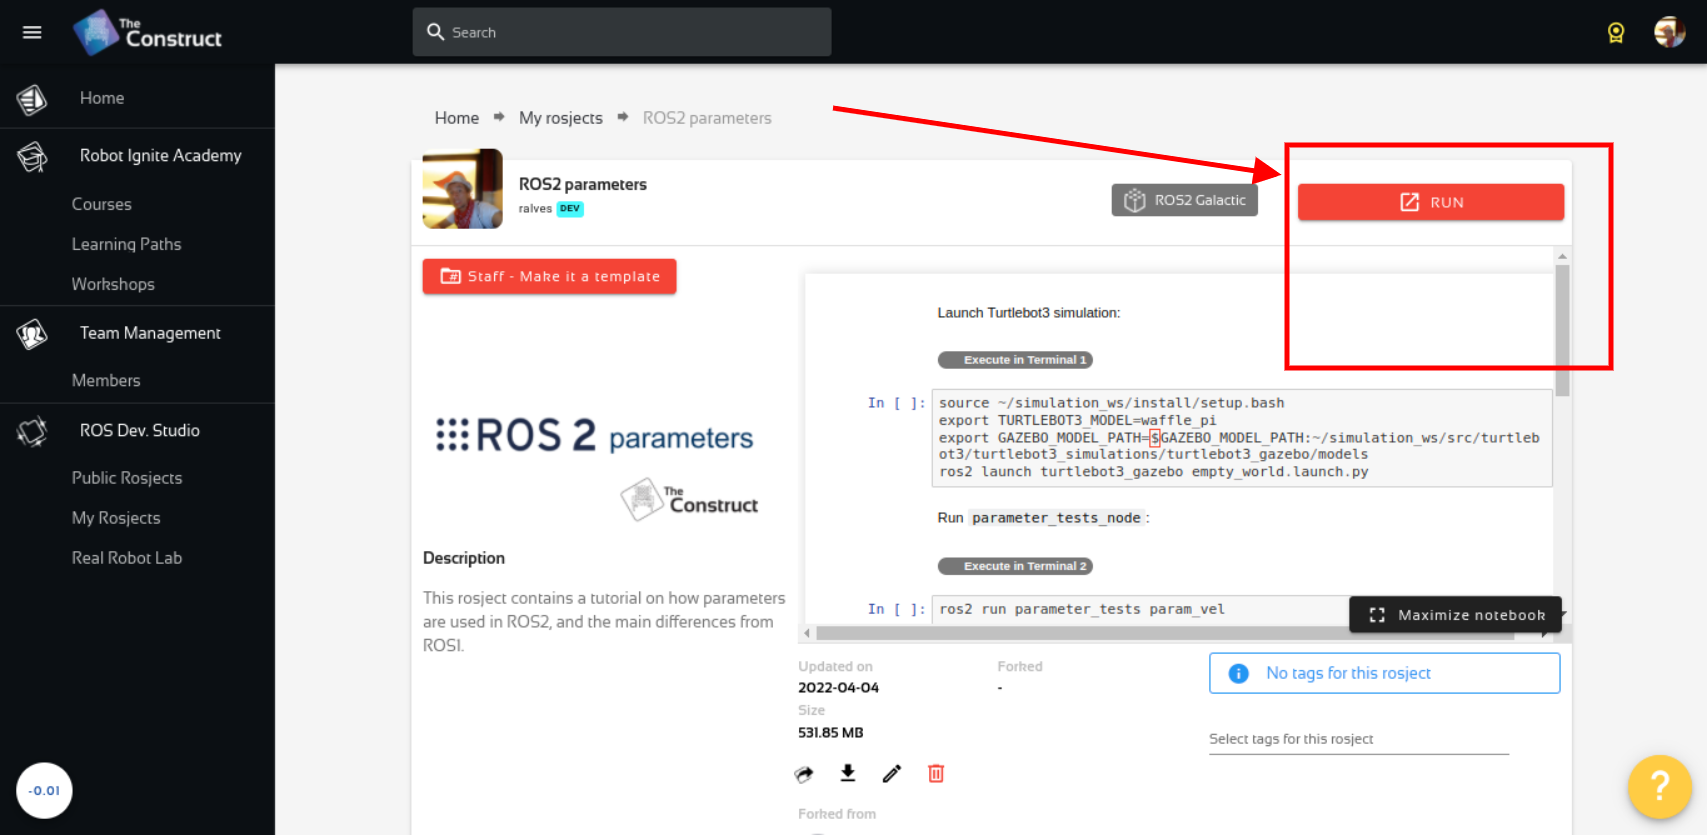
After the rosject has been successfully copied to your own area, you should see a Run button. Just click that button to launch the rosject (below you have a rosject example).

Learn ROS2 Parameters - Run rosject

My Robotic Manipulator #2: Basic URDF & RViz – Run rosject (example of the RUN button)


After pressing the Run button, you should have the rosject loaded. Now, let’s head to the next section to get some real practice.

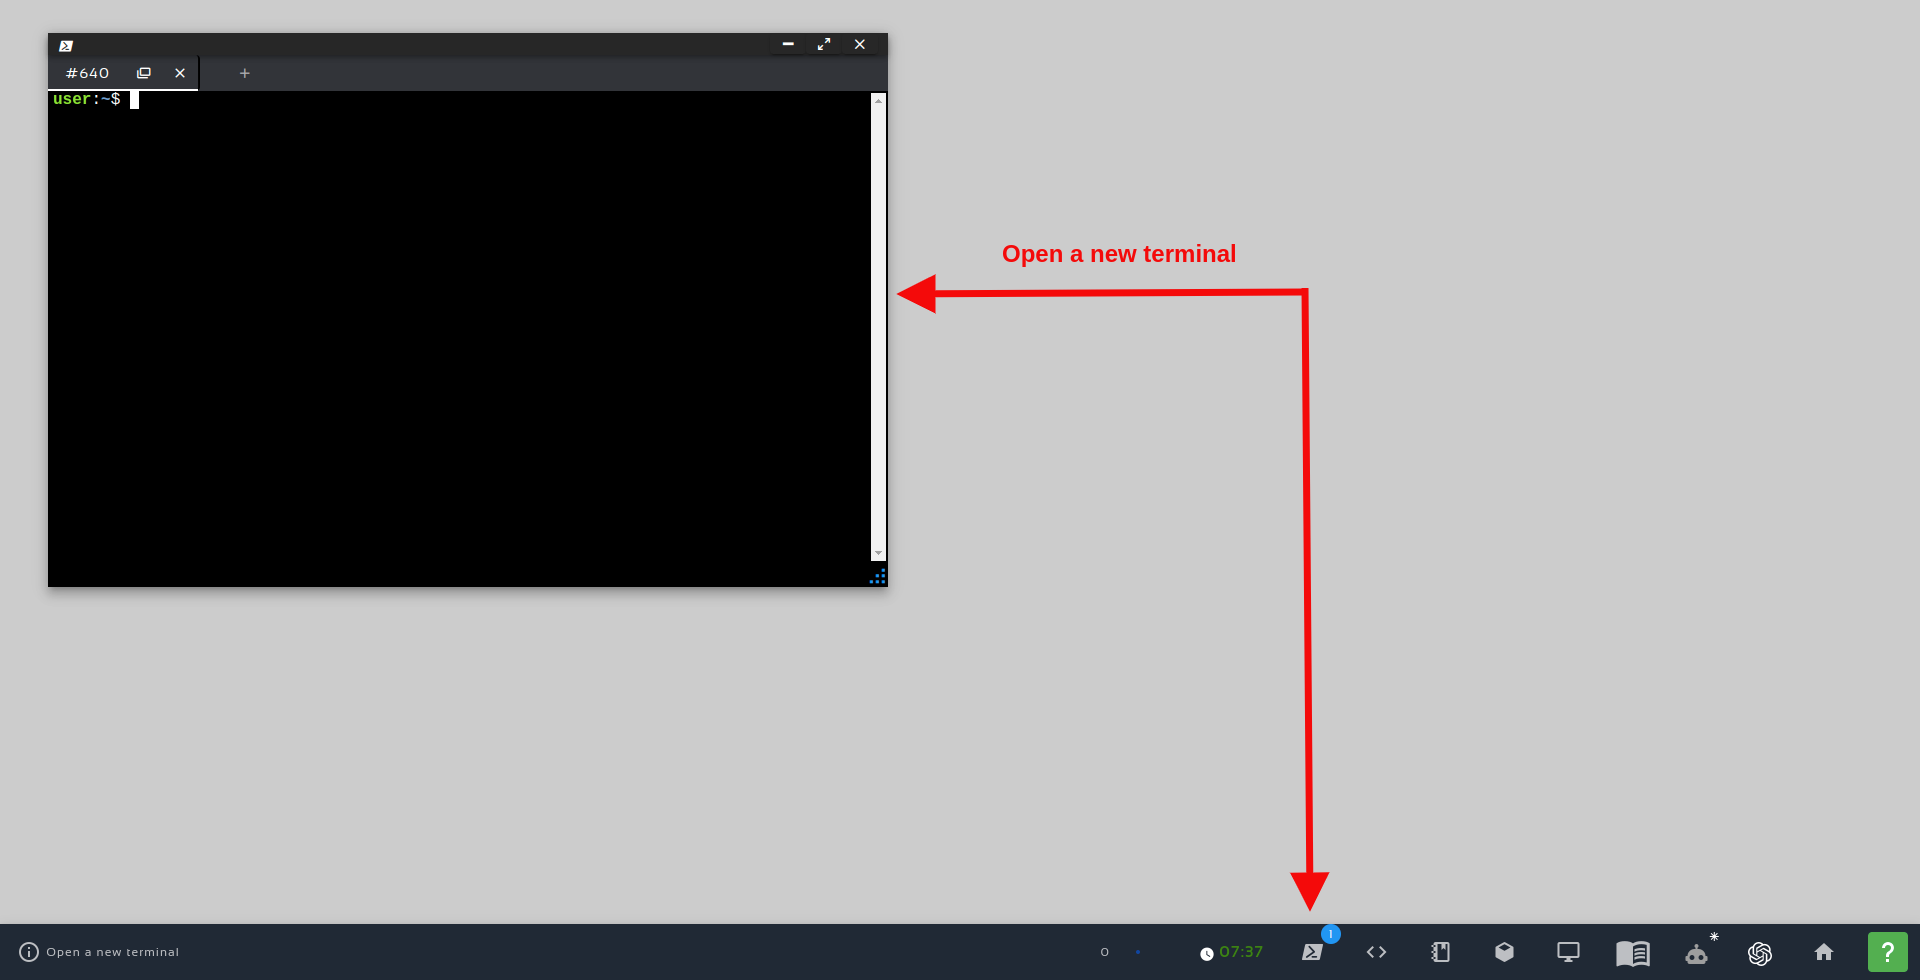
Open a terminal

In order to create files, and launch ROS nodes, we need a terminal. Let’s open a terminal by clicking the Open a new terminal button.


Open a new Terminal

Open a new Terminal

Next step – Create some MACROs to help

Having opened the first terminal, let’s now proceed with the other parts of this tutorial

We have already created some links and a joint in the previous post. Now we need to create more of them, but let’s try to make it simpler, making our XACRO file cleaner.

Let’s create a new file, ~/simulation_ws/src/mrm_description/urdf/links_joints.xacro running the following commands in this first terminal :

touch ~/simulation_ws/src/mrm_description/urdf/links_joints.xacro

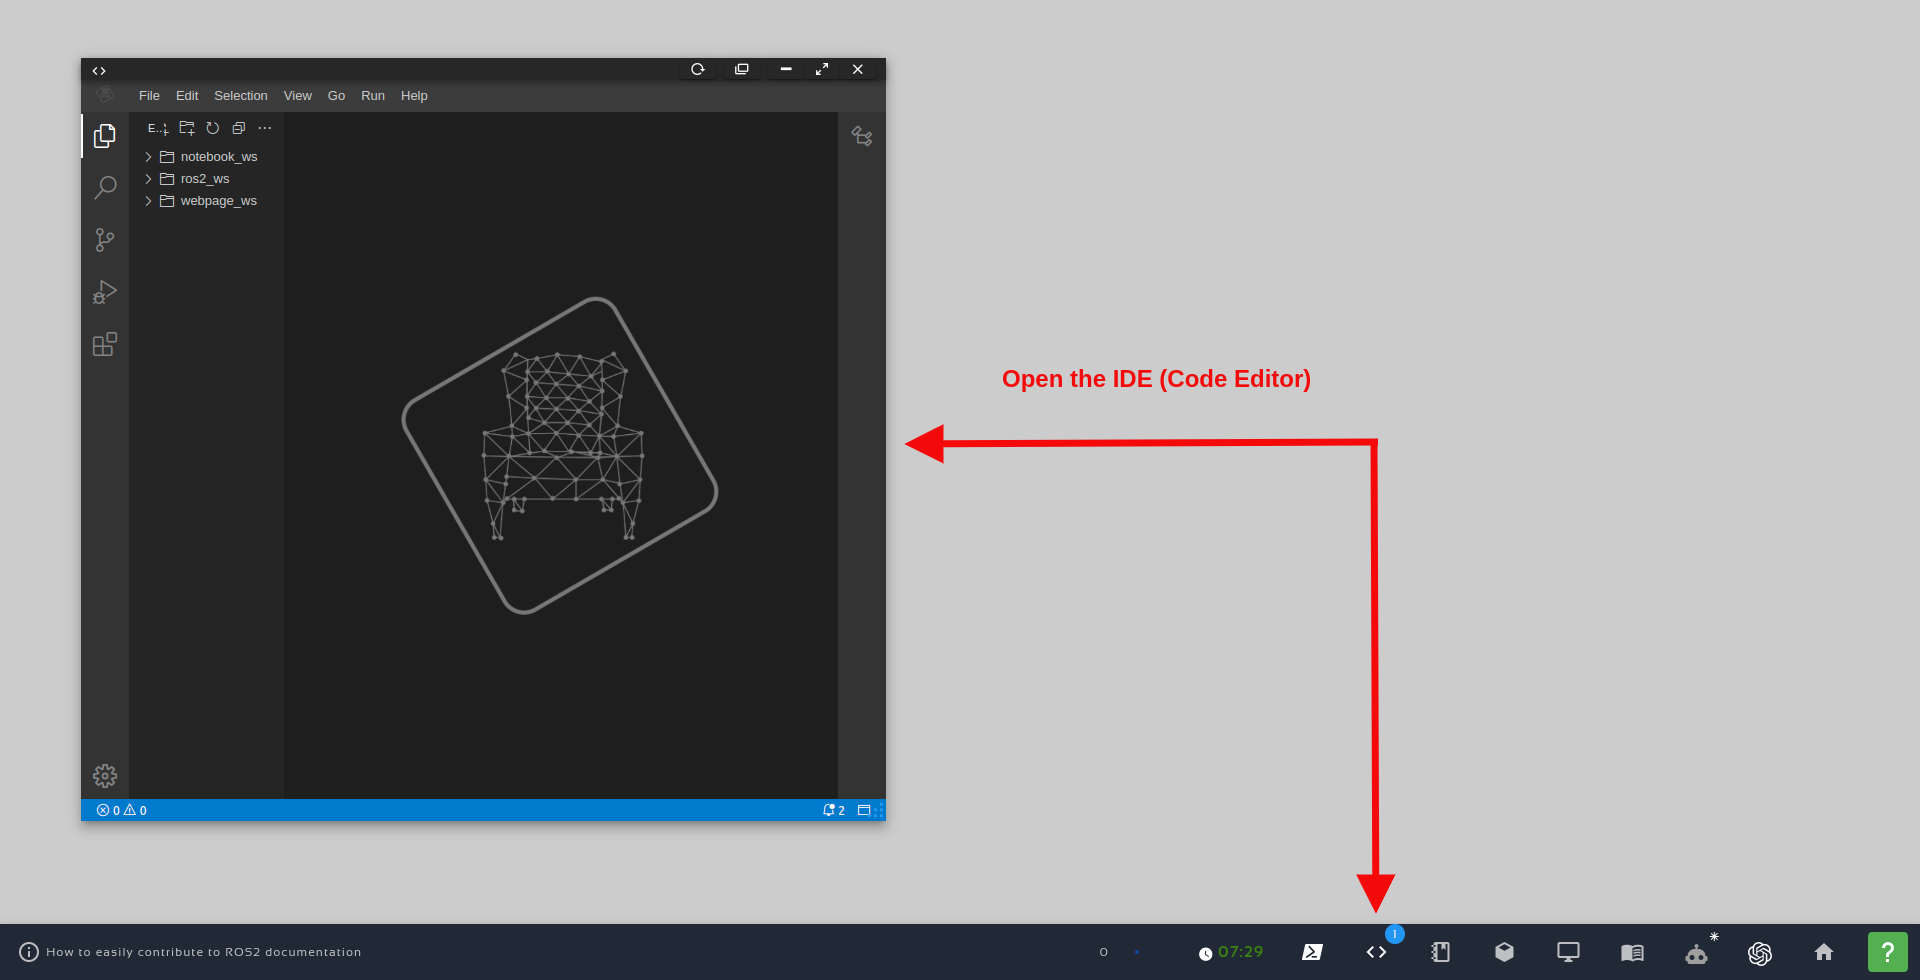
In this file, we are gonna create XML MACROs. They will help us create links and joints. Please open that file in the Code Editor, also known as IDE (Integraded Development Environment).

In order to open the IDE, just click the Code Editor button, as we can see in the image below:

Open the IDE - Code Editor

Open the IDE – Code Editor

Once the Code Editor is open, just navigate to simulation_ws/src/mrm_description/urdf/links_joints.xacro, and paste the following content to it:


<?xml version="1.0" ?>
<robot xmlns:xacro="http://www.ros.org/wiki/xacro">

    <xacro:macro name="m_joint" params="name type axis_xyz origin_rpy origin_xyz parent child">
        <joint name="${name}" type="${type}">
            <axis xyz="${axis_xyz}" />
            <limit effort="1000.0" lower="-3.14" upper="3.14" velocity="0.5" />
            <origin rpy="${origin_rpy}" xyz="${origin_xyz}" />
            <parent link="${parent}" />
            <child link="${child}" />
        </joint>
    </xacro:macro>

    <xacro:macro name="m_link_cylinder" params="name origin_xyz origin_rpy radius length">
        <link name="${name}">
            <visual>
                <origin rpy="${origin_rpy}" xyz="${origin_xyz}" />
                <geometry>
                    <cylinder radius="${radius}" length="${length}" />
                </geometry>
            </visual>
        </link>
    </xacro:macro>

    <xacro:macro name="m_link_box" params="name origin_xyz origin_rpy size">
        <link name="${name}">
            <visual>
                <origin rpy="${origin_rpy}" xyz="${origin_xyz}" />
                <geometry>
                    <box size="${size}" />
                </geometry>
            </visual>
        </link>
    </xacro:macro>
</robot>

Let’s understand what we have in this xacro file.

We have created 3 MACROs – each one with a name defined in the name attribute of the xacro:macro tags. The following attribute is used for defining the parameters we want to make available in a MACRO.

These parameters are used in the following format: ${param_name}

Let’s check how to use them in the next section.

Using our XML MACROs

In our main file, ~/simulation_ws/src/mrm_description/urdf/mrm.xacro, we have to include this new XACRO file. Let’s override its content with the following one!


<?xml version="1.0" ?>
<robot name="mrm" xmlns:xacro="http://www.ros.org/wiki/xacro"> 

    <!-- BGN - Include --> 
    <xacro:include filename="$(find mrm_description)/urdf/links_joints.xacro" />
    <!-- END - Include --> 

    <!-- BGN - Robot description --> 
    <m_link_box name="base_link" origin_rpy="0 0 0" origin_xyz="0 0 0" size="1 1 1" /> 
    <m_joint name="base_link_01" type="revolute" axis_xyz="0 0 1" origin_rpy="0 0 0" origin_xyz="0 0 0.5" parent="base_link" child="link_01" /> 
    <m_link_cylinder name="link_01" origin_rpy="0 0 0" origin_xyz="0 0 0.2" length="0.4" radius="0.35" /> 
    <!-- END - Robot description --> 

</robot>

After these changes, we are now using the MACROs we have just defined, yet we must have the very same model that we had before. Let’s check it on RViz:

roslaunch mrm_description rviz.launch

The RViz window should be similar to the one in the previous post, when we did not use our own macros:

Using multiple MACRO files

In order to get used to working with MACRO files, let’s create another one. This new file will only define the name of the links and joints we are goingto have!

Let us create a new file ~/simulation_ws/src/mrm_description/urdf/robot_parameters.xacro:

touch ~/simulation_ws/src/mrm_description/urdf/robot_parameters.xacro


Now, open that file using the Code Editor, and paste the following content to it:

<?xml version="1.0" ?>
<robot xmlns:xacro="http://www.ros.org/wiki/xacro"> 

    <xacro:property name="link_00_name" value="base_link" /> 
    <xacro:property name="link_01_name" value="link_01" /> 
    <xacro:property name="link_02_name" value="link_02" /> 
    <xacro:property name="link_03_name" value="link_03" /> 
    <xacro:property name="link_04_name" value="link_04" /> 
    <xacro:property name="link_05_name" value="link_05" />
 
</robot>

Let's also include it in the main file mrm.xacro (just appending a new include to the INCLUDE section):


<!-- BGN - Include -->
<xacro:include filename="$(find mrm_description)/urdf/links_joints.xacro" />
<xacro:include filename="$(find mrm_description)/urdf/robot_parameters.xacro" /> 
<!-- END - Include -->

Finally, replace the names in the links and joints with the values we imported from the parameters file. You  must have the description part similar the one below:


 <!-- BGN - Robot description -->
 <m_link_box name="${link_00_name}" origin_rpy="0 0 0" origin_xyz="0 0 0" size="1 1 1" /> 
 <m_joint name="${link_00_name}__${link_01_name}" 
        type="revolute" 
        axis_xyz="0 0 1" 
        origin_rpy="0 0 0" 
        origin_xyz="0 0 0.5" 
        parent="${link_00_name}" 
        child="${link_01_name}" />

 <m_link_cylinder name="${link_01_name}" 
       origin_rpy="0 0 0" 
       origin_xyz="0 0 0.2" 
       length="0.4" 
       radius="0.35" 
  /> 
<!-- END - Robot description -->

With these changes, in addition to using the parameters to fill the name of the links, we also use them to compose the joint name!

Final changes on the xacro file – Finishing the robot

Let’s now create the rest of the robot! Having already defined the MACROs and link names, we now only need to reuse them by passing some arguments!

Let’s check the final content of the mrm.xacro file:

<?xml version="1.0" ?>
<robot name="mrm" xmlns:xacro="http://www.ros.org/wiki/xacro">

<!-- BGN - Include -->
<xacro:include filename="$(find mrm_description)/urdf/robot_parameters.xacro" />
<xacro:include filename="$(find mrm_description)/urdf/links_joints.xacro" />
<!-- END - Include -->

 <!-- BGN - Robot description --> 
<m_link_box name="${link_00_name}" origin_rpy="0 0 0" origin_xyz="0 0 0" size="1 1 1" /> 
<m_joint name="${link_00_name}__${link_01_name}" 
    type="revolute" 
    axis_xyz="0 0 1" 
    origin_rpy="0 0 0" 
    origin_xyz="0 0 0.5" 
    parent="${link_00_name}" 
    child="${link_01_name}" /> 

<m_link_cylinder 
    name="${link_01_name}" 
    origin_rpy="0 0 0" 
    origin_xyz="0 0 0.2" 
    length="0.4" 
    radius="0.35" /> 

 <m_joint name="${link_01_name}__${link_02_name}" 
    type="revolute" 
    axis_xyz="0 1 0" 
    origin_rpy="0 0 0" 
    origin_xyz="0 0 0.4" 
    parent="${link_01_name}" 
    child="${link_02_name}" /> 

 <m_link_cylinder name="${link_02_name}" 
    origin_rpy="0 0 0" 
    origin_xyz="0 0 0.4" 
    radius="0.15" 
    length="0.8" /> 

 <m_joint name="${link_02_name}__${link_03_name}" 
    type="revolute" axis_xyz="0 1 0" 
    origin_rpy="0 0 0" origin_xyz="0 0 0.8" 
    parent="${link_02_name}" 
    child="${link_03_name}" /> 

 <m_link_cylinder name="${link_03_name}" 
    origin_rpy="0 0 0" origin_xyz="0 0 0.4" 
    radius="0.15" 
    length="0.8" /> 

 <m_joint name="${link_03_name}__${link_04_name}" 
    type="revolute" axis_xyz="0 1 0" 
    origin_rpy="0 0 0" 
    origin_xyz="0 0 0.8" 
    parent="${link_03_name}" 
    child="${link_04_name}" /> 

 <m_link_cylinder 
    name="${link_04_name}"
    origin_rpy="0 0 0"
    origin_xyz="0 0 0.4"
    radius="0.15" 
    length="0.8" />

 <m_joint name="${link_04_name}__${link_05_name}" 
    type="revolute" 
    axis_xyz="0 0 1" 
    origin_rpy="0 0 0" 
    origin_xyz="0 0 0.8" 
    parent="${link_04_name}" 
    child="${link_05_name}" /> 

 <m_link_cylinder 
    name="${link_05_name}" 
    origin_rpy="0 0 0" 
    origin_xyz="0 0 0.125" 
    radius="0.15" 
    length="0.25" />

<!-- END - Robot description -->


  <gazebo>
    <plugin name="gazebo_ros_control" filename="libgazebo_ros_control.so">
    </plugin>
  </gazebo>
</robot>

If you want, you can explore and play with the parameters (radius and length, for example) in order to customize your own model.

Checking the robot in RViz

Alright! Having everything in place, the time now has come for seeing the robot in RViz.

Our rviz.launch may be using joint_state_publisher, but we need joint_state_publisher_gui. To solve this, let’s open that launch/rviz.launch file using the Code Editor, and replace its content with the following one:

<launch>

<param name="robot_description" command="$(find xacro)/xacro --inorder '$(find mrm_description)/urdf/mrm.xacro'"/>

<!-- Combine joint values -->
<node name="robot_state_publisher" pkg="robot_state_publisher" type="state_publisher"/>

<!-- Show in Rviz -->
<node name="rviz" pkg="rviz" type="rviz" args="-d $(find mrm_description)/launch/config.rviz" />


<!-- send joint values -->
<node name="joint_state_publisher_gui" pkg="joint_state_publisher_gui" type="joint_state_publisher_gui">
    <param name="use_gui" value="True"/>
</node>

</launch>


Now, in the first terminal, let’s launch RViz again. Remember to kill any running process that you may have in the first terminal by pressing CTRL+C first.


roslaunch mrm_description rviz.launch

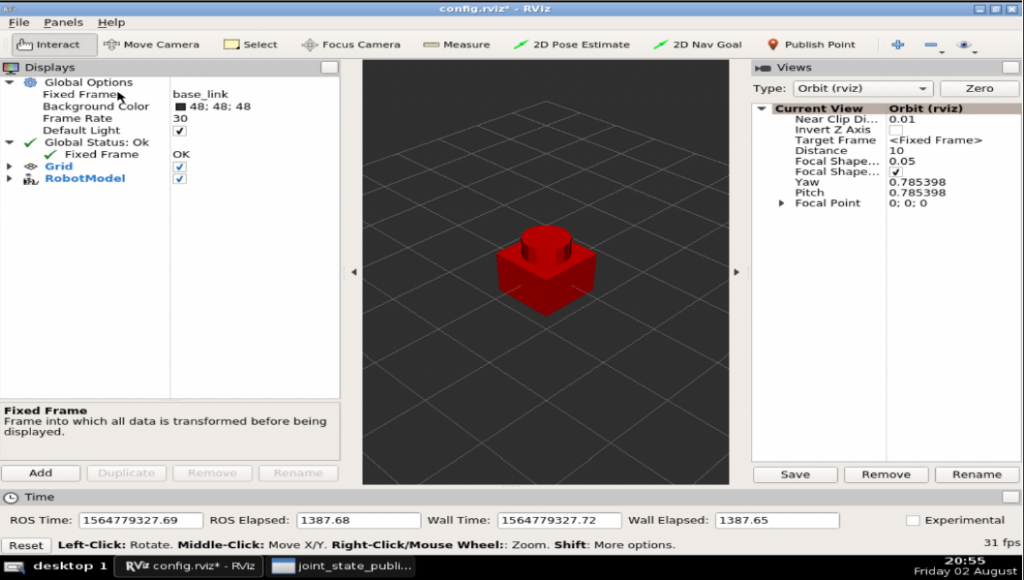
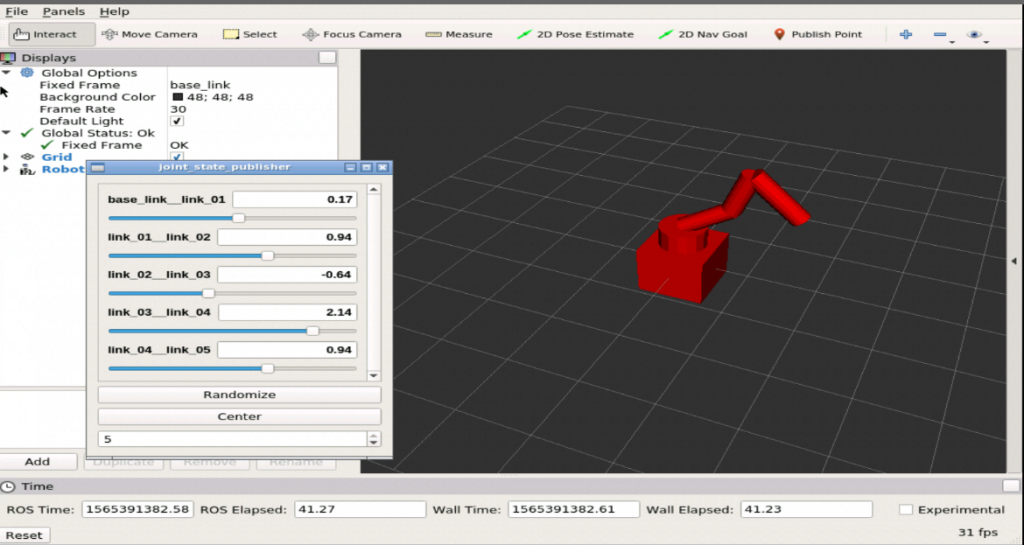
If everything went ok, you should have something similar to the following robot in RViz, after moving the joints using the Joint State Publisher :


Congratulations. We have finished the basics of a robot model using Xacro files.

In the next post, we’ll create the inertia of the robot. A very important step to have it working in Gazebo!

If you lost any part of the tutorial, you can get a copy of the ROSject, just click on this link: https://app.theconstructsim.com/l/bc1c398/

We hope this post was really helpful to you. If you want a live version of this post with more details, please check the video in the next section. Although the video was recorded in a previous version of The Construct platform, it still adds a lot of value:

Youtube video

So this is the post for today. Remember that we have the live version of this post on YouTube. If you liked the content, please consider subscribing to our youtube channel. We are publishing new content ~every day.

Keep pushing your ROS Learning.


Related Courses & Training

Robot-creation-URDF Course Cover - ROS Online Courses - Robot Ignite Academy

URDF for Robot Modeling

ROS Manipulation Course Cover - ROS Online Courses - Robot Ignite Academy

ROS Manipulation

ROS Industrial robots Course Cover - ROS Online Courses - Robot Ignite Academy

ROS for Industrial Robots

  1. ROS Courses:
    1. URDF for Robot modeling (ROS 1): https://app.theconstructsim.com/Course/13
  2. ROS2 Courses:
    1. URDF for Robot Modeling in ROS2 : https://app.theconstructsim.com/courses/83

[Robot Modeling] Create a Virtual Model of an Omni Wheel Robot – Ep.2

[Robot Modeling] Create a Virtual Model of an Omni Wheel Robot – Ep.2

Welcome to the second episode of the series of creating a Virtual Model of an Omni Wheel Robot. In this episode, we will learn:

  • How to assemble the mecanum robot & create XACRO files
  • Understand launch files and robot descriptions in RViz/Gazebo

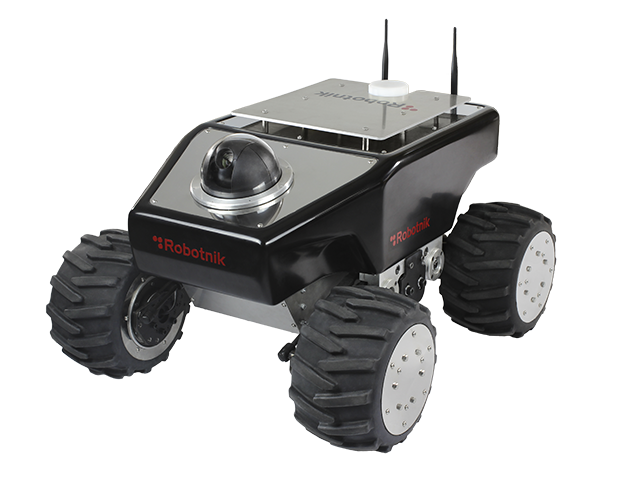
Robot Used in this video

Summit XL wheels from Robotnik

Summit XLS wheels

Courses related to the video

Robot-creation-URDF Course Cover - ROS Online Courses - Robot Ignite Academy

URDF Robot Modeling Course

[Robot Modeling] Create a Virtual Model of an Omni Wheel Robot – Ep.1

[Robot Modeling] Create a Virtual Model of an Omni Wheel Robot – Ep.1

Welcome to this series of creating a virtual model of a robot that uses mecanum wheels.

You will learn

  • What is an Omni Wheel
  • Modeling an Omni Wheel using URDF
  • Create launch files and show Omni Wheels in RViz/Gazebo

Robot Used in this video

Summit XL wheels from Robotnik

Summit XL robot by Robotnik

Courses related to the video

Robot-creation-URDF Course Cover - ROS Online Courses - Robot Ignite Academy

URDF for Robot Modeling Course

 Some cool videos with robots using their mecanum wheels

[Gazebo in 5 mins] 009 – How to create a robot using URDF – Part 2 – Joints

[Gazebo in 5 mins] 009 – How to create a robot using URDF – Part 2 – Joints

In this video we’ll learn how to use joints in a robot model and the reason why we need them. At the end of the video, you’ll understand the joints of a robot.

Let’s go!


Links mentioned in the video and other useful links:

  • Robot Ignite Academy, the place to learn to program robots using only a web browser
  • ROS Development Studio (the environment used in the video), another powerful online tool for pushing your ROS learning in a practical way

==============

WEBINAR – How to teach Autonomous Mobile Robots effectively: http://bit.ly/2z7Zbh0

==============


Feedback
Did you like this video? Whatever the case, please leave a comment in the comments section below, so we can interact and learn from each other.

If you want to learn about other ROS topics, please let us know on the comments area and we will do a video about it.

Thank you!

Pin It on Pinterest