Step 1. Create a project in ROS Development Studio(ROSDS)
ROSDS helps you follow our tutorial in a fast pace without dealing without setting up an environment locally. If you haven’t had an account yet, you can create a free account here. Let’s create a new project and call it abc_qa.
Step 2. Create a package
Let’s create a new package called abc_qa with dependency for the code.
cd catkin_ws/src
catkin_create_pkg abc_qa roscpp
Then we create a source file called abc_code.cpp under the abc_qa/src directory with the following content
int main()
{
     //Initialize and start the node
     ros::Publisher pub;
     //Define and create some messages
     abc;
     while(ros : ok)
     {
           ros_time = ros::time::now();
           pub.publish(abc);
           ros::spinOnce();
     }

 }
In order to compile the code, we have to change the following BUILD part in the CMakeLists.txt.
...
## Declare a C++ executable
## With catkin_make all packages are built within a single CMake context
## The recommended prefix ensures that target names across packages don't collide
add_executable(abc_node src/abc_code.cpp)

## Rename C++ executable without prefix
## The above recommended prefix causes long target names, the following renames the
## target back to the shorter version for ease of user use
## e.g. "rosrun someones_pkg node" instead of "rosrun someones_pkg someones_pkg_node"
# set_target_properties(${PROJECT_NAME}_node PROPERTIES OUTPUT_NAME node PREFIX "")

## Add cmake target dependencies of the executable
## same as for the library above
add_dependencies(abc_node ${abc_node_EXPORTED_TARGETS} ${catkin_EXPORTED_TARGETS})

## Specify libraries to link a library or executable target against
target_link_libraries(abc_node
  ${catkin_LIBRARIES}
)

...
Then we can try to compile it with the following command
cd ~/catkin_ws
catkin_make
You should get several compilation errors. Let’s fix the code. It should look like this after changing.
#include <ros/ros.h>
#include <std_msgs/Int32.h>

int main(int argc, char ** argv)
{
     //Initialize and start the node
     ros::init(argc, argv, "abc");
     ros::NodeHandle nh;

     ros::Publisher pub = nh.advertise<std_msgs::Int32>("abc_topic", 1000);
     //Define and create some messages
     std_msgs::Int32 abc;
     abc.data = 0;

     ros::Rate(200);

     while(ros::ok)
     {
           pub.publish(abc);
           ros::spinOnce();
     }

 }
It should work now. Try to compile and run it again with the following command
cd ~/catkin_ws
catkin_make
source devel/setup.bash
rosrun abc_qa abc_node
Now we got error said that it’s missing master now. You can either run whatever simulation from Simulations or run roscore in a new shell to solve this problem. After launching the master, execute the code again. Although it shows nothing, it is actually starting to publish to topic /abc_topic you can see it with the command rostopic echo /abc_topic. You can also try to increment the counter in the while loop.
Related Course
ROS Basics for Beginners (C++)
Feedback
Did you like this video? Do you have questions about what is explained? Whatever the case, please leave a comment on the comments section below, so we can interact and learn from each other. If you want to learn about other ROS topics, please let us know in the comments area and we will do a video about it.
If you are new to ROS and unfamiliar with C++ or Python, you must be wondering whether you should start with ROS Python or ROS C++ in order to maximize your ROS learning speed.
In this infographic we recommend you start with ROS Python and show you 3 reasons for not using C++ in ROS:
In this video we are going to see how can we subscribe to topics so that we can get the position and acceleration of a Sphero robot.
This video is especially good for beginners who have already understood the basics, and want to start writing their own code. We will try to properly structure our Python code, as well as follow some programming good practices.
Step 1. Create a project in ROS Development Studio(ROSDS)
ROSDS helps you follow our tutorial in a fast pace without dealing without setting up an environment locally. If you haven’t had an account yet, you can create a free account here. Let’s create a new project and call it Print_Position_QA.
Step 2. Create a package
To reproduce the question, we’ll use the original code from the forum. Let’s create a package for the code first with the following command.
cd ~/catkin_ws/src
catkin_create package print_pos rospy
Then we create a script file called main.py and put it in the scripts folder under the print_pos package with the following content from the forum.
! /usr/bin/env python
import rospy

from geometry_msgs.msg import Twist

from nav_msgs.msg import Odometry

from sensor_msgs.msg import Imu

rospy.init_node('sphero')

pub = rospy.Publisher('/cmd_vel', Twist, queue_size=1) #topic publisher that allows you to move the sphero

rate = rospy.Rate(0.5)

def odom (msg):

go = Odometry()

print "pose x = " + str(go.pose.pose.position.x)

print "pose y = " + str(go.pose.pose.position.y)

print "orientacion x = " + str(go.pose.pose.orientation.x)

print "orientacion y = " + str(go.pose.pose.orientation.y)

rate.sleep()

sub = rospy.Subscriber('odom', Odometry, odom)

def imu (msg):

allez = Imu()

print "veloc angular z = " + str(allez.angular_velocity.z)

print "veloc angular y = " + str(allez.angular_velocity.y)

print "aceleracion linear x = " + str(allez.linear_acceleration.x)

print "aceleracion linear y = " + str(allez.linear_acceleration.y)

rate.sleep()

sub = rospy.Subscriber('sphero/imu/data3', Imu, imu)

def twist (msg):

move = Twist()

print "velocidad linear x = " + str(move.linear.x)

print "velocidad angular z = " + str (move.angular.z)

rate.sleep()

sub=rospy.Subscriber('cmd_vel', Twist, twist)

while not rospy.is_shutdown():

move = Twist()

move.linear.x = 2

move.angular.z= 0.5

pub.publish(move)

rospy.spin()
Some part of the code is not correct(e.g. the subscriber is not subscribing correctly so there is no reading), let’s correct it as follows.
#! /usr/bin/env python
import rospy
from geometry_msgs.msg import Twist
from nav_msgs.msg import Odometry
from sensor_msgs.msg import Imu

def odom_callback(msg):
    # go = Odometry() is not needed
    print "------------------------------------------------"
    print "pose x = " + str(msg.pose.pose.position.x)
    print "pose y = " + str(msg.pose.pose.position.y)
    print "orientacion x = " + str(msg.pose.pose.orientation.x)
    print "orientacion y = " + str(msg.pose.pose.orientation.y)
    rate.sleep()

def imu_callback(msg):
    # allez = Imu()
    print "------------------------------------------------"
    print "veloc angular z = " + str(msg.angular_velocity.z)
    print "veloc angular y = " + str(msg.angular_velocity.y)
    print "aceleracion linear x = " + str(msg.linear_acceleration.x)
    print "aceleracion linear y = " + str(msg.linear_acceleration.y)
    rate.sleep()

def twist (msg):
    # move = Twist()
    print "velocidad linear x = " + str(move.linear.x)
    print "velocidad angular z = " + str (move.angular.z)
    rate.sleep()
    #sub=rospy.Subscriber('cmd_vel', Twist, twist)

rospy.init_node('sphero_monitor') # the original name sphero might be the same as other node.
pub = rospy.Publisher('/cmd_vel', Twist, queue_size=1) #topic publisher that allows you to move the sphero
sub_odom = rospy.Subscriber('/odom', Odometry, odom_callback) # the original name odom might be the same as other function.
sub_imu = rospy.Subscriber('/sphero/imu/data3', Imu, imu_callback)
rate = rospy.Rate(0.5)

while not rospy.is_shutdown():
    move = Twist()
    move.linear.x = 0.1 # m/s. The original value 2 is too large
    move.angular.z= 0.5 # rad/s
    pub.publish(move)
    rate.sleep() # Instead of using rospy.spin(), we should use rate.sleep because we are in a loop
Before executing the code, we have to give it permission first with chmod +x main.py and we also need the simulation(start it from Simulations->Sphero).
Then we can run the code with rosrun print_pos main.py
You should see the readings from sensors and the robot also starts to move around.
If you are interested in this topic, please check our ROS Basics in 5 Days course. You’ll learn how to control the Sphero robot to exit the maze in this course.
Edit by: Tony Huang
Feedback
Did you like this video? Do you have questions about what is explained? Whatever the case, please leave a comment on the comments section below, so we can interact and learn from each other.
If you want to learn about other ROS topics, please let us know on the comments area and we will do a video about it.
Step 1. Create a project in ROS Development Studio(ROSDS)
ROSDS helps you follow our tutorial in a fast pace without dealing without setting up an environment locally. If you haven’t had an account yet, you can create a free account here. Let’s create a new project and call it testing_action.
Step 2. Create package
At first, let’s create the package with dependencies
cd ~/catkin_ws/src
catkin_create_pkg test_action roscpp actionlib actionlib_msgs robot_calibration_msgs
Then we create a file called action_code.cpp under test_action/src folder with the following content from the question
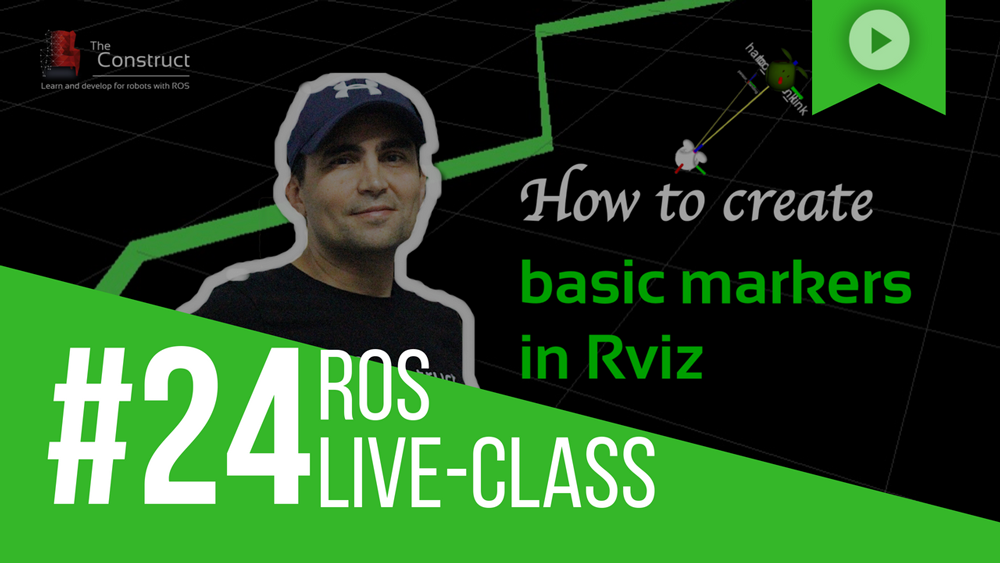
In this ROS LIVE-Class we’re going to learn how to create a marker to be displayed in ROS Rviz. Markers are special graphics that we can use in Rviz to display data generated by the robot. For example, we can create a marker that shows a person figure at the proper distance of the robot when the robot detects a person. By using markers, we can debug and understand better what the robot program is doing. Markers are basic tools for robot program debug!
We will see:
How to get the information we want to display from a ROS program
How to create a custom marker that contains that information
How to display the marker on the Rviz
How to build a mesh marker and show it on Rviz
Every Tuesday at 18:00 CET/CEST.
This is a LIVE Class on how to develop with ROS. In Live Classes you practice with me at the same time that I explain, with the provided free ROS material.
IMPORTANT: Remember to be on time for the class because at the beginning of the class we will share the code with the attendants.
IMPORTANT 2: in order to start practicing quickly, we are using the ROS Development Studio for doing the practice. You will need a free account to attend the class. Go to http://rds.theconstructsim.com and create an account prior to the class.
In this video, we are going to see how can we launch multiple robots in a single Gazebo simulation.
We will be introduced to the concept of namespace and tf_prefix, which are essential to make sure that the robots will be able to work correctly. We will create a series of launch files that will enable us to easily add robots into our Gazebo simulation.
NOTICE: most of the code would be the same in the ROS Answer, however, we’ll make some change to make sure it is compatible with ROS kinetic. Please use the code below.
Step 1. Create a project in ROS Development Studio(ROSDS)
ROSDS helps you follow our tutorial in a fast pace without dealing without setting up an environment locally. If you haven’t had an account yet, you can create a free account here.
Step 2. Create a package
We’ll create a package to put our source code for the project with the following command
cd ~/catkin_ws/src
catkin_create_pkg multi_robot rospy gazebo_ros
Then we’ll create a folder called launch under the package directory and create 3 launch files that we need.
<launch>
    <arg name="robot_name"/>
    <arg name="init_pose"/>

    <node name="spawn_minibot_model" pkg="gazebo_ros" type="spawn_model"
     args="$(arg init_pose) -urdf -param /robot_description -model $(arg robot_name)"
     respawn="false" output="screen" />

    <node pkg="robot_state_publisher" type="state_publisher"
          name="robot_state_publisher" output="screen"/>

    <!-- The odometry estimator, throttling, fake laser etc. go here -->
    <!-- All the stuff as from usual robot launch file -->
</launch>
This launch file will launch one robot in the simulation.
<launch>
  <!-- No namespace here as we will share this description.
       Access with slash at the beginning -->
  <param name="robot_description"
    command="$(find xacro)/xacro.py $(find turtlebot_description)/robots/kobuki_hexagons_asus_xtion_pro.urdf.xacro" />

  <!-- BEGIN ROBOT 1-->
  <group ns="robot1">
    <param name="tf_prefix" value="robot1_tf" />
    <include file="$(find multi_robot)/launch/one_robot.launch" >
      <arg name="init_pose" value="-x 1 -y 1 -z 0" />
      <arg name="robot_name"  value="Robot1" />
    </include>
  </group>

  <!-- BEGIN ROBOT 2-->
  <group ns="robot2">
    <param name="tf_prefix" value="robot2_tf" />
    <include file="$(find multi_robot)/launch/one_robot.launch" >
      <arg name="init_pose" value="-x -1 -y 1 -z 0" />
      <arg name="robot_name"  value="Robot2" />
    </include>
  </group>
</launch>
Please notice that it should have a different namespace and tf_prefix for each robot.
You can launch the simulation with the following command
roslaunch multi_robot main.launch
Then you have to open the gazebo window from Tools->Gazebo
You should see 2 robots are spawned in the simulation. You can spawn more by changing the robots.launch if you want.
Step 3. Move the robot
Open another terminal, if you type rostopic list , you’ll see there are 2 cmd_vel topics for the robots. The simplest way to control them is with the teleop_twist. We can run it and remap the cmd_vel with the robot you want to control. For example
—
Feedback
—
Did you like this video? Do you have questions about what is explained? Whatever the case, please leave a comment on the comments section below, so we can interact and learn from each other.
If you want to learn about other ROS topics, please let us know on the comments area and we will do a video about it.

![[Infographic] ROS Python vs C++](https://www.theconstruct.ai/wp-content/uploads/2018/06/getting-started-on-ros-with-c-or-python-1.png)
![[ROS Q&A] 131 – Compilation error in ROS Action Server](https://www.theconstruct.ai/wp-content/uploads/2018/06/Compilation-error-in-ROS-Action-Server.png)