In this post it will be shown how to organize your ROS2 package in such manner that allows you to have as many python scripts as you need. It is a quite simple way of doing it, but can be confusing for those who are coming from ROS 1. Let’s check it out!
Configuring environment
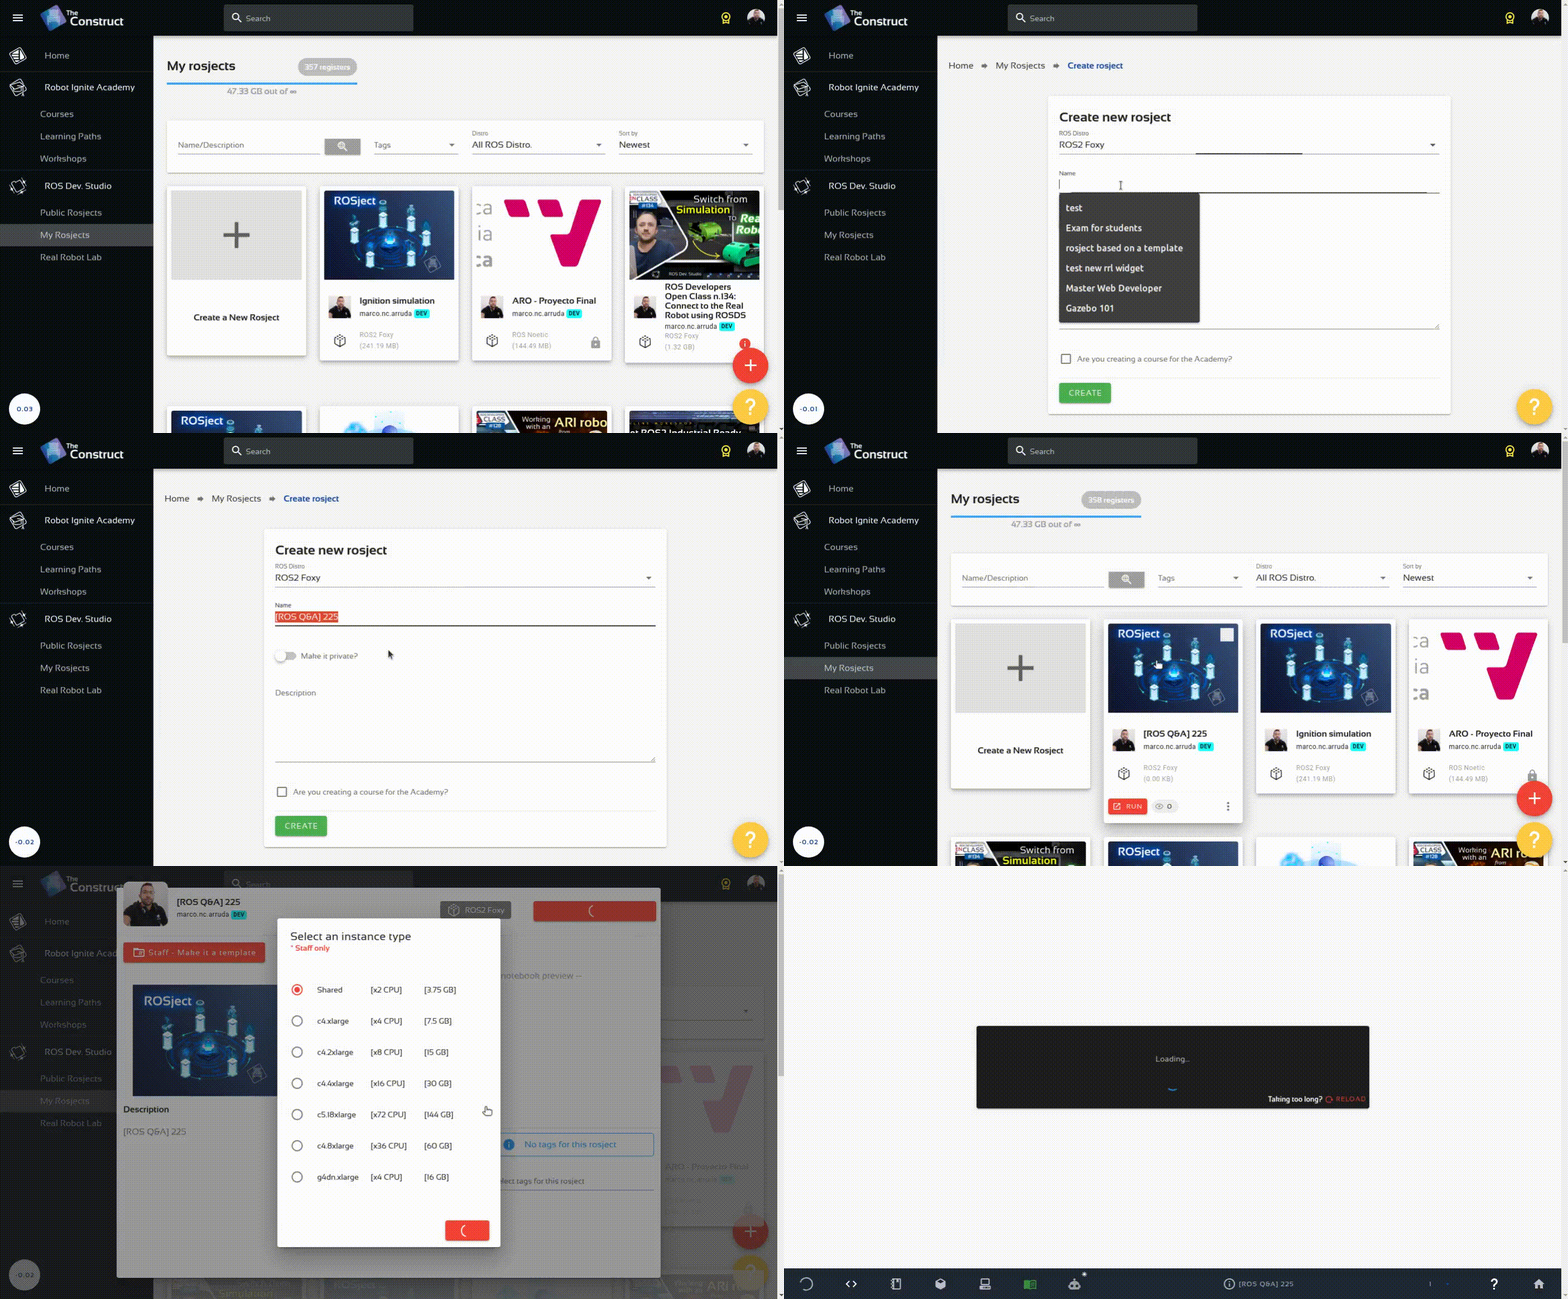
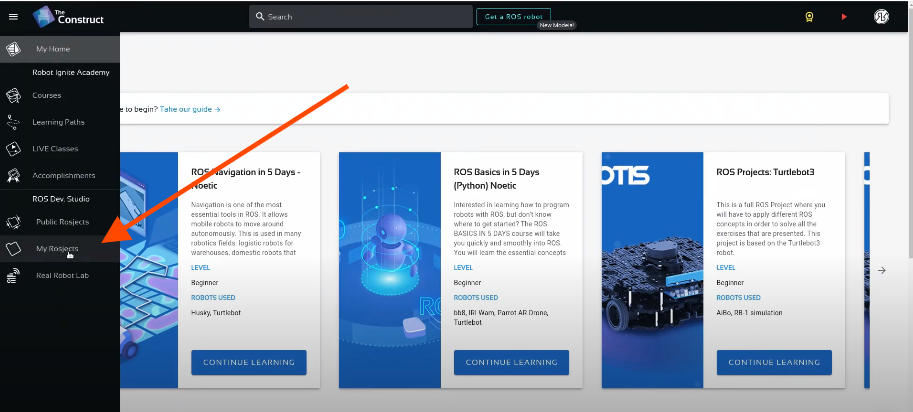
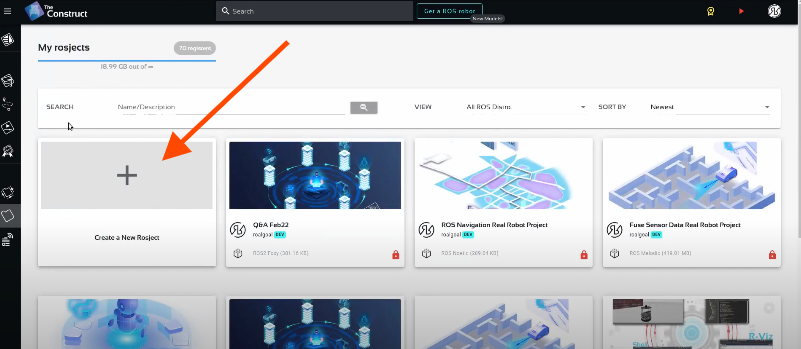
In order to do that in a way anyone can reproduce, let’s use the App of TheconstructSim. Start by creating a new rosject here
After creating it, just hit the Run button and wait for the desktop environment to get ready.
Create the ROS package
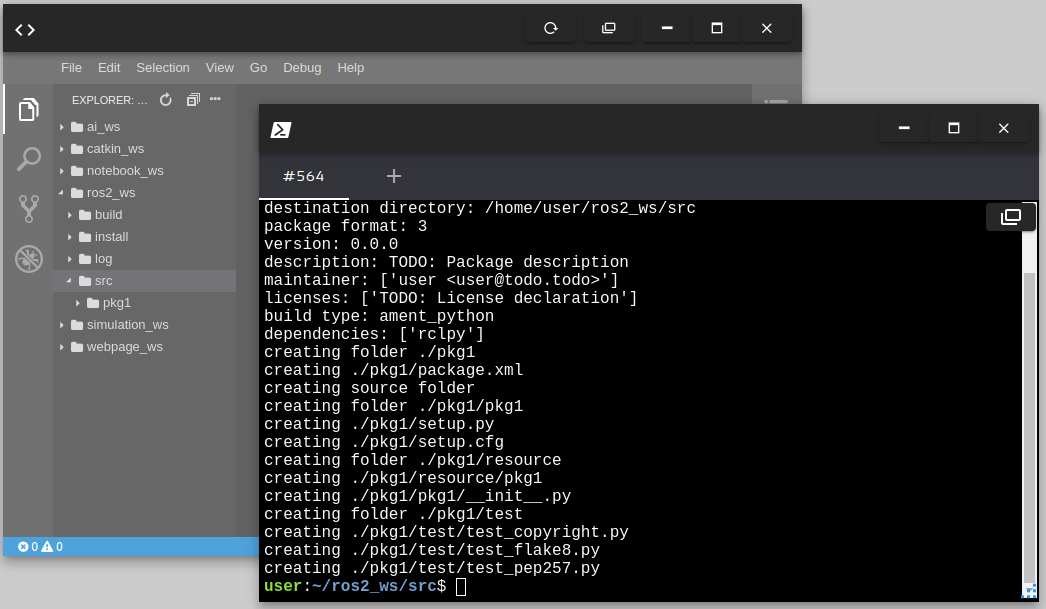
With the environment ready, create a new ROS 2 package inside the given workspace. Use the commands below:
You must be able to edit the files from the IDE at this point:
Go to the root workspace:
Compile the package
Source the workspace
Check that your package is added to ROS environment
cd ~/ros2_ws
colcon build

source install/setup.bash

ros2 pkg list | grep pkg1
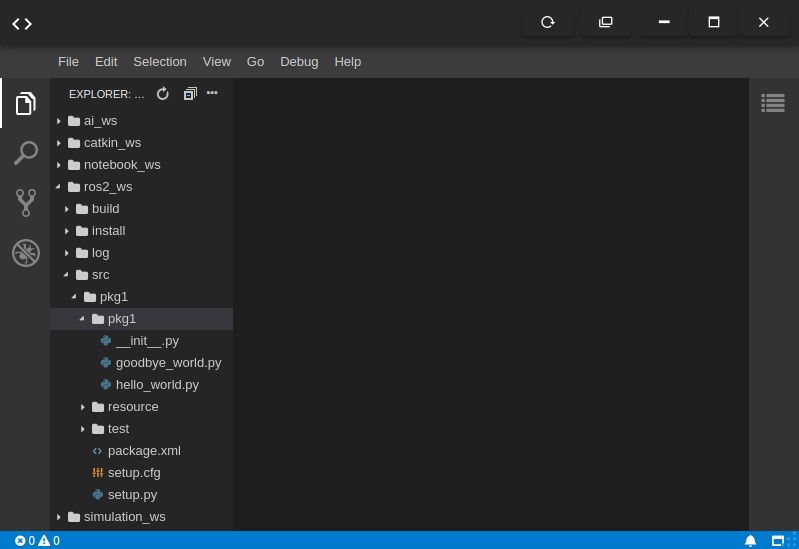
Add some code to the scripts to have some nodes
Add the code below to the hello_world.py script:
import rclpy
from rclpy.node import Node

class MyNode(Node):
    def __init__(self):
        # call super() in the constructor in order to initialize the Node object
        # the parameter we pass is the node name
        super().__init__('hello_world')
        # create a timer sending two parameters:
        # - the duration between 2 callbacks (0.2 seeconds)
        # - the timer function (timer_callback)
        self.create_timer(0.2, self.timer_callback)

    def timer_callback(self):
        # print a ROS2 log on the terminal with a great message!
        self.get_logger().info("Hello World!")

def main(args=None):
    # initialize the ROS communication
    rclpy.init(args=args)
    # declare the node constructor
    node = MyNode()
    # pause the program execution, waits for a request to kill the node (ctrl+c)
    rclpy.spin(node)
    # shutdown the ROS communication
    rclpy.shutdown()

if __name__ == '__main__':
    main()
And the same for the goodbye_world.py, just changing the info text
import rclpy
from rclpy.node import Node

class MyNode(Node):
    def __init__(self):
        # call super() in the constructor in order to initialize the Node object
        # the parameter we pass is the node name
        super().__init__('hello_world')
        # create a timer sending two parameters:
        # - the duration between 2 callbacks (0.2 seeconds)
        # - the timer function (timer_callback)
        self.create_timer(0.2, self.timer_callback)

    def timer_callback(self):
        # print a ROS2 log on the terminal with a great message!
        self.get_logger().info("Goodbye World!")

def main(args=None):
    # initialize the ROS communication
    rclpy.init(args=args)
    # declare the node constructor
    node = MyNode()
    # pause the program execution, waits for a request to kill the node (ctrl+c)
    rclpy.spin(node)
    # shutdown the ROS communication
    rclpy.shutdown()

if __name__ == '__main__':
    main()
Create a launch file
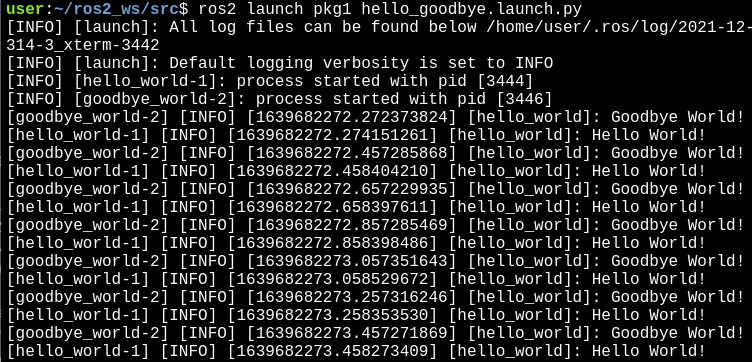
In order to run both scripts at the same time, let’s create a launch file:
cd ~/ros2_ws/src
touch pkg1/launch/hello_goodbye.launch
chmod +x pkg1/launch/hello_goodbye.launch
In order to add the launch file to the setup, it must contain some libraries like os and glob. The content of the file ~/ros2_ws/src/pkg1/setup.py will look like below:
In order to learn how to create conditional publishers, let’s start by creating a publisher and a subscriber in Python. We are going to use The Construct (https://www.theconstruct.ai/) for this tutorial, but if you have ROS2 installed on your own computer, you should be able to do ~everything on your own computer, except this creating a rosject part.
Let’s start by opening The Construct (https://www.theconstruct.ai/) and logging in. You can easily create a free account if you still don’t have one.
Once inside, let’s create My Rosjects and then, Create a new rosject:
My Rosjects
Create a new rosject
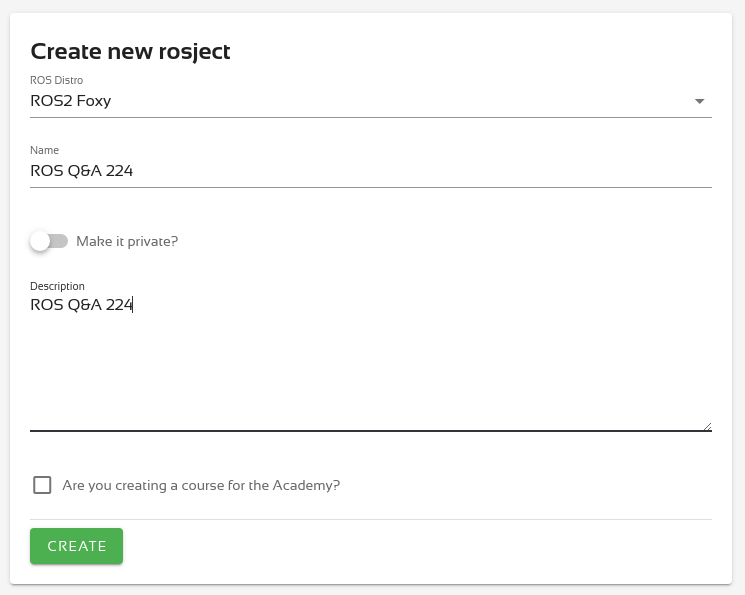
For the rosject, let’s select ROS2 Foxyfor the ROS Distro, let’s name the rosject as ROS Q&A 224. You can leave the rosject public.
If you mouse over the recently created rosject, you should see a Run button. Just click that button to launch the rosject.
Checking enviroment configuration
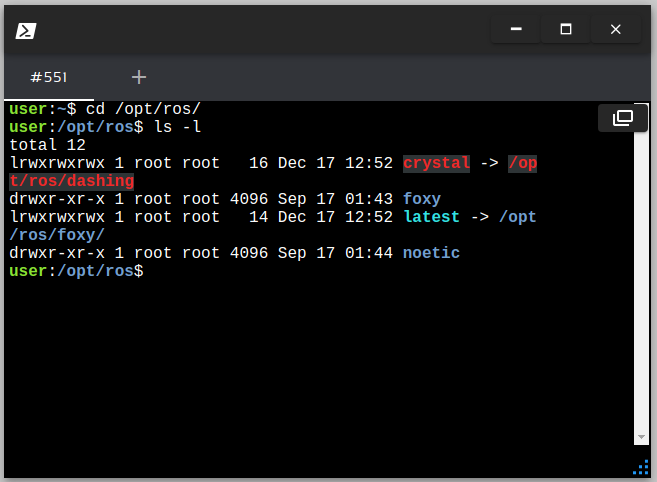
Open a webshell and go to the installation folder of ROS, like shown below:
You can see there are installed two ROS distros, ROS 1 Noetic and ROS 2 Foxy
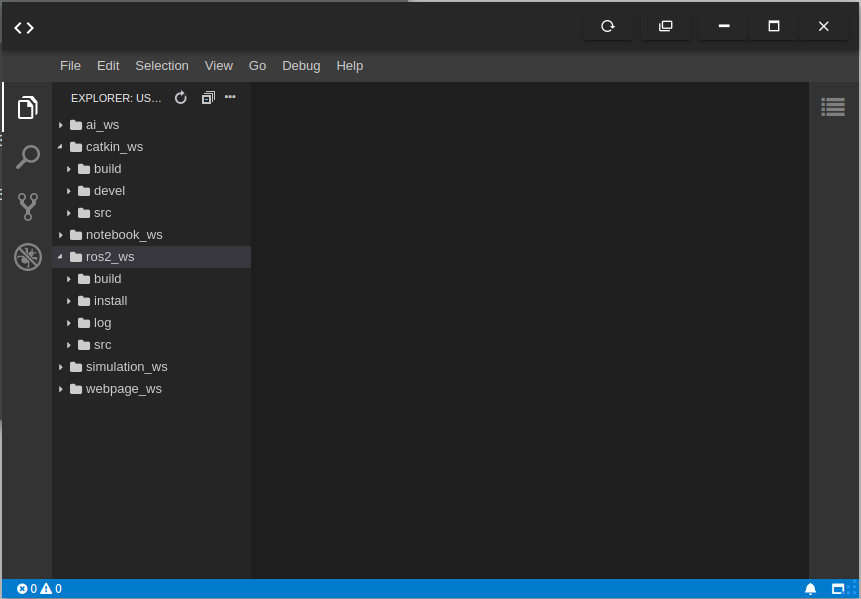
That means both systems are installed, like the user shown his workspace. Now, open the code editor and check the workspaces:
There are two main workspaces, catkin_ws (for ROS noetic) and ros2_ws (for ROS 2 foxy)
Configuring an environment with both setups
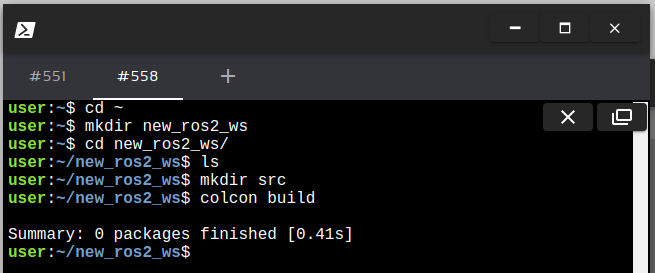
The quickest way to have a ROS environment with both ROS and ROS2 is by creating a new workspace. In the webshell, execute the following:
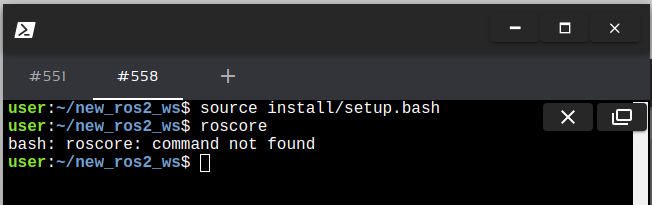
Open in the IDE the file ~/new_ros2_ws/install/setup.bash. This is a fresh new ROS2 workspace, it does not have ROS noetic attached to it. It is shown in the image below, no ROS commands (e.g: roscore) are available:
You can have as many ROS 2 workspaces as you want and the fresh new workspace built does not have the setup to attache ROS 1 to it, unless you configure to do so.
Youtube video
So this is the post for today. Remember that we have the live version of this post on YouTube. If you liked the content, please consider subscribing to our youtube channel. We are publishing new content ~every day.
In order to detect obstacles in ROS2 with TurtleBot3, let’s start by creating a rosject. We are going to use The Construct (https://www.theconstruct.ai/) for this tutorial, but if you have ROS2 installed on your own computer, you should be able to do ~everything on your own computer, except this creating a rosject part.
Let’s start by opening The Construct (https://www.theconstruct.ai/) and logging in. You can easily create a free account if you still don’t have one.
Once inside, let’s create My Rosjects and then, Create a new rosject:
My Rosjects
Create a new rosject
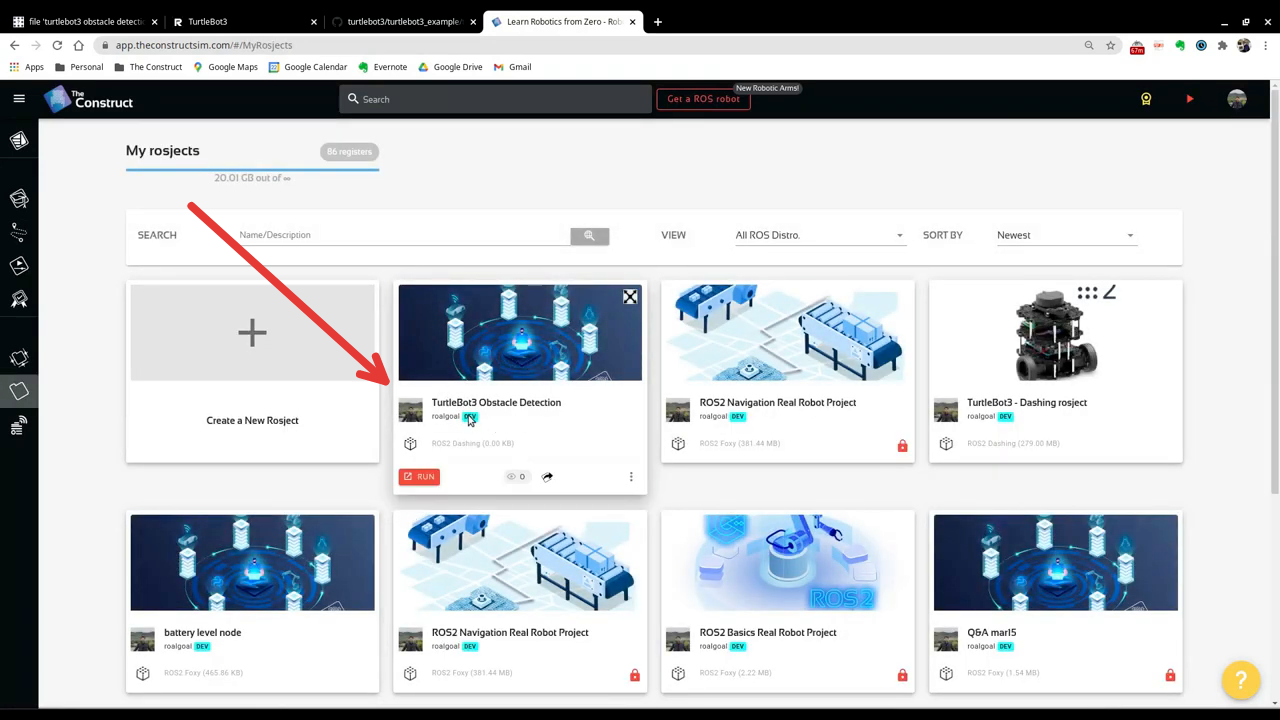
For the rosject, let’s select ROS2 Foxyfor the ROS Distro, let’s name the rosject as Turtlebot3 Obstacle Detection. You can leave the rosject public.
Turtlebot3 Obstacle Detection rosject for ros2
If you mouse over the recently created rosject, you should see a Run button. Just click that button to launch the rosject.
Cloning the Turtlebot3 repositories
Once the rosject is open, let’s start by cloning the necessary repositories.
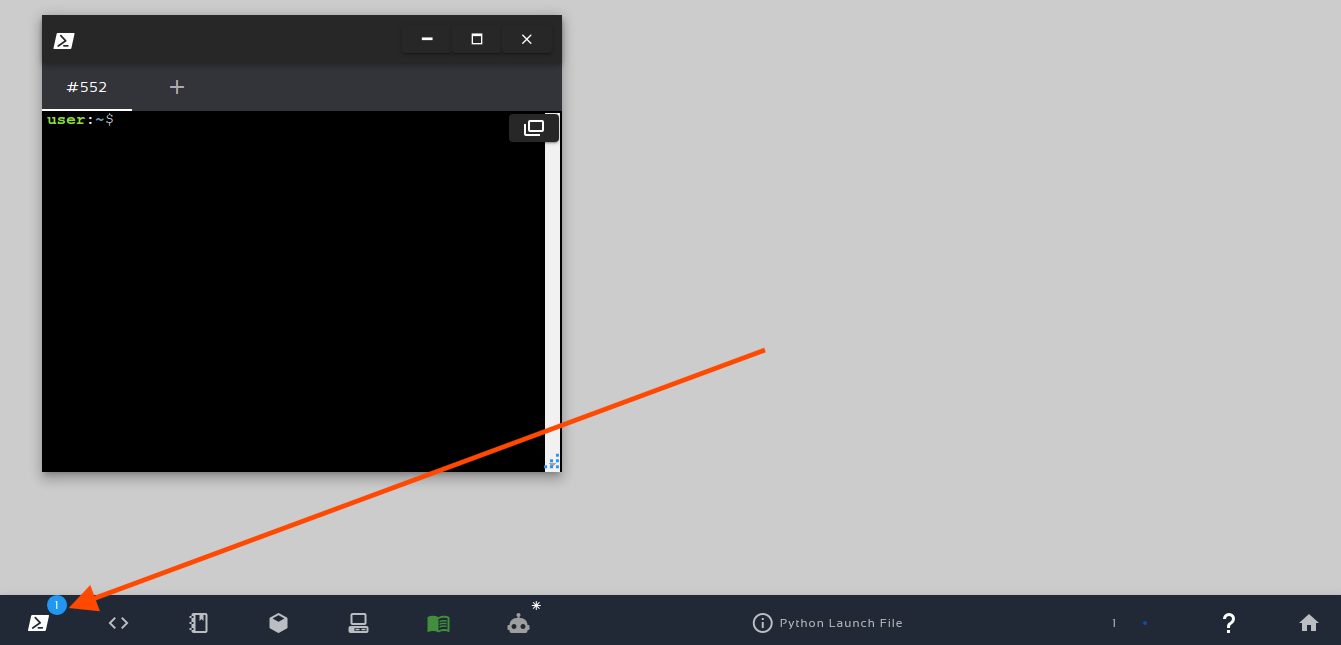
Let’s open a new terminal by clicking on the Open a new shell window button:
Open a new shell
After having a web shell open, let’s enter our ros2_ws/src folder:
cd ~/ros2_ws/src
Let’s now source our ROS Foxy environment with:
source /opt/ros/foxy/setup.bash
It is worth mentioning that this source command has to be executed in all web shells that you open. If you want to automatically run that command for every shells, just add it to the .bashrc with:
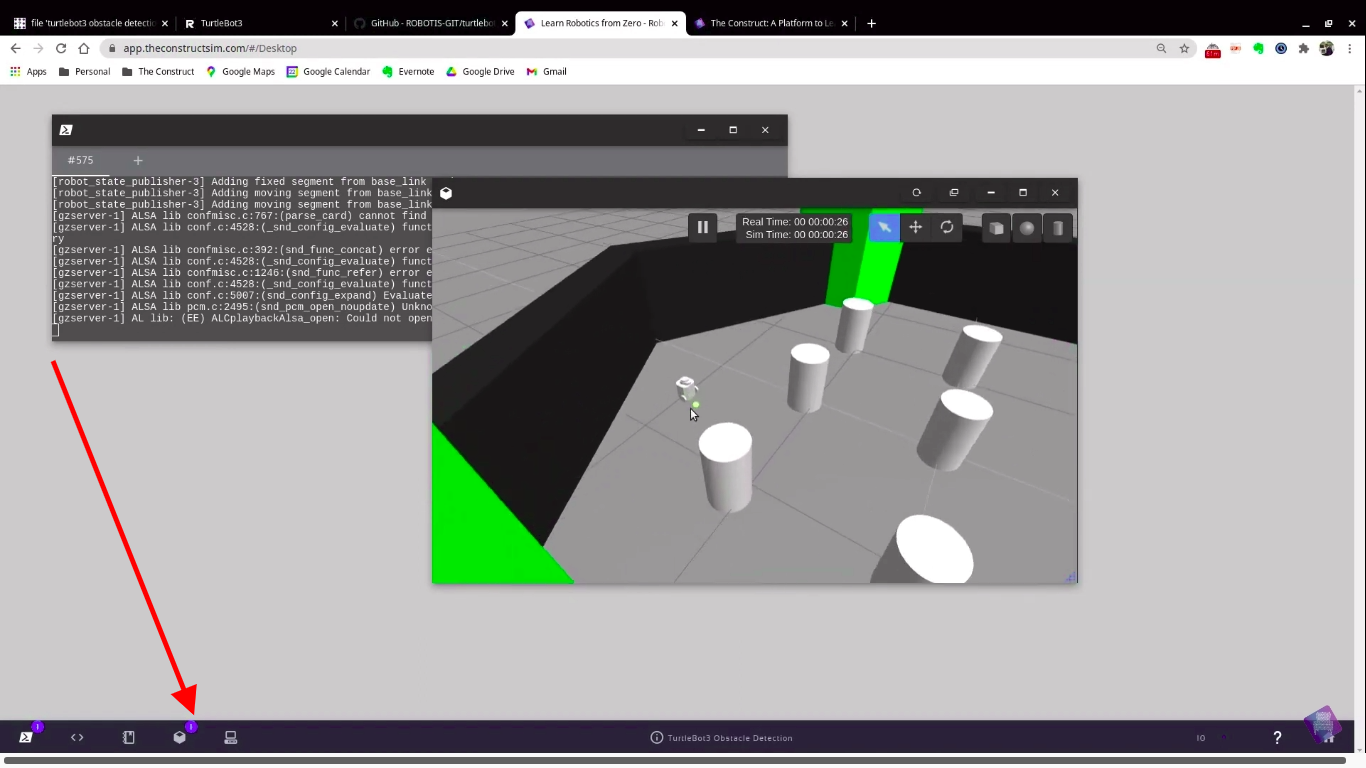
Now that the simulation was launched, we could open Gazebo by clicking the Gazebo button as we can see in the image below:
Turtlebot3 Obstacle Detection rosject – Open Gazebo
Launching the teleop keyboard
Now that the simulation is up and running, let’s run the teleop keyboard in oder to easily move the robot around.
For that, let’s open another web shell. After that, let’s source our environment:
cd ~/ros2_ws

source install/setup.bash

export TURTLEBOT3_MODEL=burger
ros2 run turtlebot3_teleop teleop_keyboard
You should now be able to move the robot around by pressing the keys as instructed in your web shell, using the keys w, a, s, d, and x.
Moving around:
  w
a s d
  x
Launching the Object Detector
Awesome. Now we have our simulation running, the keyboard teleoperator running, it is now time to run our Object Detector.
For that, let’s open a new terminal (the third one). After having it open, let’s source our workspace again:
cd ~/ros2_ws

source install/setup.bash

export TURTLEBOT3_MODEL=burger

ros2 run turtlebot3_example turtlebot3_obstacle_detection
The obstacle detection should now be working properly. It should output something similar to the following:
[INFO] [1638920304.914586963] [turtlebot3_obstacle_detection]: Turtlebot3 obstacle detection node has been initialised.
Since it may be subscribed to the /cmd_vel_raw topic, let’s kill the keyboard teleop launched in the second terminal, and run it again as follows (using the /cmd_vel_raw topic):
export TURTLEBOT3_MODEL=burger
ros2 run turtlebot3_teleop teleop_keyboard /cmd_vel:=/cmd_vel_raw
If you now move next to the wall, the terminal where the Obstacle Detector node was launched, you should see some messages saying that an obstacle was detected. Something similar to:
[INFO] [1638920462.116441990] [turtlebot3_obstacle_detection]: Obstacles are detected nearby. Robot stopped.
[INFO] [1638920462.126177608] [turtlebot3_obstacle_detection]: Obstacles are detected nearby. Robot stopped.
[INFO] [1638920462.136174240] [turtlebot3_obstacle_detection]: Obstacles are detected nearby. Robot stopped.
[INFO] [1638920462.146231079] [turtlebot3_obstacle_detection]: Obstacles are detected nearby. Robot stopped.
[INFO] [1638920462.160709358] [turtlebot3_obstacle_detection]: Obstacles are detected nearby. Robot stopped.
Congratulations. You now know how to detect obstacles with Turtlebot3 using ROS2.
Youtube video
So this is the post for today. Remember that we have the live version of this post on YouTube (important: the video uses the ROS Dashing version, but it may help you anyway). If you liked the content, please consider subscribing to our youtube channel. We are publishing new content ~every day.
In order to learn how to create conditional publishers, let’s start by creating a publisher and a subscriber in Python. We are going to use The Construct (https://www.theconstruct.ai/) for this tutorial, but if you have ROS2 installed on your own computer, you should be able to do ~everything on your own computer, except this creating a rosject part.
Let’s start by opening The Construct (https://www.theconstruct.ai/) and logging in. You can easily create a free account if you still don’t have one.
Once inside, let’s create My Rosjects and then, Create a new rosject:
My Rosjects
Create a new rosject
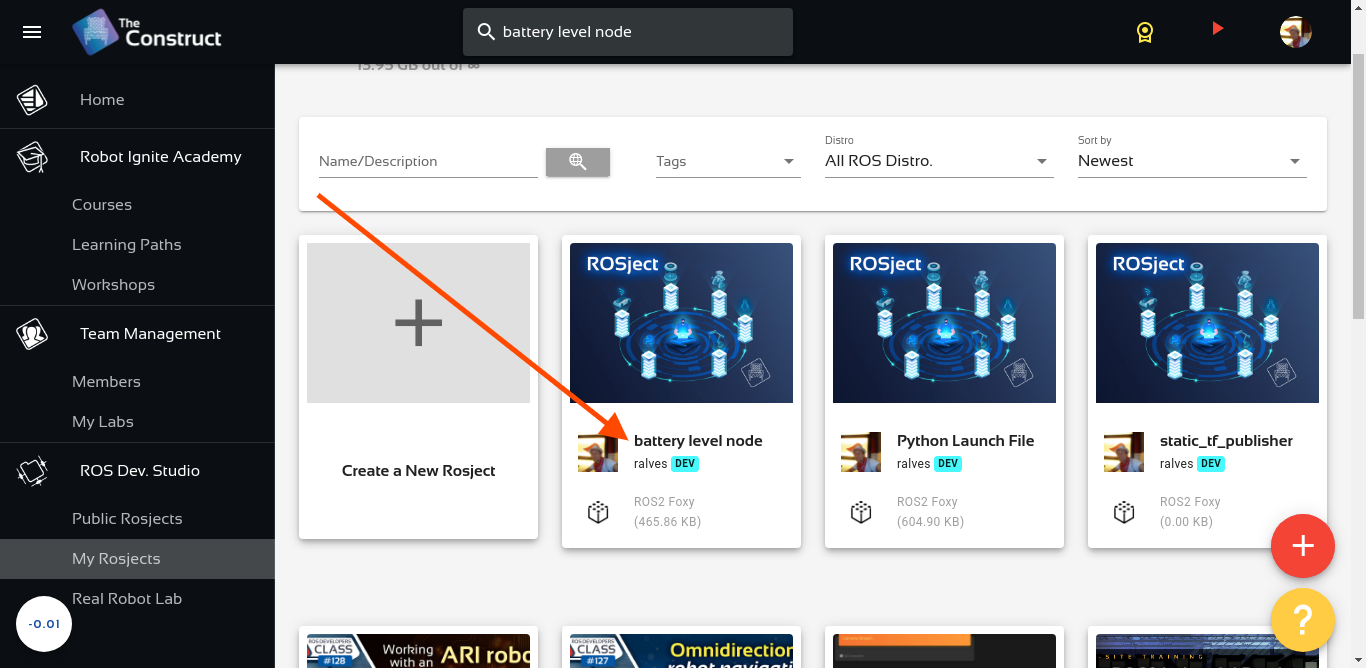
For the rosject, let’s select ROS2 Foxyfor the ROS Distro, let’s name the rosject as Battery Level Node. You can leave the rosject public.
Battery Level Node – Conditional Publisher in ROS2
If you mouse over the recently created rosject, you should see a Run button. Just click that button to launch the rosject.
Writing a simple publisher and subscriber (Python)
Once the rosject is open, we can now create our publisher and subscriber. For that, we are going to use ROS Docs as a reference.
Let’s open a new terminal by clicking on the Open a new shell window button:
Open a new shell
Once the terminal is open, we can list the files with the ls command:
user:~$ ls
ai_ws  catkin_ws  notebook_ws  ros2_ws  simulation_ws  webpage_ws
We can see a workspace named ros2_ws. Let’s enter that workspace using cd ros2_ws/:
user:~$ cd ros2_ws/
user:~/ros2_ws$
Let’s now source our workspace with:
source ~/ros2_ws/install/setup.bash
Let’s now enter our src folder:
cd ~/ros2_ws/src/
And create a package named py_pubsub (python publisher and subscriber):
Be aware that in order to create this package, we basically used ROS Docs for reference.
If you now list your src folder using ls, you should be able to see our package:
user:~/ros2_ws/src$ ls
py_pubsub
We can now enter into this py_pubsub package using cd py_pubsub/. We will find a new folder named py_pubsub inside it. Let’s just enter into it. The full command would be as easy as cd ~/ros2_ws/src/py_pubsub/py_pubsub/ . But if you want to go step by step:
user:~/ros2_ws/src$ cd py_pubsub/
user:~/ros2_ws/src/py_pubsub$ ls
package.xml  py_pubsub  resource  setup.cfg  setup.py  test
user:~/ros2_ws/src/py_pubsub$ cd py_pubsub/
user:~/ros2_ws/src/py_pubsub/py_pubsub$ ls
__init__.py
user:~/ros2_ws/src/py_pubsub/py_pubsub$
Now inside that last py_pubsub folder, let’ download a publisher and a subscriber named publisher_member_function.py and subscriber_member_function.py respectively. Bear in mind that up to this point we are basically following the docs aforementioned:
cd ~/ros2_ws/src/py_pubsub/py_pubsub

wget https://raw.githubusercontent.com/ros2/examples/foxy/rclpy/topics/minimal_publisher/examples_rclpy_minimal_publisher/publisher_member_function.py

wget https://raw.githubusercontent.com/ros2/examples/foxy/rclpy/topics/minimal_subscriber/examples_rclpy_minimal_subscriber/subscriber_member_function.py
We should now have three files inside our py_pubsub folder/package:
cd ~/ros2_ws/src/py_pubsub/py_pubsub; ls

__init__.py publisher_member_function.py subscriber_member_function.py
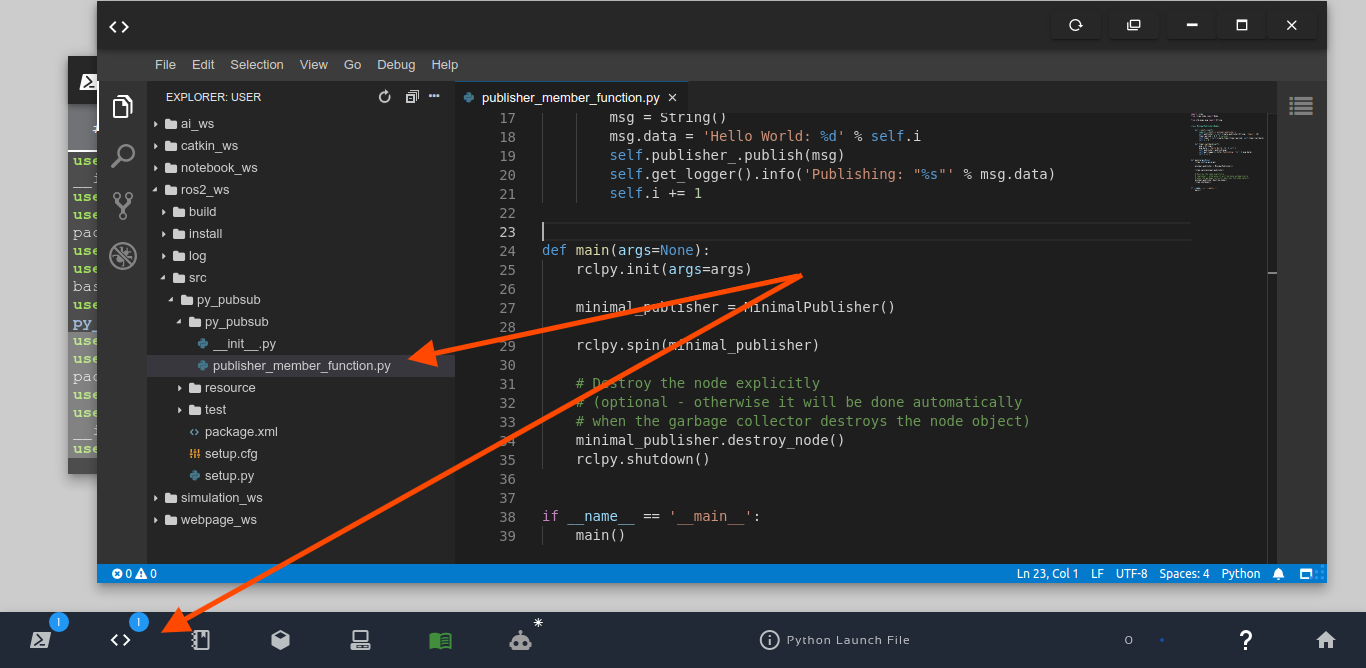
Let’s now open the publisher_member_function.py using the Code Editor:
ROS2 Publisher
Let’s modify the timer_callback method of the publisher_member_funcion.py, so that instead of increasing the initial value, let’s decrease it. Let’s also modify our constructor (__init__ method) to make the initial value of the i variable be 100.
What this means is that the i variable will initially have the value 100, then it is going to decrease it. The final content of the publisher_member_funcion.py file should be similar to the following:
# Copyright 2016 Open Source Robotics Foundation, Inc.
#
# Licensed under the Apache License, Version 2.0 (the "License");
# you may not use this file except in compliance with the License.
# You may obtain a copy of the License at
#
#     http://www.apache.org/licenses/LICENSE-2.0
#
# Unless required by applicable law or agreed to in writing, software
# distributed under the License is distributed on an "AS IS" BASIS,
# WITHOUT WARRANTIES OR CONDITIONS OF ANY KIND, either express or implied.
# See the License for the specific language governing permissions and
# limitations under the License.

import rclpy
from rclpy.node import Node
from std_msgs.msg import String

class MinimalPublisher(Node):

    def __init__(self):
        super().__init__('minimal_publisher')
        self.publisher_ = self.create_publisher(String, 'topic', 10)
        timer_period = 0.5  # seconds
        self.timer = self.create_timer(timer_period, self.timer_callback)
        self.i = 100

    def timer_callback(self):
        msg = String()
        msg.data = 'Battery Level: %d' % self.i
        self.publisher_.publish(msg)
        self.get_logger().info('Publishing: "%s"' % msg.data)
        self.i -= 1

def main(args=None):
    rclpy.init(args=args)
    minimal_publisher = MinimalPublisher()
    rclpy.spin(minimal_publisher)
    # Destroy the node explicitly
    # (optional - otherwise it will be done automatically
    # when the garbage collector destroys the node object)
    minimal_publisher.destroy_node()
    rclpy.shutdown()

if __name__ == '__main__':
    main()
Now let’s open also our subscriber_member_function.py file and modify the listener_callback method so that it will have the following content:
What the changes are going to do is: if the battery level is between 70 and 66 %, then a warning message will be printed, and that warning will be published into a topic named /battery.
We also have to create the publisher into the constructor (__init__ method) with:
So in the end, the final subscriber will look like this:
# Copyright 2016 Open Source Robotics Foundation, Inc.
#
# Licensed under the Apache License, Version 2.0 (the "License");
# you may not use this file except in compliance with the License.
# You may obtain a copy of the License at
#
# http://www.apache.org/licenses/LICENSE-2.0
#
# Unless required by applicable law or agreed to in writing, software
# distributed under the License is distributed on an "AS IS" BASIS,
# WITHOUT WARRANTIES OR CONDITIONS OF ANY KIND, either express or implied.
# See the License for the specific language governing permissions and
# limitations under the License.
import rclpy
from rclpy.node import Node
from std_msgs.msg import String
class MinimalSubscriber(Node):
def __init__(self):
super().__init__('minimal_subscriber')
self.subscription = self.create_subscription(
String,
'topic',
self.listener_callback,
10)
self.subscription # prevent unused variable warning
self.publisher_ = self.create_publisher(String, 'battery', 10)
def listener_callback(self, msg):
        if msg.data in ['Battery Level: 70', 'Battery Level: 69', 'Battery Level: 68', 'Battery Level: 67', 'Battery Level: 66']:
            self.get_logger().info('WARNING!: "%s"' % msg.data)
            self.publisher_.publish(msg)
def main(args=None):
rclpy.init(args=args)
minimal_subscriber = MinimalSubscriber()
rclpy.spin(minimal_subscriber)
# Destroy the node explicitly
# (optional - otherwise it will be done automatically
# when the garbage collector destroys the node object)
minimal_subscriber.destroy_node()
rclpy.shutdown()
if __name__ == '__main__':
main()
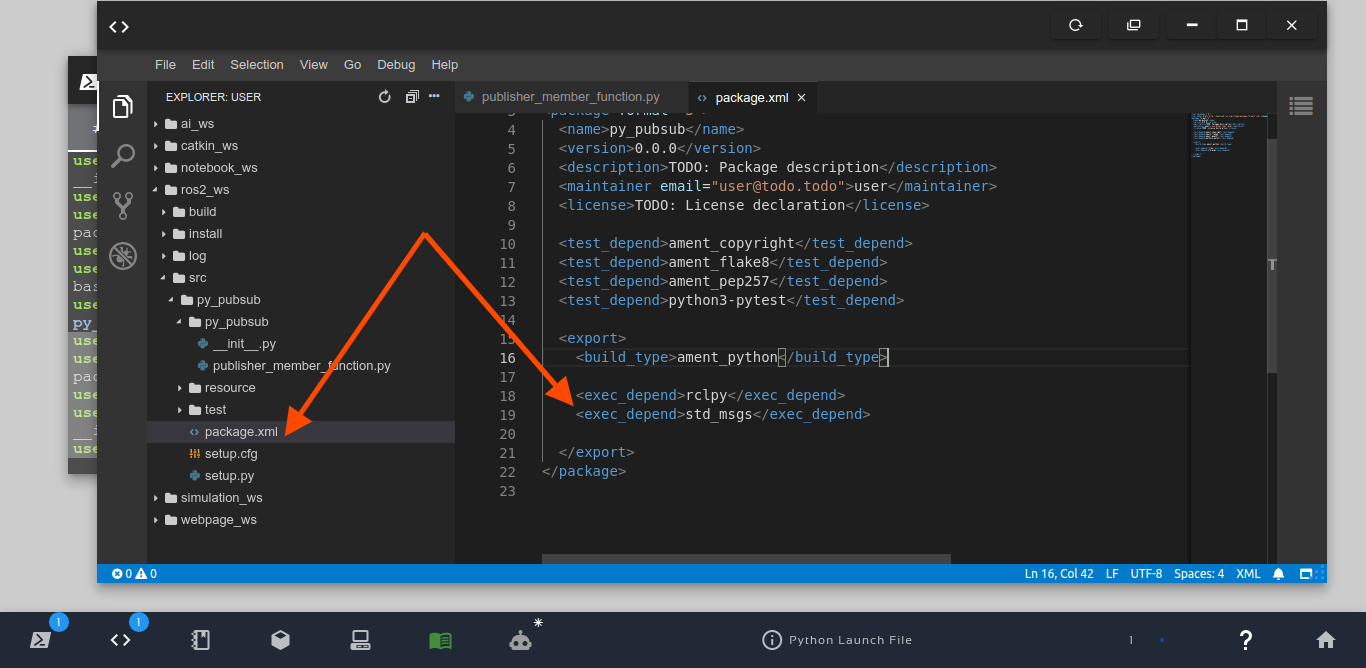
Now that we have our publisher and subscriber, ready where the subscriber contains a conditional publisher, now open our package.xml file and add rclpy and std_msgs as dependencies, by adding the two lines below afterament_python:
The final result should be similar to the image below:
exec_depend rcl_py and std_msgs
Let’s now open the setup.py file and add our publisher and subscriber (let’s call them talker and listener respectively) to the entry_points. Our final entry_points should look like:
Now that our ros2_ws (ROS2 Workspace) is built, let’s run our publisher and subscriber to make sure they are working. Let’s start by running our publisher, that we named talker.
source ~/ros2_ws/install/setup.bash

ros2 run py_pubsub talker
If everything went ok, you should see something similar to this:
But, if you got an error message like this one “No executable found“, then it means you need to make your publisher and subscriber executables. You can make them executable with:
chmod +x ~/ros2_ws/src/py_pubsub/py_pubsub/*
You can now open a different web shell and run the subscriber named listener with:
source ~/ros2_ws/install/setup.bash

ros2 run py_pubsub listener
If the battery level is already below 66%, you should see no messages being published by the listener. If that is the case, please kill and start the talker again in the first terminal. You can kill it with CTRL+C , and can start it again just as you did before:
CTRL+C

ros2 run py_pubsub talker
After having restarted the talker in the first terminal, you can now keep an eye on the terminal where the listener was executed. When the battery level goes between 70 and 66%, the following message should have been printed.
Be aware that in order to see the message being published in the third terminal, where the /battery topic is being echoed, you have to restart the talker again, since the battery level at this point is well below the 65%.
Again, you can kill the talker in the first terminal with CTRL+C , and can start it again just as you did before:
CTRL+C

ros2 run py_pubsub talker
Now you should be able to see the output in the third terminal (/battery topic)
Congratulations. You made it. You now know not only how to create conditional publishers, but you have also learned how to create packages, and modify publishers and subscribers in ROS2 Python.
Youtube video
So this is the post for today. Remember that we have the live version of this post on YouTube. If you liked the content, please consider subscribing to our youtube channel. We are publishing new content ~every day.
In order to learn how to make ROS1 interact with ROS2, we need to have ROS1 and ROS2 installed in our computers. Installing two different distros is not going to be covered in this topic because we are going to use The Construct (https://www.theconstruct.ai/) for this tutorial, where both ROS installations are already available. But if you want to test everything on your own computer, feel free to install ROS1 Noetic and install ROS2 Foxy on your Ubuntu 20.04 computer.
Let’s start by opening The Construct (https://www.theconstruct.ai/) and logging in. You can easily create a free account if you still don’t have one.
Once inside, let’s create My Rosjects and then, Create a new rosject:
My Rosjects
Create a new rosject
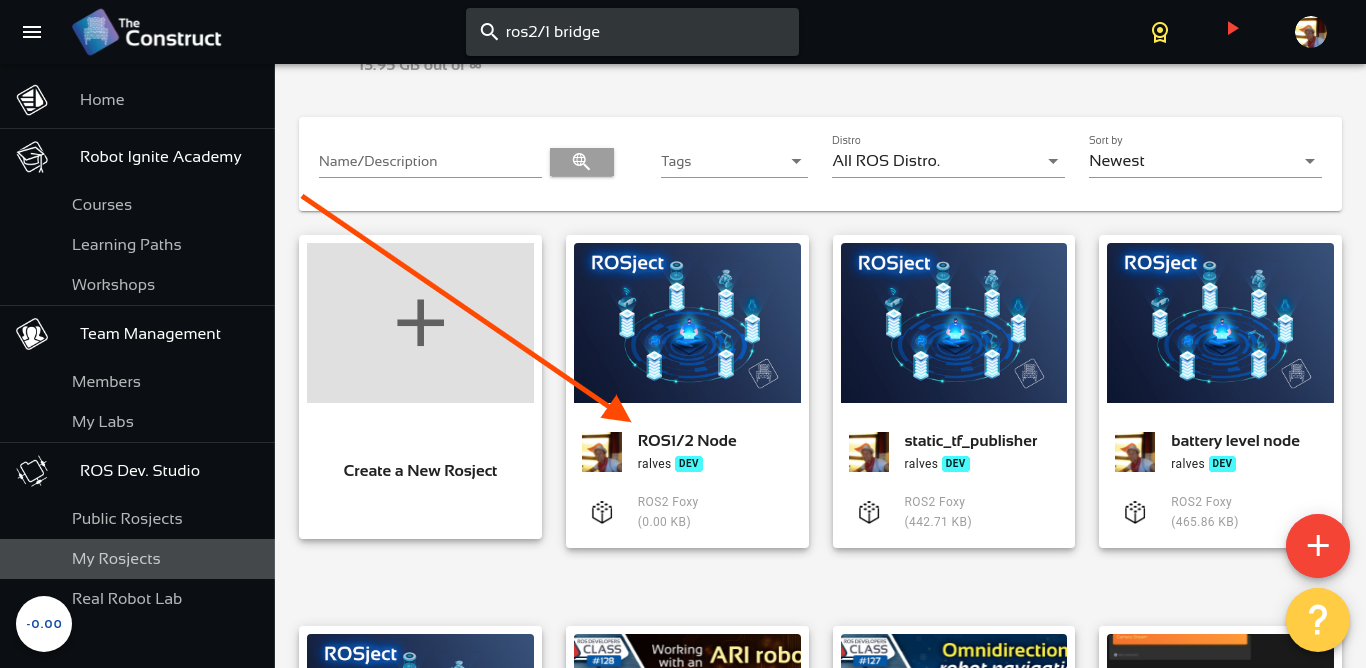
For the rosject, let’s select ROS2 Foxyfor the ROS Distro, let’s name the rosject as ROS1/2 Node. You can leave the rosject public.
Interaction between ROS1 and ROS2 Nodes using ros1_bridge
If you mouse over the recently created rosject, you should see a Run button. Just click that button to launch the rosject.
Installing ros1_bridge
As we mentioned at the beginning of this post, you need to have ROS1 and ROS2 installed on the computer. Thank God we already have that on The Construct.
Let’s open a new terminal by clicking on the Open a new shell window button:
Open a new shell
Now, let’s check the ROS distributions that we have installed:
ls /opt/ros/
You should see at least foxy and noetic installed.
Let’s now install ros1_bridge, a ROS 2 package that provides bidirectional communication between ROS 1 and ROS 2.
If everything went ok, you should have a /chatter topic now, and the talker should be printing something like the output below:
[INFO] [1636419517.414196]: hello world 1636419517.414014
[INFO] [1636419517.515074]: hello world 1636419517.5148714
[INFO] [1636419517.614426]: hello world 1636419517.614205
[INFO] [1636419517.714437]: hello world 1636419517.7142227
[INFO] [1636419517.814406]: hello world 1636419517.8142045
[INFO] [1636419517.914464]: hello world 1636419517.9142513
You can also confirm that there is a /chatter topic in ROS1 with the following commands in another (third) terminal:
source /opt/ros/noetic/setup.bash

rostolic list
The output should be similar to the following:
/chatter
/rosout
/rosout_agg
Starting a ROS2 Node
So far we have launched a ROS1 node. Let’s open a different terminal (a fourth one), source ROS2 and check the list of topics:
source /opt/ros/foxy/setup.bash

ros2 topic list
The topics listed should contain no reference to /chatter, the topic being published by a ROS1 node. The list of topics in ROS2 should be:
/parameter_events
/rosout
Now let’s run ROS1 Bridge. For that, let’s first source both ros1 and ros2. Let’s open a fifth terminal for that:
source /opt/ros/noetic/setup.bash

source /opt/ros/foxy/setup.bash

ros2 run ros1_bridge dynamic_bridge --bridge-all-topics
If everything went ok after launching ROS1 Bridge, the output should be similar to this:
created 1to2 bridge for topic '/chatter' with ROS 1 type 'std_msgs/String' and ROS 2 type 'std_msgs/msg/String'
created 1to2 bridge for topic '/rosout' with ROS 1 type 'rosgraph_msgs/Log' and ROS 2 type 'rcl_interfaces/msg/Log'
created 1to2 bridge for topic '/rosout_agg' with ROS 1 type 'rosgraph_msgs/Log' and ROS 2 type 'rcl_interfaces/msg/Log'
created 2to1 bridge for topic '/chatter' with ROS 2 type 'std_msgs/msg/String' and ROS 1 type 'std_msgs/String'
created 2to1 bridge for topic '/rosout' with ROS 2 type 'rcl_interfaces/msg/Log' and ROS 1 type 'rosgraph_msgs/Log'
[INFO] [1636419930.466921521] [ros_bridge]: Passing message from ROS 1 std_msgs/String to ROS 2 std_msgs/msg/String (showing msg only once per type)
[INFO] [1636419930.467529301] [ros_bridge]: Passing message from ROS 2 rcl_interfaces/msg/Log to ROS 1 rosgraph_msgs/Log (showing msg only once per type)
[INFO] [1636419930.467995035] [ros_bridge]: Passing message from ROS 2 std_msgs/msg/String to ROS 1 std_msgs/String (showing msg only once per type)
removed 2to1 bridge for topic '/chatter'
[INFO] [1636419930.587503640] [ros_bridge]: Passing message from ROS 1 rosgraph_msgs/Log to ROS 2 rcl_interfaces/msg/Log (showing msg only once per type)
If we now go back to the fourth terminal and list the ROS2 topics again:
source /opt/ros/foxy/setup.bash

ros2 topic list
Now we should see a /chatter topic.
/chatter
/parameter_events
/rosout
/rosout_agg
This is really awesome, isn’t it? We are running a publisher in ROS1, and we can see the topic in ROS2.
If we can see the topic, we also expect to see what is being published, right? Let’s try to subscribe to that topic using ROS2 to see what happens. We can run the command below in the same terminal where we listed the ros2 topics:
ros2 topic echo /chatter
If everything worked for you as it should, you should be able to see in ROS2 the messages published in ROS1:
data: hello world 1636420166.362258
---
data: hello world 1636420166.4622662
---
data: hello world 1636420166.5622616
---
data: hello world 1636420166.662261
---
data: hello world 1636420166.7621603
Awesome. Congratulations. You made it. You now have seen, with hands-on, how to make ROS1 and ROS2 topics interact with one another. This is certainly a really basic example, but we hope you find it useful. Feel free to kill the nodes you launched in the different terminals if you want. You can also keep using The Construct to improve your ROS Skills.
Youtube video
So this is the post for today. Remember that we have the live version of this post on YouTube. If you liked the content, please consider subscribing to our youtube channel. We are publishing new content ~every day.
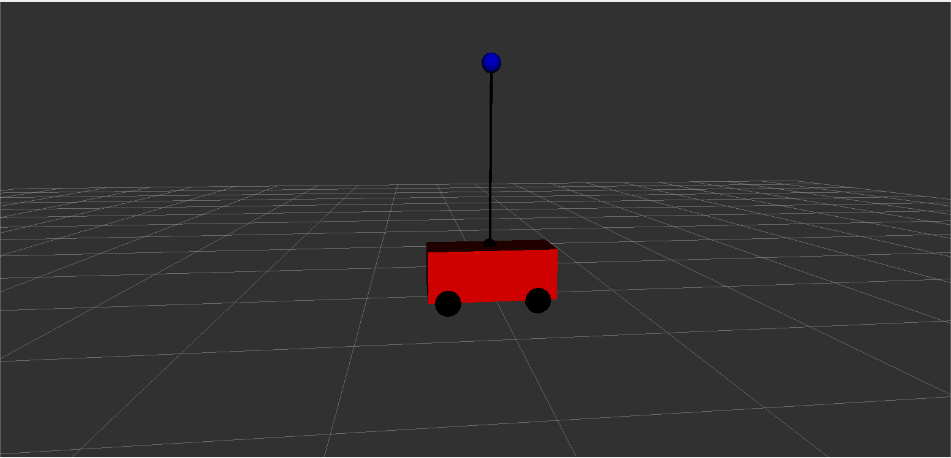
In this post, we will see how to implement Real Time in ROS2, using the ROS2 Pendulum Real Time demo.
Step 1: Grab a copy of the ROS Project containing the code
Click here to get your own copy of the project (PS: If you don’t have an account on the ROS Development Studio, you would need to create one. Once you create an account or log in, we will copy the project to your workspace).
That done, open the project using the Run button. This might take a few moments, please be patient.
You should now see a notebook with detailed instructions. This post includes a summary of these instructions and some other tips.
Step 2: Start the Simulation
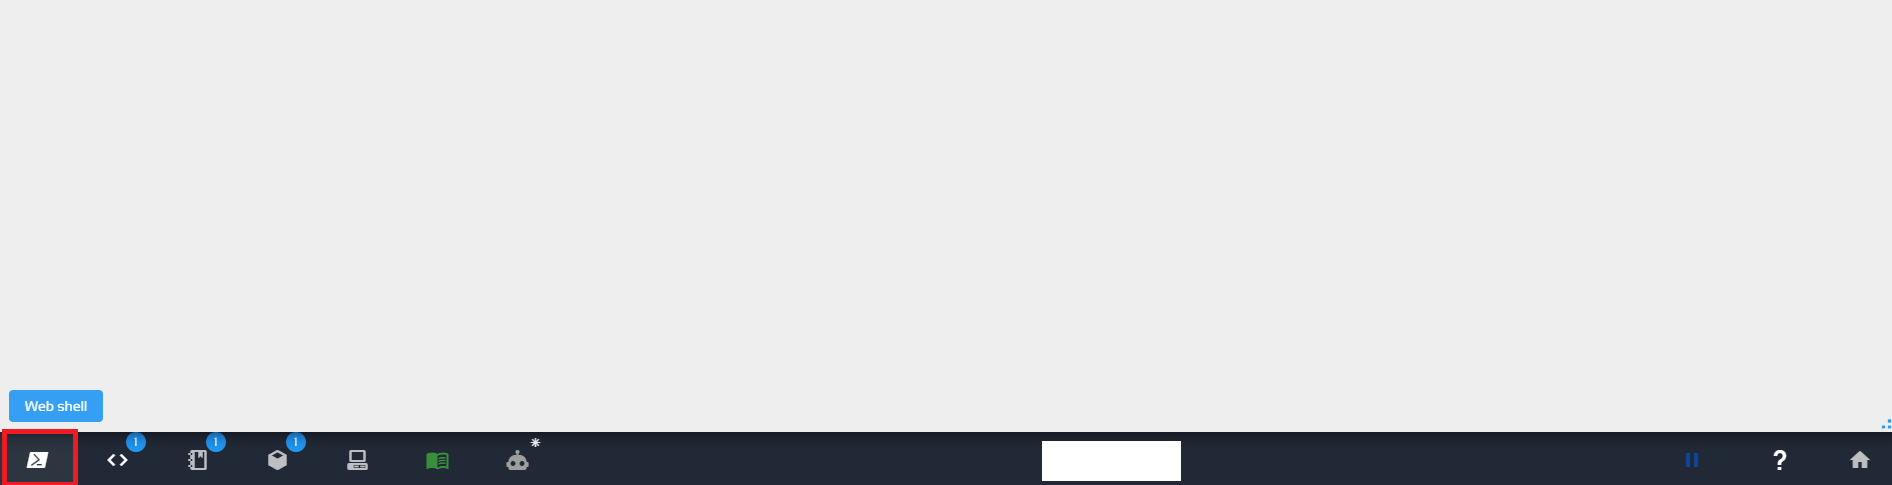
Start a web shell from the bottom bar of the screen as shown above and run the following command:
cd ~/ros2_ws

source install/local_setup.bash

ros2 launch pendulum_bringup pendulum_bringup.launch.py rviz:=True
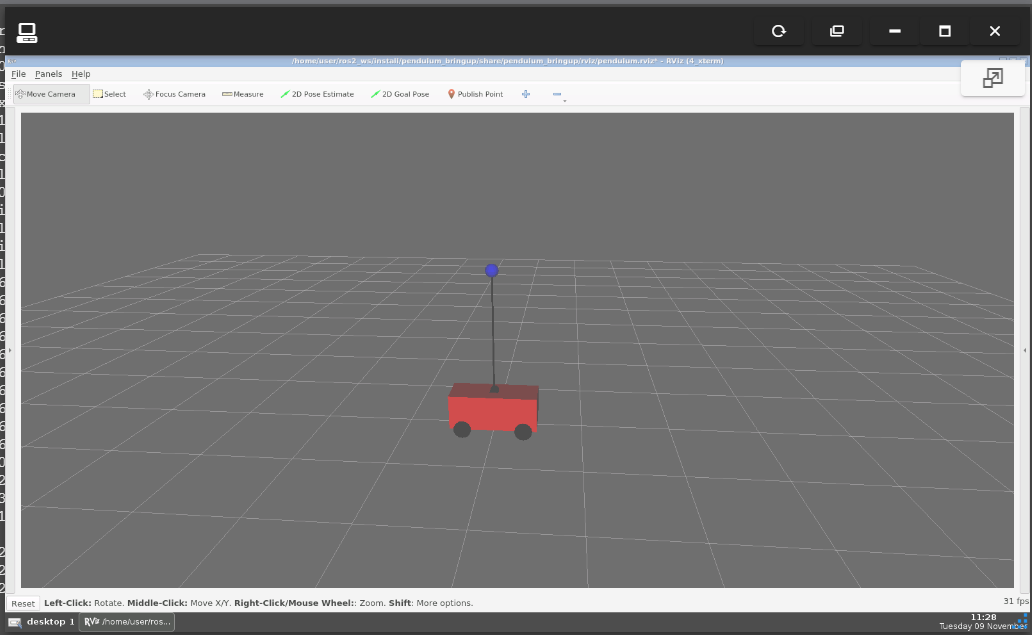
See the robot by clicking on the Graphical Tools icon on the bottom bar:
You should now see something like this (if you cannot see it, please ensure the ros2 launch command is still running and restart it if necessary):
You might need to drag the window into focus and then maximize it.
Move the robot by executing the following in a new terminal:
If you want to run the simulation on your local PC, then you need to run the commands given in the Setup section.
Step 3: Explore the source code using the IDE
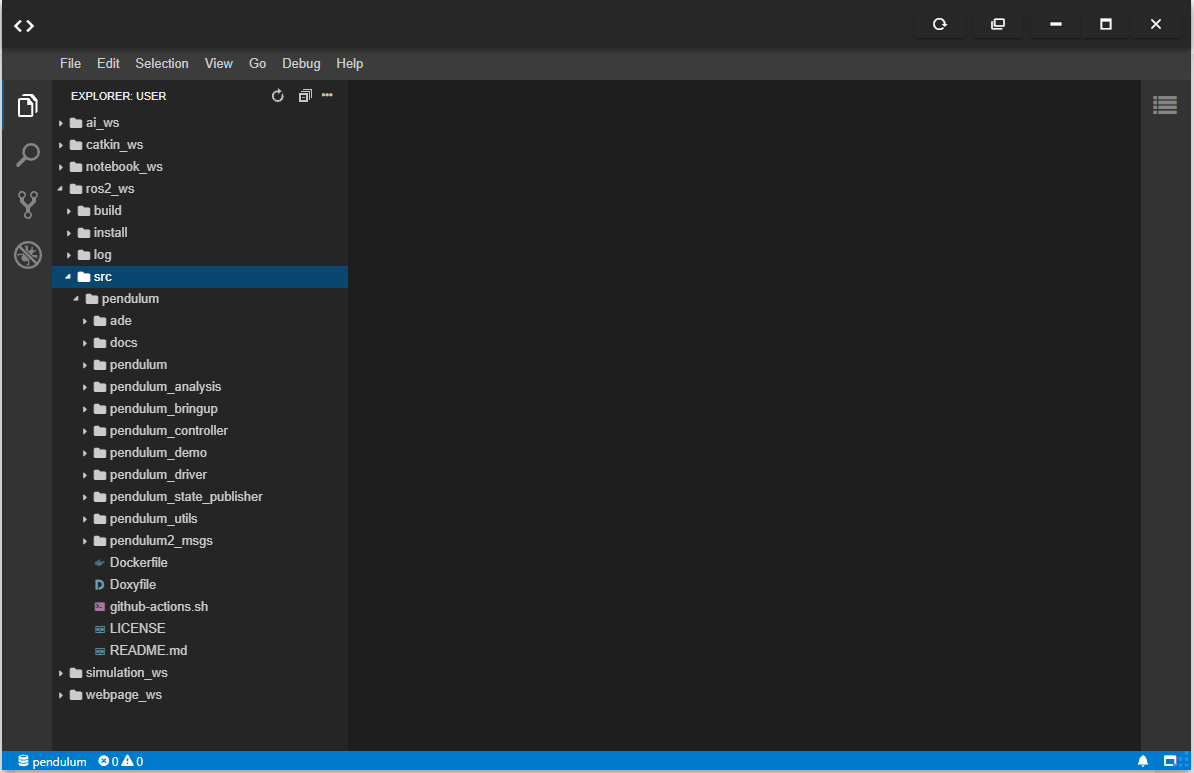
Open the IDE by clicking on the icon as shown above. You should now see something similar to the image below:
All the files used in the simulation are in the ros2_ws/src directory. Explore the files. Double-click to open a file in the editor. You will refer back to some of the files later on.
Step 4: Watch the video to understand how the simulation implemented Real Time in ROS2 with the Pendulum
Here you go:
Step 5: Consolidate your learning
Do you understand how to implement Real Time in ROS2 after watching the video? If not, have you gone over the video again?
Can you try to implement the simulation on your local PC?
Did you like this post? Do you have any questions about the explanations? Whatever the case, please leave a comment on the comments section below, so we can interact and learn from each other.
If you want to learn about other ROS2 topics, please let us know in the comments area and we will do a video or post about it.

![[ROS Q&A] 225 – Setup your ROS2 Workspace with Unlimited Node Files](https://www.theconstruct.ai/wp-content/uploads/2021/12/04-result-1.png)
![[ROS2 Q&A] 224 – How to source ROS1 & ROS2 side by side](https://www.theconstruct.ai/wp-content/uploads/2021/12/224-How-to-source-ROS1-ROS2-side-by-side.jpeg)
![[ROS2 Q&A] 219 – How to Detect Obstacles in ROS2 Foxy with TurtleBot3](https://www.theconstruct.ai/wp-content/uploads/2021/12/219-How-to-Detect-Obstacles-in-ROS2-with-TurtleBot3.jpg)
![[ROS2 Q&A] 218 – How to Create Conditional Publisher in ROS2](https://www.theconstruct.ai/wp-content/uploads/2021/12/218-How-to-Create-Conditional-Publisher-in-ROS2.jpeg)
![[ROS2 Q&A] 217 – How to Mix ROS1 and ROS2 Packages](https://www.theconstruct.ai/wp-content/uploads/2021/11/217-How-to-Mix-ROS1-and-ROS2-Packages.jpg)