Are you interested in sharing your robot simulations with other people? Would you like to have them used by many people?
Then the best thing you can do is to have it available in RDS!
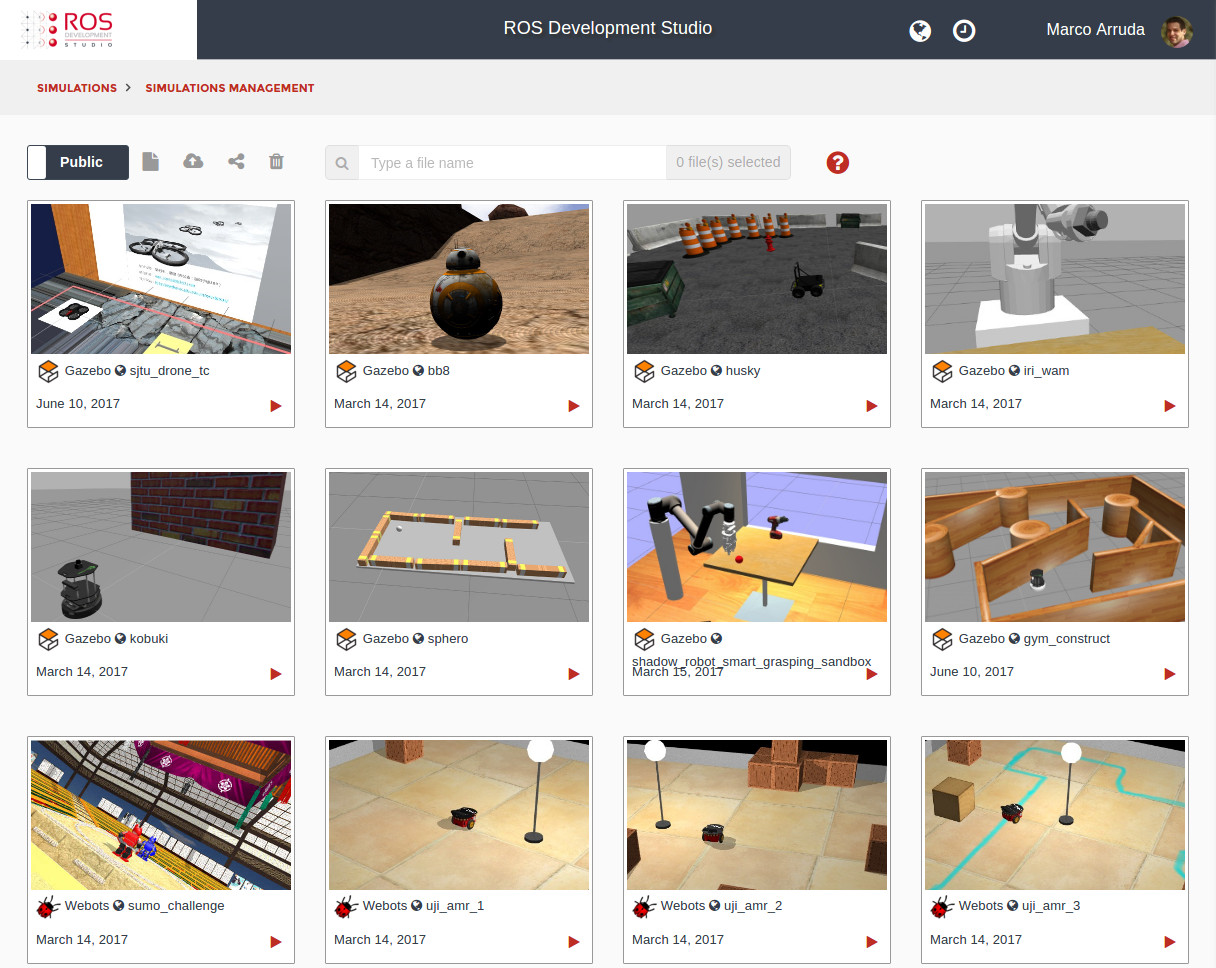
The ROS Development Studio (RDS), is a web and cloud based application where you can simulate and develop ROS programs for any kind of robot. If you have a simulation in RDS, everything people will need in order to test and work with your simulation will be a web browser! So, by having your simulation in RDS, you will be providing a 1-click access to your simulations to many people. Sounds interesting, right?
But… what do you need to do in order to have your simulation in RDS? Let’s break it down into some easy steps:
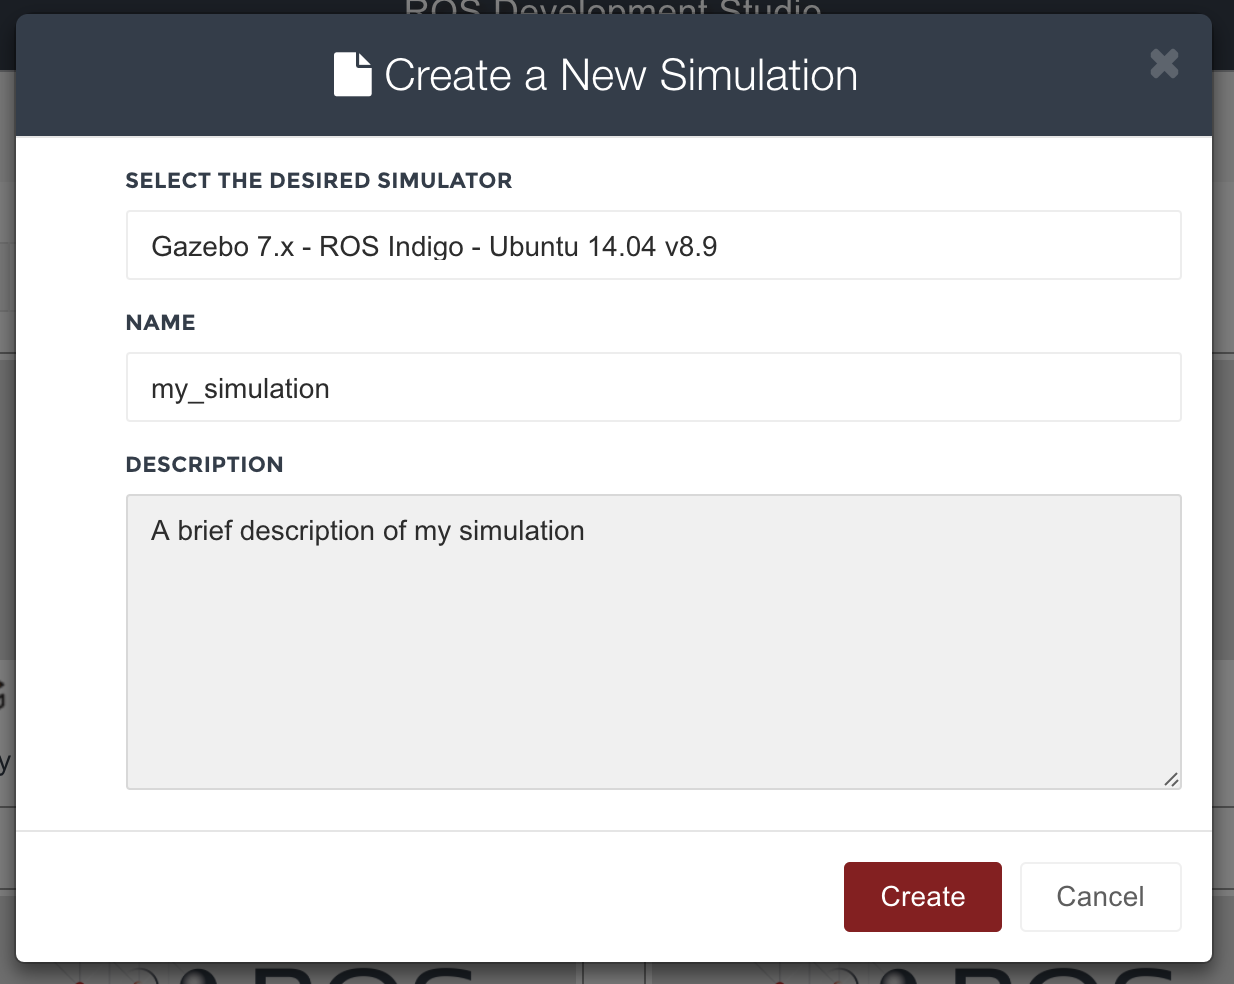
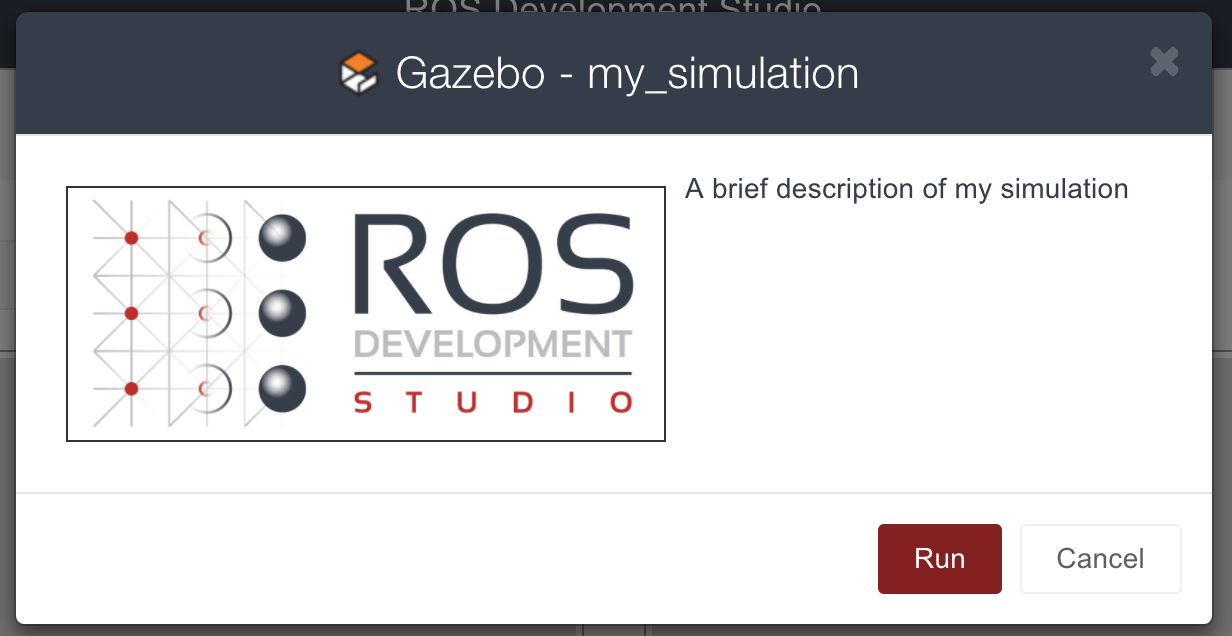
1. Create the simulation
First of all, you will need to create a new simulation in RDS, and upload your simulation packages to it. Bear in mind that RDS
supports Gazebo 7, so your simulation must be compatible with this simulator. Check that your simulation works properly, and that you can launch it using the launch files.
If you get stucked in this step, you can send us your simulation files, or send us the address of the repository containing the
simulation to the following address: simulations@theconstructsim.com.
We will help you with this process.
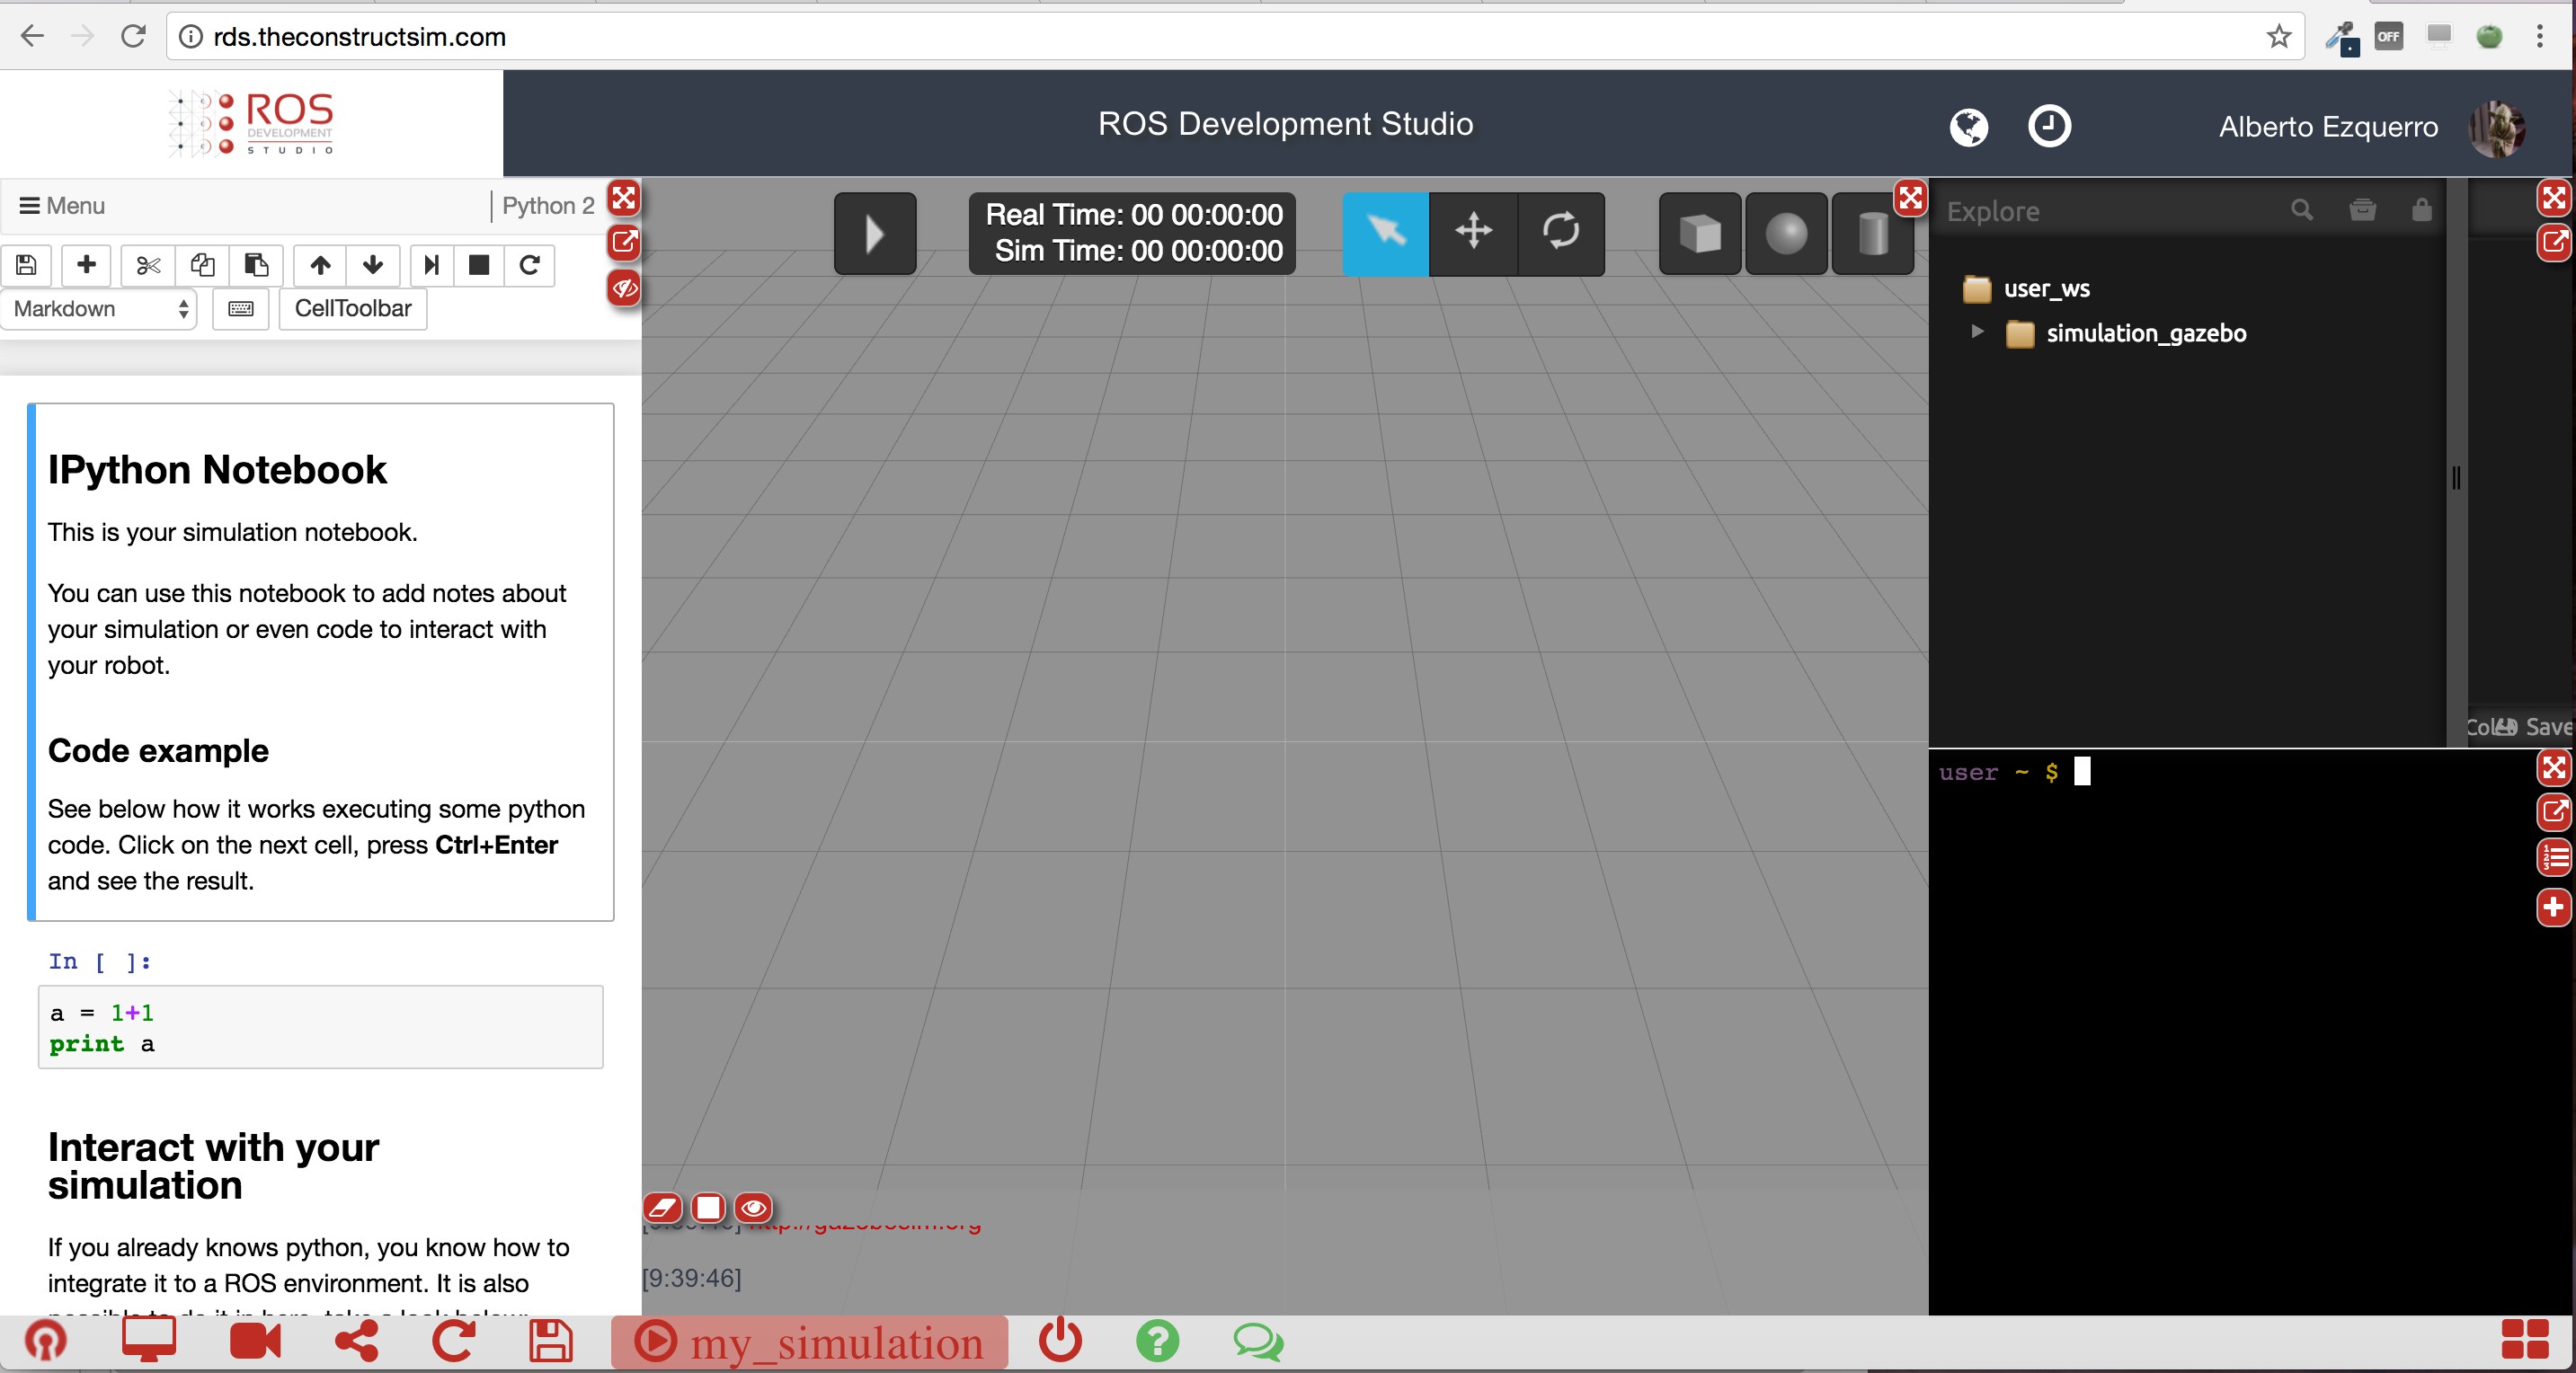
2. Create the Notebook
Once the simulation is working properly, it is time to create a Notebook for it. This notebook should consist of some basic
tips about how to use your simulation. For instance:
– What are the most important topics to look at.
– How to move/control your robot.
– Important services/actions available in your simulation.
– A basic script in order to interact with your robot.
The notebooks is the documentation for the users that want to use your simulation. This notebook is very important, since it will
guide users that want to work with your simulation.
You can have a look at the notebooks attached to any of the Public simulations that are already available in RDS in order to see
an example of how it should be.
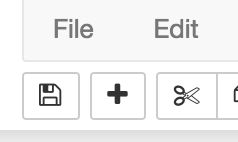
Once the notebook is created, you can then click the Save button of the Notebook, in order to Save the changes. Finally, click the Save button in the bottom menu in order to save the whole project.
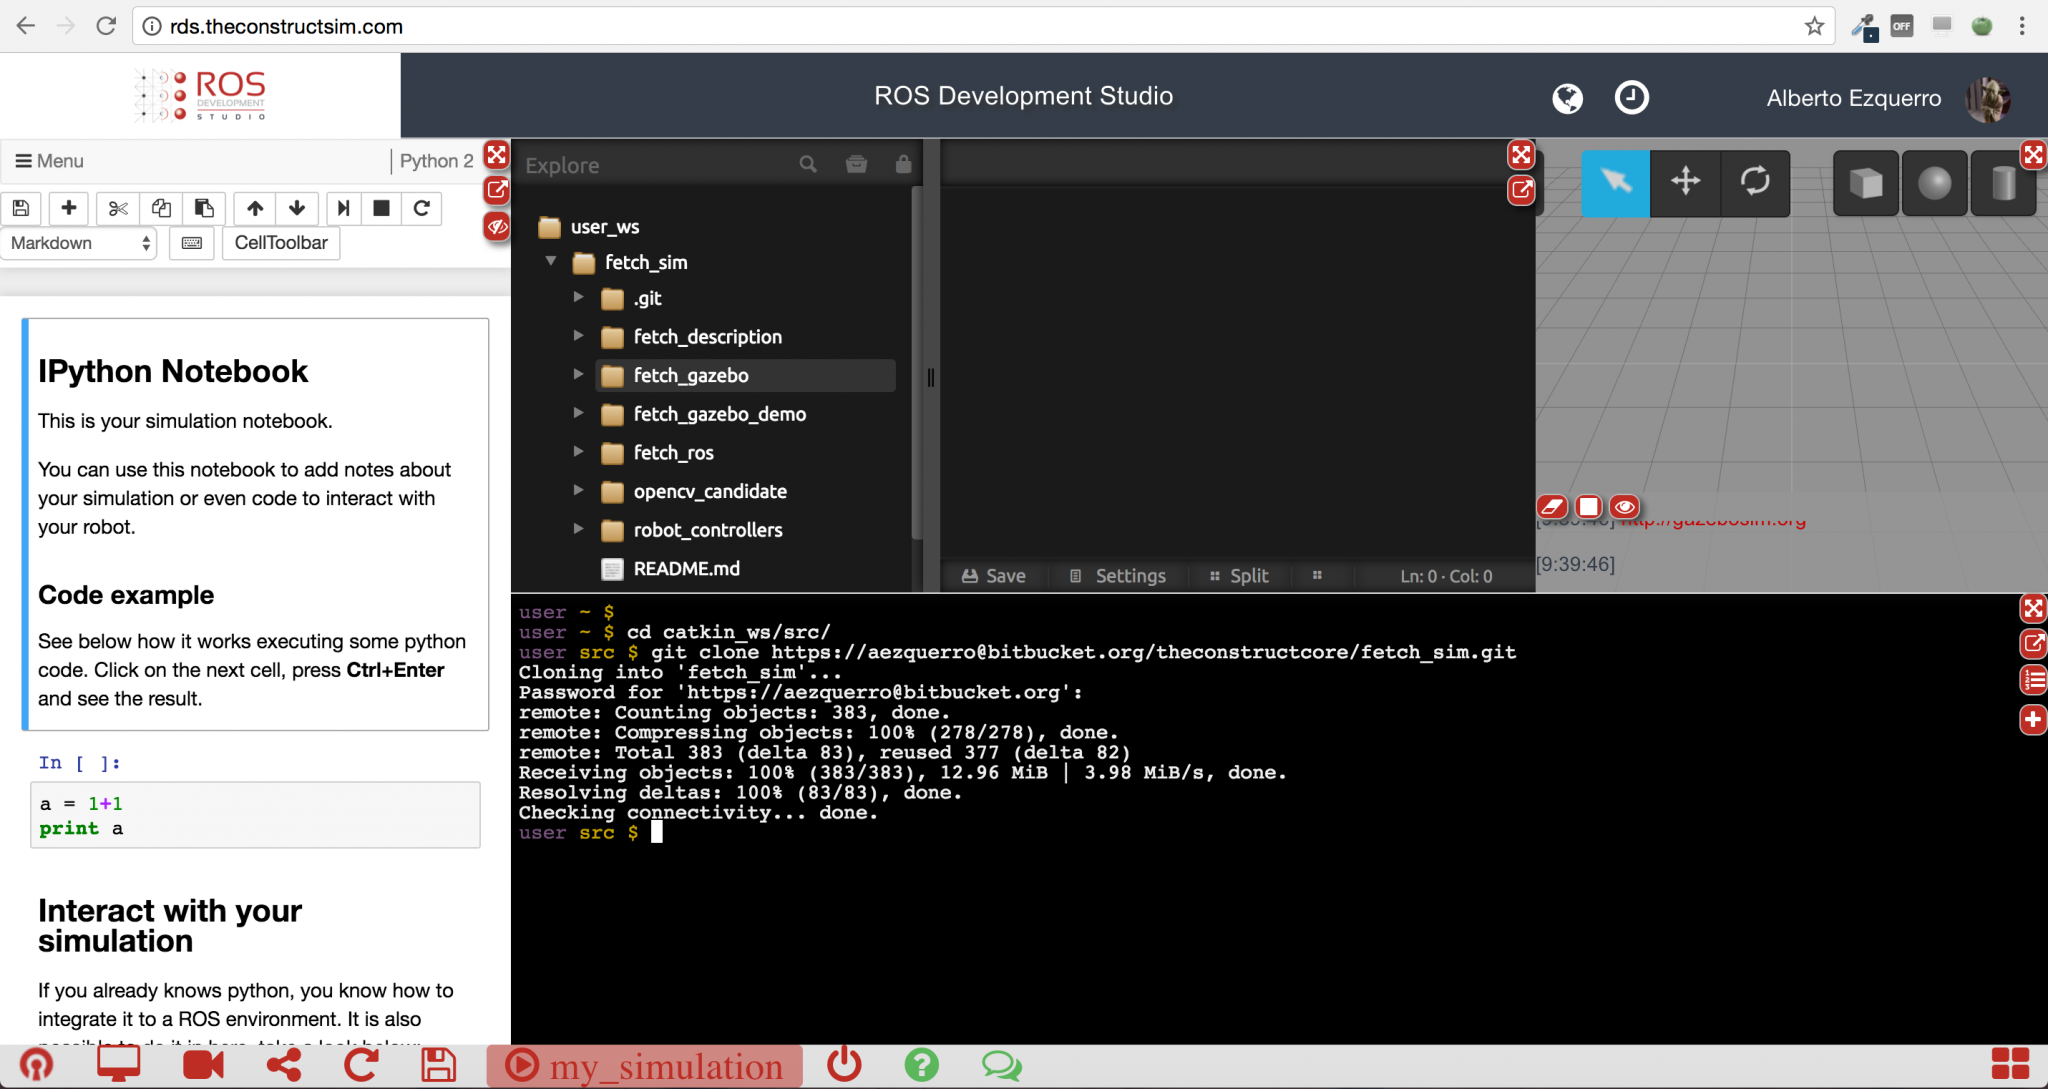
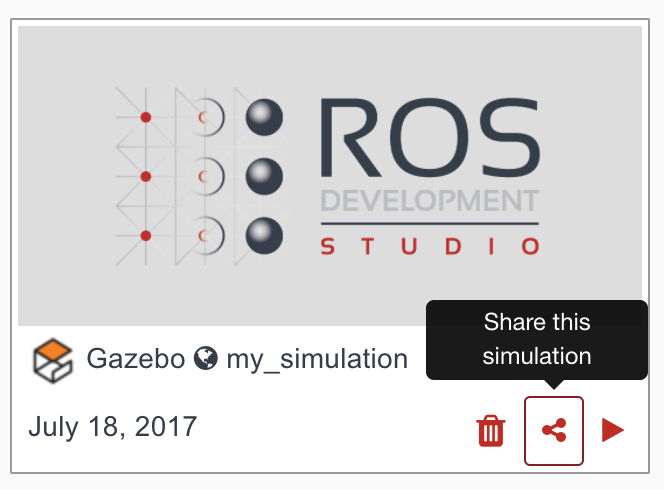
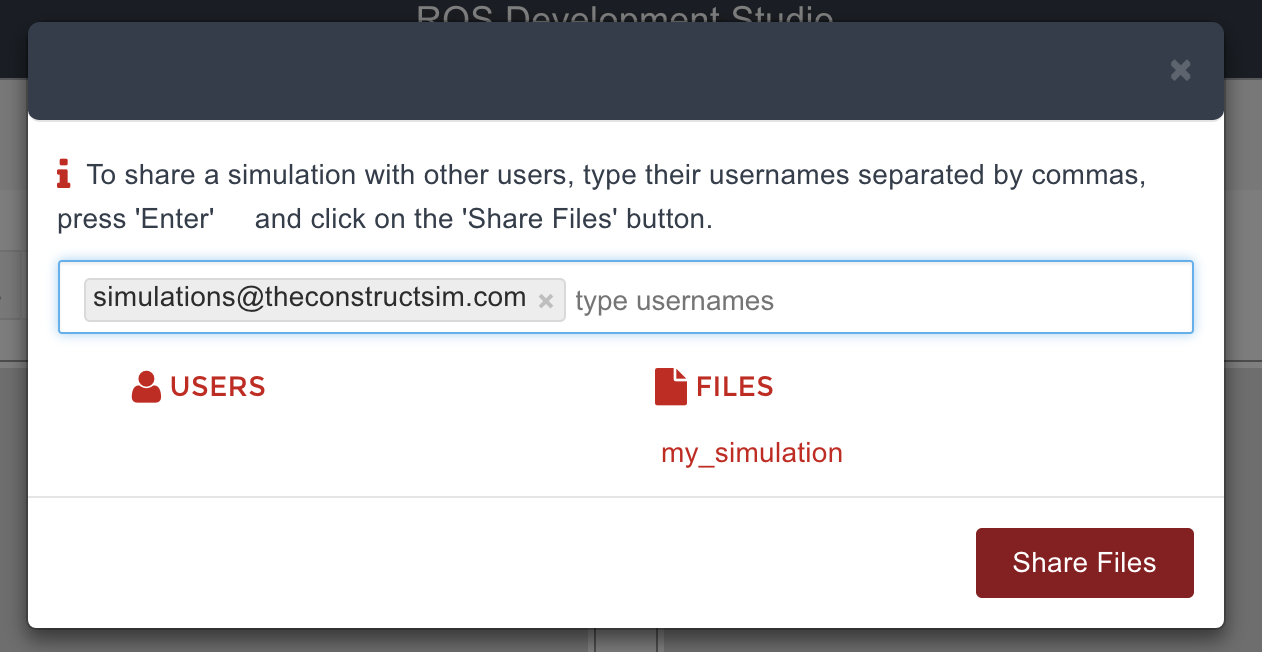
3. Share your project with us
Share your project with us. For that, you just need to click on the Share button related to your project, and share with the user
simulations@theconstructsim.com.
We will receive your whole project, and evaluate that everything is correct. Finally, we will publish your simulation in RDS as
Public, so anyone will be available to access to it.
If you are a Robotics Teacher and want to teach ROS effectively, you definitely should try the Robot Ignite Academy platform.
Since you can teach many students, today we will show you how to manage multi licenses.
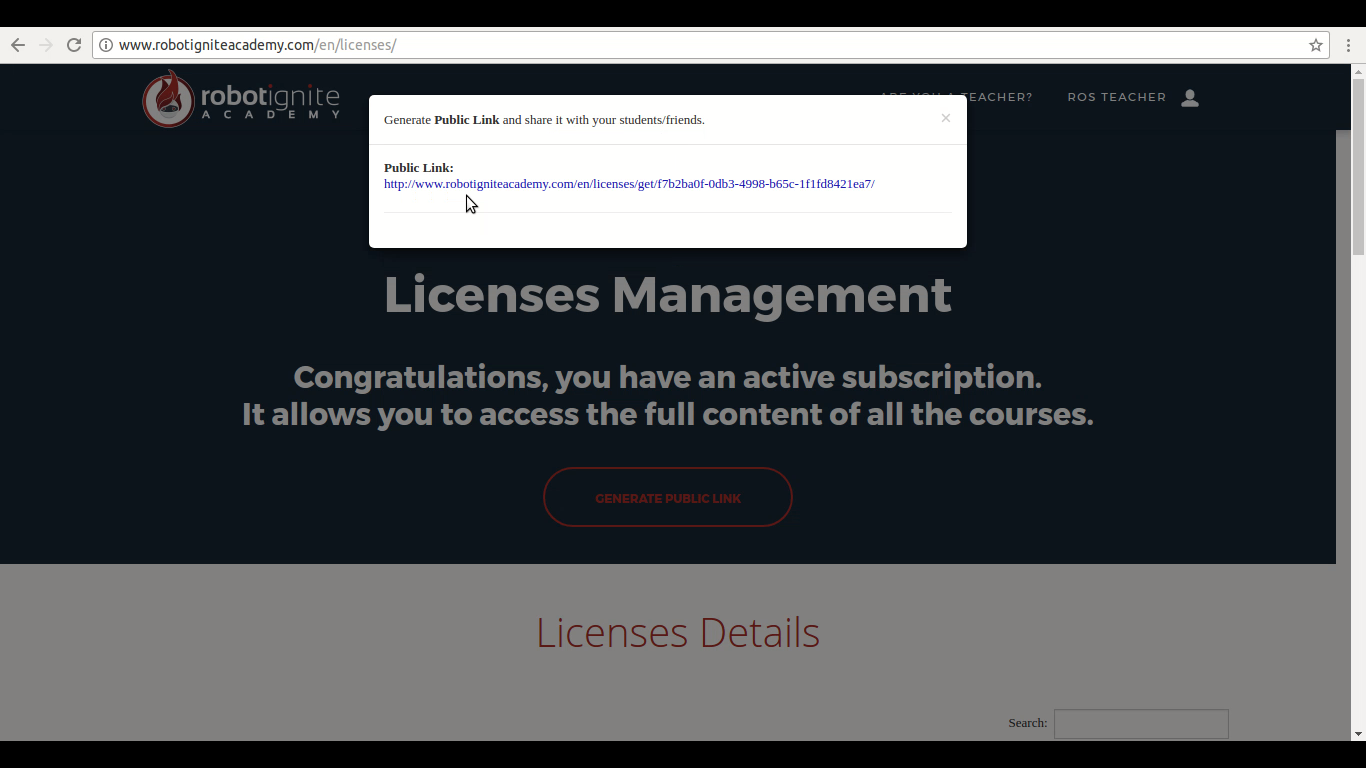
Once logged in, you just click on the Manage Licenses button as shown on the image below, in order to go to the Team Management page.
Once on the Team Management page, if you have many licenses, then a button Generate Public Link will be available for you. By clicking on that button, you will be able to generate a Public Link that can be shared with your students, so they will be able to have full access to the content of the courses using your licenses.
An example of the generated Public Link is shown below:
With that Public Link in hand, you just have to share it with your students.
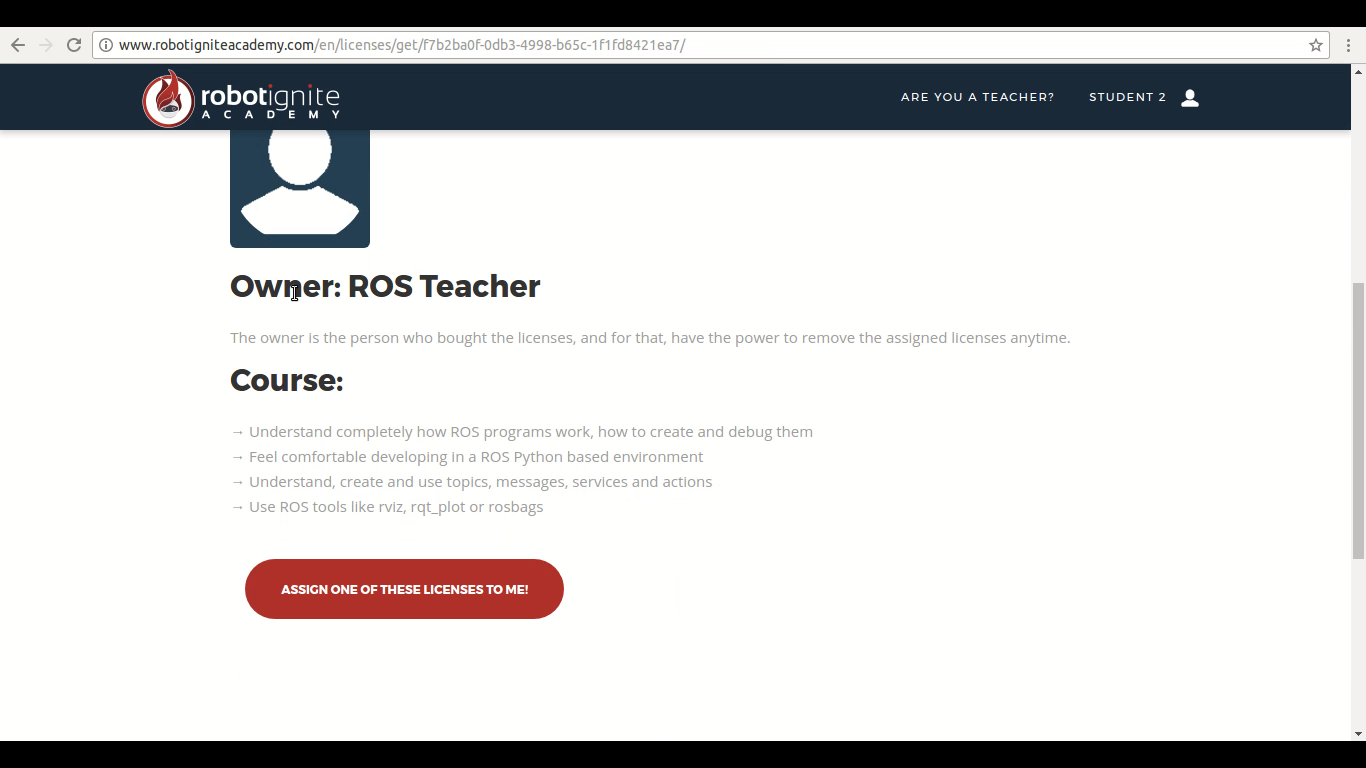
The students just have to login on the Robot Ignite Academy platform, and them go to the page represented by the Public Link by pasting the Public Link on the address bar of their Web Browser and pressing enter. Once on that page, they will see a button named ASSIGN ONE OF THESE LICENSES TO ME, as we can see on the following image.
After click on ASSIGN ONE OF THESE LICENSES TO ME, the student will start using one of your licenses and will have access to all the courses.
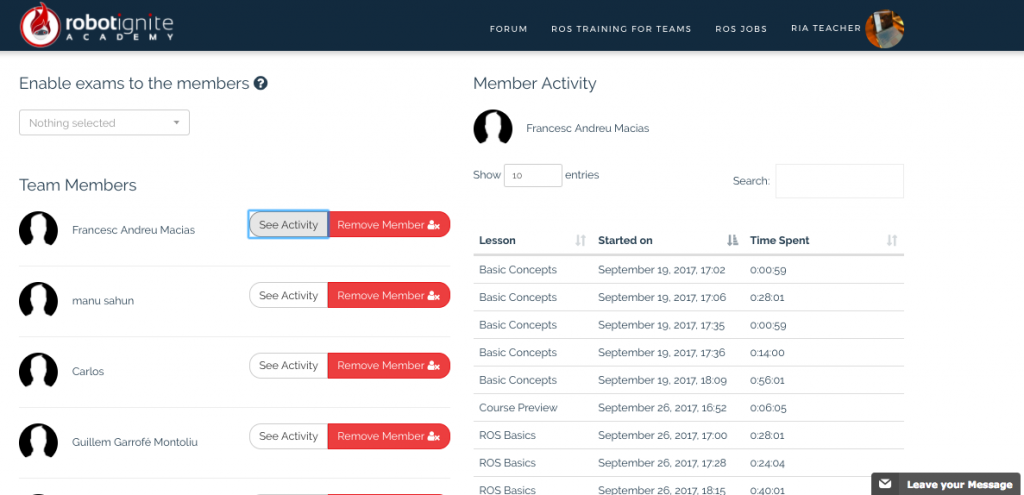
Through the Team Management page, you can see all the students using your licenses. Since you are the owner, you have the power to revoke the licenses of any students anytime.
On the image below we can see an example of the Team Management page of a teacher.
If you accidentally remove a license of a student, you just share the Public Link again with him and he can re-assign the license.
I hope I have explained well how the Multi Licenses Management page works on our platform. If I haven’t explained well and you still have any doubts or suggestions, don’t hesitate in contact us through the email: courses@robotigniteacademy.com
Learn how to import python modules from other packages and make them available for all the system. Also learn how to correctly install python scripts and modules.
Step 0. Create a project in ROS Development Studio(ROSDS)
ROSDS helps you follow our tutorial in a fast pace without dealing without setting up an environment locally. If you haven’t had an account yet, you can create a free account here.
Step 1. Create package
In this ROSject, let’s create a new package which contains the modules that you want to use in other packages.
cd ~/catkin_ws/src
catkin_create_pkg rospy
You also need a folder which has the same name as the package under the src folder and inside it, you need a empty__init__.py file.
cd test_pkg/src
mkdir test_pkg
cd test_pkg
touch __init__.py
Then you create the module you want under the src folder(e.g. the ClockSubscriber module in the coomon_tools_pkg). You’ll also need a setup.py file with the following content under the package to help the ROS system find this package.
from distutils.core import setup
from catkin_pkg.python_setup import generate_distutils_setup

setup_args = generate_disutils_setup(
    packages=['common_tools_pkg'],
    package_dir=['':'src'],
)

setup(**setup_args)
In the CMakeLists.txt file, you should change it like the following
ROS (Robot Operating System) is a common robot software platform which intents to integrate the world’s robotics research energy, and is completely open source. Anyone could just install ROS and immediately get access to all the resources that ROS integrates.
Over the several years, ROS is growing faster than ever. It can be used not only in the laboratory but in the commercial and services industries. If you subscribe to some mailing list such as Robotics Worldwide, you could see that around 70% of robotics job offerings require ROS.
However, this system is huge and complex. There are over 3,000 packages in the ROS ecosystem, and those are constantly updated every day. It requires a lot of effort to learn ROS and it is relatively hard for a beginner.
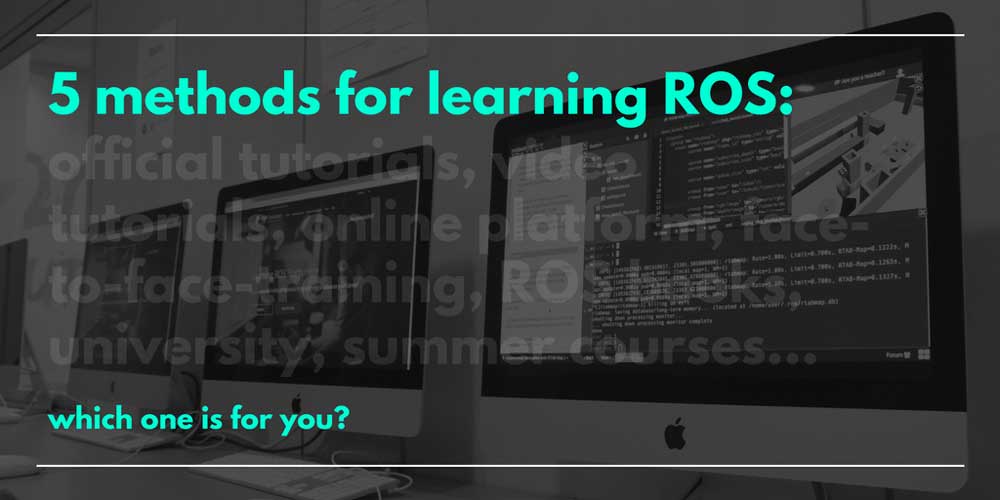
If you Google it, you will find a full of variety of ROS learning resources, everyone implementing a different learning method. But which kind of learning method is most effective for you? Check the following 5 ROS learning methods and find the best one for you:
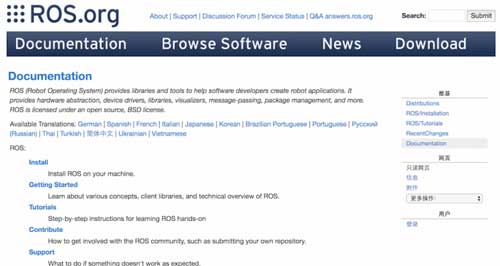
Official tutorials: ROS Wiki
The official ROS tutorial website provided by OSRF is very comprehensive and it is available in multiple languages. It includes details for ROS installation, documentation of ROS, ROS courses&events, etc. and it’s completely free. You just need to follow the ROS tutorials provided on ROS Wiki page, and get started.
This type of tutorial belongs to the traditional academic learning materials. They start by describing concepts one by one, following a well-defined hierarchy. It’s good material but easy to get lost while reading, and it takes time to grasp the core spirit of ROS.
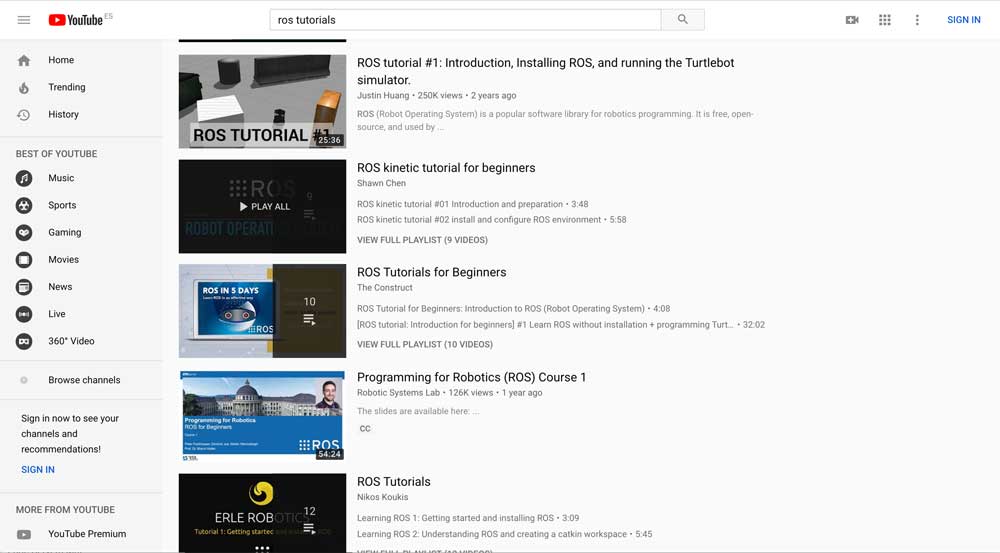
ROS Video Tutorials:
ROS video tutorials provide a unique presentation which shows how programs are created and ran, in a practical way. It allows you to learn how to carry a ROS project from the professional or instructor, which alleviate a beginner’s fear to start learning ROS to a certain degree.
But there is a drawback that anyone can create a video, this means not require any sort of qualification to publish their content, credibility might be shifty.
One of the ROS video tutorial course provided by Dr. Anis Koubaa from Prince Sultan University, is a great starting point to learn ROS. The course combines a guided tutorial, different examples, and exercises with increasing level of difficulty along with an autonomous robot.
Integrated ROS learning platform – Robot Ignite Academy
The integrated learning platform is a more dynamic way of ROS learning. Compared to other learning methods, it provides a more comprehensive learning platform.
Thismethod makes the students forget as many concepts as possible and concentrate on doing things with the robots. You will learn ROS by practicing.
You will follow a step-by-step ROS tutorial and will program the robots while observing the program’s result on the robot simulation in real-time. The whole platform is integrated into a web page so you don’t have to install anything. You just connect by using a web browser from any type of computer and start learning.
Well, perhaps the only drawback is it is not free. You can try the platform for free inwww.robotigniteacdemy.com or watch their free video tutorials on YouTube.
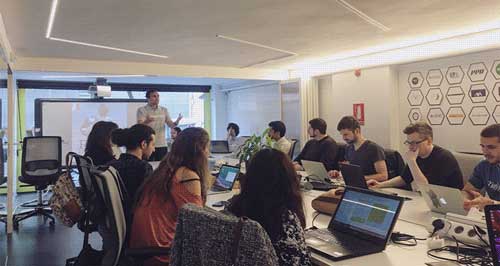
Face-to-face ROS training
The face-to-face instructional course is the traditional way of teaching. It builds strong foundations of ROS into students.
ROS training is usually a short course, it requires you to focus on learning ROS in a particular environment and a period of time. With the interaction with teachers and colleagues which allows you to get feedback directly. Under the guidance and supervision of instructors, it definitely encourages a better result.
The following are some of the institutions that are holding offline ROS training or summer courses on a regular basis:
ROS books are published by experienced roboticists. They extract the essence of ROS and present a lot of practical examples.
Books are good tools for learning ROS, however, it requires high self-discipline and concentration so as to achieve the desired result. (but they are only as good as the person using them, it depends on many factors. It allows many distractions to easily affect your progress, unless the strong self-discipline to ensure is paying full attention at all times)
Some recommend readings:
Programming Robot with ROS: by combining real-world examples with valuable knowledge from the ROS community, this practical book provides a set of motivating recipes for solving specific robotics use cases.
ROS IN 5 DAYS Book Collection: a book collection associated with online ROS courses giving you the basic tools and knowledge to be able to understand and create any basic ROS related project.
ROS Robotics by Example: this book will help you boost your knowledge of ROS and give you advanced practical experience you can apply to your ROS robot platforms.
Do you have any other better ROS learning method? Please, comment to share it with us!
Lecturer Steffen Pfiffner of the University of Weingarten in Germany is teaching ROS (Robot Operating System) to 26 students at the same time at a very fast pace.
His students, all of them within the Master on Computer Science of University of Weingarten, use only a web browser. They connect to a web page containing the lessons, a ROS development environment and several ROS based simulated robots. Using the browser, Pfiffner and his colleague Benjamin Stähle, are able to teach fast how to program with ROS to so many students, each student engaged in her own learning experience, moving at her own peace. The teacher, providing support when the student gets stuck. This is what Robot Ignite Academy is made for.
With Ignite Academy our students can jump right into ROS without all the hardware and software setup problems. And the best: they can do this from everywhere
— indicates Pfiffner
Robot Ignite Academy provides a web service which contains the teaching material in text and video format, the simulations of several ROS based robots that the students must learn to program, and the development environment required to build ROS programs and test them on the simulated robot.
Students Point of View
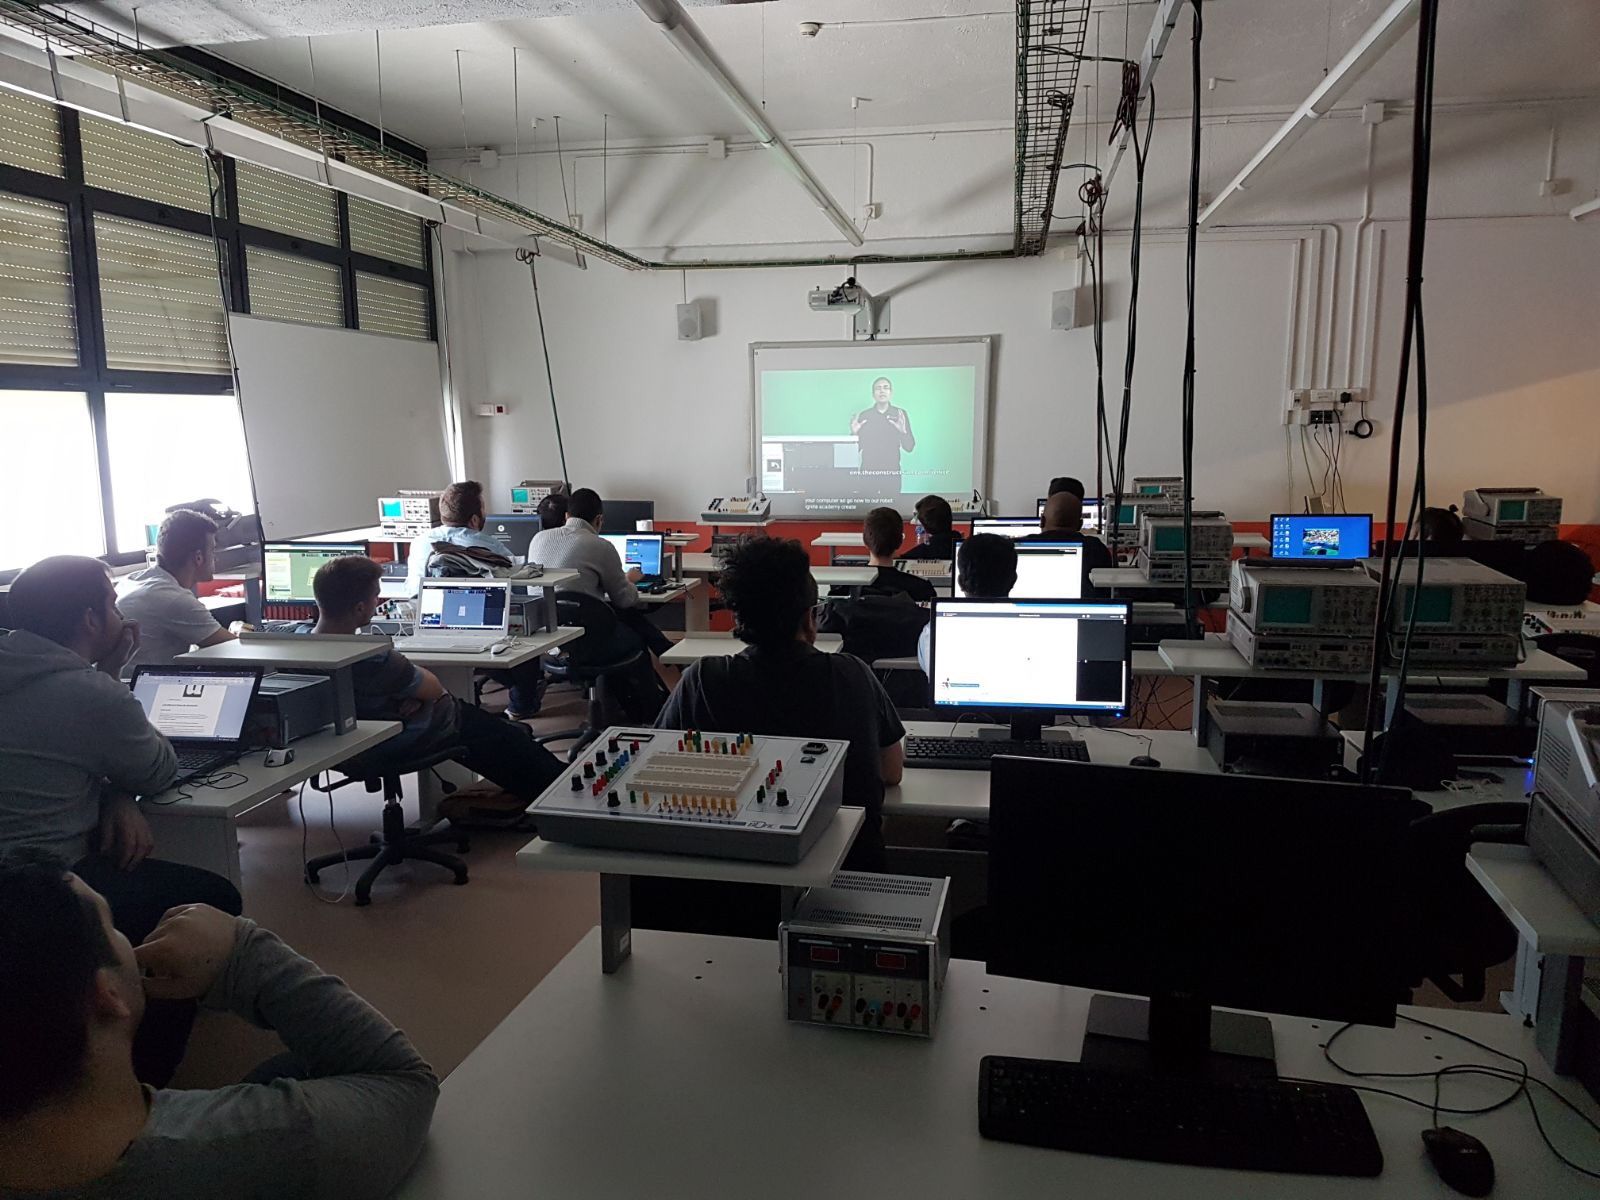
Students bring their own laptops to the class and connect to the online platform (http://robotignite.academy). From that moment, their laptop becomes a ROS development machine, ready to develop programs for many simulated real robots.
The Academy provides the text, the videos and the examples that the student has to follow. Then proposes the student to create her own ROS program and make the robot perform some specific action. The student develops the ROS programs as if she was in a typical ROS development computer. The main advantage is that students can use a Windows, Linux or Mac machine to learn ROS. They don’t even have to install ROS in their computers. The only requisite of the laptop is to have a browser. So students do not mess with all the installation problems that frustrate them (and the teachers!) specially when they are starting. After class, students can later continue with their learning at home, library or even the beach if there is a wifi available! All their code, learning material, simulations are stored online so they can access from anywhere, anytime using any computer and keep learning and practicing.
Teachers Point of View
But the advantage of using the platform is not only for the students but also for the teachers. Teachers do not have to create the material and maintain it updated. They do not have to prepare the simulations and make them work in so many different computers. They don’t even have to prepare the exams!! (which are already provided by the platform).
So what are the teachers there for?!!?
For the most important part of the whole process: to teach. By making use of the provided material, the teacher can concentrate on guiding the students by explaining the most confusing parts, answer questions, suggest modifications according to the level of each student, and adapt the pace to the different types of students. But specially, provide support to the student. That is teaching!
This new method of teaching ROS is exploding among the Universities and High Schools which want to provide the latest and most practical teachings to their students. The method, developed by Robot Ignite Academy, combines a new way of teaching based on practice, with an online learning platform. Those two points combined make the teaching of ROS a smooth experience and skyrocket the students knowledge of the subject.
The method is becoming very popular in the robotics circuits, and many teachers are using it, even for younger students. For example High School Mundet in Barcelona is using it to teach ROS to 15 years old students.
High School Students of Institut A.G. Mundet, Barcelona, learning ROS
Next events where Robot Ignite Academy will be used to teach ROS together with teachers:
1 week ROS course in Barcelona for SMART-E project team members. This is a private course given by Robot Ignite Academy at Barcelona for 15 members of the SMART-E project that need to be up to speed with ROS fast. From 8th to 12nd of May 2017
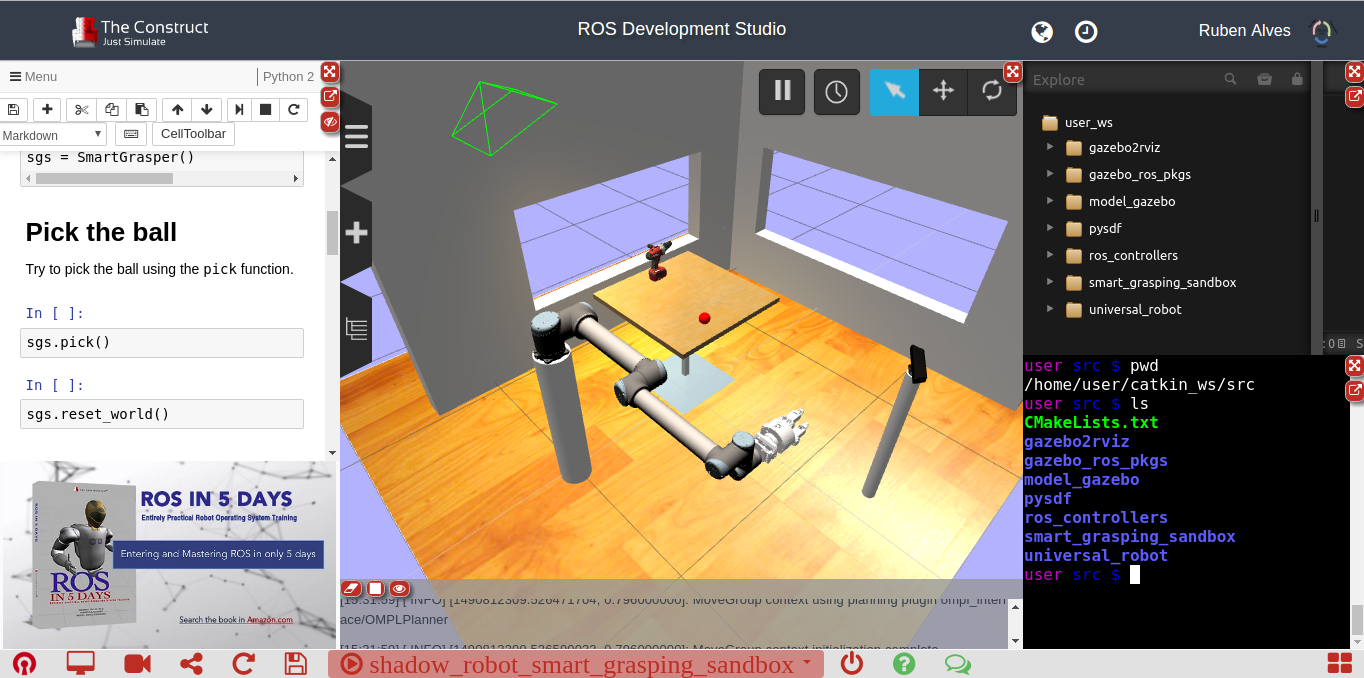
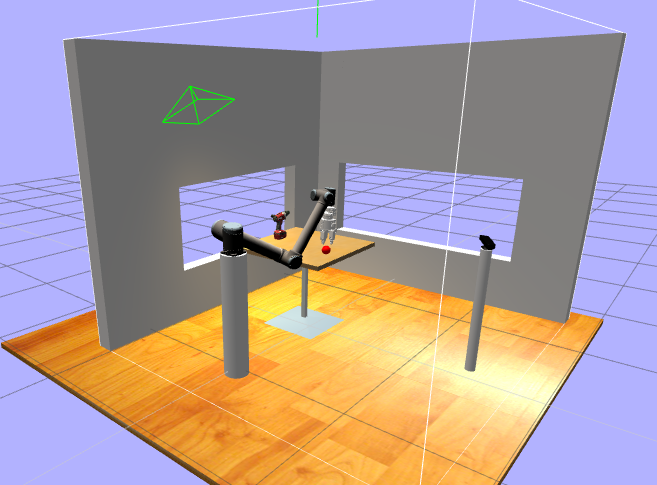
The Smart Grasping Sandbox is a public simulation for the Shadow’s Smart Grasping System with the UR10 robot from Universal Robots. It allows you to make a robot to grasp something without having to learn everything related to Machine Learning, and being available on the ROS Development Studio, it allows you to test it without the hassle of installing all the requirements.
“I don’t want to have to specify every aspect of a problem — I’d rather the system learn the best way to approach a given problem itself”.
Using the Development Environment for Grasping
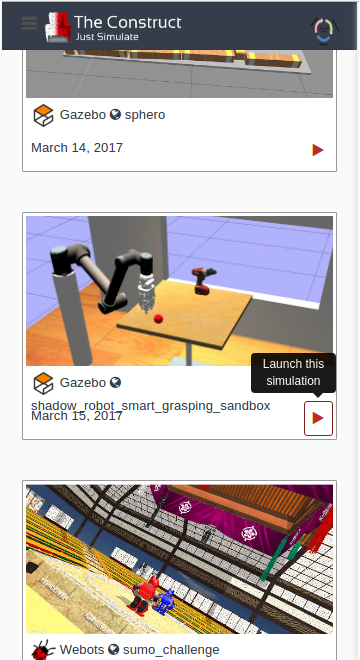
In order to user the Smart Grasping Sandbox on ROS Development Studio – also known as RDS -, just go to http://rds.theconstructsim.com and Sign In. Once logged in, go to the Public Simulations, select the Smart Grasping Sandbox simulation and press the red Launch this simulation button.
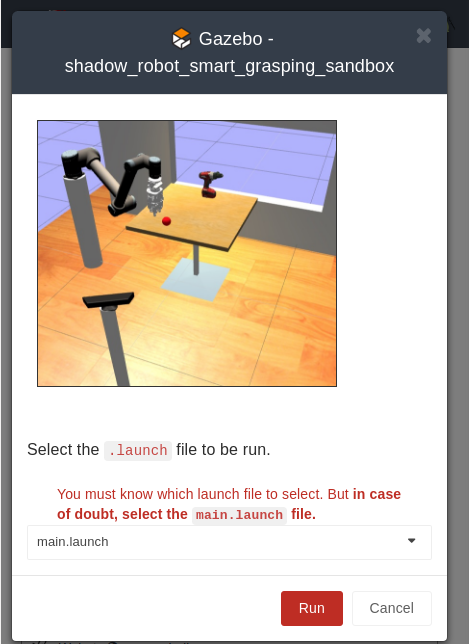
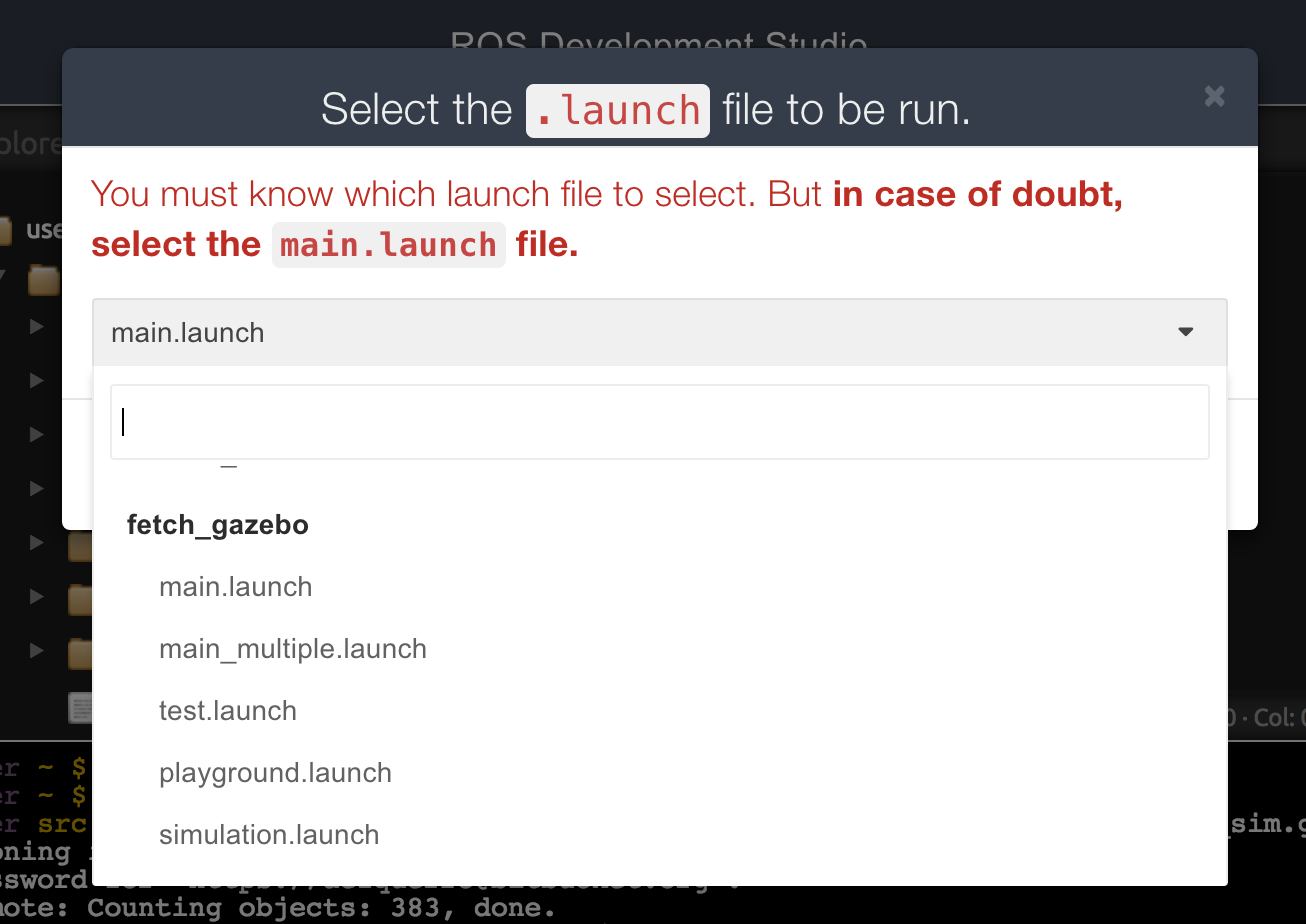
After pressing the Launch this simulation, a new screen will appears asking you to select the launch file. Just keep the default main.launch and press the red run button.
After a few seconds, the simulation will be loaded and you will be able interact with the simulation.
Once the simulation is loaded, you can see the instructions about how to control it on the left side.
In the center you have the simulation itself, and on the right side you can see the Integrated Development Environment and the Web Shell that allows you to modify the code and send Linux commands to the simulation respectively.
You can modify, the simulation, the control programs or even create your own manipulation control programs, make the grasping system learn using deep learning or else. This is up to you as developer!
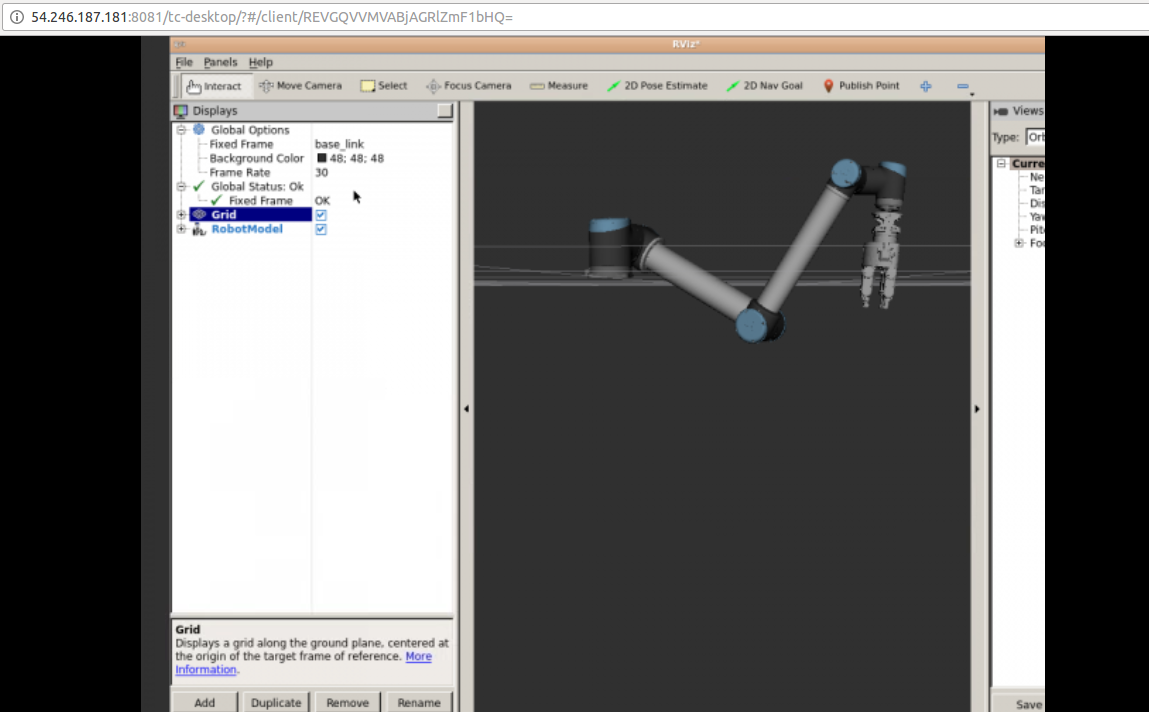
You can also see what the robot sees using the online ROS 3D Visualizer (RViz) typing the following command on the Web Shell:
$ rosrun rviz rviz
After running Rviz, you press the red Open ROS Graphic Tools button on the bottom left side of the system and a new tab should appear with Rviz.
Conclusion
Here we have seen how to use a simulation to program a robot to grasp something.
The simulation uses ROS as the middleware to control the robot.
If you want to learn ROS or master your ROS Skills, we recommend you to give a try to Robot Ignite Academy.
If you are a robot builder and want to have your own simulation available for everybody on RDS, or you want to have a course specifically for your robot, contact us through the email info@theconstructsim.com.
Regarding to the Smart Grasping Sandbox, you can also watch the following video with the system in action on the ROS Development Studio:

![[ROS Q&A] How to import python modules from different ROS packages](https://www.theconstruct.ai/wp-content/uploads/2017/07/ROS-QA-How-to-import-python-modules-from-different-ROS-packages.png)