In this post, we will see how to make a robot detect and avoid an obstacle in its front. We will move the robot forward until it detects there’s an obstacle (the wall) closer than 1 meter. Then, we will stop the robot so that it does not collide with the wall.
PS:This ROS project is part of our ROS Mini Challenge series, which gives you an opportunity to win an amazing ROS Developers T-shirt! This challenge is already solved. For updates on future challenges, please stay tuned to our Twitter channel.
Step 1: Grab a copy of the ROS Project that contains the code for the challenge
Click here to get your own copy of the project. If you don’t have an account on the ROS Development Studio, you will need to create one. Once you create an account or log in, we will copy the project to your workspace. That done, open your ROSject using the Open button. This might take a few moments, please be patient.
You should now see a notebook with detailed instructions about the challenge. This post includes a summary of these instructions as well as the solution to the challenge.
PS: Please ignore the Claim your Prize! section because…well…you are late the party 🙂
Step 2: Start the Simulation and get the robot moving
Click on the Simulations menu and then Choose launch file… . In the dialog that appears, select rotw5.launchunder rosbot_gazebo package. Then click the Launchbutton. You should see a Gazebo window popup showing the simulation: a ROSbot in front of a wall.
Get the robot moving. Pick a Shell from the Tools menu and run the following commands:
Yay, the robot moved. But, wait, it didn’t detect and avoid the obstacle – it crashed into the wall!We don’t want that, solet’s fix it in the next section!
Step 3: Identify the problem, man!
So the robot didn’t stop as we expected. As the challenge hinted, something must be wrong with the code, especially the part that should detect the wall and stop the robot. Let’s see.
Fire up the IDE from the Toolsmenu and browse to catkin_ws/src/rotw5_pkg/src/detect_wall.py
#! /usr/bin/env python

import rospy
from sensor_msgs.msg import LaserScan
from geometry_msgs.msg import Twist

def callback(msg):

  #If the distance to an obstacle in front of the robot is bigger than 1 meter, the robot will move forward
  if msg.ranges[360] > 1:
      move.linear.x = 0.5
      move.angular.z = 0.0

  #If the distance to an obstacle in front of the robot is smaller than 1 meter, the robot will stop
  if msg.ranges[360] < 1:
      move.linear.x = 0.0
      move.angular.z = 0.0

  pub.publish(move)

rospy.init_node('rotw5_node')
sub = rospy.Subscriber('/scan', LaserScan, callback) #We subscribe to the laser's topic
pub = rospy.Publisher('/cmd_vel', Twist)
move = Twist()

rospy.spin()
Now, this is the part that should stop the robot. It says that if there’s an obstacle less than 1 meter away, we should set both linear and angular velocities to zero (stopping the robot)
  #If the distance to an obstacle in front of the robot is smaller than 1 meter, the robot will stop
  if msg.ranges[360] < 1:
      move.linear.x = 0.0
      move.angular.z = 0.0
This is not being executed obviously because the condition msg.ranges[360] < 1 is never True! Let’s test this assumption:
In the IDE, add the following lines to the detect_wall.py, after the comment below. Then save.
  #If the distance to an obstacle in front of the robot is smaller than 1 meter, the robot will stop
  print "Number of readings: ", print len(msg.ranges)
  print "Reading at position 360:", msg.ranges[360]
From the Shell: Press Ctrl + C to end the current program. Then stop the robot by publishing zero velocities to the /cmd_vel topic. Press Ctrl + C again and then call the Gazebo service that resets the world.
user:~$ rosrun rotw5_pkg detect_wall.py
Number of readings:  720
Reading at position 360: inf
# ...
Number of readings:  720
Reading at position 360: 11.7952680588
You should notice that several readings at 360 are printed, and none of them is less than 1. Whew!
Step 4: Now let’s solve the problem
We saw from the previous section that our problem was the condition msg.ranges[360] < 1, but how did we arrive at this condition?
We knew the laser sensor has 720 scan points stored in the ranges array, as seen in the output of our print statement in Step 3.
We assumed that the laser had a range of 180 degrees, covering the front of the robot only, so that position 360 is at the front-middle of the robot. But this is false, and we can confirm this by running the following command:
The command prints out a single message from the /scan topic. We can deduce the range from the angle_max and angle_min values: angle_max - angle_min = 2pi = 360 deg! Buff! So position 360/720 of the scan messages could be somewhere at the back of the robot. No wonder it didn’t detect the wall.
Now, we have to figure out which position is the front-middle of the robot. Depending on how the sensor was installed, this could be any position. For this robot, the sensor was installed with position “0″ at the front-center, so the readings of positions “0″ or 720 could represent the front-center. Let’s use the position “0″ and test again.
In the IDE, change the front-middle position from 360 to “0″:
#! /usr/bin/env python

import rospy
from sensor_msgs.msg import LaserScan
from geometry_msgs.msg import Twist

def callback(msg):

#If the distance to an obstacle in front of the robot is bigger than 1 meter, the robot will move forward
  if msg.ranges[0] > 1:
      move.linear.x = 0.5
      move.angular.z = 0.0

#If the distance to an obstacle in front of the robot is smaller than 1 meter, the robot will stop
  print "Number of ranges: ", len(msg.ranges)
  print "Reading at position 0:", msg.ranges[0]
  if msg.ranges[0] < 1:
      move.linear.x = 0.0
      move.angular.z = 0.0

  pub.publish(move)

rospy.init_node('rotw5_node')
sub = rospy.Subscriber('/scan', LaserScan, callback) #We subscribe to the laser's topic
pub = rospy.Publisher('/cmd_vel', Twist)
move = Twist()

rospy.spin()
From the Shell: Press Ctrl + C to end the current program. Then stop the robot by publishing zero velocities to the /cmd_vel topic. Press Ctrl + C again and then call the Gazebo service that resets the world.
Run the program again and observe the output and see if the robot detects and avoids the obstacle:
user:~$ rosrun rotw5_pkg detect_wall.py
Number of ranges:  720
Reading at position 0: 2.49150013924
Number of ranges:  720
#...
Number of ranges:  720
Reading at position 0: 1.92249274254
#...
Number of ranges:  720
Reading at position 0: 0.991922438145
Yay, finally we are able to make the robot detect and avoid the obstacle!
Extra: Video of this post
We made a video showing how this challenge was solved. If you prefer “sights and sounds” to “black and white”, here you go:
Did you like this post? Do you have questions about what was explained? Whatever the case, please leave a comment on the comments section below, so we can interact and learn from each other.
If you want to learn about other ROS or ROS2 topics, please let us know in the comments area and we will do a video or post about it.
Once you clicked in the link to get a copy of the ROSject,
When you click in the ROSject Link (www.rosject.io/l/e80ec70/), you will get a copy of it. You can then download it if you want to use it on our local computer, or you can just click Open to have it opened in ROSDS.
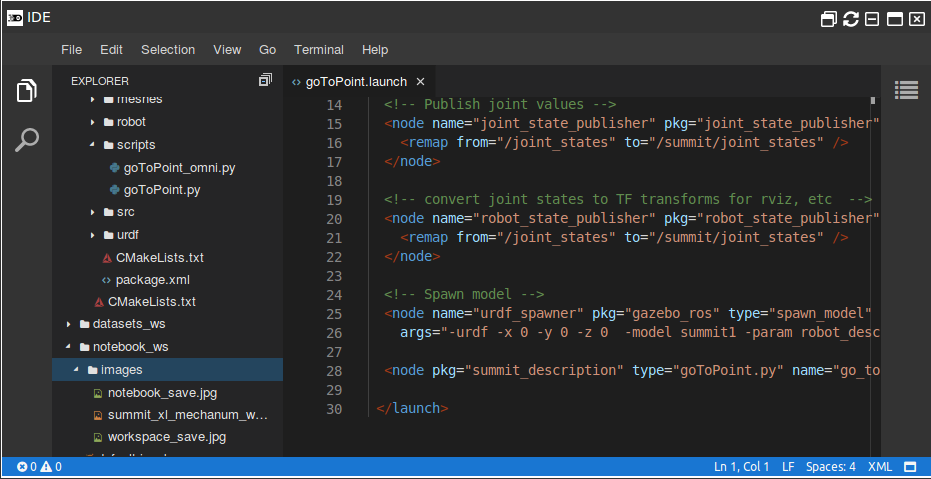
Once it’s open, you can find all the code associated with this challenge in the ~/catkin_ws folder. To see the full code, open the IDE by going to the top menu and select Tools->IDE.
Code Editor (IDE) – ROSDS
Launching the simulation
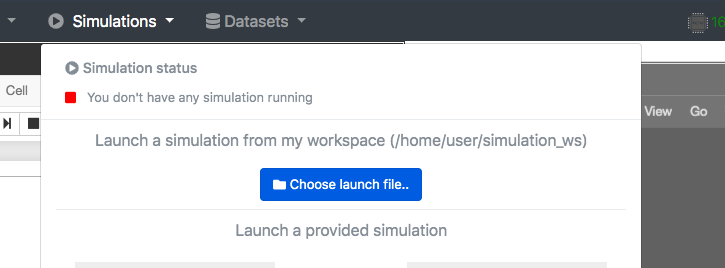
Go to the top menu and select Simulations. On the menu that appears, click on the Choose launch file… button.
Choose lunch file to open simulation in ROSDS
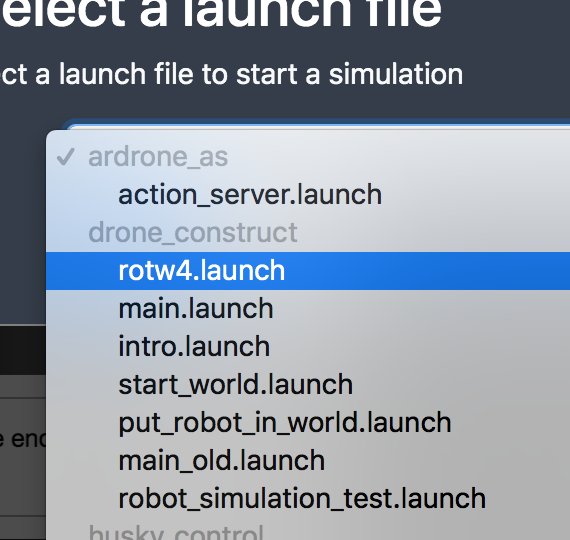
Now, from the launch files list, select the launch file named rotw4.launch from the drone_construct package.
ROS Mini Challenge #4 – Drone – ROSDS
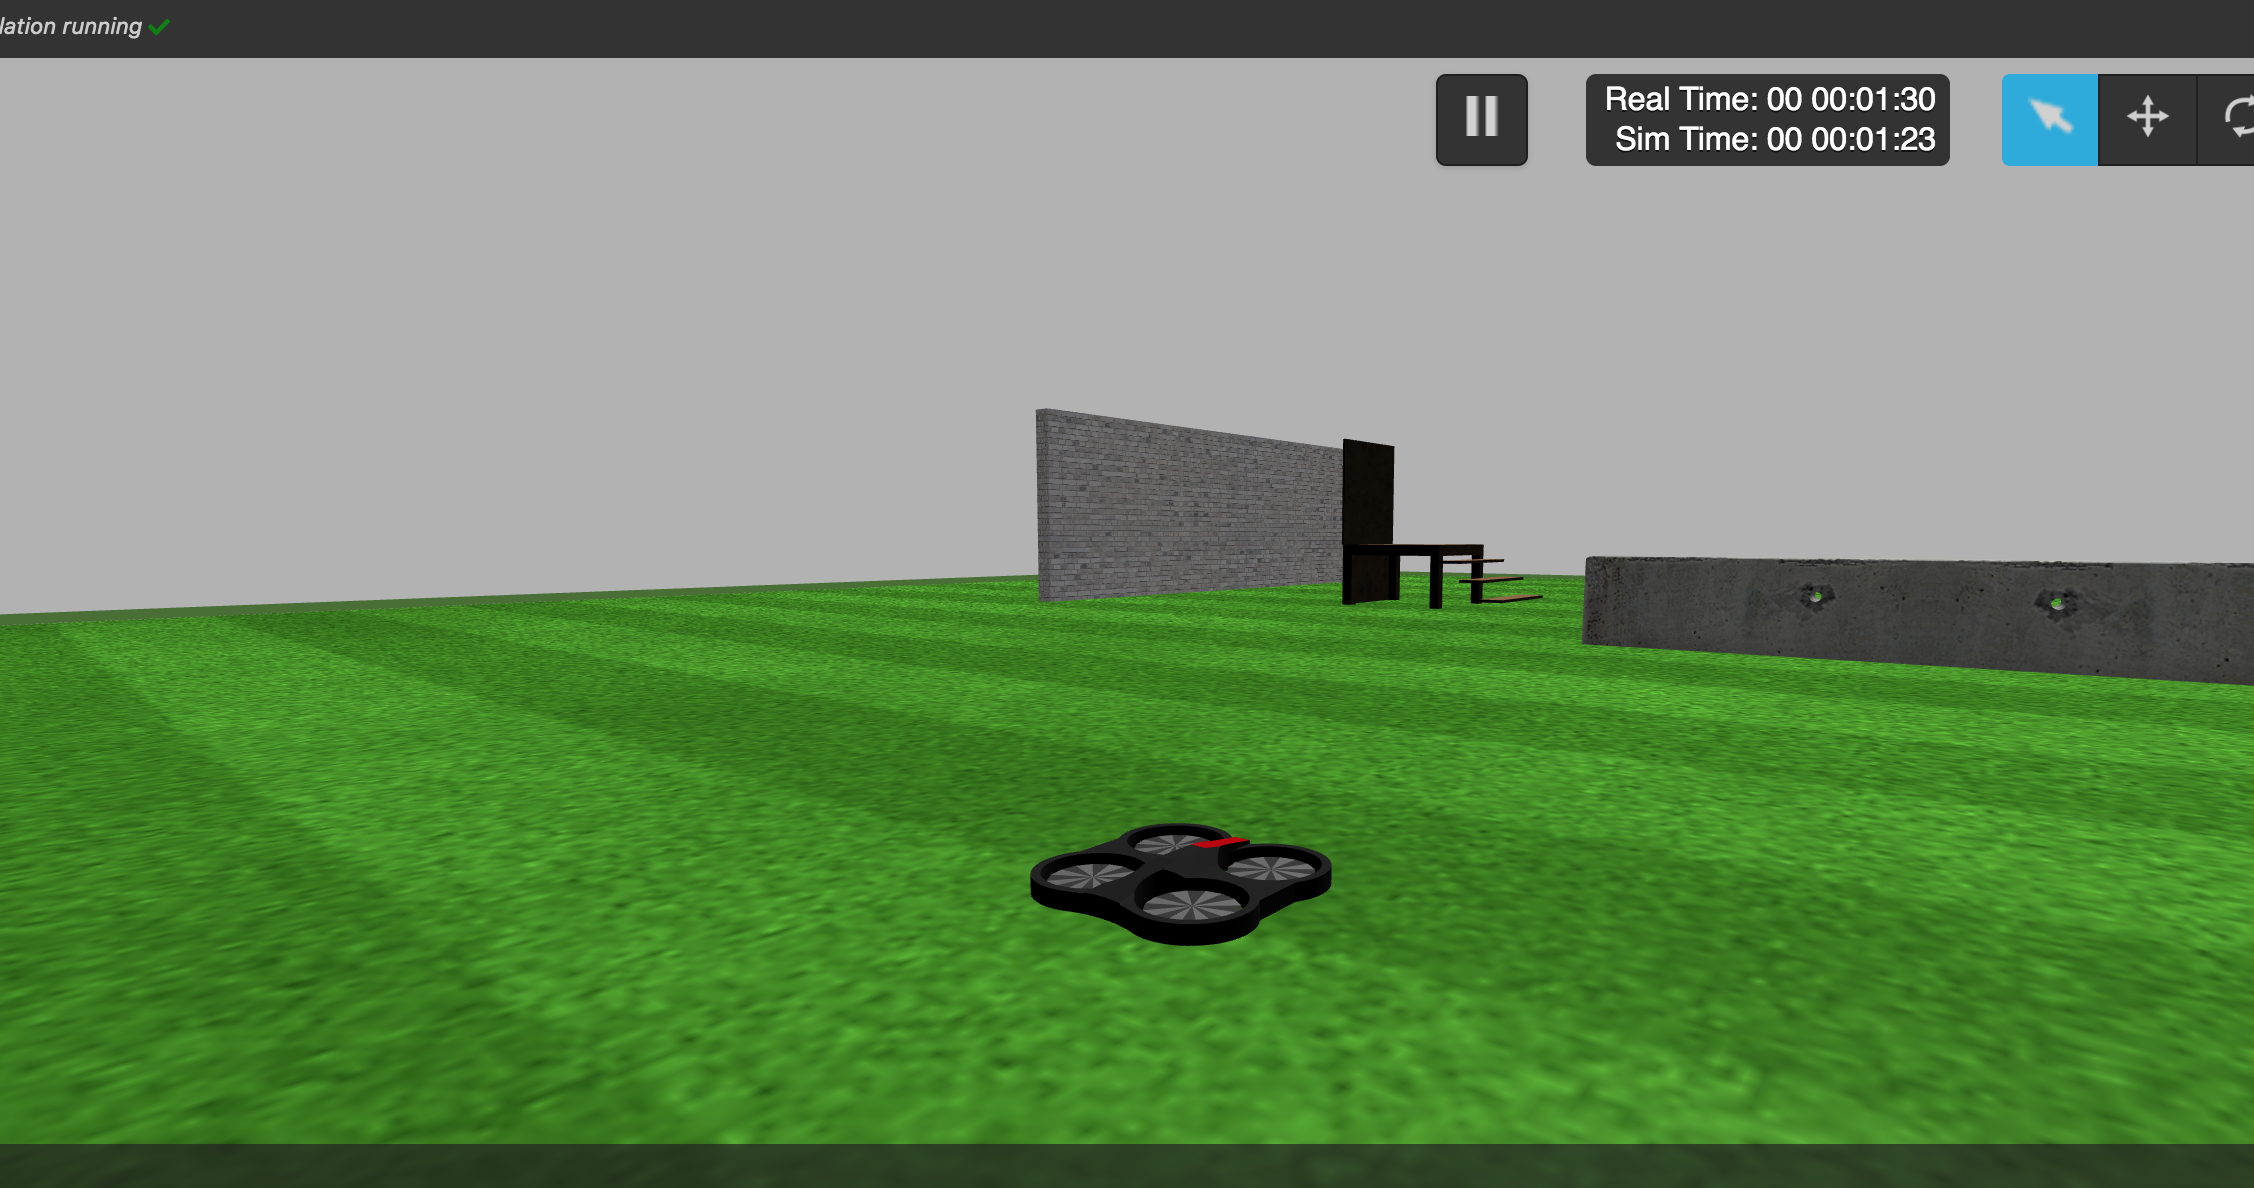
Finally, click on the Launch button to start the simulation. In the end, you should get something like this:
Drone simulation in ROSDS
The problem to solve
As you can see, this ROSject contains 1 package inside its catkin_ws workspace: rotw4_code. The purpose of this packages is to allow you to control the Drone (Take Off or Land) using an Action Server.
So, the main purpose of this ROSject is to be able to send a Goal to this Action Server, specifying a keyword in the goal (either “UP” or “DOWN”), and the Drone receives and executes this goal. The steps in order to achieve this are the following:
First, you will need to compile the Action Server and the Action message used. For this, execute the following command:
cd ~/catkin_ws/
catkin_make
source ~/catkin_ws/devel/setup.bash
Once, the compilation has finished successfully, you will start the Action Server by executing the following command:
rosrun rotw4_code rotw4_action_node
Once the Action Server is up and running, you can send goals to the Action with the following commands.
Also, you will see in the Action Server a message indicating that the action was successfully executed.
Action Server succeeded in ROSDS
Ok, so… where’s the problem? If you have tried to reproduce the steps described above you have already seen that it DOES NOT WORK. When you follow the pipeline you can see that even the 1st step, which is to compile the package, it does not work (though it is not the only error here). But Why? Let’s find it in the section below.
Solving the ROS Mini Challenge
According to the instructions, we need to have a look at the rotw4_code package and try to find there the errors.
If you looked carefully, after running the first commands, you had an error:
cd ~/catkin_ws/
catkin_make
The error was:
Building CXX object rotw4_code/CMakeFiles/rotw4_action_node.dir/src/rotw4_action.cpp.o
/home/user/catkin_ws/src/rotw4_code/src/rotw4_action.cpp:3:34: fatal error: rotw4_code/ActionMsg.h: No such file or directory
compilation terminated.
rotw4_code/CMakeFiles/rotw4_action_node.dir/build.make:62: recipe for target 'rotw4_code/CMakeFiles/rotw4_action_node.dir/src/rotw4_action.cpp.o' failed
make[2]: *** [rotw4_code/CMakeFiles/rotw4_action_node.dir/src/rotw4_action.cpp.o] Error 1
CMakeFiles/Makefile2:1909: recipe for target 'rotw4_code/CMakeFiles/rotw4_action_node.dir/all' failed
make[1]: *** [rotw4_code/CMakeFiles/rotw4_action_node.dir/all] Error 2
Makefile:138: recipe for target 'all' failed
make: *** [all] Error 2
Invoking "make -j2 -l2" failed
The problem is that it can’t find the ActionMsg.h, so, which tell us that our ~/catkin_ws/src/rotw4_code/action/ActionMsg.action is not being compiled. Let’s then open the CMakeLists.txt file located in the rotw4_code package, to see where is the error.
If we look at the line 153 of the CMakeLists.txt file, we find the following:
Now we have another error. Although it looks similar, at least now the messages were compiled:
[ 97%] Building CXX object rotw4_code/CMakeFiles/rotw4_action_node.dir/src/rotw4_action.cpp.o
/home/user/catkin_ws/src/rotw4_code/src/rotw4_action.cpp:3:34: fatal error: rotw4_code/ActionMsg.h: No such file or directory
compilation terminated.
We can confirm the message was generated with find ~/catkin_ws/devel/ -name ActionMsg*.h:
As we can see, we have no file named ActionMsg.h, which is imported by rotw4_code/src/rotw4_action.cpp. Let’s then fix rotw4_action.cpp on line 3 and import ActionMsgAction.h. Now let’s try to compile again:
cd ~/catkin_ws/
catkin_make
Now we have different errors:
Scanning dependencies of target rotw4_action_node
[ 97%] Building CXX object rotw4_code/CMakeFiles/rotw4_action_node.dir/src/rotw4_action.cpp.o
/home/user/catkin_ws/src/rotw4_code/src/rotw4_action.cpp:11:33: error: 'ActionMsg' is not a member of 'rotw4_code'
actionlib::SimpleActionServer<rotw4_code::ActionMsg> as_;
^
/home/user/catkin_ws/src/rotw4_code/src/rotw4_action.cpp:11:33: error: 'ActionMsg' is not a member of 'rotw4_code'
/home/user/catkin_ws/src/rotw4_code/src/rotw4_action.cpp:11:54: error: template argument 1 is invalid
actionlib::SimpleActionServer<rotw4_code::ActionMsg> as_;
^
/home/user/catkin_ws/src/rotw4_code/src/rotw4_action.cpp: In constructor 'ActionClass::ActionClass(std::__cxx11::string)':
/home/user/catkin_ws/src/rotw4_code/src/rotw4_action.cpp:29:26: error: expression list treated as compound expression in mem-initializer [-fpermissive]
action_name_(name) {
^
/home/user/catkin_ws/src/rotw4_code/src/rotw4_action.cpp:30:9: error: request for member 'start' in '((ActionClass*)this)->ActionClass::as_', which is of non-class type 'int'
as_.start();
^
/home/user/catkin_ws/src/rotw4_code/src/rotw4_action.cpp: In member function 'void ActionClass::executeCB(const ActionMsgGoalConstPtr&)':
/home/user/catkin_ws/src/rotw4_code/src/rotw4_action.cpp:43:13: error: request for member 'isPreemptRequested' in '((ActionClass*)this)->ActionClass::as_', which is of non-class type 'int'
if (as_.isPreemptRequested() || !ros::ok()) {
^
/home/user/catkin_ws/src/rotw4_code/src/rotw4_action.cpp:46:11: error: request for member 'setPreempted' in '((ActionClass*)this)->ActionClass::as_', which is of non-class type 'int'
as_.setPreempted();
^
/home/user/catkin_ws/src/rotw4_code/src/rotw4_action.cpp:62:9: error: request for member 'publishFeedback' in '((ActionClass*)this)->ActionClass::as_', which is of non-class type 'int'
as_.publishFeedback(feedback_);
^
/home/user/catkin_ws/src/rotw4_code/src/rotw4_action.cpp:68:11: error: request for member 'setSucceeded' in '((ActionClass*)this)->ActionClass::as_', which is of non-class type 'int'
as_.setSucceeded(result_);
We have a bunch of errors, so, let’s look at the first one first, which says:
rotw4_action.cpp:11:33: error: 'ActionMsg' is not a member of 'rotw4_code' actionlib::SimpleActionServer<rotw4_code::ActionMsg> as_;
The problem is almost the same as before. Instead of using ActionMsgAction, we used ActionMsg. Let’s fix that on line 11, and try to compile again:
cd ~/catkin_ws/
catkin_make
Congratulations, now everything compiled as expected:
Scanning dependencies of target rotw4_action_node
[ 97%] Building CXX object rotw4_code/CMakeFiles/rotw4_action_node.dir/src/rotw4_action.cpp.o
[100%] Linking CXX executable /home/user/catkin_ws/devel/lib/rotw4_code/rotw4_action_node
[100%] Built target rotw4_action_node
Scanning dependencies of target rotw4_code_generate_messages
[100%] Built target rotw4_code_generate_messages
Now, let’s run our action server:
rosrun rotw4_code rotw4_action_node
Now we could try to make the robot take off by running the following command in a different web shell:
The only problem is that the robot doesn’t move as expected yet, although the action server says succeeded.
rotw4_action: Succeeded
If we look the file rotw4_action.cpp, in the executeCB method, everything seems to be correct.
void executeCB(const rotw4_code::ActionMsgGoalConstPtr &goal) {

    std::string upDown = goal->goal;
    takeoff_pub_ = nh_.advertise<std_msgs::Empty>("/drone/takeoff", 1000);
    land_pub_ = nh_.advertise<std_msgs::Empty>("/drone/land", 1000);

    // check that preempt has not been requested by the client
    if (as_.isPreemptRequested() || !ros::ok()) {
      ROS_INFO("%s: Preempted", action_name_.c_str());
      // set the action state to preempted
      as_.setPreempted();
      success_ = false;
    }

    if (upDown == "UP") {
      takeoff_pub_.publish(takeoff_msg_);
      feedback_.feedback = "Taking Off Drone...";
    }

    if (upDown == "DOWN") {
      land_pub_.publish(land_msg_);
      feedback_.feedback = "Landing Drone...";
    }

    // feedback_.feedback = i;
    // publish the feedback
    as_.publishFeedback(feedback_);

    if (success_) {

      ROS_INFO("%s: Succeeded", action_name_.c_str());
      // set the action state to succeeded
      as_.setSucceeded(result_);
    }
  }
The problem is that we are instantiating the topic publishers and publishing on them straight away, and the topics need some time after being defined to start being used. To solve this, let’s add a while loop to publish at least 4 times, once a second:
void executeCB(const rotw4_code::ActionMsgGoalConstPtr &goal) {

    std::string upDown = goal->goal;
    takeoff_pub_ = nh_.advertise<std_msgs::Empty>("/drone/takeoff", 1000);
    land_pub_ = nh_.advertise<std_msgs::Empty>("/drone/land", 1000);
    ros::Rate rate(1);

    // check that preempt has not been requested by the client
    if (as_.isPreemptRequested() || !ros::ok()) {
      ROS_INFO("%s: Preempted", action_name_.c_str());
      // set the action state to preempted
      as_.setPreempted();
      success_ = false;
    }

    if (upDown == "UP") {
      int i = 0;
      while (i < 4) {
        takeoff_pub_.publish(takeoff_msg_);
        feedback_.feedback = "Taking Off Drone...";
        i++;
        rate.sleep();
      }
    }

    if (upDown == "DOWN") {
      land_pub_.publish(land_msg_);
      feedback_.feedback = "Landing Drone...";
    }

    // feedback_.feedback = i;
    // publish the feedback
    as_.publishFeedback(feedback_);

    if (success_) {

      ROS_INFO("%s: Succeeded", action_name_.c_str());
      // set the action state to succeeded
      as_.setSucceeded(result_);
    }
  }
So this is the post for today. Remember that we have the live version of this post on YouTube. If you liked the content, please consider subscribing to our youtube channel. We are publishing new content ~every day.
This is the 2nd of 4 posts of the series Developing web interfaces for ROS Robots.
In this post, we are going to add some styles to the web page using a very popular framework: Bootstrap. Furthermore, we will add a JavaScript framework to make our code look better: Vue.js.
1 – Loading the libraries
First things first! Let’s import the libraries we are going to use.
In our html file (the only one so far), we add the following code to the <head> section:
The first tag (<link>) is used to add the Bootstrap framework. It’s a css file, that’s why it looks different than the <script> tags. It will allow us to create prettier elements in our page without having the work to stylish them.
The second tag is the same we have used in the previous post. It includes roslib.js.
Finally, the third tag includes Vue.js framework. This framework will make our JavaScript code quite different, but more organized.
2 – New appearance for the page
Let’s create a new page for our project.
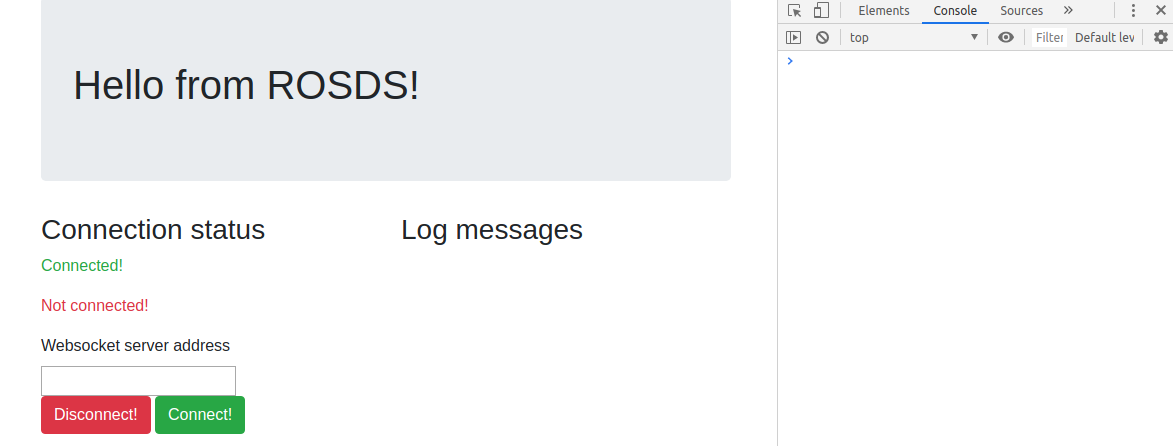
We want to have something pretty and easy to understand. In order to do so, let’s create some new HTML elements. Our <body> section will look like below:
And the page (make sure you have the webserver running like we did in the previous post) must look like this:
We have created many elements and they are being shown all together. Let’s improve it!
3 – Adding JavaScript with Vue.js
This time we are creating a separeted file to keep our JavaScript. Create a file main.js in the same folder of the index.html
Our file will contain the following code:
var app = new Vue({
    el: '#app',
    // storing the state of the page
    data: {
        connected: false,
        ros: null,
        ws_address: 'ws://3.91.38.82:9090',
        logs: [],
    },
    // helper methods to connect to ROS
    methods: {
        connect: function() {
            this.logs.unshift('connect to rosbridge server!!')
            this.ros = new ROSLIB.Ros({
                url: this.ws_address
            })
            this.ros.on('connection', () => {
                this.connected = true
                this.logs.unshift('Connected!')
                // console.log('Connected!')
            })
            this.ros.on('error', (error) => {
                this.logs.unshift('Error connecting to websocket server')
                // console.log('Error connecting to websocket server: ', error)
            })
            this.ros.on('close', () => {
                this.connected = false
                this.logs.unshift('Connection to websocker server closed')
                // console.log('Connection to websocket server closed.')
            })
        },
        disconnect: function() {
            this.ros.close()
        },
    },
})
Let’s understand what we have there:
We start instantiating a Vue.js object. This object refers the element #app of the webpage. (The element identified by the attribute id=”app”). It means that everything inside this element can be managed by our JavaScript code.
The next attribute the called data. This attribute is an object that contains other attributes. These are defined for our application, they are custom attributes, not pre-defined by the framework.
We have defined a boolean connected. A ros object, that will handle the connection to rosbridgeserver. The address of the server, ws_address. And the last one logs, that is an array, which will contain messages of the events.
Then, we have the methods attribute. This is pre-defined by the framework and is the place to define functions to help us developing our application. We have created two: connect and disconnect.
The first one is very similar to what we have done in the previous post, but now interacting with the attributes inside data. We start the connect method creating a new log and pushing to the this.logs array. Then we define the connection object and assign the this.ros to handle it. Finally, the same callbacks we have defined before are defined here, but changing the value of the boolean connected and adding the logs to the array, instead of showing in the console.
The disconnect method is just closing the connection.
4 – Integrating with the webpage
In order to allow the main.js to do its “magic”, we need to adjust the html code. First thing is to include it at the end of the <body> section.
In this post, we will see how to configure MoveIt to make a manipulator robot execute a trajectory based on a Position Goal. We send a Position Goal to the manipulator, and the robot computes and executes a trajectory plan in order to reach this goal.
PS:This ROS project is part of our ROS Mini Challenge series, which gives you an opportunity to win an amazing ROS Developers T-shirt! This challenge is already solved. For updates on future challenges, please stay tuned to our Twitter channel.
Step 1: Grab a copy of the ROS Project that contains the simulation
Click here to get your own copy of the project. If you don’t have an account on the ROS Development Studio, you will need to create one. Once you create an account or log in, we will copy the project to your workspace. That done, open your ROSject using the Open button. This might take a few moments, please be patient.
You should now see a notebook with detailed instructions about the challenge. Please ignore the Claim your Prize! section because…well…you are late the party 🙂
Step 2: Start the Simulation and run the MoveIt program to configure the manipulator
Click on the Simulations menu and then Choose launch file… . In the dialog that appears, select main.launchfrom the shadow_gazebo package. Then click the Launchbutton. You should see a Gazebo window popup showing the simulation: a manipulator robot.
Start the MoveIt package – pick a Shell from the Tools menu and run the following command:
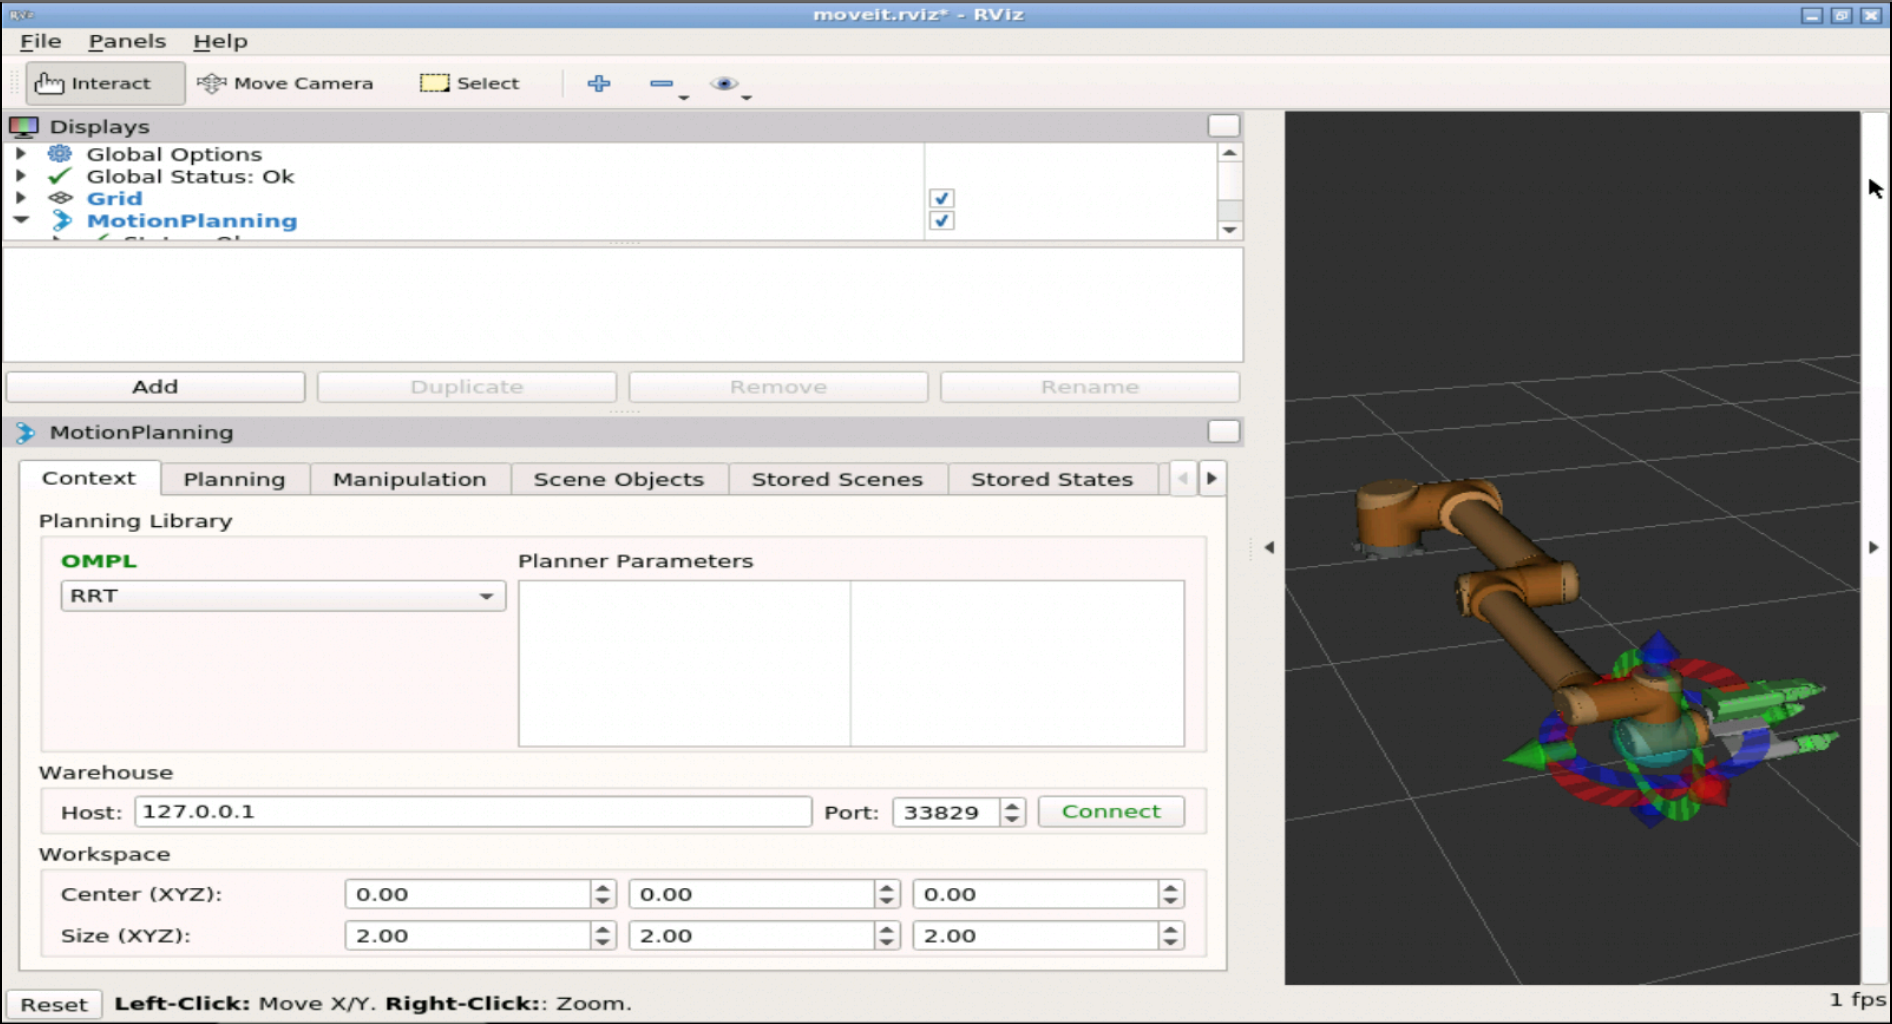
Once you see the green text that says “You can start planning now”, pick the Graphical Tools app from the Toolsmenu.
Probably, at first, you will see the window a bit displaced.
In order to center it, just click on the Resize opened app button. At the end, you should get something like this:
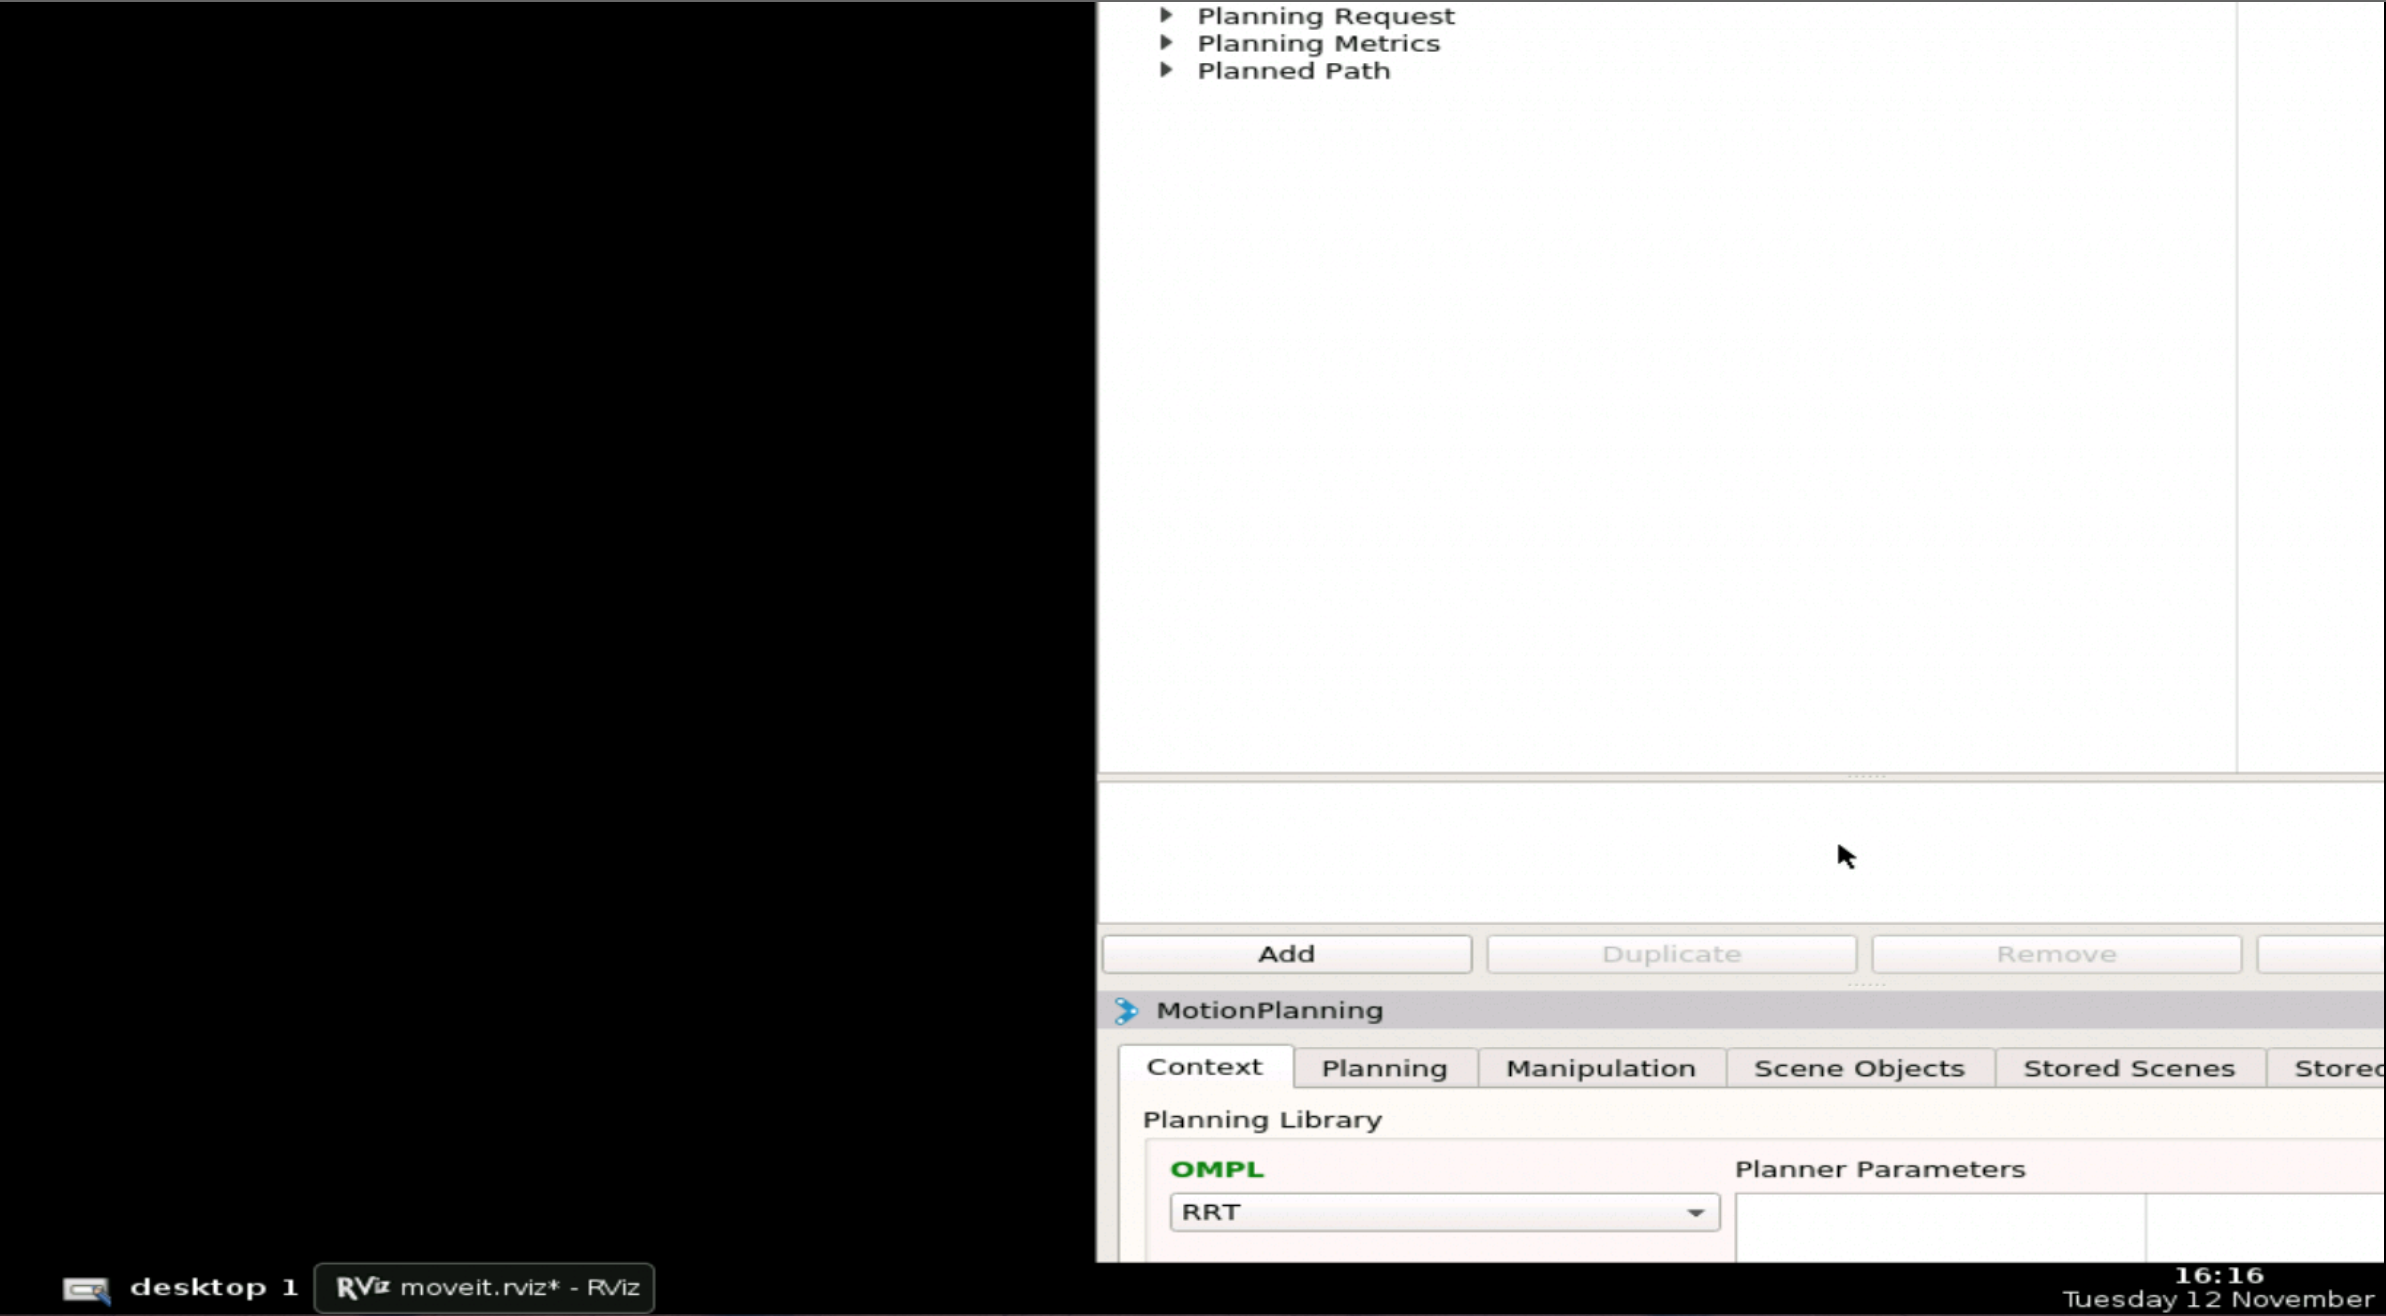
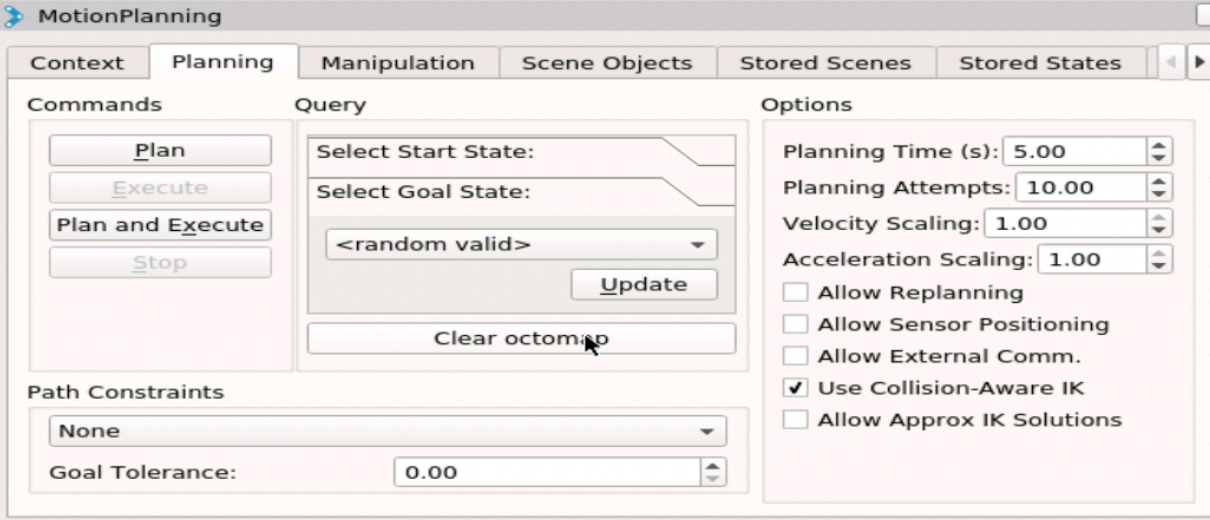
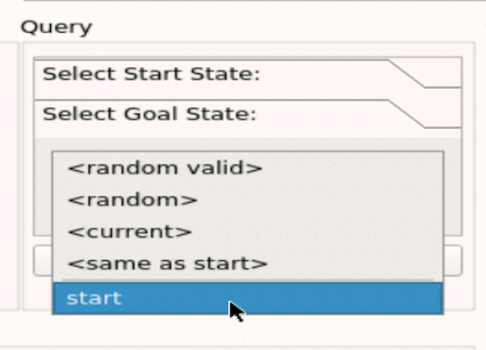
In the window that appears, go to the Planning tab and then to the Select Goal State dropdown under Query.
Select “start” and click Update.
Click on the Planbutton under Commands in order to calculate a suitable trajectory for reaching the goal position.
Finally, click on the Executebutton under Commands in order to execute the position goal (and the plan).
You should see the manipulator on the right moving in order to execute the trajectory, as shown below (in the Graphical Tools and the Gazebo windows).
But this didn’t happen did it?Let’s fix that in the next section!
Step 3: Let’s solve the problem!
What the heck was the problem?! Hmm, I wished I had paid more attention to the Shell…because it left a message for us there, in red letters! Let’s go see it:
[ERROR] [1580760680.575679474]: Unable to identify any set of controllers that can actuate the specified joints: [ elbow_joint shoulder_lift_joint shoulder_pan_joint wrist_1_joint wrist_2_joint wrist_3_joint ]
[ERROR] [1580760680.575917519]: Known controllers and their joints:

[ INFO] [1580760680.671585828]: ABORTED: Solution found but controller failed during execution
We didn’t set up a controller for moving the robot arm. Whew!
We need to examine the package to find the fix, so fire up the IDE from the Tools menu and browse to the catkin_ws/src/myrobot_moveit_config package. In the launch subdirectory, we have a file named smart_grasping_sandbox_moveit_controller_manager.launch.xml:
The first line of the configuration above refers to a file my_controllers.yamlfile in the config subdirectory let’s open that file up:
controller_list:
    Hi there!
Huh, we expected this file to list the controllers, but all we get here is “Hi there!”! We don’t need that – so this must be the wrong file! We need to find a file containing the controllers we need, so let’s check out some other files there, for example controllers.yaml:
WOW, this might be what we need (ssh! Top secret: it is!), so let’s copy over the contents of controllers to my_controllers and save!
Step 4: Test the Fix
Now get back to the Shell. Stop the program we ran in Step 2 using Ctrl + C.
^C[rviz_rosdscomputer_8081_1478977940469499802-4] killing on exit
[move_group-3] killing on exit
[joint_state_publisher-2] killing on exit
[rosout-1] killing on exit
[master] killing on exit
shutting down processing monitor...
... shutting down processing monitor complete
done
user:~$ roslaunch myrobot_moveit_config myrobot_planning_execution.launch
After this, repeat everything in Step 2. Oops, yeah, it didn’t work yet!! Instead, we got another error:
[ERROR] [1580771100.563075907, 98.692000000]: Unable to identify any set of controllers that can actuate the specified joints: [ elbow_joint shoulder_lift_joint shoulder_pan_joint wrist_1_joint wrist_2_joint wrist_3_joint ]
[ERROR] [1580771100.563656482, 98.692000000]: Known controllersand their joints:
controller 'hand_controller' controls joints:
  H1_F1J1
  H1_F1J2
  H1_F1J3
  H1_F2J1
  H1_F2J2
  H1_F2J3
  H1_F3J1
  H1_F3J2
  H1_F3J3
The controllers again! Now let’s examine the error message again.
The controllers for the parts that need to move could not be found. But these controllers are listed in the my_controllers.yaml .
Some other controllers listed in the same file were found.
Perhaps there’s some misconfiguration – let’s have a second look at this my_controllers.yaml file:
We have two controllers: arm_controller and hand_controller.
They both have an action_ns called follow_joint_trajectory.
But they have different types! They should be the same since they have the same “action namespace”!
The type for arm_controller is probably wrong because it’s the one we couldn’t find!
Now, change the type for arm_controller to FollowJointTrajectory and repeat step 2! Now the manipulator should execute the trajectory successfully – you should see the robot arm moving in both the Graphical Tools and the Gazebo windows.
This is one example of how to make a manipulator robot execute a trajectory based on a Position Goal. I hope you found it useful.
Extra: Video of this post
We made a video showing how this challenge was solved. If you prefer “sights and sounds” to “black and white”, here you go:
Did you like this post? Do you have questions about what was explained? Whatever the case, please leave a comment on the comments section below, so we can interact and learn from each other.
If you want to learn about other ROS or ROS2 topics, please let us know in the comments area and we will do a video or post about it.
It’s a ROS-related problem in which the first person who solves wins a prize. Different challenges are published every week.
Launching the Simulation
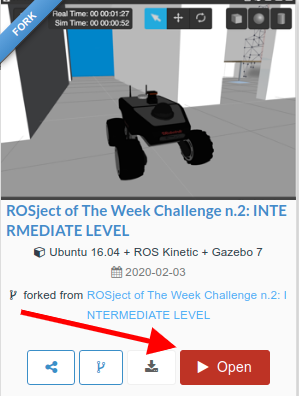
When you click in the ROSject Link (www.rosject.io/l/e0bc374/), you will get a copy of it. You can then download it if you want to use it on our local computer, or you can just click Open to have it opened in ROSDS.
Open ROSject of the Week number 2 in ROSDS
Once you have it open, go to the top menu and select Simulations. On the menu that appears, click on the Choose launch file… button.
Choose lunch file to open simulation in ROSDS
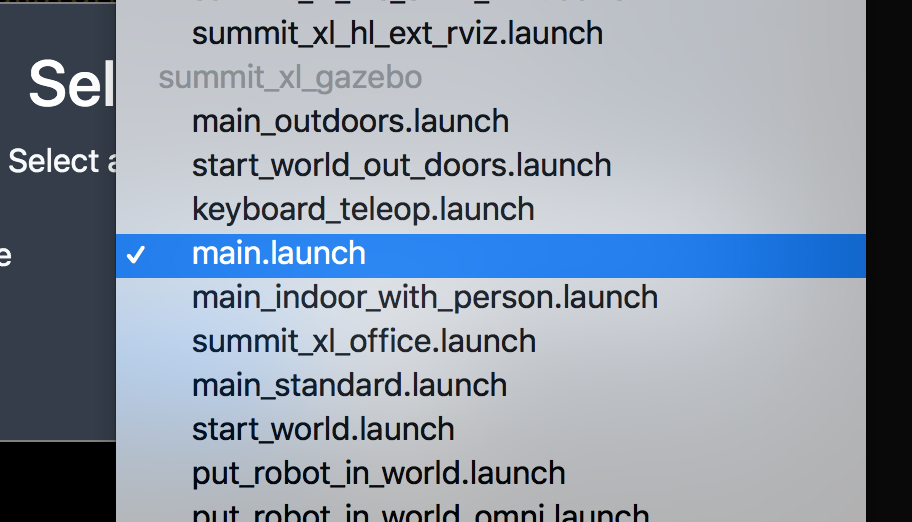
Now, from the launch files list, select the launch file named main.launch from the summit_xl_gazebo package.
Summit XL gazebo in ROSDS, ROSject of the week
Finally, click on the Launch button to start the simulation. In the end, you should get something like this:
Summit XL gazebo simulation in ROSDS, ROSject of the week
The problem to solve
As you can see, this ROSject contains 3 packages inside its catkin_ws workspace: my_summit_mapping, my_summit_localization, and my_summit_path_planning. The purpose of all these packages is to make the Summit XL robot autonomously navigate through the environment.So, the main purpose of this ROSject is to be able to send a Navigation Goal to the robot, and the Summit XL robot computes and executes a trajectory plan in order to reach this goal. The steps in order to achieve this are the following:
First, you launch the Navigation system by executing the following command in the terminal (Tools -> Shell):
Second, in a different terminal, you launch RViz in order to visualize all the required elements:
rosrun rviz rviz
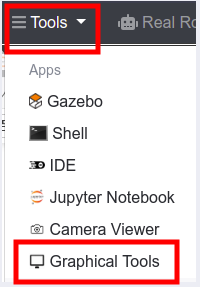
Now, in order to be able to visualize the RViz screen, you will need to open the Graphical Tools window, in the Tools menu.
Launching Graphical Tools in ROSDS
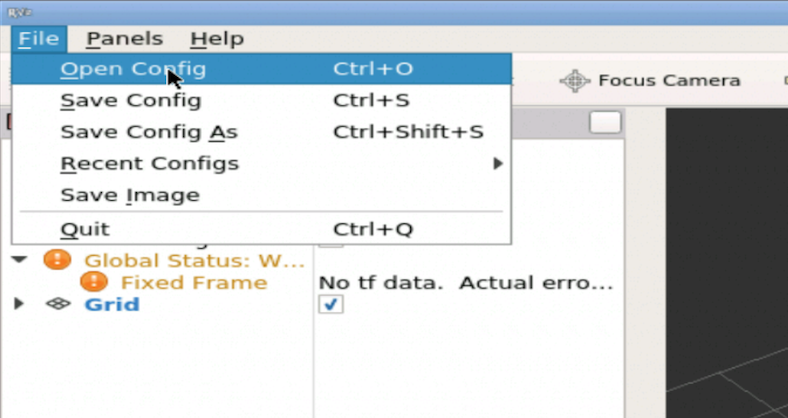
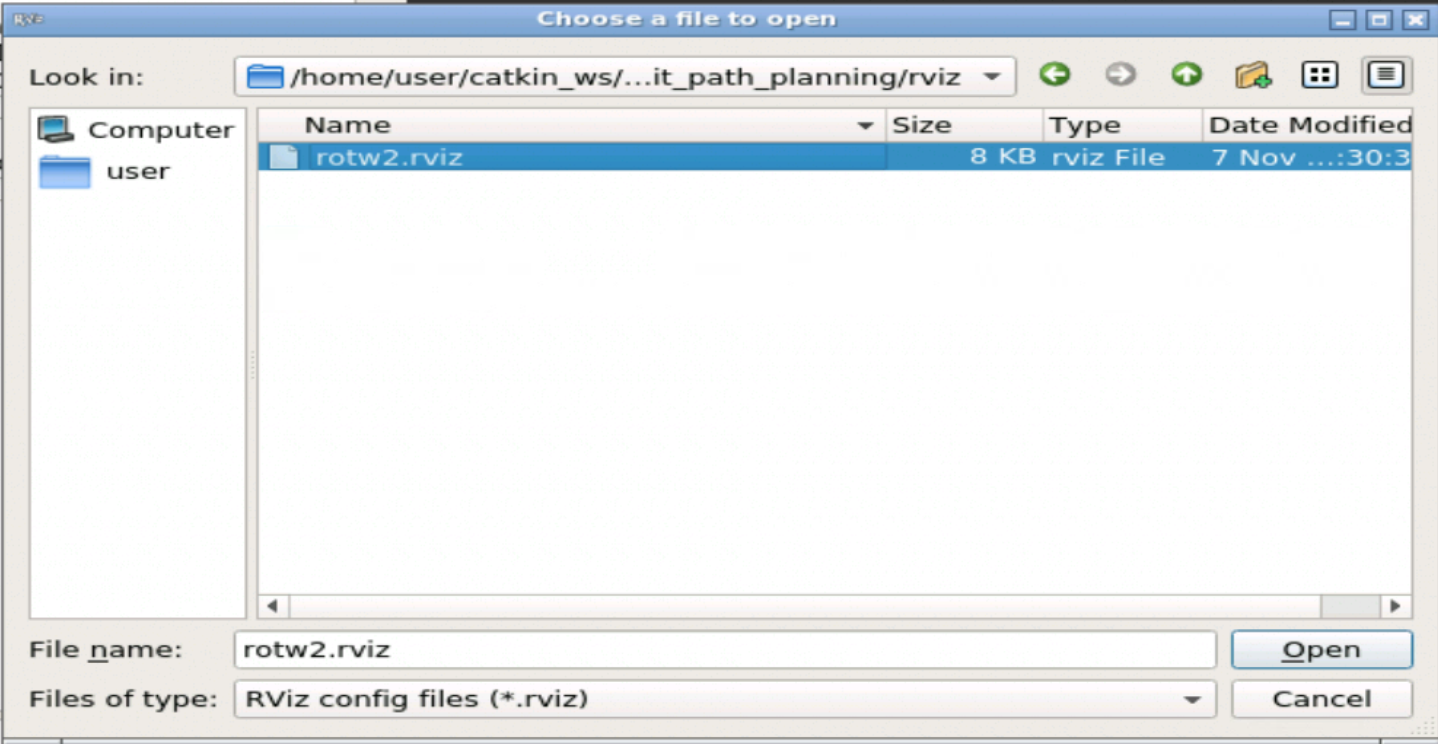
Also, in order to speed up the process, we have already created an RViz configuration that you can load. To do so, just click on the Open Config button in RViz, and select the RViz configuration in the following path: /home/user/catkin_ws/src/my_summit_path_planning/rviz/rotw2.rviz.
File -> Open Config button in RViz
Opening rotw2.rviz config file in RViz
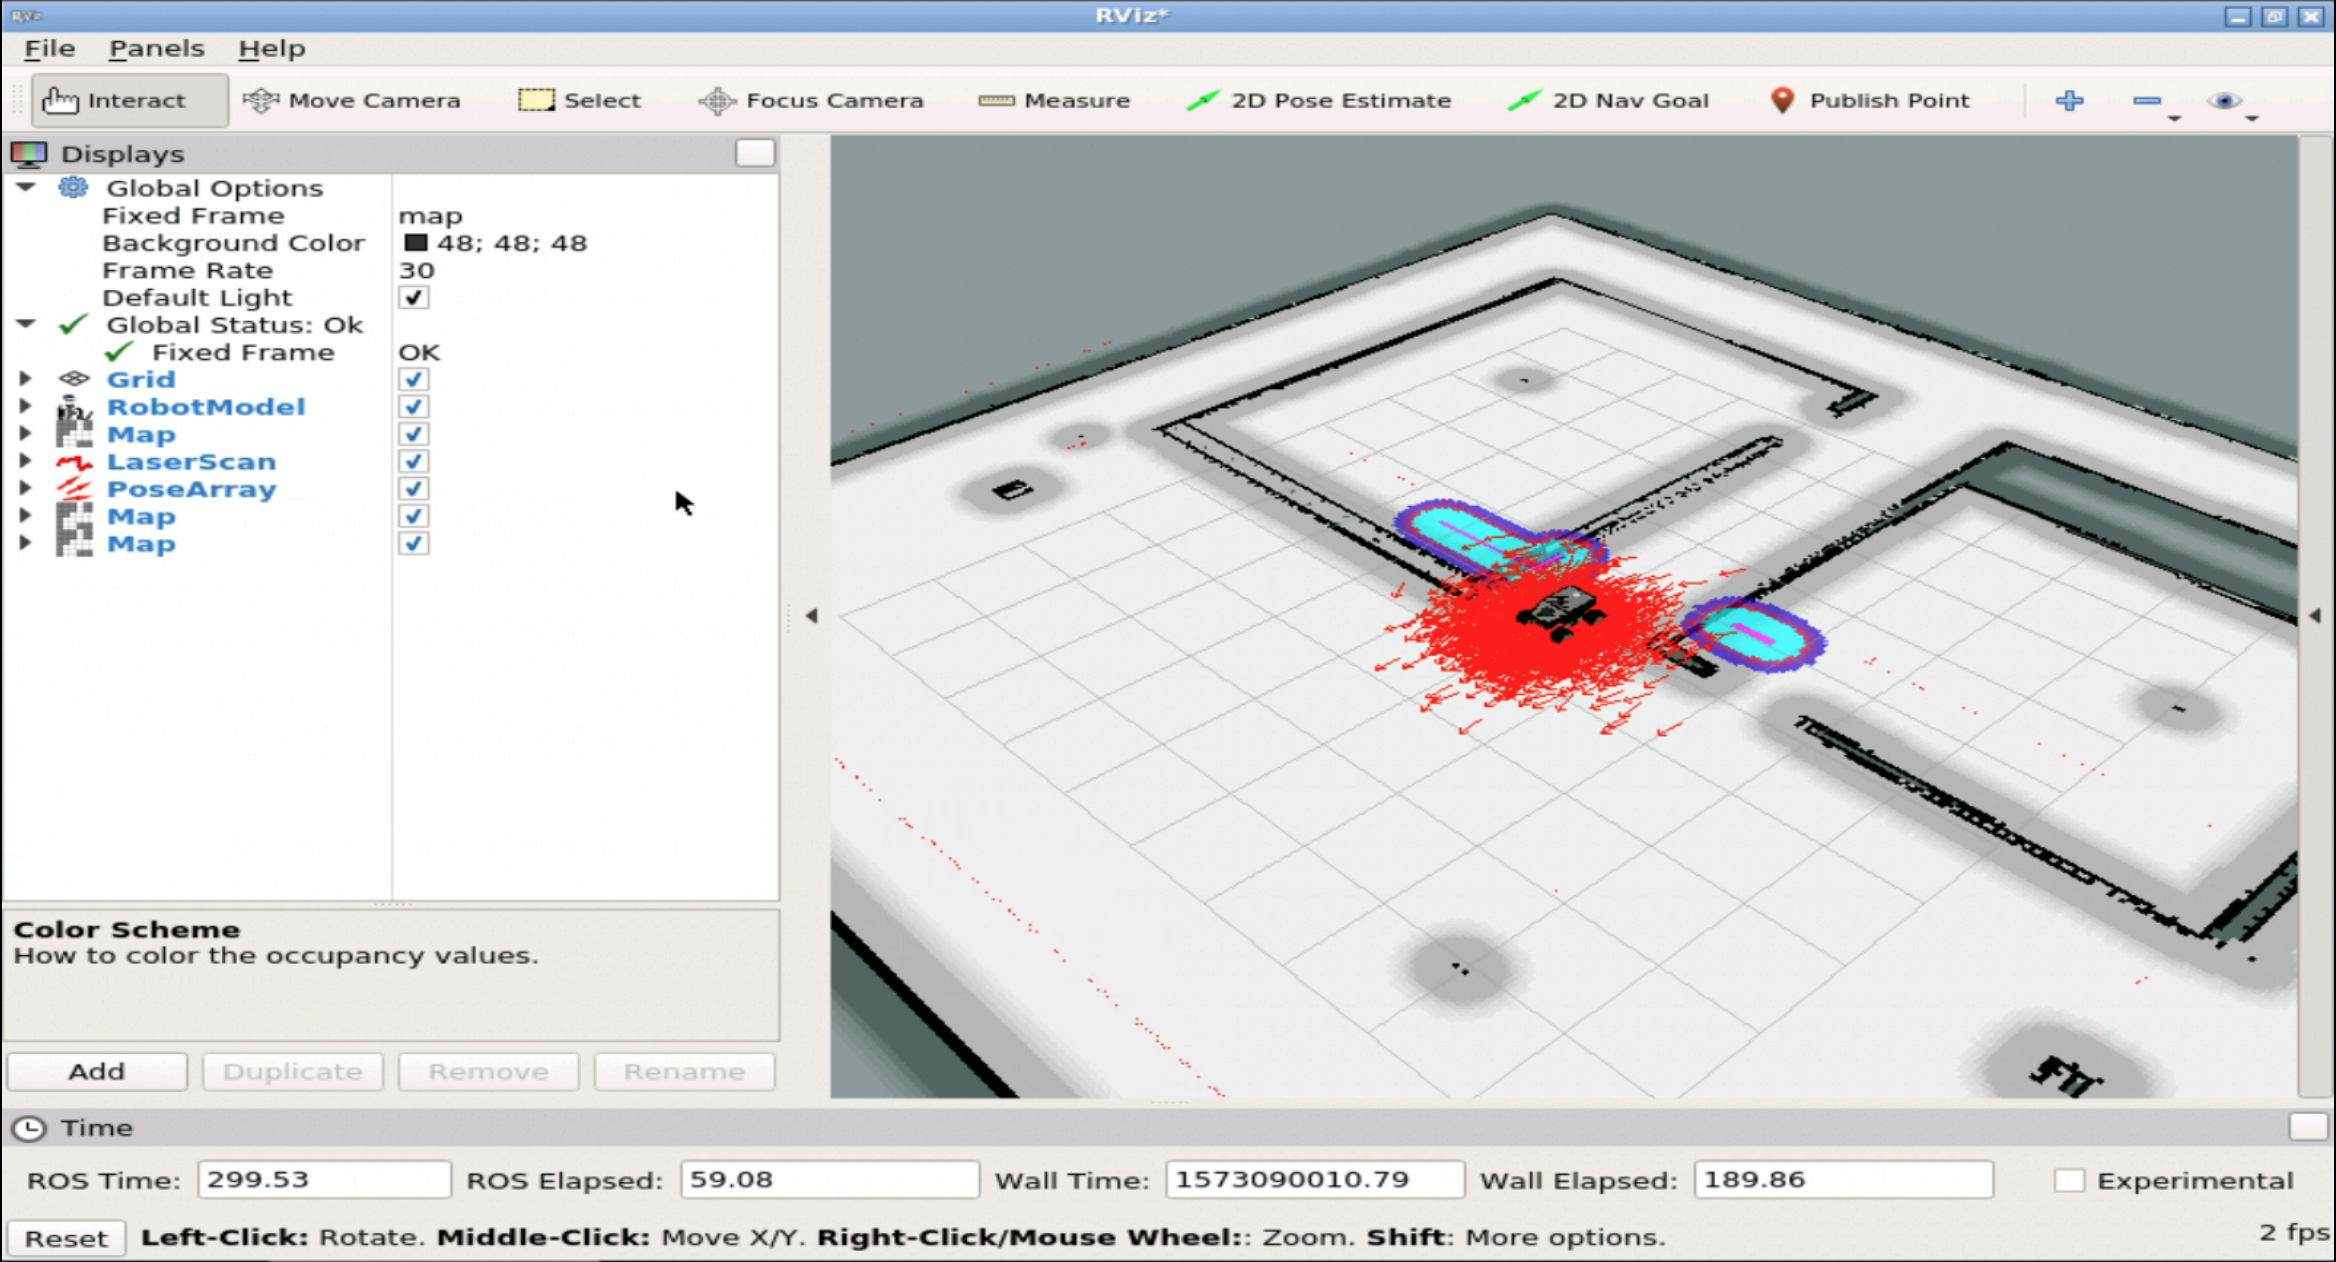
When you load the Rviz configuration file, you should get something like this:
ROS Mini Challenge #2 – RViz
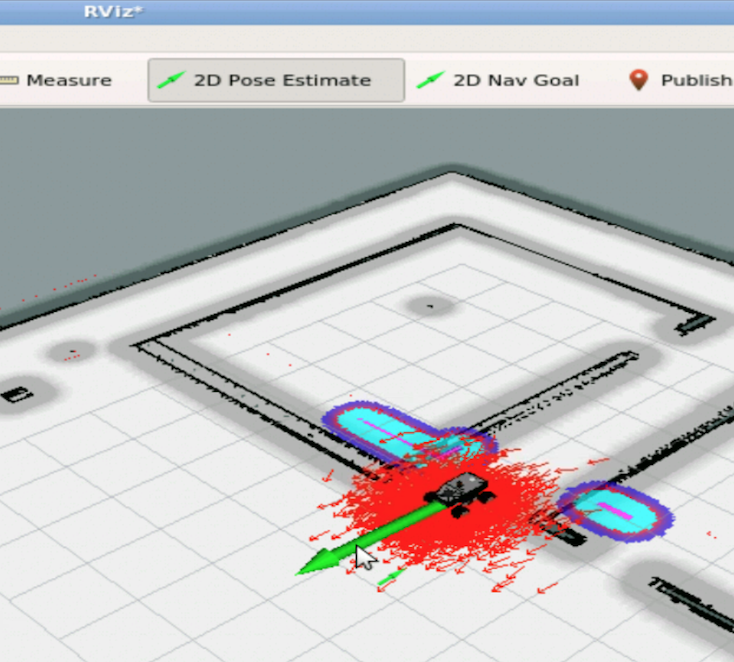
Now, all you need to do is to set the initial localization of the robot, using the 2D Pose Estimate tool, and then set a navigation goal for the robot, using the 2D Nav Goal tool.
RViz Pose Estimate – ROS Mini Challenge
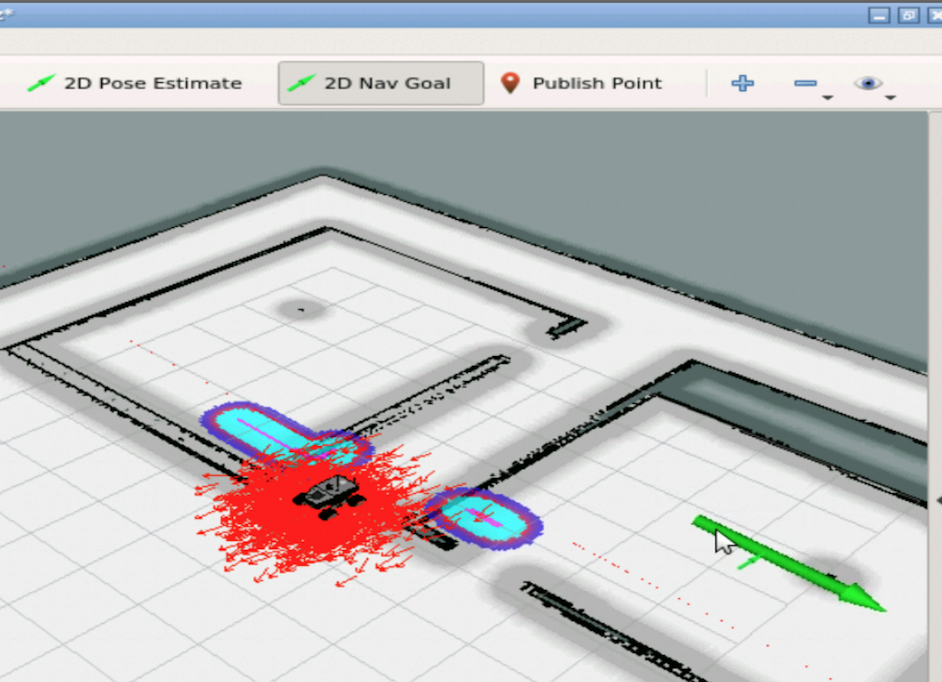
RViz 3D Nav Goal – ROS Mini Challenge
As you can see in the animations below, when setting the Nav Goal for the robot, you should see how it starts moving towards the goal, both in RViz and in the simulation!
ROS Mini Challenge #2 – RViz animation
Robot moving simulation – ROS Mini Challenge #2
Ok, but the problem doesn’t move as expected, so… where’s the problem? If you have tried to reproduce the steps described above you have already seen that it DOES NOT WORK. When you follow the pipeline and set a navigation goal, this goal is not reached successfully. Why? Let’s figure it out in the section below.
Solving the ROS Mini Challenge
According to the instructions, we need to have a look at the my_summit_path_planning package and try to find there the errors are. If you want to try to solve it by yourself and you don’t have all the ROS Navigation knowledge, we highly recommend you trying Robot Ignite Academy.
If you already have some ROS knowledge, you will notice some errors after running the command below:
[ INFO] [1580755905.369676908, 45.878000000]: Subscribed to Topics: hokuyo_laser
[FATAL] [1580755905.422091274, 45.888000000]: Only topics that use point clouds or laser scans are currently supported
terminate called after throwing an instance of 'std::runtime_error'
what(): Only topics that use point clouds or laser scans are currently supported
which says that only PonitCloud or LaserScan message types are supported when loading the obstacle_layer plugin, right after trying to subscribe to the hokuyo_laser topic.
Now we have to find where the plugin is defined and check the topic names and types. In the instructions, we have a hint to check the my_summit_path_planning package.
In that package, we can see that the plugin is loaded by the my_summit_path_planning/config/local_costmap_params.yaml file, but the plugin is defined in the config/costmap_common_params.yaml file:
In the configuration, we can see that the obstacle_layer laser defines hokuyo_laser, which subscribes to the /scanner topic of type Odometry.
If we try to find that /scanner topic, the topic doesn’t exist:
rostopic list | grep scanner
Normally the topics that contain Laser data have the scan in their name. Let’s try to find a topic with that name:
$ rostopic list | grep scan
/hokuyo_base/scan
Hey, there we have. The topic name is /hokuyo_base/scan. Let’s see whether there is data being published in this topic:
rostopic echo -n1 /hokuyo_base/scan
After running the command above, we can see that data is correctly being published, so, it seems this is really the topic we are looking for. Let’s now check the topic type to see whether it has something related to laser:
There you go. The topic type is sensor_msgs/LaserScan.
Let’s then copy the topic name /hokuyo_base/scan and paste it in place of the /scanner in the my_summit_path_planning/config/costmap_common_params.yaml file. In the same file, let’s also change the Odometry data_type by LaserScan, which is the type of topic we will use.
Now, after saving the file, let’s launch our move base node with the same command used previously:
Now you should see no errors in the output. You can know go again to RViz and correctly estimate the pose of the robot by clicking 2D Pose Estimate, and then move the robot with the 2D Nav Goal.
RViz Pose Estimate – ROS Mini Challenge
RViz 3D Nav Goal – ROS Mini Challenge
Now the robot should move as expected:
ROS Mini Challenge #2 – RViz animation
Robot moving simulation – ROS Mini Challenge #2
Congratulations. You know how to solve the ROS Mini Challenge #2, in which you have to make the robot navigate to a given location.
Youtube video
So this is the post for today. Remember that we have the live version of this post on YouTube. If you liked the content, please consider subscribing to our youtube channel. We are publishing new content ~every day.
This is the 1st of 4 posts of the series Developing web interfaces for ROS Robots.
In this post, we are going to introduce the ROSBridge server and make some basic communication using a simple web page.
It’s based on the video series, but with improvements, to make the flow easier and more practical.
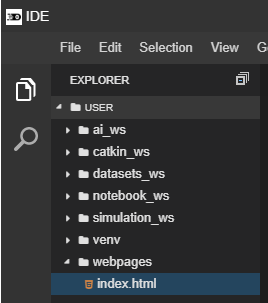
Part 1 – Creating our first webpage
First of all, we will create a folder to contain the webpage files. Through the IDE or a web shell, create the folder webpages. Inside the folder, create a file called index.html. You must have something like below:
Fill the index.html with the following content:
<html>

<head>
</head>

<body>
    <h1>Hello from ROSDS!</h1>

    <p>Communicate to rosbridge from my 1st webpage</p>
</body>

</html>
We have just created a webpage, though we need a server to provide this page for the clients (our browser, in this case). Let’s use the python “simple http server” to do that.
In a web shell, enter into the folder webpages and start the server like shown below:
user:~$ cd ~/webpages;
user:~$ python -m SimpleHTTPServer 7000;
At this point, you must have access to the webpage we have just created through your web browser. If you are on your local computer, it must be available at the address http://localhost:8000
But if you are working on ROSDS, you need to execute a command in the web shell to figure your public address:
*Do not copy the output from this tutorial, each user has his/her own webpage_address!
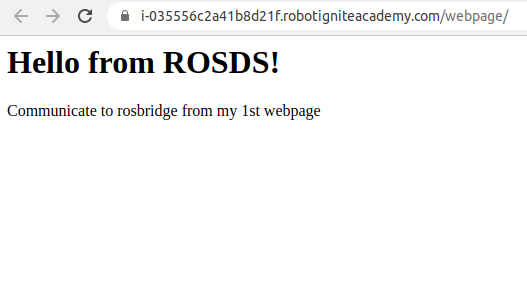
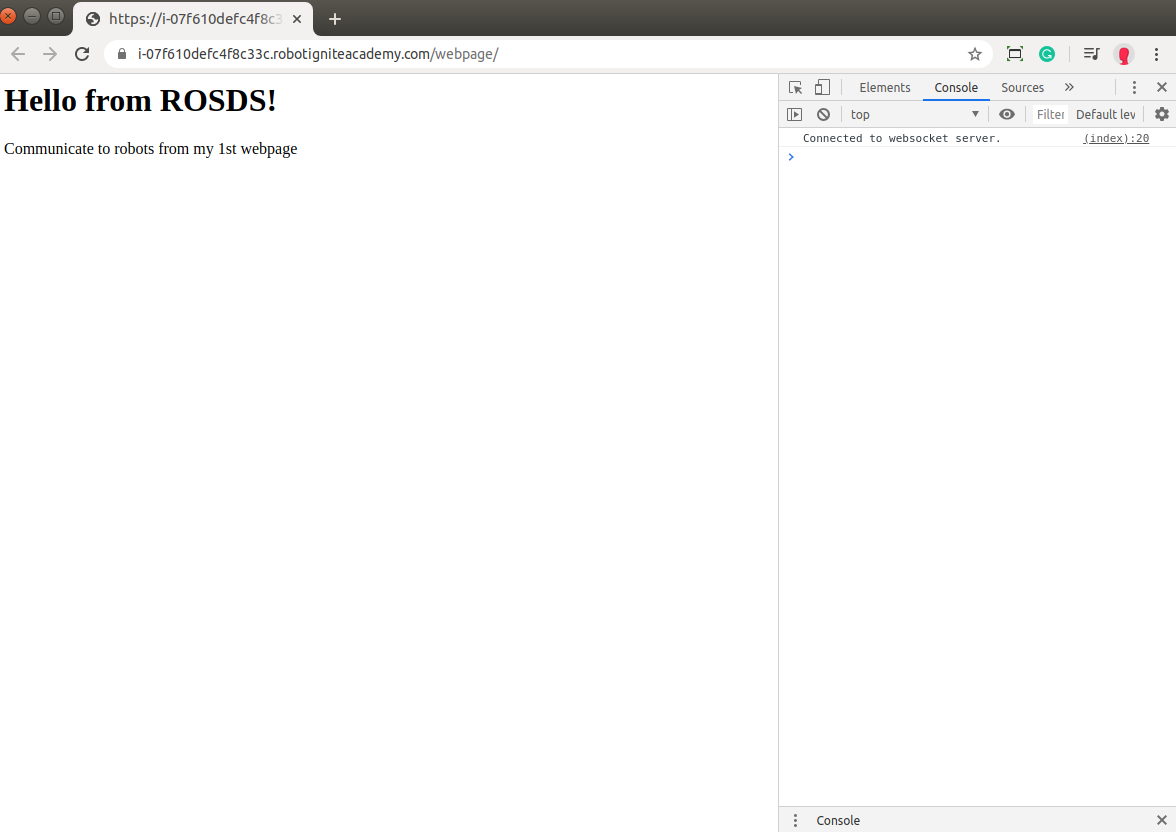
Open the address in a new tab of the browser and must get the following page:
First webpage result
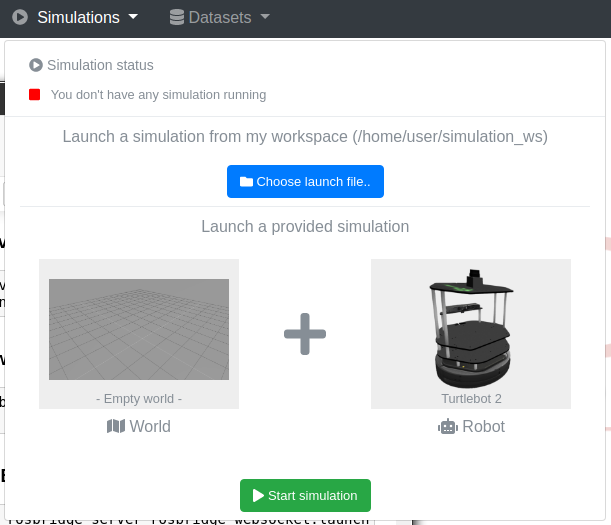
Part 2 – Preparing a robot to work with
In order to see everything working, we are gonna use a robot from ROSDS library. Let’s launch an empty worl with Turtlebot 2 in it. You can do it easily using the simulation menu:
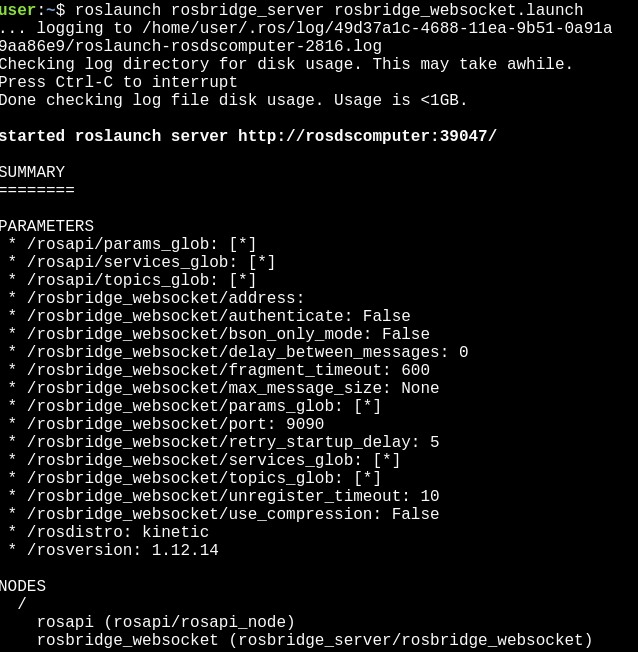
And one more step just before coding our JavaScript files, let’s start the rosbridge server as well. Open another terminal and execute the following:
This tag is including the roslibjs library. It is necessary to provide the objects that connects to rosbridge.
After that, inside the <body> tag, we create another <script> tag to have our code.
<body>
    <h1>Hello from ROSDS!</h1>

    <p>Communicate to robots from my 1st webpage</p>

    <script type="text/javascript">
      // Here it goes our code!
    </script>
</body>
And we are going to replace the comment // Here it goes our code! by the code itself!
Part 4 – Connecting to the rosbridge
The first part of the code is responsible to connect to rosbridge:
var ros = new ROSLIB.Ros({
    url : 'wss://i-07f610defc4f8c33c.robotigniteacademy.com/rosbridge/'
});
The value of the url attribute is different for each one. If you are working on ROSDS, get yours using the following command in a terminal:
rosbridge_address
But, if you are working on your local computer, your address will be:
ws://localhost:9090
We need also to define some callbacks in order to identify the connection to rosbridge.
ros.on('connection', function() {
    console.log('Connected to websocket server.');
});

ros.on('error', function(error) {
    console.log('Error connecting to websocket server: ', error);
});

ros.on('close', function() {
    console.log('Connection to websocket server closed.');
});
These events are triggered whenever rosbridge connection status is changed. At this point we can reload the page and observe the console of the browser. In order to debug our javascript, we need to open it. With the webpage selected, press F12. You must have the following page opened:
Note that we have the message “Connected to websocketserver.” in the console. It means the connection was established successfully!
Part 5 – Sending commands to the robot
Now that we have the connection with the server, let’s send the first command, which is gonna be a Twist message to the robot.
First we define the topic object
var cmdVel = new ROSLIB.Topic({
    ros : ros,
    name : '/cmd_vel',
    messageType : 'geometry_msgs/Twist'
})
We must fill the topic name and the message type.
Then, we define the values of the message we are going to send through this topic:
var twist = new ROSLIB.Message({
    linear : {
        x : 0.5,
        y : 0.0,
        z : 0.0
    },
    angular : {
        x : 0.0,
        y : 0.0,
        z : 0.5
    }
})
Finally, we send the message through the topic:
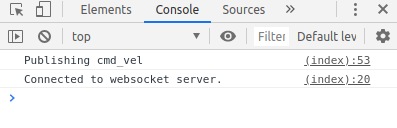
cmdVel.publish(twist)
At this point, reload the web page and check the logs of the console.
![[ROS Mini Challenge] #5 – make a robot detect and avoid an obstacle](https://www.theconstruct.ai/wp-content/uploads/2020/02/rotw5-thumbnail1.png)


![[ROS Mini Challenge] #3 – make a manipulator robot execute a trajectory](https://www.theconstruct.ai/wp-content/uploads/2020/02/shadow_sim1.png)
![[ROS Mini Challenge] #2 – Make a robot navigate to a specific location](https://www.theconstruct.ai/wp-content/uploads/2020/02/rotw2_img.png)