Software usually builds on other software. When you are creating a ROS2 Package, for example, you have to specify the packages that the created package depends on.
In this post, we are going to talk about different methods that you can use to properly handle package dependencies in ROS2.
ROS Inside!
ROS inside
Before anything else, in case you want to use the logo above on your own robot or laptop, feel free to download it for free and attach it to your robot. It is really free. Find it in the link below:
In order to learn how to install third-party Python packages using ROS2, we need to have ROS2 installed in our system, and it is also useful to have some simulations. To make your life easier, we already prepared a rosject for that: https://app.theconstructsim.com/l/4fefbbab/.
You can download the rosject on your own computer if you want to work locally, but just by copying the rosject (clicking the link), you will have a setup already prepared for you.
After the rosject has been successfully copied to your own area, you should see a Run button. Just click that button to launch the rosject (below you have a rosject example).
Installing Third-Party Python packages in ROS2 – Run rosject (example of the RUN button)
After pressing the Run button, you should have the rosject loaded. Let’s now head to the next section to really get some real practice.
Installing packages via rosdep
The rosdep command helps you install external dependencies in an OS-independent manner.
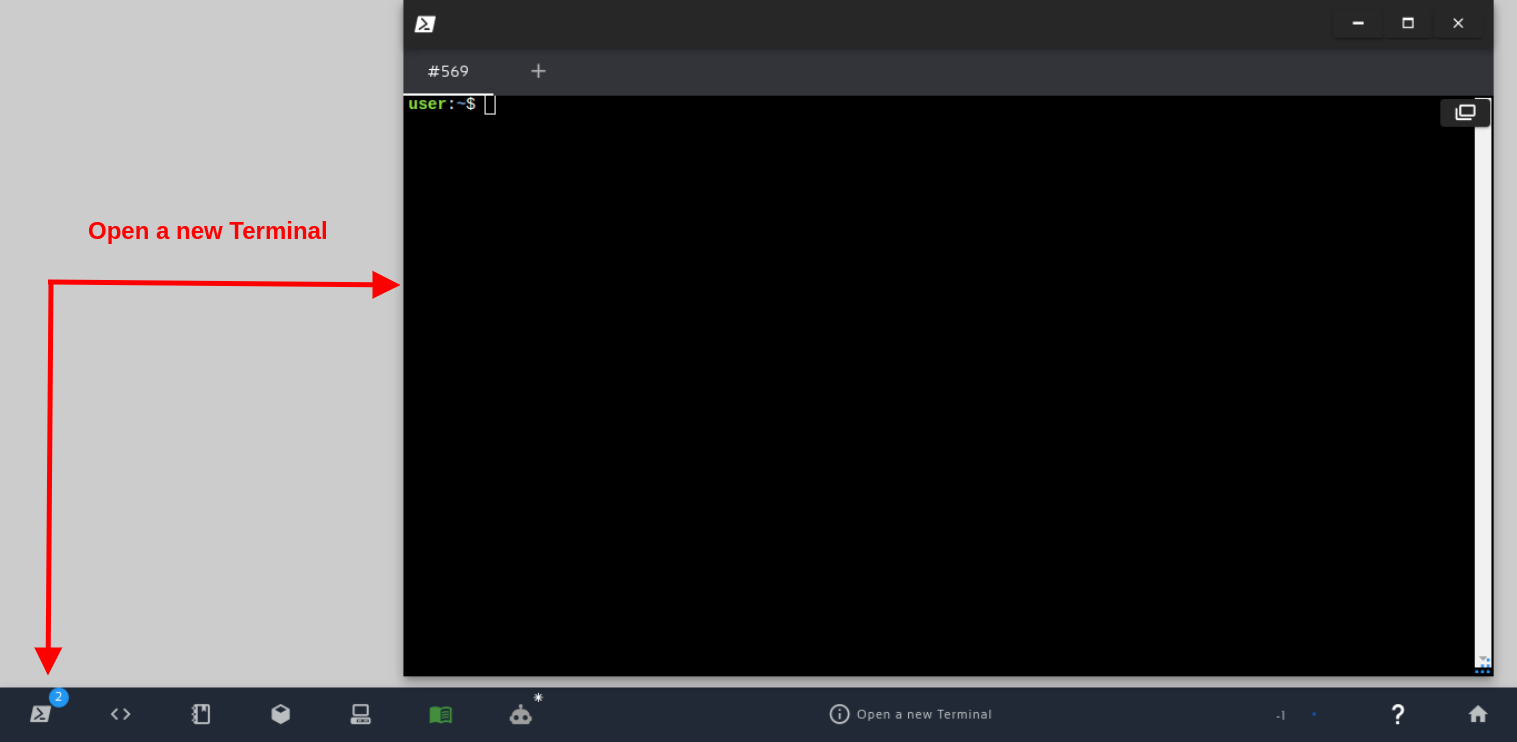
In order to use rosdep, we need a terminal. Let’s open one:
Open a new Terminal
Ok, in this rosject, we have already some packages. They were created with the following commands (you don’t need to run those commands since the package already exists):
After checking that file, let’s pay attention to the following line:
<depend>python3-numpy</depend>
Do you remember that we specific python3-numpy as a dependency of our package when we created it?
You can also add a new dependency to an existing package by manually editing the package.xml file.
All right, now that our package is created, let’s install its dependencies using rosdep. For that, let’s run the following commands in the first terminal:
The last command above installs all the packages that are not yet installed in our system and are required by the packages in your workspace.
If the message says no package was installed, that is because all dependencies are already installed in the system, but you should have seen at least the package python3-websockets installed.
That python3-websockets package is a dependency of our second package called my_new_ros2_websockets_pkg in our workspace, which was created using the following commands
Installing packages using a package manager (apt, apt-get)
We just learned how to install packages using rosdep. Another way of installing dependencies is by using a package manager directly. If you are using Linux Ubuntu, for example, you can use apt or apt-get, which are command-line tools that can be used to install and manage packages.
You can use the following command to list the packages installed with apt;
apt list --installed
The output would be something similar to the following:
...
xxd/jammy,now 2:8.2.3995-1ubuntu2 amd64 [installed,automatic]
xz-utils/jammy,now 5.2.5-2ubuntu1 amd64 [installed,automatic]
yaru-theme-gnome-shell/now 21.10.2 all [installed,upgradable to: 22.04.4]
yaru-theme-gtk/jammy,jammy,now 22.04.4 all [installed,automatic]
yaru-theme-icon/jammy,jammy,now 22.04.4 all [installed,automatic]
yaru-theme-sound/jammy,jammy,now 22.04.4 all [installed,automatic]
yelp-xsl/jammy,jammy,now 42.0-1 all [installed,automatic]
yelp/jammy,now 42.1-1 amd64 [installed,automatic]
zenity-common/jammy-updates,jammy-updates,now 3.42.1-0ubuntu1 all [installed,automatic]
zenity/jammy-updates,now 3.42.1-0ubuntu1 amd64 [installed,automatic]
zip/jammy,now 3.0-12build2 amd64 [installed,automatic]
zlib1g-dev/jammy,now 1:1.2.11.dfsg-2ubuntu9 amd64 [installed,automatic]
zlib1g/jammy,now 1:1.2.11.dfsg-2ubuntu9 amd64 [installed,automatic]
zstd/jammy,now 1.4.8+dfsg-3build1 amd64 [installed,automatic]
If you want to see if a given package named xml is installed, you would run the command below:
apt list --installed| grep libxml
which would should packages that contain the word xml:
libxml-parser-perl/jammy,now 2.46-3build1 amd64 [installed,automatic]
libxml-twig-perl/jammy,jammy,now 1:3.52-1 all [installed,automatic]
libxml-xpathengine-perl/jammy,jammy,now 0.14-1 all [installed,automatic]
libxml2/jammy-updates,jammy-security,now 2.9.13+dfsg-1ubuntu0.1 amd64 [installed,automatic]
libxmlb2/jammy,now 0.3.6-2build1 amd64 [installed,automatic]
Another way of finding installed packages is by calling dpkg directly.
sudo dpkg -l | grep xml
If you know the name of the package you wish to install, you can install it by using this syntax:
Instead of installing python dependencies system-wide, you can install them in a virtual environment, so that you can have different versions of a given package being used by different projects, yet they do not conflict. For that, we need to use virtualenv.
To check if virtualenvis installed, we can use the following command:
virtualenv --version
If you have an error like the following, it means virtualenv is not installed:
bash: virtualenv: command not found
In order to install virtualenv, we would use the following commands:
Once virtualenv is installed, we can create our virtual environment this way:
cd ~

mkdir -p ~/ros2_ws_venv/src

cd ~/ros2_ws_venv

virtualenv -p python3 ./venv
If everything went well, you should now have a python virtual environment in the ~/ros2_ws_venv folder.
You can now activate your environment with the following command:
source ./venv/bin/activate
After you activate the environment, your command prompt will change to show that you are in a Python virtual environment, so, instead of having user:~/ros2_ws_venv$ in your terminal, you would see something like this:
(venv) user:~/ros2_ws_venv$
Ignoring the venv folder (virtual environment) when compiling our ros2 workspace
In order to tell ROS2 not to consider our venv folder when compiling our workspace, we just create a file named COLCON_IGNORE in the folder that we want to ignore.
Example:
touch ~/ros2_ws_venv/venv/COLCON_IGNORE
All right. In the previous section we activated our environment with:
cd ~/ros2_ws_venv

source ./venv/bin/activate
Now, we can install Python packages in this environment just like we did before. Example:
python3 -m pip install torch
Now you can build your workspace and run your python node that depends on packages installed in your virtual environment.
Let’s compile our workspace:
cd ~/ros2_ws_venv

colcon build
Now your packages can use the Python packages installed in your virtual environment, just like if they were installed system-wide.
As long as your virtual environment is activated, you can install packages into that specific environment and you will be able to import and use those packages in your application.
Bear in mind that you always need to have the virtual environment activated when you want o use it.
To exit/deactivate the virtual environment, you can run the following command:
deactivate
Congratulations on reaching the end of this post. I hope it was useful for you. If you want a live version of this post, please check the video in the next section.
Youtube video
So this is the post for today. Remember that we have the live version of this post on YouTube. If you liked the content, please consider subscribing to our youtube channel. We are publishing new content ~every day.
Keep pushing your ROS Learning.
Related Courses & Training
If you want to learn more about ROS and ROS2, we recommend the following courses:
In this post we are going to show are ROS Arguments are, how to use them from the command line with the ros-args flag, and how they can modify some aspects of a ROS Node in a ROS Network.
ROS Inside!
ROS inside
Before anything else, in case you want to use the logo above on your own robot or laptop, feel free to download it for free and attach it to your robot. It is really free. Find it in the link below:
In order to learn how to pass ROS2 arguments to a ROS2 Node via the command line, we need to have ROS2 installed in our system, and it is also useful to have some simulations. To make your life easier, we already prepared a rosject with a simulation for that: https://app.theconstructsim.com/#/l/4e79d8dd/
You can download the rosject to your own computer if you want to work locally, but just by copying the rosject (clicking the link), you will have a setup already prepared for you.
After the rosject has been successfully copied to your own area, you should see a Run button. Just click that button to launch the rosject (below you have a rosject example).
ROS2 Arguments – Run rosject (example of the RUN button)
After pressing the Run button, you should have the rosject loaded. Let’s now head to the next section to really get some real practice.
Launching the simulation
The rosject we provided contains the packages needed to run a simulation in ROS2. The ros2_ws (ROS2 Workspace) is already compiled. Let’s compile it again just in case. For that, let’s first open a terminal:
Open a new Terminal
Now, let’s compile the ros2_ws folder:
cd ~/ros2_ws

colcon build
Once the workspace is compiled, let’s source it.
source install/setup.bash
Now that the workspace is compiled and sourced, let’s start the simulation by running the following commands:
cd ~/ros2_ws/src/t3_humble

./start_sim_house.sh
The simulation should have been loaded, as we can see on the left side of the image below:
ROS2 –ros-args: Simulation launched
Starting a normal obstacle avoidance node (without –ros-args)
Now that we have the simulation running, let’s run the obstacle avoidance node. For that, let’s open a new terminal, let’s call it second terminal and type the following command on it:
ros2 run rule_based_obstacle_avoidance obstacle_avoidance
Let’s now to go to a third terminal and list the ROS2 nodes there:
ros2 node list
The expected list of nodes should be similar to the following:
Starting the obstacle avoidance node in a specific namespace (using –ros-args)
Now that we saw how to launch a normal node in ROS2, let’s see how to launch it in a specific namespace. For that, we are going to use the–ros-argsparameter when running ros2 run.
Let’s go to the second terminal where we launched the node, and stop the node by pressing CTRL+C.
After the node has stopped, let’s launch it again in the /robot1 namespace.
ros2 run rule_based_obstacle_avoidance obstacle_avoidance --ros-args -r __ns:=/robot1
If we now list the nodes again, just as we did before in the third terminal, we should see something different:
As we can see, now the ObstacleAvoidance node that we just launched is under the /robot1 namespace. The reason why the other nodes are not under a namespace is that those nodes were launched in the first terminal, where we launched the simulation.
We can also check the topics now, in order to find whether the Obstacle Avoidance-related topics are under the namespace. Let’s run the following command in the third terminal:
The important difference in the list of topics here are the cmd_vel and scan topics, which are now under the /robot1 namespace, yet, some topics with the same name without the namespace:
The topics under the /robot1 namespace are the ones that the Obstacle Avoidance node subscribes to. The topics without the namespace are watched by other nodes in the Gazebo Simulation, not by the Obstacle Avoidance.
Why have a namespace for ROS2 Nodes?
One of the reasons why Namespaces are useful is because this way, you can run the same node multiple times, once for each robot. This way, you will not have two robots processing the same messages, nor will you have to change your code to consider whether the code is running on robot1 or robot2, for example.
You can run multiple instances of a node with the same name, as long as they are in different namespaces.
Examples:
ros2 run rule_based_obstacle_avoidance obstacle_avoidance --ros-args -r __ns:=/robot1
ros2 run rule_based_obstacle_avoidance obstacle_avoidance --ros-args -r __ns:=/robot2
Assigning a different name to a ROS2 Node using –ros-args
In order to change the name of a given ROS2 Node, we use the __node variable.
In order to run this example, please remember to kill the node that we launched in the second terminal by pressing CTRL+C.
Once the old node is terminated, we can launch it again with a different name using the following command:
ros2 run rule_based_obstacle_avoidance obstacle_avoidance --ros-args --remap __node:=collision_avoidance
The above command will cause the node to be started under the node collision_avoidance name.
Let’s check it by listing the nodes using the third terminal:
ros2 node list
You should now see the /collision_avoidance. instead of /obstacle_avoidance that we had before.
Changing topic names in ROS2 (Remapping)
Remapping means changing topics’ names.
So far we have learned how to add a namespace to a node, and how to change the node name. Time now has come to learn how to change the topic that a given node publishes or subscribes to.
Let’s go again to the second terminal , kill the node we launched earlier by pressing CTRL+C, then launch the node again using the command below:
ros2 run rule_based_obstacle_avoidance obstacle_avoidance --ros-args -r scan:=laser_scan
The command above will make the node subscribe to the topic named laser_scan instead of the default scan.
If you now check the topics again in the third terminal, you should see the /laser_scan topic, which is the one that the Obstacle Avoidance subscribes to:
ros2 topic list
Setting parameters directly from the command line when the node starts up
If you pay attention carefully, you will see that up to now we have been using the —ros-args –remap parameters. Now, in order to pass parameters to the node, we use –ros-args -pinstead.
In order to set the “safety_distance” parameter to 0.5, for example, we would use the following command in the second terminal:
ros2 run rule_based_obstacle_avoidance obstacle_avoidance --ros-args -p safety_distance:=0.5
To check of the parameter was set, we can start by listing the parameters in the third terminal:
ros2 param list
With the command above you will see that we have a node called ObstacleAvoidance and there is a parameter called safety_distance associated with the node.
We can check the value of the node with the following command:
ros2 param get ObstacleAvoidance safety_distance
After retrieving the value, you will see that it matches exactly with the value we set in the second terminal when we ran the node.
Setting Logger Level using –ros-args
Now we will see that we can control log severity levels printed out to the terminal, using the command line.
Let’s go again to our second terminal and kill the node we launched previously by pressing CTRL+C.
After the node has stopped, let’s run the following command:
ros2 run rule_based_obstacle_avoidance obstacle_avoidance --ros-args --log-level debug
The command above specifies that our logger level is DEBUG, which means we will see basically all log messages, given that DEBUG is the lowest level.
We set the level to debug, but you could also use info, warn or error, for example.
After having launched the node, you should have seen a lot of log messages coming out, logs that we didn’t have the previous times.
Using different parameters, you can control which logs you are going to see, without having to recompile your nodes, in case the nodes are in C++.
Congratulations on reaching the end of this post. We really hope it was of great use to you.
If case you want a live version of this post, please check the video in the next section.
Youtube video
So this is the post for today. Remember that we have the live version of this post on YouTube. If you liked the content, please consider subscribing to our youtube channel. We are publishing new content ~every day.
Keep pushing your ROS Learning.
Related Courses & Training
If you want to learn more about ROS and ROS2, we recommend the following courses:
In this post, you will learn how to replay ros2 bags with changed Quality of Service (QoS) setting. You’ll discover how to set the QoS before recording the bag, and how to change the QoS when playing back the bag file.
Step 1: Get a Copy of the ROS package containing the code used in the post
Click here to copy the project. It would be copied to your cloud account at The Construct. That done, open the project using the Run button. This might take a few moments, please be patient.
PS: If you don’t have an account on the The Construct, you would need to create one. Once you create an account or log in, you will be able to follow the steps to read and write parameters in ros1 and ros2.
You might also want to try this on a local PC if you have ROS installed. In that case you need to read on and duplicate the source code of the package in your own local workspace. However, please note that we cannot support local PCs and you will have to fix any errors you run into on your own.
Step 2: Start a simulation and the Quality of Service publisher
Open a web shell
Open a web shell (1) and run the following commands to start a simulation:
Now start the QoS publisher in the same web shell (2) where you published to /cmd_vel. Note that we set the reliability to reliable. The QoS publisher publishes to the /robot_pose topic.
ros2 run qos_pose_publisher qos_pose_publisher -reliability reliable
Now let’s look at the reliability of the /robot_pose topic in a new web shell (3):
ros2 topic info /robot_pose --verbose
You should see something like this as part of the output:
Step 3: Record and play back a ros2 bag file of a topic
Now let’s record a ros2 bag file of a topic in web shell (3). We are using the /robot_pose topic.
ros2 bag record -o ros2bag_qos_as_published /robot_pose
Let it run for 5 seconds and then kill it, in web shell (3). You should have a new file created:
ros2bag_qos_as_published
Now let’s play the ros2 bag. But before that kill the qos_pose_publisher node in web shell (2) by pressing Ctrl+C. In the same web shell (2), run the following command:
ros2 bag play ros2bag_qos_as_published
Now let’s examine the QoS of the /robot_pose topic (now being published to from the ros2 bag), in web shell (3):
And that’s it! That’s how to replay ros2 bags with changed quality of service setting.
Step 5: Check your learning
Do you understand how to set the QoS for the topic before recording a bag?
Do you understand how to replay ros2 bags with changed quality of service setting?
If you didn’t get any of the points above, please go over the post again, more carefully this time.
(Extra) Step 6: Watch the video to understand how to create ros2 XML launch files
Here you go:
Feedback
Did you like this post? Do you have any questions about how to read and write parameters in ros1 and ros2? Whatever the case, please leave a comment on the comments section below, so we can interact and learn from each other.
If you want to learn about other ROS topics, please let us know in the comments area and we will do a video or post about it.
Let’s assume you wish to wash your clothing. There are two possible ways you could go about it:
Go to the Laundry service provider
Put your clothes to wash.
Wait until the clothes are washed.
Get your clothes.
If you have a washing machine at home:
Put your clothes to wash
Instead of waiting, you can do other things and leave the watching machine doing its jobs
Check once in a while if the clothes are finished
Do other things.
Clothes are washed.
Option 1 is a blocking activity because you have to wait (in theory not able to do anything else) for the clothes to be washed, while option 2 is non-blocking because you can do some other things while your clothes are being washed.
This non-blocking is what defines an Action. If ROS2 Services are for instant request-responses, an Action is a task that may take a lot of time to be finished, and in the meantime, a robot (or you) is free to do other things and is also able to constantly check the status of the action.
Opening the rosject
In order to learn how to create an and use an Action Server in ROS2, we need to have ROS2 installed in our system, and it is also useful to have some simulations. To make your life easier, we already prepared a rosject with a simulation for that: https://app.theconstructsim.com/#/l/4a1c58c5/.
You can download the rosject on your own computer if you want to work locally, but just by copying the rosject (clicking the link), you will have a setup already prepared for you.
After the rosject has been successfully copied to your own area, you should see a Run button. Just click that button to launch the rosject (below you have a rosject example).
Learn ROS2 – Run rosject (example of the RUN button)
After pressing the Run button, you should have the rosject loaded. Let’s now head to the next section to really get some real practice.
Launching the simulation
The rosject we provided contains the packages needed to run a TurtleBot3 simulation in ROS2. The TurtleBot3 has the following sensors:
Lidar
IMU
Feel free to use this rosject to test your mobile robot programs.
The rosject is structured the following way:
turtlebot3_ws: this workspace contains the TurtleBot3 packages provided by ROBOTIS. Don’t modify this unless you know what you are doing and want to change something from the simulation
Use this workspace to develop your programs
Assuming you have opened the rosject by clicking the Run button, we can launch the simulation with:
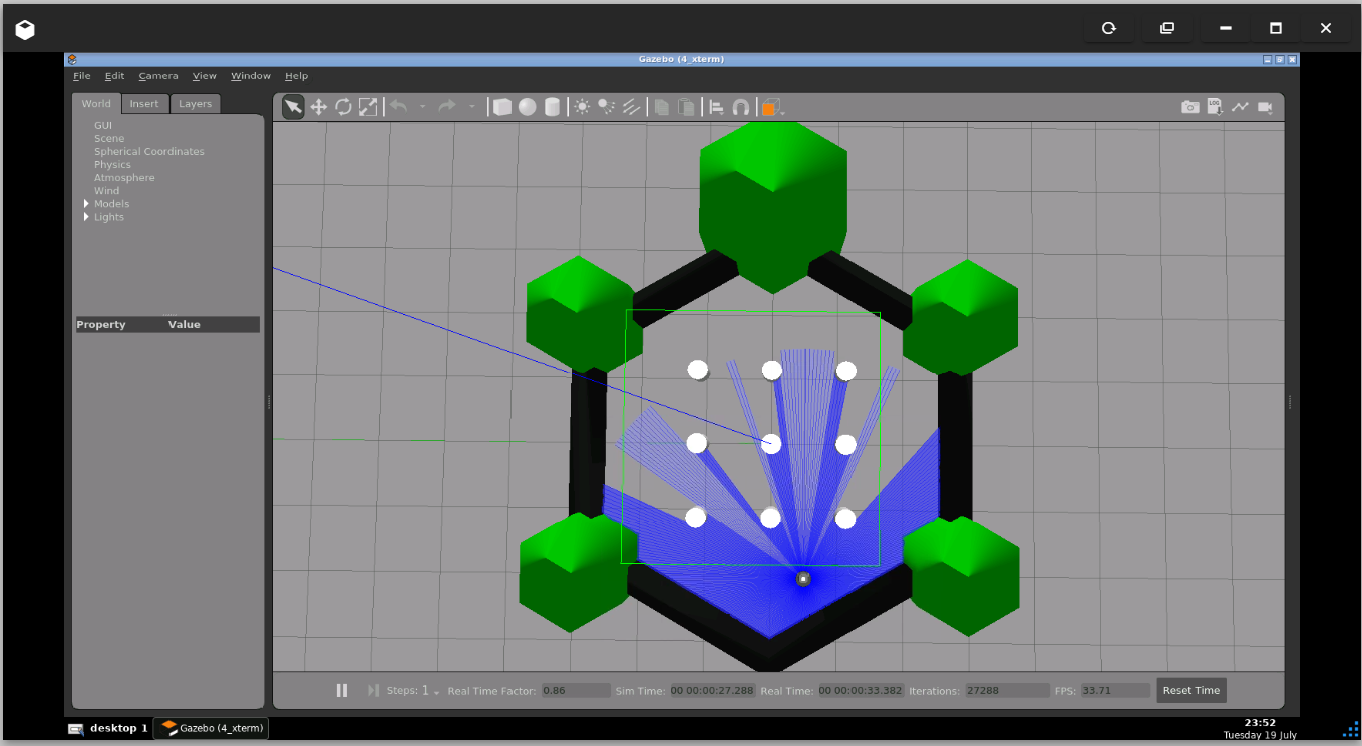
After a few seconds, the simulation should have opened automatically:
[ROS2 How-to] #2 – Create a ROS2 action server – Simulation running
In case the simulation does not pop up automatically, you can easily click the Open Gazebo button like in the example below (bear in mind that the simulation below is not the one used in this tutorial. Its main purpose is to show the Open Gazebo button):
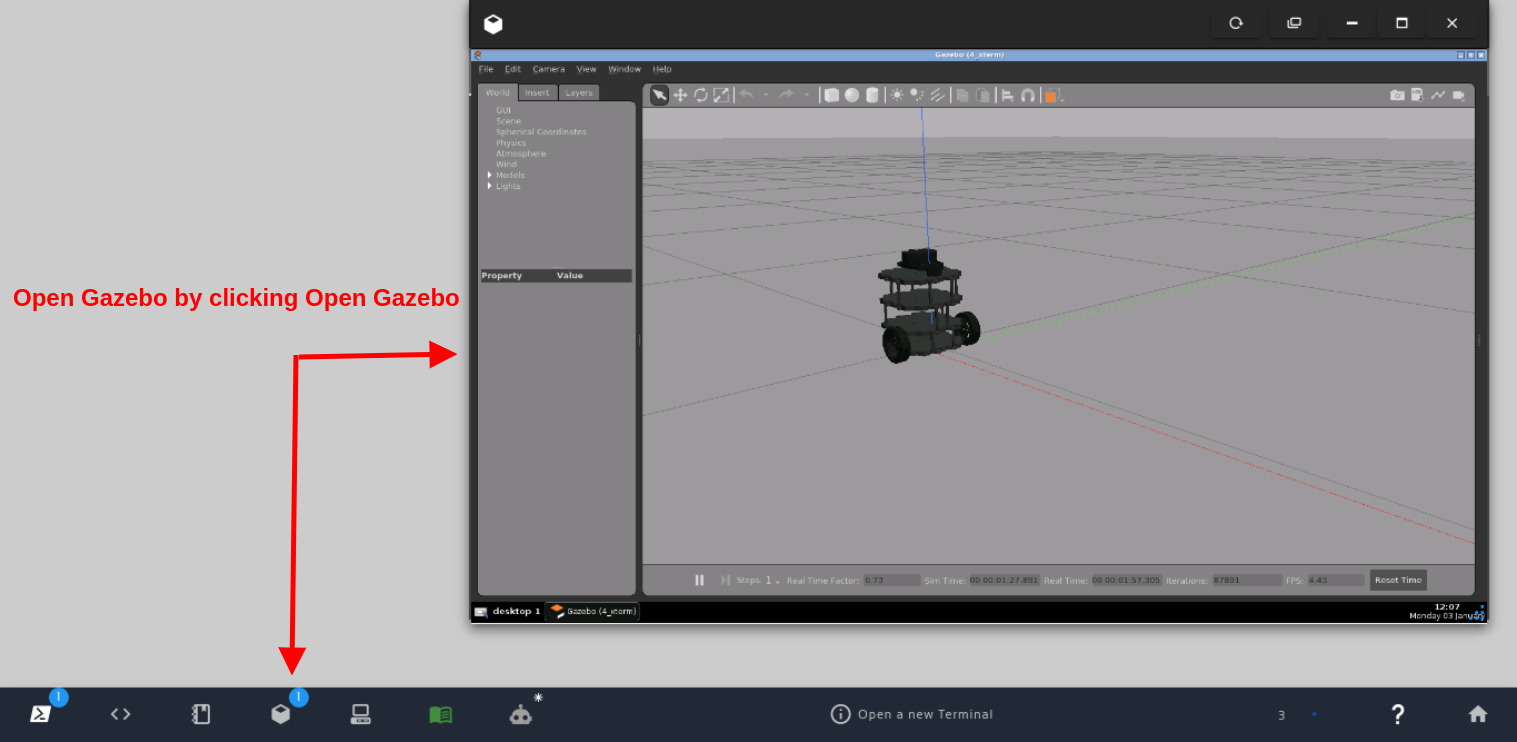
Open Gazebo by clicking Open Gazebo
Creating our ROS2 package (later used to create our Action Server)
Let’s create our ROS2 Package. For that, let’s start by opening a new terminal:
Open a new Terminal
In the terminal that was just open, by running the “ls” command you can see that we have at least the following folders:
ros2_ws turtlebot3_ws
The turtlebot3_ws contains the simulation, and the ros2_ws is where we are going to place our code.
Before you continue, it is worth mentioning that in the rosject that we shared with you, the custom_interfaces package that we are going to create here already exists. We are going to create it here basically for learning purposes. You would actually not need it since the package was already created for you:
Let’s create a package named custom_interfaces with the action_msgs std_msgs rosids_default_generators packages as dependencies:
After the package was created, let’s create a folder called action:
mkdir -p custom_interfaces/action/
and also create the action/Patrol.action file.
touch custom_interfaces/action/Patrol.action
This is the file/Interface that we will use in our Action Server for patrolling.
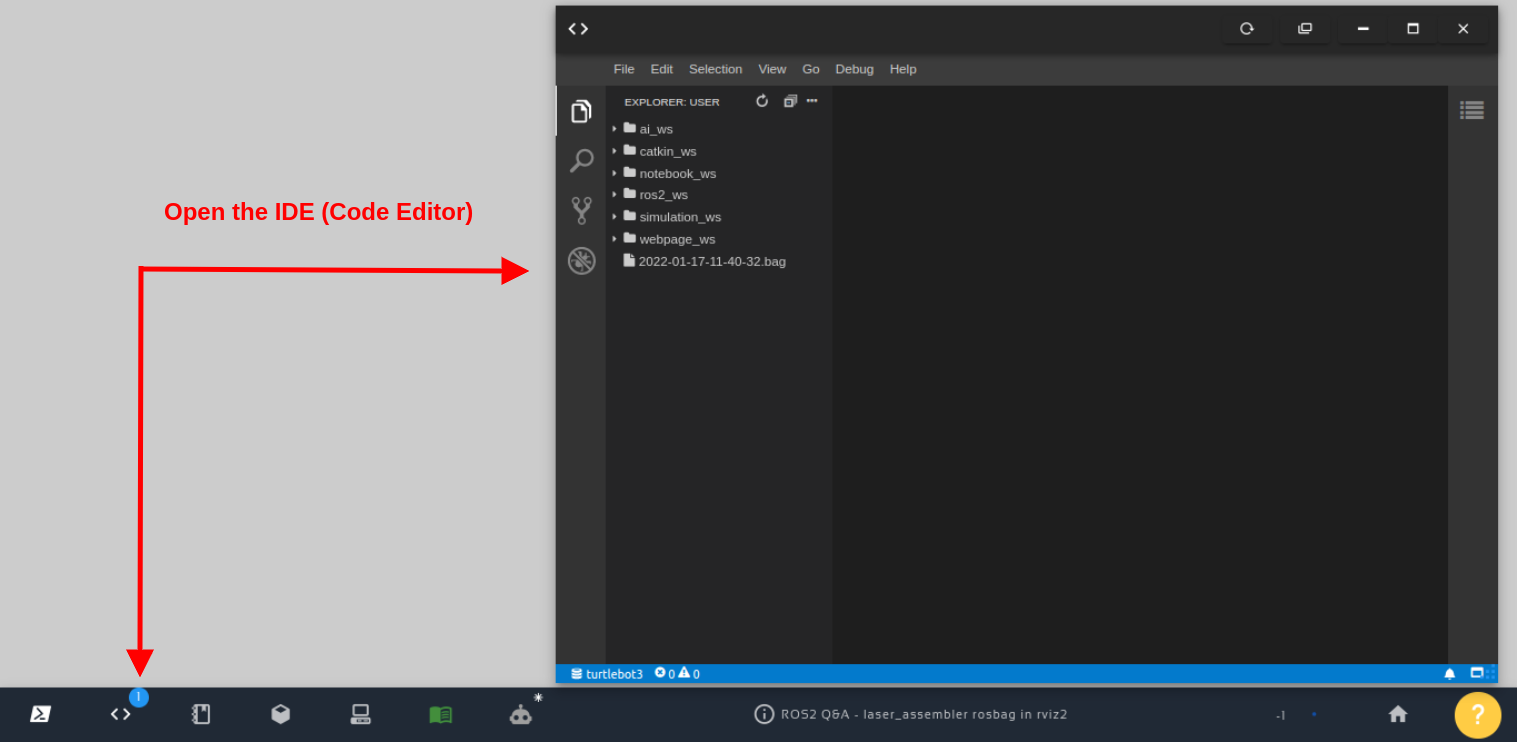
Let’s now open that Patrol.action file. You can open it in the Code Editor. If you do not know how to open the Code Editor, please check the image below:
Open the IDE – Code Editor
You can now open the custom_interfaces/action/Patrol.action file and paste the following content on it:
In the end, the final CMakeLiss.txt file would look like the following:
cmake_minimum_required(VERSION 3.8)
project(custom_interfaces)
if(CMAKE_COMPILER_IS_GNUCXX OR CMAKE_CXX_COMPILER_ID MATCHES "Clang")
add_compile_options(-Wall -Wextra -Wpedantic)
endif()
# find dependencies
find_package(ament_cmake REQUIRED)
find_package(action_msgs REQUIRED)
find_package(std_msgs REQUIRED)
find_package(rosidl_default_generators REQUIRED)
set(action_files
    "action/Patrol.action"
)

rosidl_generate_interfaces(${PROJECT_NAME}
    ${action_files}
    DEPENDENCIES action_msgs std_msgs
)
if(BUILD_TESTING)
find_package(ament_lint_auto REQUIRED)
# the following line skips the linter which checks for copyrights
# uncomment the line when a copyright and license is not present in all source files
#set(ament_cmake_copyright_FOUND TRUE)
# the following line skips cpplint (only works in a git repo)
# uncomment the line when this package is not in a git repo
#set(ament_cmake_cpplint_FOUND TRUE)
ament_lint_auto_find_test_dependencies()
endif()
ament_package()
And for the file custom_interfaces/package.xml we also have to add the following code before the <export> tag:
So far so good. ROS is able to find our custom interface.
The time has now come for us to create the Action Server.
Creating our ROS2 Action Server
Let’s create a different package for the Action Server, just to keep things separated. Since we are not doing to create Interfaces in this new package, just use existing interfaces, let’s use the ament_python build type. Again, bear in mind that if you are using the rosject that we provided, the package already exists in the ~/ros2_ws/src folder:
Let’s now open that file using the Code Editor, and paste the following content to it:
#!/usr/bin/env python3
#
# Copyright 2019 ROBOTIS CO., LTD.
#
# Licensed under the Apache License, Version 2.0 (the "License");
# you may not use this file except in compliance with the License.
# You may obtain a copy of the License at
#
# http://www.apache.org/licenses/LICENSE-2.0
#
# Unless required by applicable law or agreed to in writing, software
# distributed under the License is distributed on an "AS IS" BASIS,
# WITHOUT WARRANTIES OR CONDITIONS OF ANY KIND, either express or implied.
# See the License for the specific language governing permissions and
# limitations under the License.
#
# Authors: Ryan Shim, Gilbert
import math
import time
import rclpy
from geometry_msgs.msg import Twist
from rclpy.action import ActionServer
from rclpy.action import CancelResponse
from rclpy.action import GoalResponse
from rclpy.callback_groups import ReentrantCallbackGroup
from rclpy.duration import Duration
from rclpy.node import Node
from rclpy.qos import QoSProfile
from rclpy.executors import MultiThreadedExecutor
from custom_interfaces.action import Patrol
class Turtlebot3PatrolServer(Node):
def __init__(self):
super().__init__('turtlebot3_patrol_server')
self.goal = Patrol.Goal()
qos = QoSProfile(depth=10)
# Initialise publishers
self.cmd_vel_pub = self.create_publisher(Twist, 'cmd_vel', qos)
# Initialise servers
self._action_server = ActionServer(
self,
Patrol,
'patrol',
execute_callback=self.execute_callback,
callback_group=ReentrantCallbackGroup(),
goal_callback=self.goal_callback,
cancel_callback=self.cancel_callback)
self.get_logger().info("Turtlebot3 patrol action server has been initialised.")
def destroy(self):
self._action_server.destroy()
super().destroy_node()
def goal_callback(self, goal_request):
# Accepts or rejects a client request to begin an action
self.get_logger().info('Received goal request :)')
self.goal = goal_request
return GoalResponse.ACCEPT
def cancel_callback(self, goal_handle):
# Accepts or rejects a client request to cancel an action
self.get_logger().info('Received cancel request :(')
return CancelResponse.ACCEPT
async def execute_callback(self, goal_handle):
self.get_logger().info('Executing goal...')
radius = self.goal.radius # unit: m
speed = 0.5 # unit: m/s
feedback_msg = Patrol.Feedback()
total_driving_time = 2 * math.pi * radius / speed
feedback_msg.time_left = total_driving_time
last_time = self.get_clock().now()
# Start executing an action
while (feedback_msg.time_left > 0):
if goal_handle.is_cancel_requested:
goal_handle.canceled()
self.get_logger().info('Goal canceled')
return Patrol.Result()
curr_time = self.get_clock().now()
duration = Duration()
duration = (curr_time - last_time).nanoseconds / 1e9 # unit: s
feedback_msg.time_left = total_driving_time - duration
self.get_logger().info('Time left until the robot stops: {0}'.format(feedback_msg.time_left))
goal_handle.publish_feedback(feedback_msg)
# Give vel_cmd to Turtlebot3
twist = Twist()
twist = self.drive_circle(radius, speed)
self.cmd_vel_pub.publish(twist)
# Process rate
time.sleep(0.010) # unit: s
# When the action is completed
twist = Twist()
self.cmd_vel_pub.publish(twist)
goal_handle.succeed()
result = Patrol.Result()
result.success = True
self.get_logger().info('Returning result: {0}'.format(result.success))
return result
def drive_circle(self, radius, velocity):
self.twist = Twist()
self.linear_velocity = velocity # unit: m/s
self.angular_velocity = self.linear_velocity / radius # unit: rad/s
self.twist.linear.x = self.linear_velocity
self.twist.angular.z = self.angular_velocity
return self.twist
def main(args=None):
rclpy.init(args=args)
patrol_action_server = Turtlebot3PatrolServer()
# Use a MultiThreadedExecutor to enable processing goals concurrently
executor = MultiThreadedExecutor()
rclpy.spin(patrol_action_server, executor=executor)
patrol_action_server.destroy()
rclpy.shutdown()
if __name__ == '__main__':
main()
The code used above is just an adaptation of a code already provided by ROBOTIS.
Before we compile our code, we also have to open the patrol_action_server/setup.py file and modify the entry_points section to define our executable called patrol_action_server_exe in the following way:
We can now run our server with the following commands:
source install/setup.bash
ros2 run patrol_action_server patrol_action_server_exe
The server should start with no problems:
[INFO] [1651528559.914166370] [turtlebot3_patrol_server]: Turtlebot3 patrol action server has been initialised
Calling our ROS2 Action Server
Ok, if you did not kill the Action Server launched in the previous section, please open a second terminal that we will use to call the Action Server.
With “ros2 node list” we should be able to find our node running:
ros2 node list
/turtlebot3_patrol_server
And with ros2 action list, we should be able to see the /patrol action:
ros2 action list
/patrol
We can now call our Action Server. If you remember when we created the Patrol.action, we defined a radius. Let’s them call the Action Server passing a radius of 0.5. The robot will be basically rotating:
You should now see the feedback sent by the action server:
Waiting for an action server to become available...
Sending goal:
radius: 0.5
Goal accepted with ID: dd32bc835d7a4ef5ae854d0bfb4b119f
Feedback:
time_left: 6.2831525802612305
Feedback:
time_left: 6.271763801574707
Feedback:
time_left: 6.260392665863037
Feedback:
time_left: 6.2484917640686035
Feedback:
time_left: 6.237414836883545
Feedback:
time_left: 6.2265496253967285
Feedback:
time_left: 6.215761661529541
...
^CCanceling goal...
Feedback:
time_left: 5.634908676147461
Goal canceled.
Remember that you can easily cancel the call to the action server by pressing CTRL+C.
If you look at the simulation after sending a goal to the Action Server, you should see the robot spinning around 0.5 meters.
Congratulations. You now know how to create a ROS2 Action Server from scratch. If you want more details about the code of the Action Server, please check the video in the next section.
Youtube video
So this is the post for today. Remember that we have the live version of this post on YouTube. If you liked the content, please consider subscribing to our youtube channel. We are publishing new content ~every day.
Keep pushing your ROS Learning.
Related Courses & Training
If you want to learn more about ROS and ROS2, we recommend the following courses:
In order to better understand ROS2 Interfaces, we need to have ROS2 installed in our system, and sometimes it is also useful to have some simulations. To make your life easier, we already prepared a rosject that you can use, with ROS2 already installed: https://app.theconstructsim.com/#/l/4a5c5215/.
You can download the rosject on your own computer if you want to work locally, but just by copying the rosject (clicking the link), you will have a setup already prepared for you.
After the rosject has been successfully copied to your own area, you should see a Run button. Just click that button to launch the rosject (below you have a rosject example).
Learn ROS2 – Run rosject (example of the RUN button)
After pressing the Run button, you should have the rosject loaded. Let’s now head to the next section to really get some real practice.
ROS2 Interfaces overview
ROS2 Interfaces is a common language behind ROS2 messages, services, and actions.
Let’s start listing the interfaces. For that, let’s first open a terminal:
Open a new Terminal
After the terminal is open, you can list the interfaces with the command ros2 interface list. The output would be something similar to the following:
As you can see in the output above, the same command returned Messages, Actions, and Services.
Creating our first ROS2 Interface (a message)
If you are using the rosject provided at the beginning of this post, there is already a ROS2 Package called checking_interfaces on the /home/user/ros2_ws/src/checking_interfaces path. The package also already contains a message on the ~/ros2_ws/src/checking_interfaces/msg/NewMsg.msg path.
If you are not using the provided rosject, you can create a package with:
If you are using the rosject you do not need to create the message msg/NewMsg.msg, but for learning purposes, let’s see how to create it.
~/ros2_ws/src/checking_interfaces$ ls ~/ros2_ws/src/checking_interfaces$ ls msg/NewMsg.msg
cd ~/ros2_ws/src/checking_interfaces
mkdir msg
cd msg
touch NewMsg.msg
Then, paste the following content on the NewMsg.msg file:
bool check
int16 number
string text
If you are wondering how to know which types are accepted for the properties of the new message, the types available are:
ROS2 build-in-types
Type name
C++
Python
DDS type
bool
bool
builtins.bool
boolean
byte
uint8_t
builtins.bytes*
octet
char
char
builtins.str*
char
float32
float
builtins.float*
float
float64
double
builtins.float*
double
int8
int8_t
builtins.int*
octet
uint8
uint8_t
builtins.int*
octet
int16
int16_t
builtins.int*
short
uint16
uint16_t
builtins.int*
unsigned short
int32
int32_t
builtins.int*
long
uint32
uint32_t
builtins.int*
unsigned long
int64
int64_t
builtins.int*
long long
uint64
uint64_t
builtins.int*
unsigned long long
string
std::string
builtins.str
string
wstring
std::u16string
builtins.str
string
Compiling our ROS2 Interface
In order to compile our ROS2 Interface, we have to touch the ~/ros2_ws/src/checking_interfaces/CMakeLists.txt file. Again, if you are using the rosject we provided, everything is already prepared for you. For learning purposes, let’s open the file to modify it. Let’s start by opening the Code Editor:
Open the IDE – Code Editor
After the Code Editor is open, feel free to open the checking_interfaces/CMakeListst.txt file.
Around line 13 of the CMakeListst.txt file, we have to add the following lines:
The first line mentioned above includes the rosidl_default_generators package, which will be used to “compile” our message to make it available for Python and C++, so that our nodes can use the interface.
In the rosidl_generate_interfaces we add the name of the interface (message, service, or action) that we want to compile, which in this case is “msg/NewMsg.msg”.
After setting up the CMakeLists.txt file, you also have to set up the checking_interfaces/package.xml file. We have to add rosidl_default_generators as a build dependency, we also need to add the rosidl_default_runtime execution dependency, and we also need the rosidl_interface_packages “member of group”. In the end, the lines you would need to add are:
After saving the files, you can compile the interface with:
cd ~/ros2_ws/

colcon build --packages-select checking_interfaces
The package should compile with no errors:
...
This may be promoted to an error in a future release of colcon-core.
Starting >>> checking_interfaces
Finished <<< checking_interfaces [5.27s]
Summary: 1 package finished [5.87s]
After the package is compiled, we can now source the installation folder so that ROS can find what we have compiled so far:
source install/setup.bash
If we now list the interfaces again and search for our NewMsg, we should be able to find it:
ros2 interface list | grep New
# ...
checking_interfaces/msg/NewMsg
# ...
As we can see in the output above, we have a message called NewMsg.
Using the interface we just created
If we have just created the checking_interfaces/msg/NewMsg, we should be able to use it. We can check its definition with:
ros2 interface show checking_interfaces/msg/NewMsg
which shows the exact thing we defined in the NewMsg.msg file:
bool check
int16 number
string text
Let’s now create a publisher in a topic called /testing using this message:
Similar to when defining our message, we already have a service defined on ~/ros2_ws/src/checking_interfaces/srv/NewServiceMessage.srv, but we will be following the process for learning purposes in case you are not using the rosject we provided, or wants to learn with hands-on.
cd ~/ros2_ws/src/checking_interfaces
mkdir srv
cd srv
touch NewServiceMessage.srv
You can now open the NewServiceMessage.srv file with the Code Editor and paste the following content on it:
bool check
---
int16 number
string text
In order to compile the service interface, you have to open the CMakeLists.txt file again and add “srv/NewServiceMessage.srv” right after “msg/NewMsg.msg” that we added earlier around line 15 of our CMakeLists.txt file. The rosidl_generate_interfaces section of the file would be like:
As you can see so far, the same rosidl_generate_interfaces is used to compile Messages and Services.
You may have noticed that we have a line containing “—“ in the NewServiceMessage.srv file. These three “—” basically separate the Service Request from the Service Response.
The request will be “bool check“, and the fields used in a response will be “int16 number” and “string text“.
After saving the file changes, we can just compile the service interface in the same way that we compiled the message interface:
cd ~/ros2_ws/

colcon build --packages-select checking_interfaces
source install/setup.bash
If you now list the interfaces, you should be able to easily find our NewServiceMessage.
ros2 interface list | grep New


checking_interfaces/msg/NewMsg
checking_interfaces/srv/NewServiceMessage
Congratulations. You now know how to easily create ROS2 Interfaces. Please go ahead and try to create ROS2 Action Interfaces yourself, or you can also check the courses that we have listed at the end of this post.
Youtube video
So this is the post for today. Remember that we have the live version of this post on YouTube. If you liked the content, please consider subscribing to our youtube channel. We are publishing new content ~every day.
Keep pushing your ROS Learning.
Related Courses & Training
If you want to learn more about ROS and ROS2, we recommend the following courses:
In order to better understand DDS/RTTPS used in ROS2, we need to have ROS2 installed in our system, and it is also useful to have some simulations. To make your life easier, we already prepared a rosject with a simulation for that: https://app.theconstructsim.com/#/l/4a5ab758/ .
You can download the rosject on your own computer if you want to work locally, but just by copying the rosject (clicking the link), you will have a setup already prepared for you.
After the rosject has been successfully copied to your own area, you should see a Run button. Just click that button to launch the rosject (below you have a rosject example).
Learn ROS2 – Run rosject (example of the RUN button)
After pressing the Run button, you should have the rosject loaded. Let’s now head to the next section to really get some real practice.
Up until ROS2 Foxy, the default DDS Implementation used by ROS was eProsima’s Fast DDS (previous default RMW)
Eclipse Cyclone DDS (default one since Galactic)
For ROS2 Galactic, as we already mentioned earlier, the default DDS Implementation is Cyclone DDS. The Galactic version was released on May23rd, 2021, and is supported until November 2022.
Running publishers and subscribers with default DDS
Assuming you have opened the rosject by clicking the Run button mentioned in earlier sections, let’s now Open a Terminal in order to launch ROS nodes.
Open a new Terminal
In the first terminal that is open, let’s start a publisher by running the command below:
ros2 run demo_nodes_cpp talker
Please open a second terminal and run a subscriber there:
ros2 run demo_nodes_cpp listener
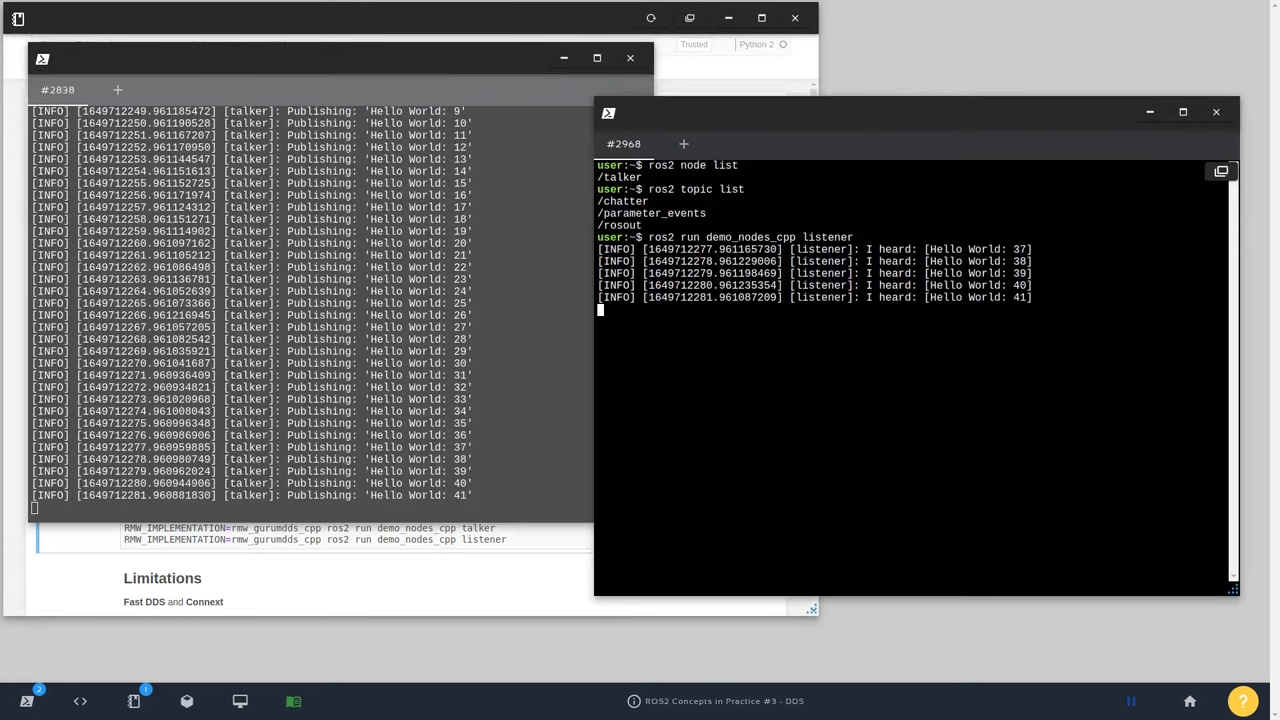
If everything went well, the publisher and subscriber should be working with no problems:
ROS2 Concepts in Practice #3 – DDS_RTPS – publisher and subscriber
Since we did not inform the DDS Implementation that we are using, they are using the default one, which for ROS Galactic is Cyclone DDS.
You may be asking: How do I know which implementation I’m really using?
That is quite easy. After running ros2 topic list, a ROS2 Daemonwill be launched and in the command line, you will see the DDS Implementation used. If you then list the process and search for rmw using grep, you will find the implementation being used.
Let’s search the DDS with the command “ps faux | grep rmw“:
As we can see in the output “–rmw-implementation rmw_cyclonedds_cpp“, the implementation used for ROS Galactic is Cyclone DDS.
RMW_IMPLEMENTATION
If you want to use different DDS Implementations, you can make usage of the environment variable called RMW_IMPLEMENTATION that ROS uses.
Let’s put it into practice in the next sections.
Using eProsima’s Fast DDS
In order to use FastDDS, you have to export the following variable:
export RMW_IMPLEMENTATION=rmw_fastrtps_cpp
On The Construct we already have ros-galactic-rmw-fastrtps-cpp installed, but if running the nodes in your own computer, you may need to install it with:
You can also set the variable when starting each node, for example. Please go to the first terminal, kill the current publisher by pressing CTRL-C, and then let’s launch the publisher with FastDDS with the command below:
RMW_IMPLEMENTATION=rmw_fastrtps_cpp ros2 run demo_nodes_cpp talker
And to run the subscriber using FastDDS, you can just set RMW_IMPLEMENTATION:
RMW_IMPLEMENTATION=rmw_fastrtps_cpp ros2 run demo_nodes_cpp listener
You can go even further and use different DDS Implementations for different ROS Nodes. To test this, please open a third terminal and do not kill the current publisher running with FastDDS. You can then run the listener in a third terminal using CyCloneDDS with:
RMW_IMPLEMENTATION=rmw_cyclonedds_cpp ros2 run demo_nodes_cpp listener
The listener should be working with no problems.
Using CycloneDDS
In order to use CycloneDDS, you just have to define RMW_IMPLEMENTATION=rmw_cyclonedds_cpp, and you will also need to have the ros-galactic-rmw-cyclonedds-cpp package installed.
On The Construct, this package is already installed, but if you are running the ROS2 nodes on your computer, you may need to install the package ros-galactic-rmw-cyclonedds-cpp with:
You can then run the talker/publisher and listener/subscriber using CycloneDDS with:
RMW_IMPLEMENTATION=rmw_cyclonedds_cpp ros2 run demo_nodes_cpp talker

RMW_IMPLEMENTATION=rmw_cyclonedds_cpp ros2 run demo_nodes_cpp listener
Using GurumNetworks GurumDDS
In order to use GurumDDS, you have to export RMW_IMPLEMENTATION=rmw_gurumdds_cpp.
Let’s try to run the publisher:
RMW_IMPLEMENTATION=rmw_gurumdds_cpp ros2 run demo_nodes_cpp talker
Since we do not have that DDS implementation installed, you should have an error similar to the following:
[ERROR] [1651517328.801031797] [rcl]: Error getting RMW implementation identifier /
RMW implementation not installed (expected identifier of 'rmw_gurumdds_cpp'),
with error message 'failed to load shared library 'librmw_gurumdds_cpp.so' due to dlopen error:
librmw_gurumdds_cpp.so: cannot open shared object file: No such file or directory,
at /tmp/binarydeb/ros-galactic-rcutils-4.0.2/src/shared_library.c:99,
at /tmp/binarydeb/ros-galactic-rmw-implementation-2.4.1/src/functions.cpp:75', exiting with 1.,
at /tmp/binarydeb/ros-galactic-rcl-3.1.2/src/rcl/rmw_implementation_identifier_check.c:139
The problem happens because we do not have the GurumDDS installed by default on The Construct. You have to install the ros-galactic-rmw-gurumdds-cpp package with:
After that, running the publisher and subscriber should work with no problems:
RMW_IMPLEMENTATION=rmw_gurumdds_cpp ros2 run demo_nodes_cpp talker
Hm, now you probably have a new error similar to the following:
user:~$ RMW_IMPLEMENTATION=rmw_gurumdds_cpp ros2 run demo_nodes_cpp talker
22-05-02 18:52:44.719 2804 2804 E [License] Invalid license
22-05-02 18:52:44.719 2804 2804 E [License] Reason: No license for feature(gurumdds-x86_64-linux)
22-05-02 18:52:44.719 2804 2804 E [License] Please contact us via email below for license extension and inquiries.
22-05-02 18:52:44.719 2804 2804 E [License] email: contact@gurum.cc
Well, I think it is clear to you that this DDS implementation needs a special license. If you want to use this implementation, it would be nice to reach the creators through the email contact@gurum.cc.
Using Connext DDS
In order to use Connext DDS to run a ROS2 node, for example, you can just:
RMW_IMPLEMENTATION=rmw_connext_cpp ros2 run demo_nodes_cpp talker
But we will have an error also because this DDS implementation is not installed. The error is the following:
[ERROR] [1651517890.844612937] [rcl]: Error getting RMW implementation identifier /
RMW implementation not installed (expected ide ntifier of 'rmw_connext_cpp'),
with error message 'failed to load shared library 'librmw_connext_cpp.so' due to dlopen error:
librmw_connext_cpp.so: cannot open shared object file:
No such file or directory, at /tmp/binarydeb/ros-galactic-rcutils-4.0.2/src/sha
red_library.c:99,
at /tmp/binarydeb/ros-galactic-rmw-implementation-2.4.1/src/functions.cpp:75',
exiting with 1.,
at /tmp/binarydeb/ros-galactic-rcl-3.1.2/src/rcl/rmw_implementation_identifier_check.c:139
If you want to install this DDS implementation, I would ask you to follow the instructions in the link below:
We saw in the Using FastDDS section that we can use different DDSs for the publisher and subscriber.
We cannot use, however, any combinations of DDS implementations because there are some limitations. The know limitations are:
Fast DDS and Connext limitations
WString published by Fast DDS can’t be received correctly by Connext on macOS
Connext and Cyclone DDS
Does not support pub/sub communication for WString
Connext Dynamic and Connext Dynamic
Does not support C services
Youtube video
So this is the post for today. Remember that we have the live version of this post on YouTube. If you liked the content, please consider subscribing to our youtube channel. We are publishing new content ~every day.
Keep pushing your ROS Learning.
Related Courses & Training
If you want to learn more about ROS and ROS2, we recommend the following courses:
![[ROS2 How-to] Install third-party Python packages using ROS2 #5](https://www.theconstruct.ai/wp-content/uploads/2022/09/how-to-install-ros2-depencencies-using-rosdep-apt-get-pip.jpg)


![[ROS2 How-to] #2 – Create a ROS2 action server](https://www.theconstruct.ai/wp-content/uploads/2022/05/how-to-use-action-server-in-ros2.jpeg)
![[ROS2 How-to] #2 - Create a ROS2 action server - Simulation running](https://www.theconstruct.ai/wp-content/uploads/2022/05/ROS2-How-to-2-Create-a-ROS2-action-server-Simulation-running.png)