In this ROS video tutorial we will show you a quick example of how to control a Gazebo simulated ur5 robotic arm with MoveIt!.
* Get all the ROS code of the video in this link: http://www.rosject.io/l/c3b7cee/
Step 1. Create a project in ROS Development Studio(ROSDS)
We can do any ROS development we want easily, without setting up environment locally in ROSDS and that’s the reason why we will use ROSDS for this tutorial. If you haven’t had an account yet. You can create one here for free now. After logging in, let’s begin our journey by clicking on the create new project and call it demo.
Step 2. Clone the universal robot repo
Please open a shell in ROSDS(tools->shell) and type the following command to clone the repo from ROS Industrial
NOTICE: We now put every simulation-related content under simulation_ws
cd ~/simulation_ws/src
git clone https://github.com/ros-industrial/universal_robot.git
NOTICE: Then you can launch the simulation from Simulations->Select Launch file->ur5.launch
Step 3. Generate Moveit config file
Type the following command to start configuration
roslaunch moveit_setup_assistant setup_assistant.launch
Then you can open the graphical tool from tools:
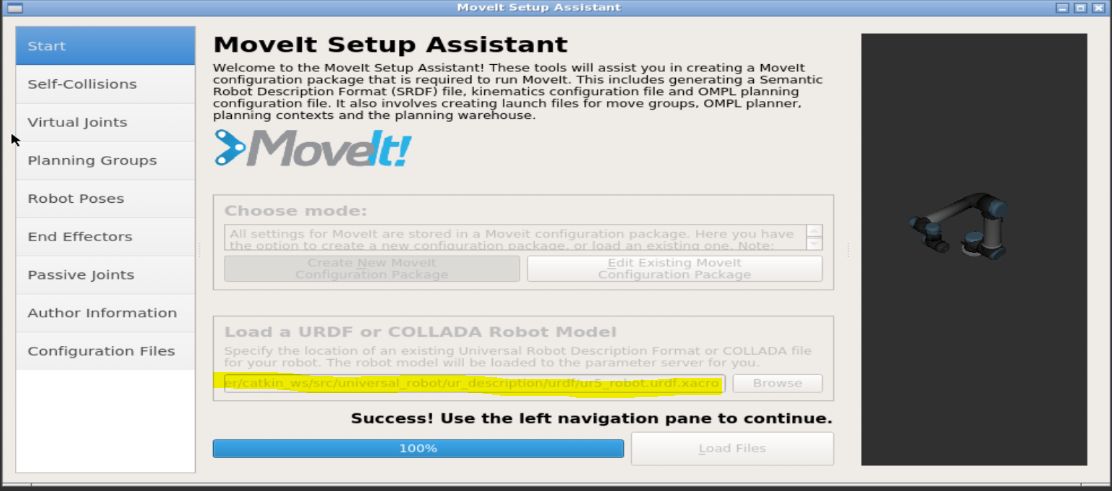
1.Select the xarco file (NOTICE: Use simulation_ws instead of catkin_ws now)
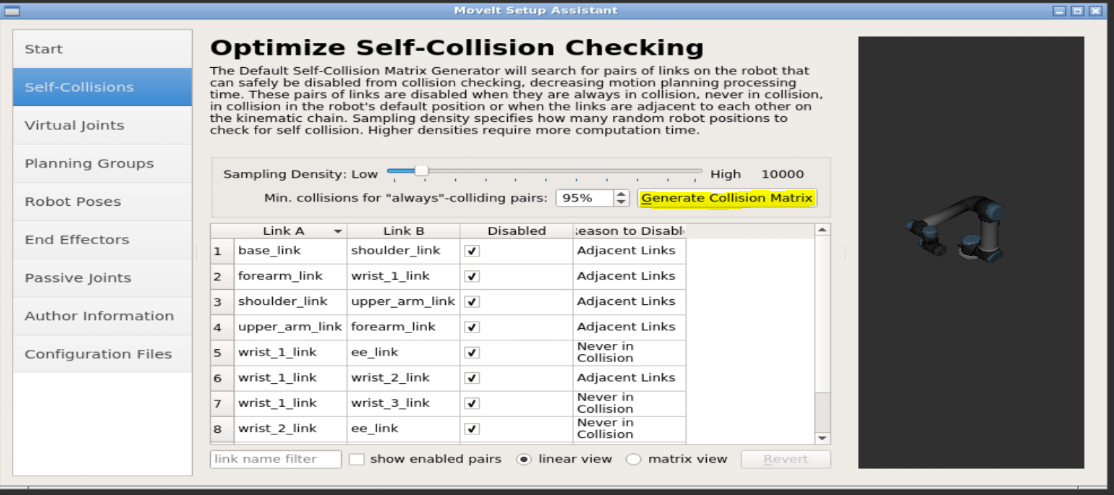
2.Self-Collisions: click generate collision matrix
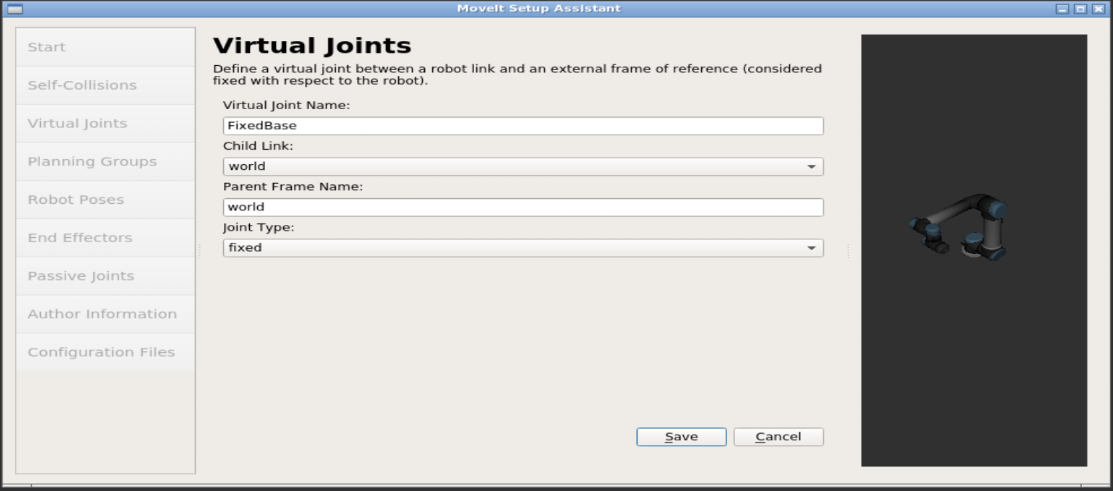
3.Virtual Joints: click add virtual joint then edit it as the following image.
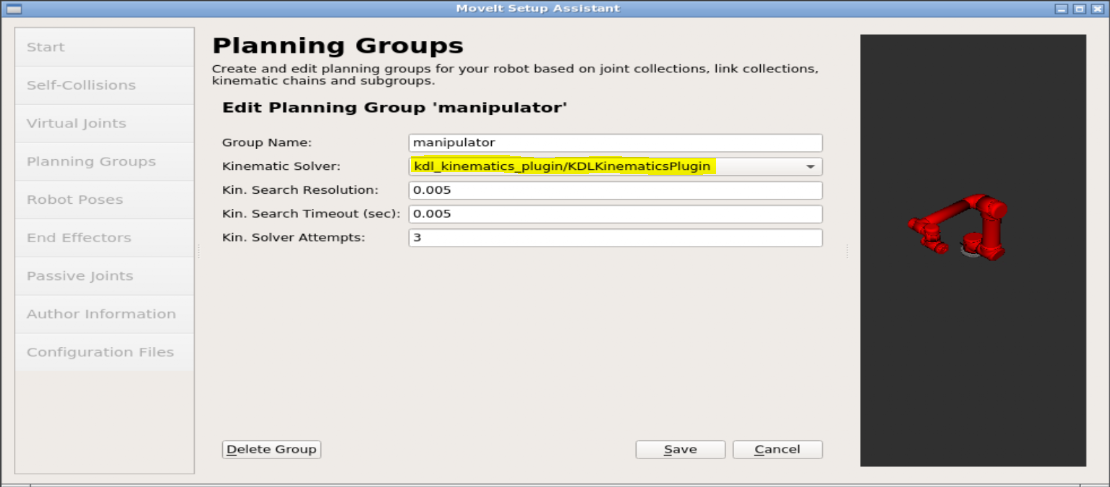
4.Planning Group: click add group then configure it as the following image. click on add kinetic chain and use base_link as Base Link and tool0 as Tip Link
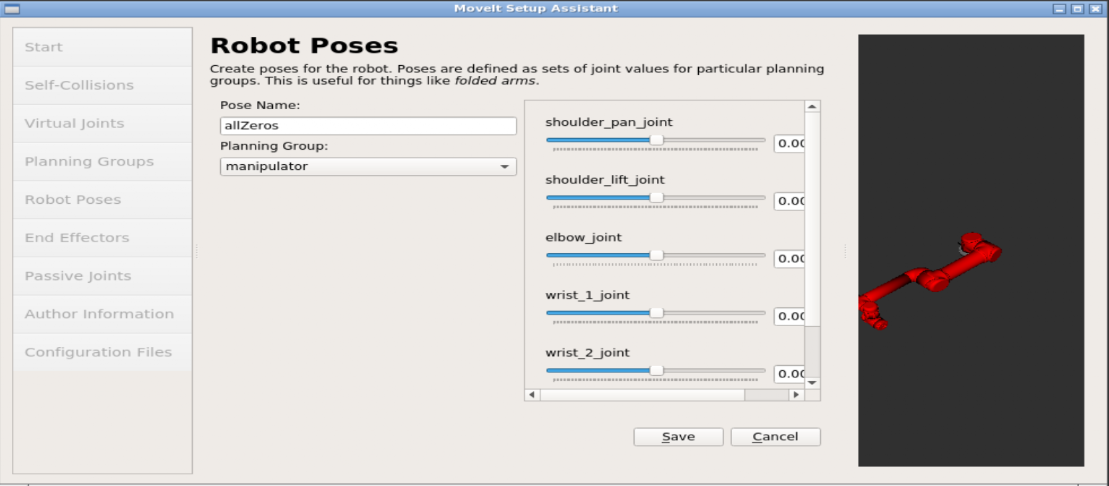
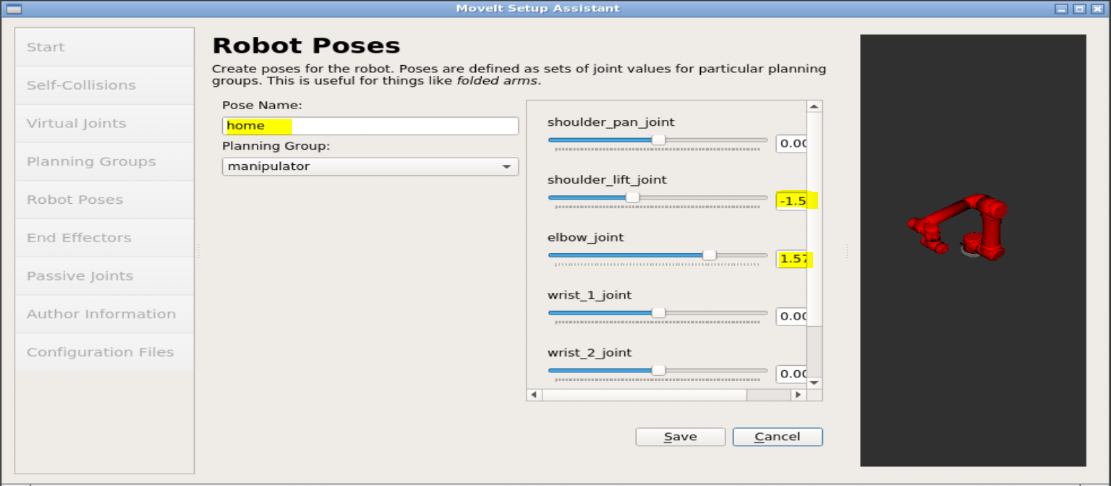
5.Robot Poses: Add the following poses
6.Skip the end effectors and passive joints to the author information
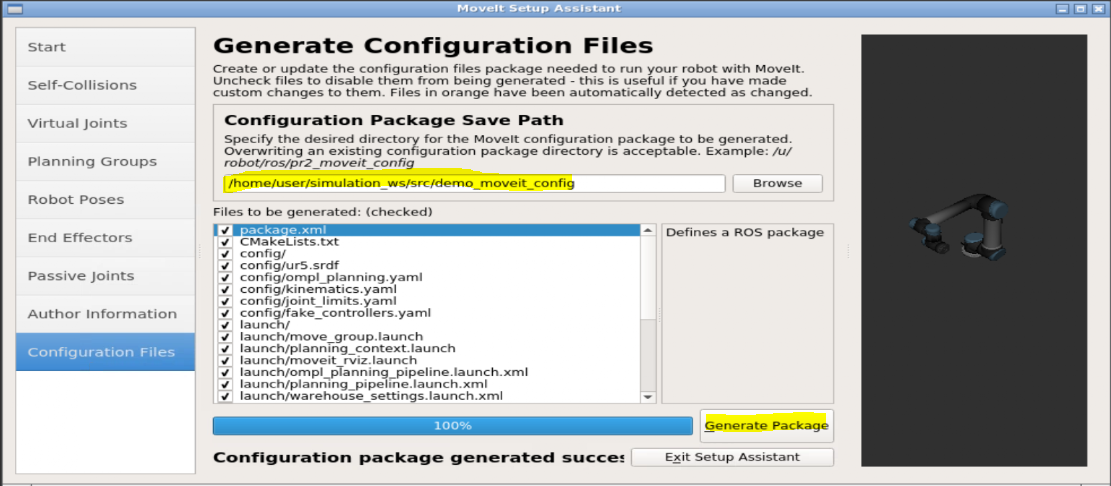
7. Finish and generate config file: select the folder under simulation_ws
Step 4. Configure the controller
Create a file called controller.yaml under /demo_moveit_config/config directory with the following content
controller_list:
  - name: arm_contoller
    action_ns: "follow_joint_trajectory"
    type: FollowJointTrajectory
    joints: [shoulder_pan_joint, shoulder_lift_joint, elbow_joint, wrist_1_joint, wrist_2_joint, wrist_3_joint]
Create another file called joint_names.yaml under the same directory with the following content
controller_joint_names: [shoulder_pan_joint, shoulder_lift_joint, elbow_joint, wrist_1_joint, wrist_2_joint, wrist_3_joint]
Modify the ur5_moveit_controller_manager.launch file with the following content
<launch>
  <rosparam file="$(find demo_moveit_config)/config/controllers.yaml"/>
  <param name="use_controller_manager" value="false"/>
  <param name="trajectory_execution/execution_duration_monitoring" value="false"/>
  <param name="moveit_controller_manager" value="moveit_simple_controller_manager/MoveItSimpleControllerManager"/>
</launch>
Create a new launch file called demo_planning_execution.launch with the following content
<launch>

  <rosparam command="load" file="$(find myrobot_moveit_config)/config/joint_names.yaml"/>

  <include file="$(find demo_moveit_config)/launch/planning_context.launch" >
    <arg name="load_robot_description" value="true" />
  </include>

  <node name="joint_state_publisher" pkg="joint_state_publisher" type="joint_state_publisher">
    <param name="/use_gui" value="false"/>
    <rosparam param="/source_list">[/joint_states]</rosparam>
  </node>

  <include file="$(find demo_moveit_config)/launch/move_group.launch">
    <arg name="publish_monitored_planning_scene" value="true" />
  </include>

  <include file="$(find demo_moveit_config)/launch/moveit_rviz.launch">
    <arg name="config" value="true"/>
  </include>

</launch>
Now you can launch the controller with the command
roslaunch demo_moveit_config demo_planning_execution.launch
You may also want to resize the window in graphical tool with
wmctrl -r :ACTIVE: -e 0,65,24,1500,550
You can try to do the planning now and execute, you should see the robot arm moving as you planned in moveit!
Edit by: Tony Huang





There is a mistake in: called demo_planning_execution.launch
It shouldn’t be “myrobot_moveit_config” but instead “demo_moveit_config”.
Hello, Thanks a lot for the very great tutorial. There are few mistakes in the files:
-(controller_list:
– name: arm_contoller) it should be- name: arm_controller (r is missing from the controller name)
.-There is a mistake in: called demo_planning_execution.launch
It shouldn’t be “myrobot_moveit_config” but instead “demo_moveit_config”
-Create a file called controller.yaml
It should be controllers.yaml
Many thanks
That typo in the arm_controller had me stuck for hours! Thanks so much for leaving that comment!!
+1
hi, i have an error that says unused args [config] for include of moveit_rviz.launch. does anyone know how to solve this issue. Thank you in advance.
“config” in your demo_planning_execution.launch must be changed to rviz_config
‘param’ attribute must be set for non-dictionary values
XML is
The traceback for the exception was written to the log file
i am getting this error
Hello I have an error which says:
WARN: unrecognized ‘param’ tag in tag
WARN: unrecognized ‘param’ tag in tag
RLException: unused args [execution_type] for include of [/home/user/catkin_ws/src/myur5sim/myur5_moveit_config/launch/myur5_moveit_controller_manager.launch.xml]
The traceback for the exception was written to the log file.
Does anyone know how to solve this issue?
I would like to move the ur5 robot with the end-effector orientation fixed throughout the movemnt. is it possible? what should I use? I tried “constrainits” in moveit, it was not working.