Explore the basics of robot modeling using the URDF
In this tutorial, we’re going to explore the basics of robot modeling using the Unified Robot Description Format (URDF). At the end of this tutorial, we will have a model ready and running in Gazebo simulator. Let’s start!
STEP 1
First of all, this project was created to help ROS beginners to understand the main tools ROS provides using a quite simple kind of robot. In order to do that, we are going to use ROSDS (ROS Development Studio). In this first part, we are going to create a robot model, visualize it in RViz and spawn it into a gazebo world.
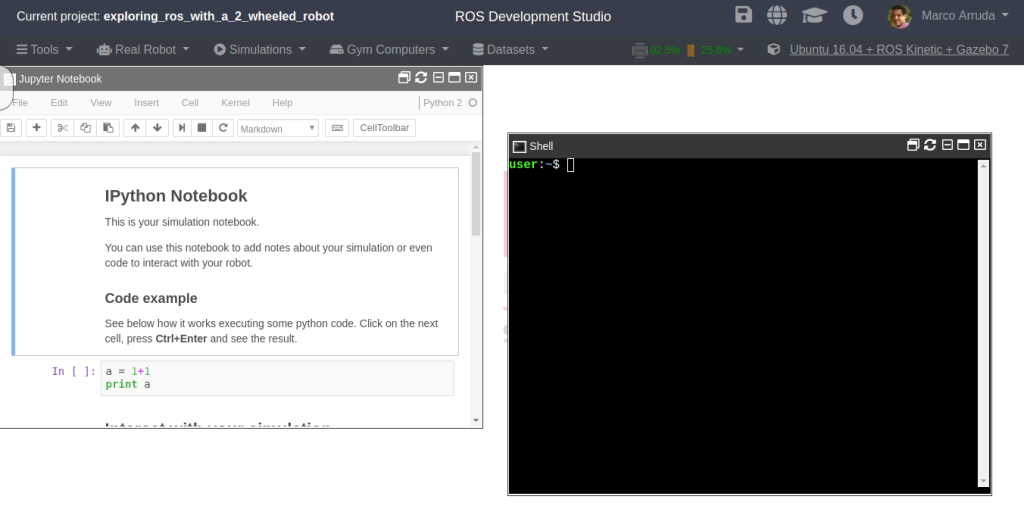
Go to this page to start using it! Create a new ROSject and open it. That’s our development environment or ROSDS desktop:
STEP 2
Let’s start creating our package, inside of simulation_ws/src:
user:~$ cd ~/simulation_ws/src
user:~$ catkin_create_pkg m2wr_description urdf
The first we are gonna do it to create the robot description file. We are using a XACRO file. It’s a big file in this first moment, we will explain how to break it into different ones in the next posts, but for now let’s keep it like that. It’s shown only the beginning of the file. See the full content here.
STEP 3
Create a new folder urdf inside of ~/simulation_ws/src/m2wr_description and paste the robot description to a new file: ~/simulation_ws/src/m2wr_description/urdf/m2wr.xacro
<?xml version="1.0" ?>
<robot name="m2wr" xmlns:xacro="http://www.ros.org/wiki/xacro">
  <material name="black">
    <color rgba="0.0 0.0 0.0 1.0"/>
  </material>
  <material name="blue">
    <color rgba="0.203125 0.23828125 0.28515625 1.0"/>
  </material>
  <material name="green">
    <color rgba="0.0 0.8 0.0 1.0"/>
  </material>
  <material name="grey">
    <color rgba="0.2 0.2 0.2 1.0"/>
  </material>
  <material name="orange">
    <color rgba="1.0 0.423529411765 0.0392156862745 1.0"/>
  </material>
  <material name="brown">
    <color rgba="0.870588235294 0.811764705882 0.764705882353 1.0"/>
  </material>
  <material name="red">
    <color rgba="0.80078125 0.12890625 0.1328125 1.0"/>
  </material>
  <material name="white">
    <color rgba="1.0 1.0 1.0 1.0"/>
  </material>

  <gazebo reference="link_chassis">
    <material>Gazebo/Orange</material>
  </gazebo>
  <gazebo reference="link_left_wheel">
    <material>Gazebo/Blue</material>
  </gazebo>
  <gazebo reference="link_right_wheel">
    <material>Gazebo/Blue</material>
  </gazebo>

  <gazebo>
    <plugin filename="libgazebo_ros_diff_drive.so" name="differential_drive_controller">
      <legacyMode>false</legacyMode>
      <alwaysOn>true</alwaysOn>
      <updateRate>20</updateRate>
      <leftJoint>joint_left_wheel</leftJoint>
      <rightJoint>joint_right_wheel</rightJoint>
      <wheelSeparation>0.2</wheelSeparation>
      <wheelDiameter>0.2</wheelDiameter>
      <torque>0.1</torque>
      <commandTopic>cmd_vel</commandTopic>
      <odometryTopic>odom</odometryTopic>
      <odometryFrame>odom</odometryFrame>
      <robotBaseFrame>link_chassis</robotBaseFrame>
    </plugin>
  </gazebo>

  <link name="link_chassis">
    <!-- pose and inertial -->
    <pose>0 0 0.1 0 0 0</pose>
    <inertial>
      <mass value="5"/>
      <origin rpy="0 0 0" xyz="0 0 0.1"/>
      <inertia ixx="0.0395416666667" ixy="0" ixz="0" iyy="0.106208333333" iyz="0" izz="0.106208333333"/>
    </inertial>
    <!-- body -->
    <collision name="collision_chassis">
      <geometry>
        <box size="0.5 0.3 0.07"/>
      </geometry>
    </collision>
    <visual>
      <origin rpy="0 0 0" xyz="0 0 0"/>
      <geometry>
        <box size="0.5 0.3 0.07"/>
      </geometry>
      <material name="blue"/>
    </visual>
    <!-- caster front -->
    <collision name="caster_front_collision">
      <origin rpy=" 0 0 0" xyz="0.35 0 -0.05"/>
      <geometry>
        <sphere radius="0.05"/>
      </geometry>
      <surface>
        <friction>
          <ode>
            <mu>0</mu>
            <mu2>0</mu2>
            <slip1>1.0</slip1>
            <slip2>1.0</slip2>
          </ode>
        </friction>
      </surface>
    </collision>
    <visual name="caster_front_visual">
      <origin rpy=" 0 0 0" xyz="0.2 0 -0.05"/>
      <geometry>
        <sphere radius="0.05"/>
      </geometry>
    </visual>
  </link>

  <link name="link_right_wheel">
    <inertial>
      <mass value="0.2"/>
      <origin rpy="0 1.5707 1.5707" xyz="0 0 0"/>
      <inertia ixx="0.000526666666667" ixy="0" ixz="0" iyy="0.000526666666667" iyz="0" izz="0.001"/>
    </inertial>
    <collision name="link_right_wheel_collision">
      <origin rpy="0 1.5707 1.5707" xyz="0 0 0"/>
      <geometry>
        <cylinder length="0.04" radius="0.1"/>
      </geometry>
    </collision>
    <visual name="link_right_wheel_visual">
      <origin rpy="0 1.5707 1.5707" xyz="0 0 0"/>
      <geometry>
        <cylinder length="0.04" radius="0.1"/>
      </geometry>
    </visual>
  </link>

  <joint name="joint_right_wheel" type="continuous">
    <origin rpy="0 0 0" xyz="-0.05 0.15 0"/>
    <child link="link_right_wheel"/>
    <parent link="link_chassis"/>
    <axis rpy="0 0 0" xyz="0 1 0"/>
    <limit effort="10000" velocity="1000"/>
    <joint_properties damping="1.0" friction="1.0"/>
  </joint>

  <link name="link_left_wheel">
    <inertial>
      <mass value="0.2"/>
      <origin rpy="0 1.5707 1.5707" xyz="0 0 0"/>
      <inertia ixx="0.000526666666667" ixy="0" ixz="0" iyy="0.000526666666667" iyz="0" izz="0.001"/>
    </inertial>
    <collision name="link_left_wheel_collision">
      <origin rpy="0 1.5707 1.5707" xyz="0 0 0"/>
      <geometry>
        <cylinder length="0.04" radius="0.1"/>
      </geometry>
    </collision>
    <visual name="link_left_wheel_visual">
      <origin rpy="0 1.5707 1.5707" xyz="0 0 0"/>
      <geometry>
        <cylinder length="0.04" radius="0.1"/>
      </geometry>
    </visual>
  </link>

  <joint name="joint_left_wheel" type="continuous">
    <origin rpy="0 0 0" xyz="-0.05 -0.15 0"/>
    <child link="link_left_wheel"/>
    <parent link="link_chassis"/>
    <axis rpy="0 0 0" xyz="0 1 0"/>
    <limit effort="10000" velocity="1000"/>
    <joint_properties damping="1.0" friction="1.0"/>
  </joint>
</robot>
What do we have there?
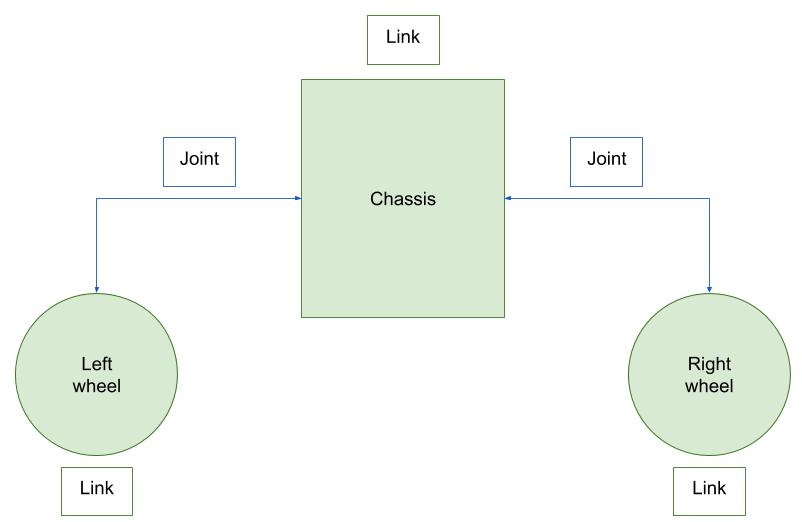
Basically, it’s a robot composed by 3 links and 2 joints. Every robot needs a base link, in this case, the chassis is in charge of connecting all the parts of the robot. See below an image that represents the relation between the links and joints. (Links in green, joints in blue).
STEP 4
We have our robot model defined. Let’s check it in RViz. In order to do that, let’s create a launch file and that opens RViz and fill its robot visualization with our fresh new model.
Create a new folder: ~/simulation_ws/src/m2wr_description/launch/rviz.launch
You can copy & paste the content below to the launch file we have just created:
<?xml version="1.0"?>
<launch>

  <param name="robot_description" command="cat '$(find m2wr_description)/urdf/m2wr.xacro'"/>

  <!-- send fake joint values -->
  <node name="joint_state_publisher" pkg="joint_state_publisher" type="joint_state_publisher">
    <param name="use_gui" value="False"/>
  </node>

  <!-- Combine joint values -->
  <node name="robot_state_publisher" pkg="robot_state_publisher" type="state_publisher"/>

  <!-- Show in Rviz   -->
  <node name="rviz" pkg="rviz" type="rviz" />

</launch>
Now, open a terminal or get back to the one you had opened before and compile the simulation_ws. (we actually don’t have anything to be compiled, but we need catkin to generate ROS header files, in order to have it into our $ROS_PACKAGE_PATH). After compiling it, launch the RViz visualization of the robot. You’ll execute something like:
user:~$ cd ~/simulation_ws
user:~/simulation_ws/$ catkin_make
user:~/simulation_ws/$ roslaunch m2wr_description rviz.launch
STEP 5
Now, let’s open the Graphical Tools application:
Great! We have a consistent robot model!
Now.. Let’s spawn it into a gazebo simulation. First, create a new launch file: ~/simulation_ws/src/m2wr_description/launch/spawn.launch
Stop the last launch file we started (for RViz), we are going to use the same terminal once again.
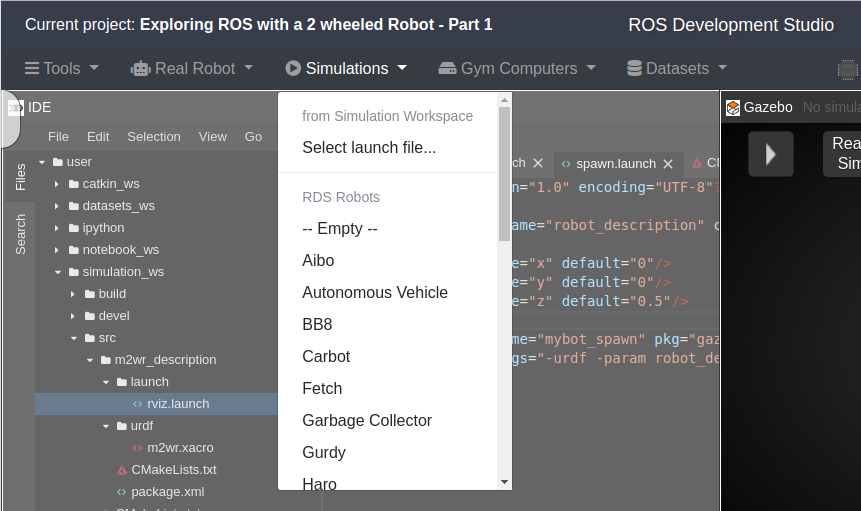
Start an empty simulation, from the simulations menu:
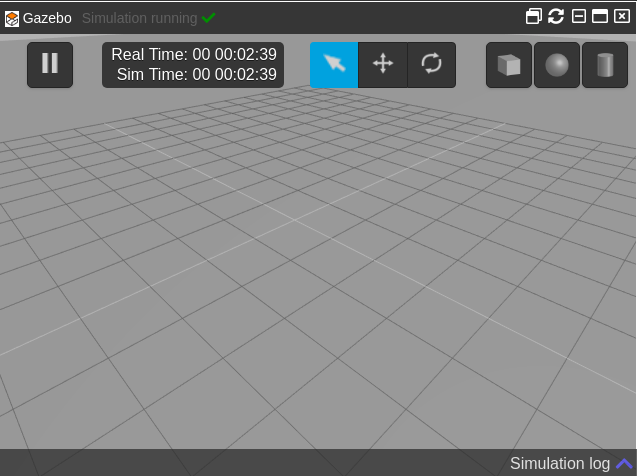
You should have the empty simulation ready:
STEP 6
Finally, spawn the robot to the Gazebo simulation. In your terminal, execute the following:
user:~/simulation_ws$ roslaunch m2wr_description spawn.launch
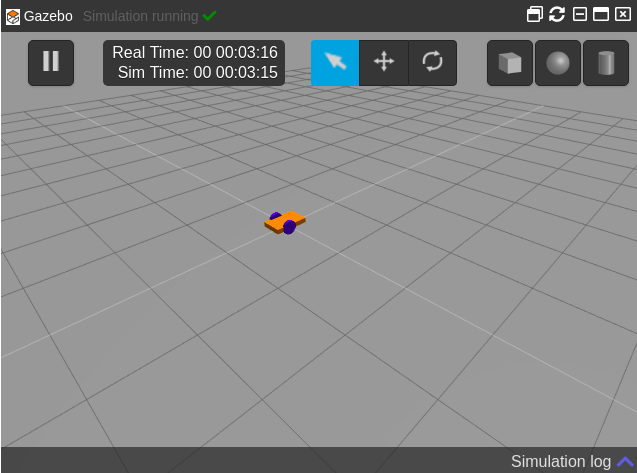
Check gazebo simulation again, the robot is there!
Done!
In case you have missed some part of the tutorial, you can have a copy of the ROSject we generated by writing this post: http://www.rosject.io/l/8e6c887/
In this next tutorial, we will explore the macros for URDF files using XACRO files.
[irp posts=”12948″ name=”Exploring ROS with a 2 Wheeled Robot #2 : XACROs”]
Don’t forget to leave a comment! Let us know what you think about this kind of post! We will be glad to have your opinion!
See you!!




hii
i tried running the code both in RDS and on ubuntu based laptop i got the robot model in gazebo in RDS but unable to get it in ubuntu based laptop
Hi Marcon Arruda! Thanks for this tutorial it is very good to better organize the urdf files.