What you will learn
- Learn how to add a gazebo model to a running gazebo simulation
List of resources used in this post:
- Robot Ignite Academy, the place to learn to program robots using only a web browser
- ROS Development Studio (the environment used in the video), another powerful online tool for pushing your ROS learning in a practical way
- Gazebo models repository where you can find different models to be spawned
Including our model in the .world file
In this post, we are assuming you already have created a ROS package called my_simulations and the following files: ~/simulation_ws/src/my_simulations/launch/my_world.launch and ~/simulation_ws/src/my_simulations/world/empty_world.world.
If you don’t have these files, please remember to first follow the previous post: https://www.theconstruct.ai/gazebo-5-mins-launch-first-gazebo-world-using-ros/
If you check the my_world.world file, from the previous post we have the following content:
<?xml version="1.0" ?>

<sdf version="1.5">
	<world name="default">
		<!-- A global light source -->
		<include>
			<uri>model://sun</uri>
		</include>

		<!-- A ground plane -->
		<include>
			<uri>model://ground_plane</uri>
		</include>
	</world>
</sdf>
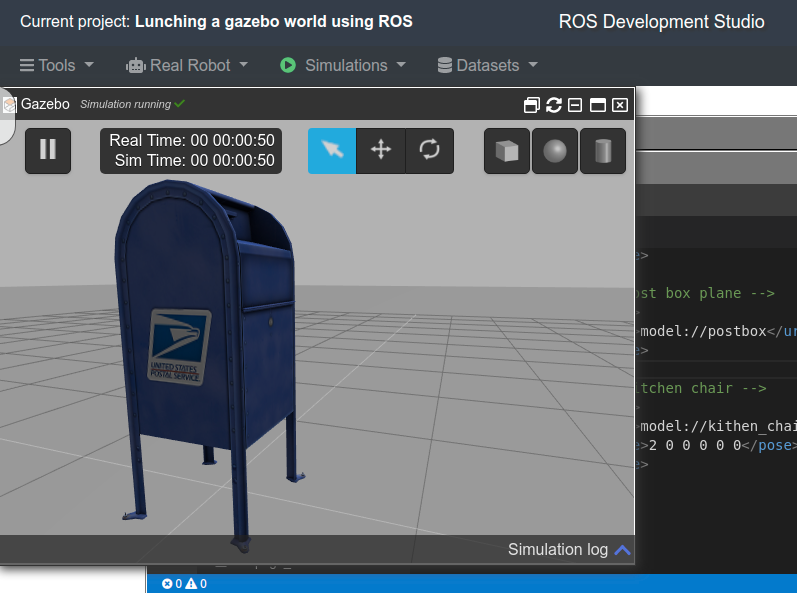
Let’s add a postbox model. Remember that you can find many Gazebo moels on the Gazebo models repository.
The final content of ~/simulation_ws/src/my_simulations/world/empty_world.world after adding the postbox would be:
<?xml version="1.0" ?>

<sdf version="1.5">
	<world name="default">
		<!-- A global light source -->
		<include>
			<uri>model://sun</uri>
		</include>

		<!-- A ground plane -->
		<include>
			<uri>model://ground_plane</uri>
		</include>

                <!-- A post box plane -->
		<include>
			<uri>model://postbox</uri>
		</include>

	</world>
</sdf>
This adds a model called postbox in the initial position (x=0, y=0, z=0). If you want it in a different position, you can add a <pose> like in the example below:
<include>
  <uri>model://postbox</uri>
  <pose>2 1 0 0 0 0</pose>
</include>
Adding the gazebo model to the simulation
Now that we have our empty_world.world file set, we can start our simulation in two ways:
Option one: Click Simulation -> Choose File, then select my_world.launch. This should automatically load the web version of gazebo, called gzweb.
Option two: If you are running the tests on your computer, or you want to manually run the simulation, you can just:
source ~/simulation_ws/devel/setup.bash
roslaunch my_simulations my_world.launch --screen
If you are in ROSDS and chose to run the simulation manually, then you have to manually open the Gazebo Web (gzweb) by clicking on Tools -> Gazebo.
Congratulations. You have successfully loaded a custom model in a Gazebo World using ROS.
Youtube video
If you didn’t understand well all the steps explained here or needs more understanding of the files we created, remember that we have the live version of this post on YouTube. Also, if you liked the content, please consider subscribing to our youtube channel. We are publishing new content ~every day.
Keep pushing your ROS Learning.

![[Gazebo in 5 minutes] 002 – How to add gazebo models to a simulation [Gazebo in 5 minutes] 002 - How to add gazebo models to a simulation](https://www.theconstruct.ai/wp-content/uploads/2018/09/Gazebo-in-5-minutes-002-How-to-add-gazebo-models-to-a-simulation.png)


Thanks… its nice tutorial…
Hello, I followed the entire tutorial and it prints out that it can’t find the other models I try. For instance, when I try to add a plane model it prints out “Error Code 11 Msg: Unable to find uri[model://plane]”, but when I try to change from a ground_plane to an asphalt_plane it changes without a problem. Do you have any idea what the problem might me?
Thanks in advance