In this post, we are going step-by-step to install ROS 2 Crystal in a fresh Ubuntu 18.04.
I’m using a regular desktop computer, the one I use to support me on ROS development.
This tutorial is a report of my personal experience as a ROS developer.
All the steps were taken from the official tutorial: https://index.ros.org/doc/ros2/Installation/Crystal/Linux-Install-Binary
Let’s do it!
Step 1 – Configuration
The first step is adding the ROS repository to your ubuntu sources.list.
user:~$ sudo apt update && sudo apt install curl gnupg2 lsb-release
(multiple lines from apt update)...
user:~$ curl -s https://raw.githubusercontent.com/ros/rosdistro/master/ros.asc | sudo apt-key add -
OK
user:~$ sudo sh -c 'echo "deb [arch=amd64,arm64] http://packages.ros.org/ros2/ubuntu `lsb_release -cs` main" > /etc/apt/sources.list.d/ros2-latest.list'
Great!
Step 2 – Download
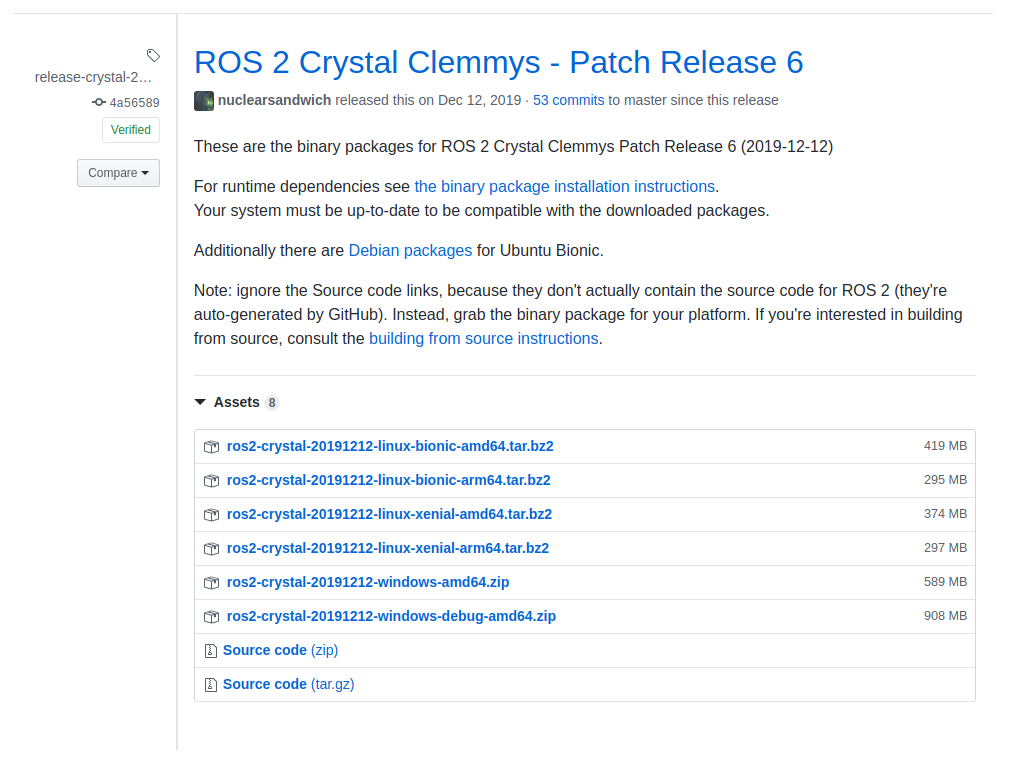
A bit different from ROS 1 (Melodic), we don’t install from using sudo apt, instead, we download a file.
It was taken from: https://github.com/ros2/ros2/releases/tag/release-crystal-20191212
In my case, for Ubuntu 18.04 desktop, I have chosen ros2-crystal…amd64.zip
Save it into your ~/Downloads folder.
Now, let’s create a new folder to keep the files:
user:~$ mkdir ~/ros2_crystal
user:~$ cd ~/ros2_crystal
Extract the files there:
user:~/ros2_crystal$ tar xf ros2-crystal-20191212-linux-xenial-amd64.tar.bz2
Installing and initializing rosdep
Let’s update ubuntu’s repo once more:
user:~$ sudo apt update
We need to install python-rosdep package, the one in charge of managing ROS dependencies:
user:~$ sudo apt install -y python-rosdep
Then we initialize rosdep and update it:
user:~$ sudo rosdep init
user:~$ rosdep update
Finally, we install some dependencies for this specific version:
user:~$ cd ~/ros2_crystal
user:~$ source /opt/ros/melodic/setup.bash
user:~/ros2_crystal$ CHOOSE_ROS_DISTRO=crystal
user:~/ros2_crystal$ ROS_PYTHON_VERSION=3
user:~/ros2_crystal$ rosdep install --from-paths ros2-linux/share --ignore-src --rosdistro $CHOOSE_ROS_DISTRO -y --skip-keys "console_bridge fastcdr fastrtps libopensplice67 libopensplice69 osrf_testing_tools_cpp poco_vendor rmw_connext_cpp rosidl_typesupport_connext_c rosidl_typesupport_connext_cpp rti-connext-dds-5.3.1 tinyxml_vendor tinyxml2_vendor urdfdom urdfdom_headers"
Installing the Autocomplete
In the case of this tutorial, we are working with Ubuntu 18.04 and ROS 1 Melodic, so the autocomplete installation goes like this:
user:~$ sudo apt install python3-pip
user:~$ sudo pip3 install argcomplete
Trying it!
Finally, let’s try some examples!
We have some nodes ready to be used from the installation process.
Open a shell, let’s call it Shell 1:
user:~$ . ~/ros2_crystal/ros2-linux/setup.bash
user:~$ ros2 run demo_nodes_cpp talker
You must have the following output:
[INFO] [talker]: Publishing: 'Hello World: 1'
[INFO] [talker]: Publishing: 'Hello World: 2'
[INFO] [talker]: Publishing: 'Hello World: 3'
[INFO] [talker]: Publishing: 'Hello World: 4'
[INFO] [talker]: Publishing: 'Hello World: 5'
[INFO] [talker]: Publishing: 'Hello World: 6'
[INFO] [talker]: Publishing: 'Hello World: 7'
[INFO] [talker]: Publishing: 'Hello World: 8'
[INFO] [talker]: Publishing: 'Hello World: 9'
And a second shell: Shell 2
user:~$ . ~/ros2_crystal/ros2-linux/setup.bash
user:~$ ros2 run demo_nodes_py listener
The output must be something like:
[INFO] [listener]: I heard: [Hello World: 8]
[INFO] [listener]: I heard: [Hello World: 9]
[INFO] [listener]: I heard: [Hello World: 10]
[INFO] [listener]: I heard: [Hello World: 11]
[INFO] [listener]: I heard: [Hello World: 12]
[INFO] [listener]: I heard: [Hello World: 13]
[INFO] [listener]: I heard: [Hello World: 14]
Conclusion
Finally, this is the basic process of installation we achieved with the following environment:
- Ubuntu 18.04
- ROS 1 Melodic
- ROS 2 Crystal
If you like this kind of post, don’t forget to share it.
Leave a comment so we take your feedback to improve our blog posts.
Cheers!


0 Comments