What we are going to learn
- How to put a node inside a namespace
- How to remap a topic
- How to set a node parameter
- How to set the logger level
List of resources used in this post
- Use the rosject: https://app.theconstructsim.com/#/l/4e79d8dd/
- The Construct: https://app.theconstructsim.com/
- ROS2 Guide: https://docs.ros.org/en/humble/How-To-Guides/Node-arguments.html
- ROS2 Courses –▸
- ROS2 Basics in 5 Days (Python): https://app.theconstructsim.com/#/Course/73
- ROS2 Basics in 5 Days (C++): https://app.theconstructsim.com/#/Course/61
Overview
In this post we are going to show are ROS Arguments are, how to use them from the command line with the ros-args flag, and how they can modify some aspects of a ROS Node in a ROS Network.
ROS Inside!
Before anything else, in case you want to use the logo above on your own robot or laptop, feel free to download it for free and attach it to your robot. It is really free. Find it in the link below:
Opening the rosject
In order to learn how to pass ROS2 arguments to a ROS2 Node via the command line, we need to have ROS2 installed in our system, and it is also useful to have some simulations. To make your life easier, we already prepared a rosject with a simulation for that: https://app.theconstructsim.com/#/l/4e79d8dd/
You can download the rosject to your own computer if you want to work locally, but just by copying the rosject (clicking the link), you will have a setup already prepared for you.
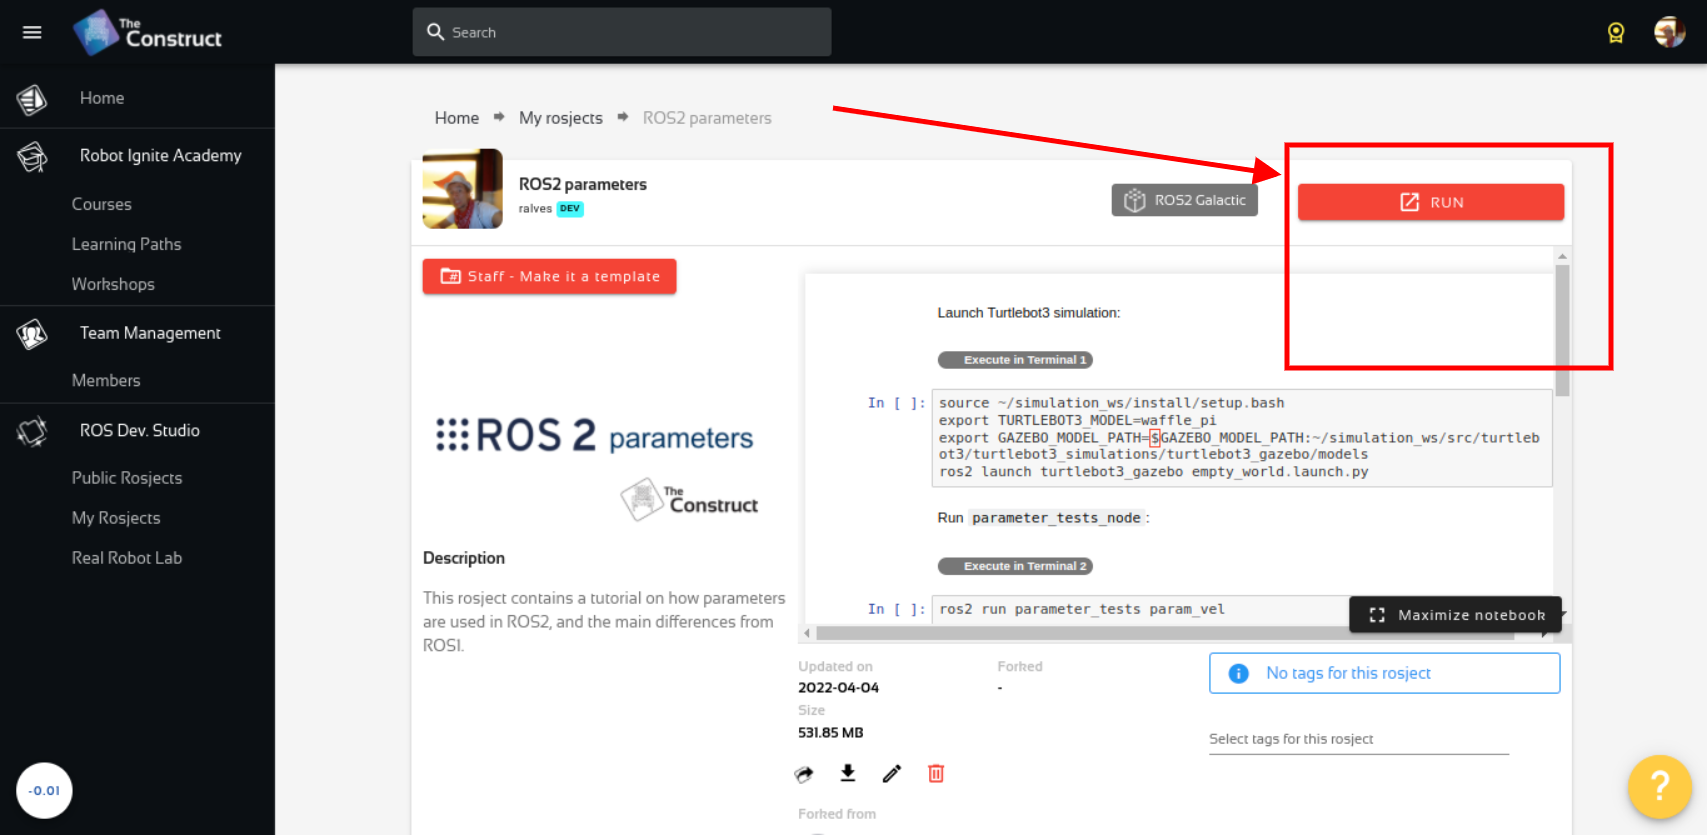
After the rosject has been successfully copied to your own area, you should see a Run button. Just click that button to launch the rosject (below you have a rosject example).
After pressing the Run button, you should have the rosject loaded. Let’s now head to the next section to really get some real practice.
Launching the simulation
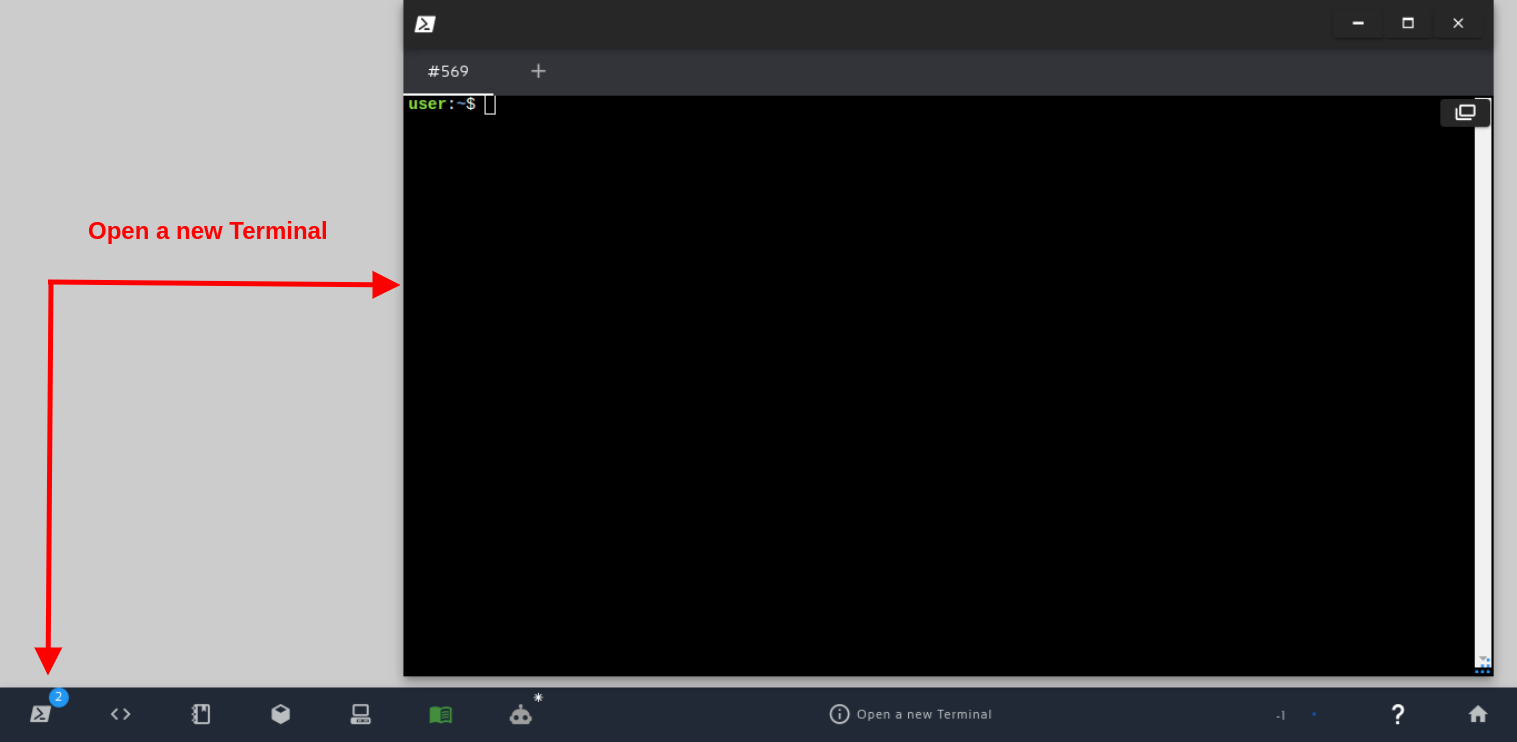
The rosject we provided contains the packages needed to run a simulation in ROS2. The ros2_ws (ROS2 Workspace) is already compiled. Let’s compile it again just in case. For that, let’s first open a terminal:
Now, let’s compile the ros2_ws folder:
cd ~/ros2_ws

colcon build
Once the workspace is compiled, let’s source it.
source install/setup.bash
Now that the workspace is compiled and sourced, let’s start the simulation by running the following commands:
cd ~/ros2_ws/src/t3_humble

./start_sim_house.sh
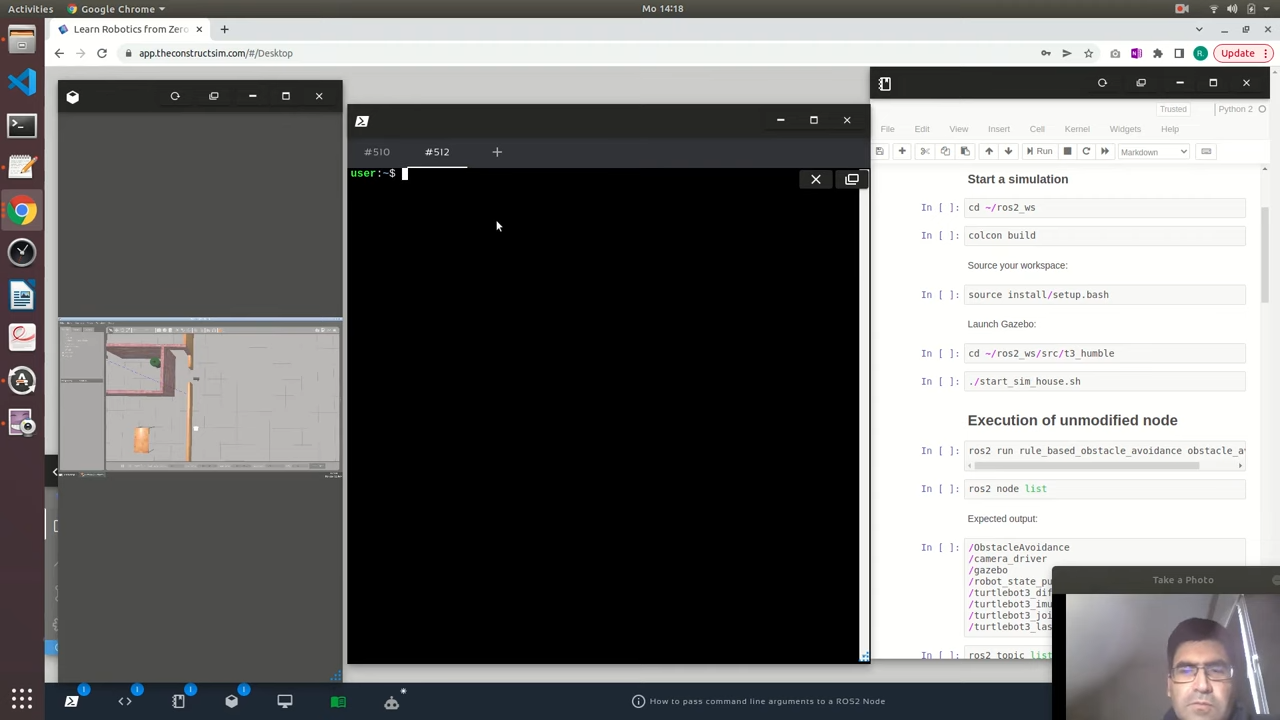
The simulation should have been loaded, as we can see on the left side of the image below:
Starting a normal obstacle avoidance node (without –ros-args)
Now that we have the simulation running, let’s run the obstacle avoidance node. For that, let’s open a new terminal, let’s call it second terminal and type the following command on it:
ros2 run rule_based_obstacle_avoidance obstacle_avoidance
Let’s now to go to a third terminal and list the ROS2 nodes there:
ros2 node list
The expected list of nodes should be similar to the following:
/ObstacleAvoidance
/camera_driver
/gazebo
/robot_state_publisher
/turtlebot3_diff_drive
/turtlebot3_imu
/turtlebot3_joint_state
/turtlebot3_laserscan
Let’s take the chance and also check the list of ROS2 topics still in the third terminal:
ros2 topic list
We should have something like this:
/camera/camera_info
/camera/image_raw
/camera/image_raw/compressed
/camera/image_raw/compressedDepth
/camera/image_raw/theora
/clock
/cmd_vel
/imu
/joint_states
/odom
/parameter_events
/performance_metrics
/robot_description
/rosout
/scan
/tf
/tf_static
Starting the obstacle avoidance node in a specific namespace (using –ros-args)
Now that we saw how to launch a normal node in ROS2, let’s see how to launch it in a specific namespace. For that, we are going to use the –ros-args parameter when running ros2 run.
Let’s go to the second terminal where we launched the node, and stop the node by pressing CTRL+C.
After the node has stopped, let’s launch it again in the /robot1 namespace.
ros2 run rule_based_obstacle_avoidance obstacle_avoidance --ros-args -r __ns:=/robot1
If we now list the nodes again, just as we did before in the third terminal, we should see something different:
ros2 node list
The output must be something like this:
/camera_driver
/gazebo
/robot1/ObstacleAvoidance
/robot_state_publisher
/turtlebot3_diff_drive
/turtlebot3_imu
/turtlebot3_joint_state
/turtlebot3_laserscan
As we can see, now the ObstacleAvoidance node that we just launched is under the /robot1 namespace. The reason why the other nodes are not under a namespace is that those nodes were launched in the first terminal, where we launched the simulation.
We can also check the topics now, in order to find whether the Obstacle Avoidance-related topics are under the namespace. Let’s run the following command in the third terminal:
ros2 topic list
We should have something similar to this:
/camera/camera_info
/camera/image_raw
/camera/image_raw/compressed
/camera/image_raw/compressedDepth
/camera/image_raw/theora
/clock
/cmd_vel
/imu
/joint_states
/odom
/parameter_events
/performance_metrics
/robot1/cmd_vel
/robot1/scan
/robot_description
/rosout
/scan
/tf
/tf_static
The important difference in the list of topics here are the cmd_vel and scan topics, which are now under the /robot1 namespace, yet, some topics with the same name without the namespace:
...
/cmd_vel
...
/robot1/cmd_vel
/robot1/scan
...
/scan
The topics under the /robot1 namespace are the ones that the Obstacle Avoidance node subscribes to. The topics without the namespace are watched by other nodes in the Gazebo Simulation, not by the Obstacle Avoidance.
Why have a namespace for ROS2 Nodes?
One of the reasons why Namespaces are useful is because this way, you can run the same node multiple times, once for each robot. This way, you will not have two robots processing the same messages, nor will you have to change your code to consider whether the code is running on robot1 or robot2, for example.
You can run multiple instances of a node with the same name, as long as they are in different namespaces.
Examples:
ros2 run rule_based_obstacle_avoidance obstacle_avoidance --ros-args -r __ns:=/robot1
ros2 run rule_based_obstacle_avoidance obstacle_avoidance --ros-args -r __ns:=/robot2
Assigning a different name to a ROS2 Node using –ros-args
In order to change the name of a given ROS2 Node, we use the __node variable.
In order to run this example, please remember to kill the node that we launched in the second terminal by pressing CTRL+C.
Once the old node is terminated, we can launch it again with a different name using the following command:
ros2 run rule_based_obstacle_avoidance obstacle_avoidance --ros-args --remap __node:=collision_avoidance
The above command will cause the node to be started under the node collision_avoidance name.
Let’s check it by listing the nodes using the third terminal:
ros2 node list
You should now see the /collision_avoidance. instead of /obstacle_avoidance that we had before.
Changing topic names in ROS2 (Remapping)
Remapping means changing topics’ names.
So far we have learned how to add a namespace to a node, and how to change the node name. Time now has come to learn how to change the topic that a given node publishes or subscribes to.
Let’s go again to the second terminal , kill the node we launched earlier by pressing CTRL+C, then launch the node again using the command below:
ros2 run rule_based_obstacle_avoidance obstacle_avoidance --ros-args -r scan:=laser_scan
The command above will make the node subscribe to the topic named laser_scan instead of the default scan.
If you now check the topics again in the third terminal, you should see the /laser_scan topic, which is the one that the Obstacle Avoidance subscribes to:
ros2 topic list
Setting parameters directly from the command line when the node starts up
If you pay attention carefully, you will see that up to now we have been using the —ros-args –remap parameters. Now, in order to pass parameters to the node, we use –ros-args -p instead.
In order to set the “safety_distance” parameter to 0.5, for example, we would use the following command in the second terminal:
ros2 run rule_based_obstacle_avoidance obstacle_avoidance --ros-args -p safety_distance:=0.5
To check of the parameter was set, we can start by listing the parameters in the third terminal:
ros2 param list
With the command above you will see that we have a node called ObstacleAvoidance and there is a parameter called safety_distance associated with the node.
We can check the value of the node with the following command:
ros2 param get ObstacleAvoidance safety_distance
After retrieving the value, you will see that it matches exactly with the value we set in the second terminal when we ran the node.
Setting Logger Level using –ros-args
Now we will see that we can control log severity levels printed out to the terminal, using the command line.
Let’s go again to our second terminal and kill the node we launched previously by pressing CTRL+C.
After the node has stopped, let’s run the following command:
ros2 run rule_based_obstacle_avoidance obstacle_avoidance --ros-args --log-level debug
The command above specifies that our logger level is DEBUG, which means we will see basically all log messages, given that DEBUG is the lowest level.
We set the level to debug, but you could also use info, warn or error, for example.
After having launched the node, you should have seen a lot of log messages coming out, logs that we didn’t have the previous times.
Using different parameters, you can control which logs you are going to see, without having to recompile your nodes, in case the nodes are in C++.
Congratulations on reaching the end of this post. We really hope it was of great use to you.
If case you want a live version of this post, please check the video in the next section.
Youtube video
So this is the post for today. Remember that we have the live version of this post on YouTube. If you liked the content, please consider subscribing to our youtube channel. We are publishing new content ~every day.
Keep pushing your ROS Learning.
Related Courses & Training
If you want to learn more about ROS and ROS2, we recommend the following courses:
- ROS2 Basics in 5 Days (Python): https://app.theconstructsim.com/#/Course/73
- ROS2 Basics in 5 Days (C++): https://app.theconstructsim.com/#/Course/61


0 Comments