What we are going to learn
- What persistent parameters are
- How to install the ros2_persist_parameter_server package
- How to run the ros2_persist_parameter_server package
- How to set and get persistent parameters from the command line
- How to get persistent parameters programmatically
List of resources used in this post
- Use the rosject: https://app.theconstructsim.com/l/51ef510a/
- The Construct: https://app.theconstructsim.com/
- A repository from https://github.com/fujitatomoya
- ROS2 Courses –▸
- ROS2 Basics in 5 Days (Python): https://app.theconstructsim.com/#/Course/73
- ROS2 Basics in 5 Days (C++): https://app.theconstructsim.com/#/Course/61
Overview
In this post, we will have a look at the ros2_persist_parameter_server package by the GitHub user fujitatomoya. With this package, you can have parameters saved to the disk. This way they are not lost when the machine is powered off or reset. The package we are going to use can be found at:
ROS Inside!
Before anything else, in case you want to use the logo above on your own robot or computer, feel free to download it for free and attach it to your robot. It is really free. Find it in the link below:
How to set and get persistent parameters in ROS2
You might already know that in ROS 2, all parameters are node-specific. A far less discussed aspect of parameters is their non-persistent nature. Non-persistent parameters are those parameters whose values are not saved to the disk. They are lost when the machine is powered off or reset.
In this post, we will have a look at the ros2_persist_parameter_server package aforementioned. We would like to thank Tomoya Fujita for making it Open Source.
Opening the rosject
In order to follow this tutorial, we need to have ROS2 installed in our system, and ideally a ros2_ws (ROS2 Workspace). To make your life easier, we already prepared a rosject with a simulation for that: https://app.theconstructsim.com/l/51ef510a/.
You can download the rosject on your own computer if you want to work locally, but just by copying the rosject (clicking the link), you will have a setup already prepared for you.
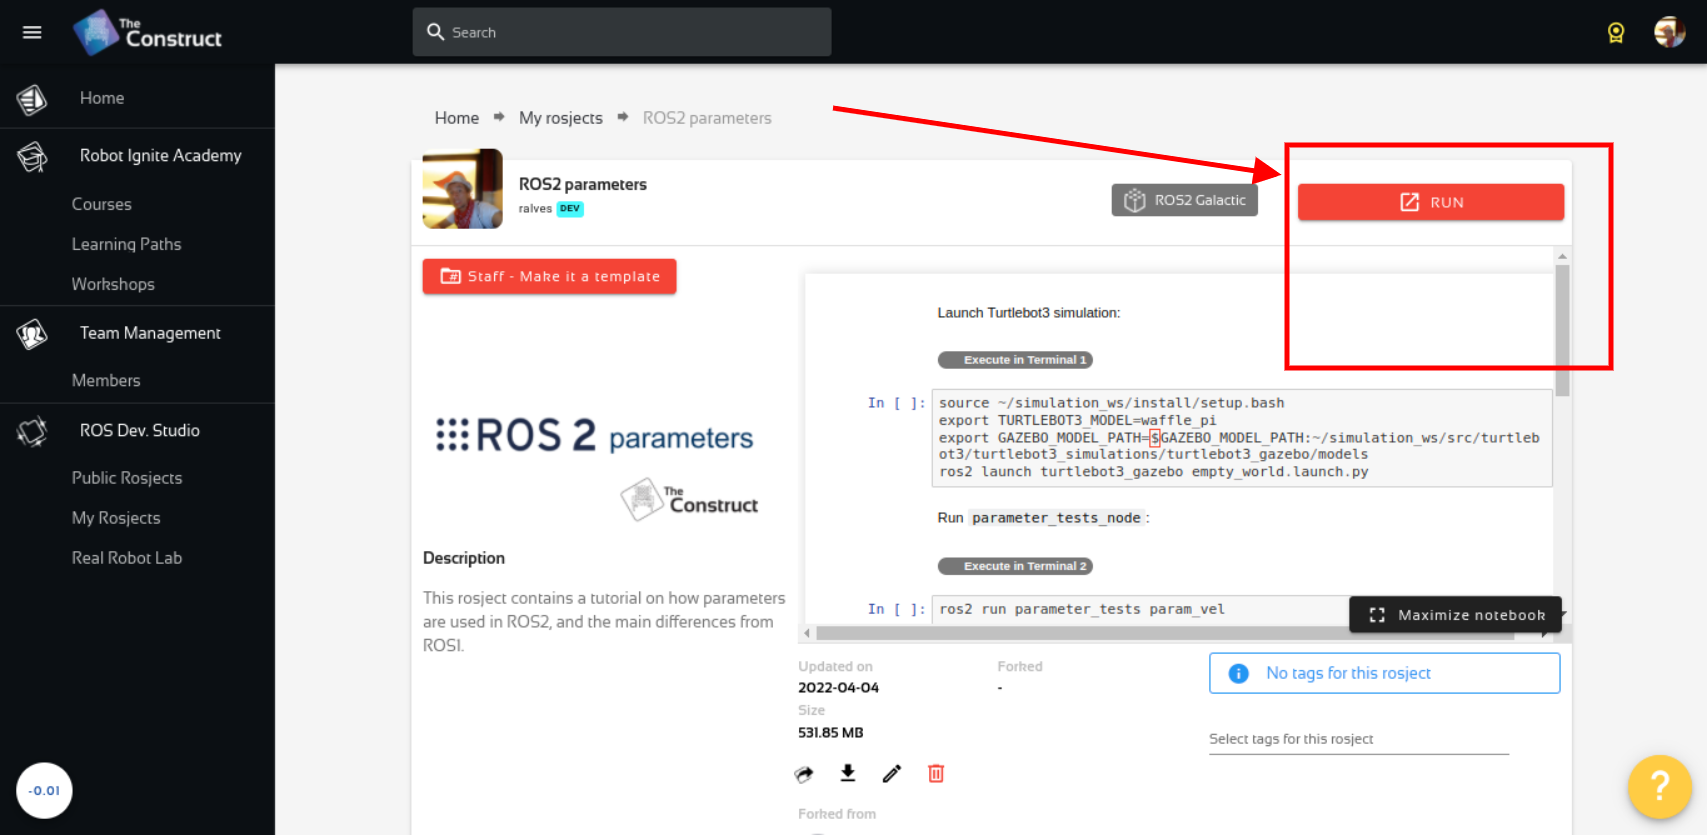
After the rosject has been successfully copied to your own area, you should see a Run button. Just click that button to launch the rosject (below you have a rosject example).
After pressing the Run button, you should have the rosject loaded. Now, let’s head to the next section to get some real practice.
Get the ros2_persist_parameter_server package and compile it
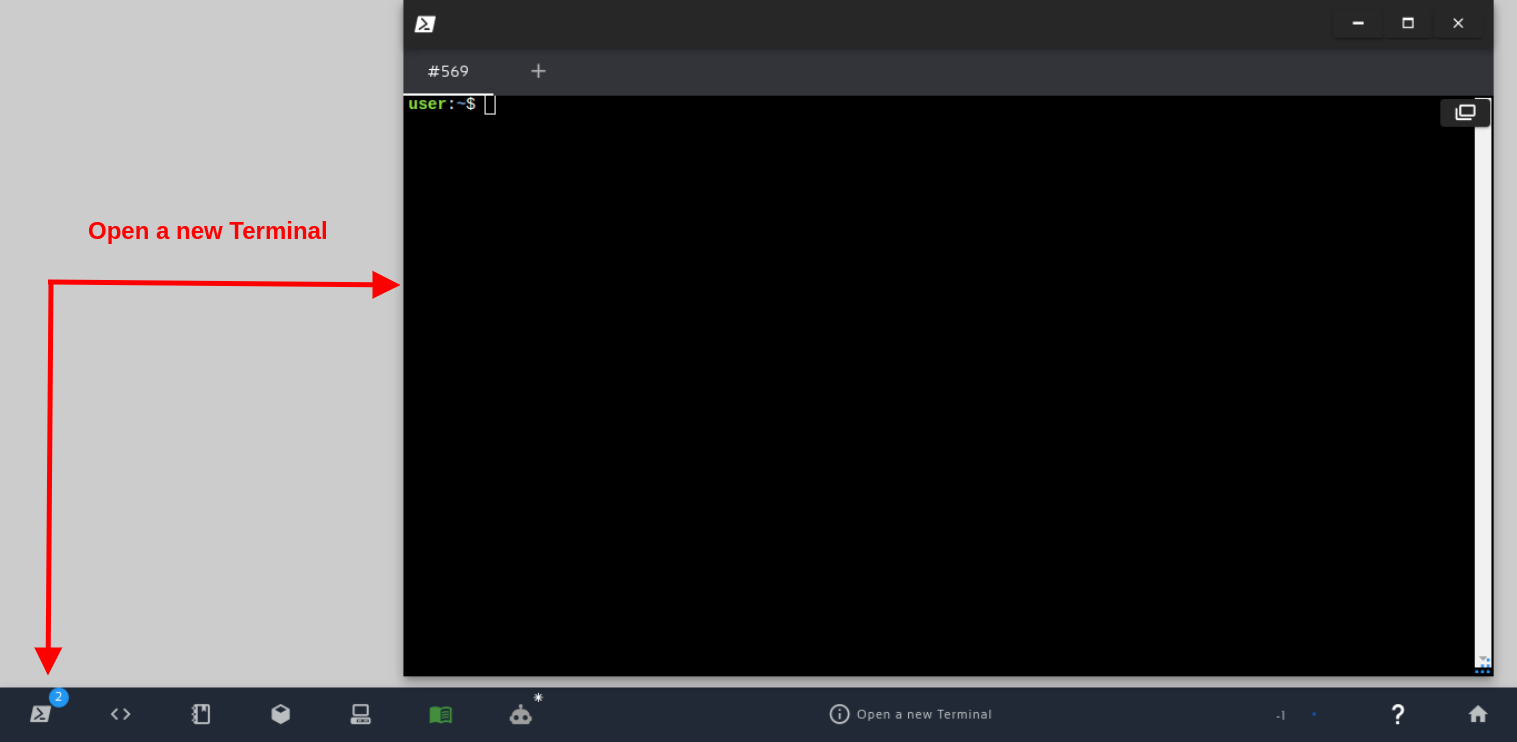
After having opened the rosject, let’s close the ros2_persist_parameter_server package. For that, let’s open a terminal by clicking the Open a new terminal button.
Open a new Terminal
Once inside the terminal, let’s run the commands below:
cd ~/ros2_ws/src
git clone https://github.com/fujitatomoya/ros2_persist_parameter_server.git
cd ~/ros2_ws/

colcon build
source install/setup.bash
Running the “parameter_server server” node
Still in the first terminal, let’s run the parameter server, specifying where to save the parameters using the “-f” parameter:
ros2 run parameter_server server -f /home/user/ros2_ws/persistent_parameters.yaml
Now, let’s set a ROS2 parameter using the following command in a second terminal:
ros2 param set /parameter_server persistent.some_int 81
We should see the following output:
Set parameter successful
One thing worth noticing in the command above is the “persistent.” prefix in the some_int parameter. The parameters need that prefix in order to be saved automatically in the /home/user/ros2_ws/persistent_parameters.yaml file.
We can now set more parameters, which should also be successfully set:
ros2 param set /parameter_server persistent.a_string Konnichiwa
ros2 param set /parameter_server persistent.pi 3.14159265359
ros2 param set /parameter_server persistent.some_lists.some_integers 81,82,83,84
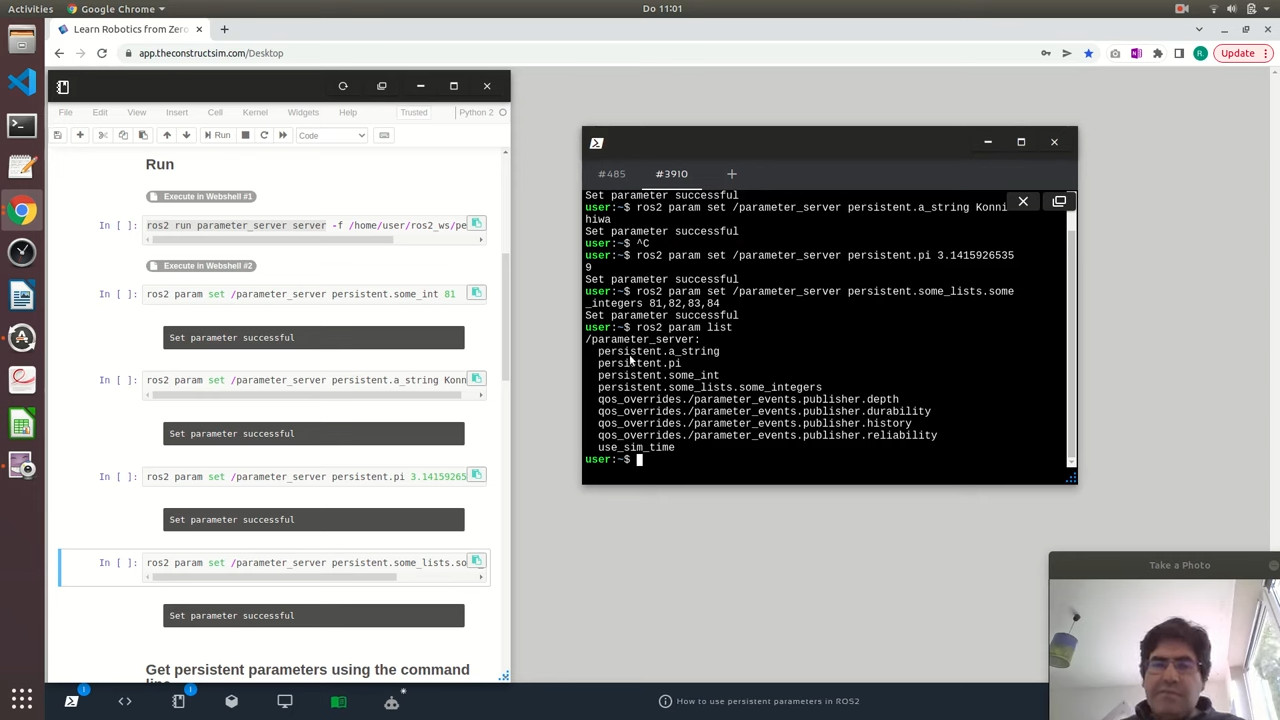
After the parameters are set, we can list them using the following command:
ros2 param list
We can also retrieve the persistent.pi parameter, for example, just in case you want to be really sure that it is there:
ros2 param get /parameter_server persistent.pi
You can now kill the node running in the first terminal by pressing CTRL+C. You can also make sure there are no nodes running by running:
ros2 node list
Now, let’s start the node again to see that the parameters are loaded:
ros2 run parameter_server server -f /home/user/ros2_ws/persistent_parameters.yaml
And again, in another terminal you can list the parameters again, to confirm that the parameters from the previous “session” were successfully loaded:
ros2 param list

ros2 param get /parameter_server persistent.pi
Get those persistent parameters programmatically from another node
Alright. We have saved the parameters but they are related to a node that does nothing “nothing”. We need to be able to use those values in a ROS 2 node that really does some hard work.
In ROS 2, parameters are available via service interfaces. We could implement a service client ourselves and retrieve the parameters associated with any individual node. However, we could also use the rclpcpp library includes this functionality built in.
The rclcpp library implements the classes SyncParametersClient and AsyncParametersClient on which you can call functions like get_parameters that will handle the service calls to retrieve values about one or more parameters.
Let’s create another package called my_app_node using a third terminal (make sure you still have the server running in the first terminal):
cd ~/ros2_ws/src
ros2 pkg create my_app_node --build-type ament_cmake --dependencies rclcpp
cd ~/ros2_ws/src/my_app_node/src
touch my_app_node.cpp
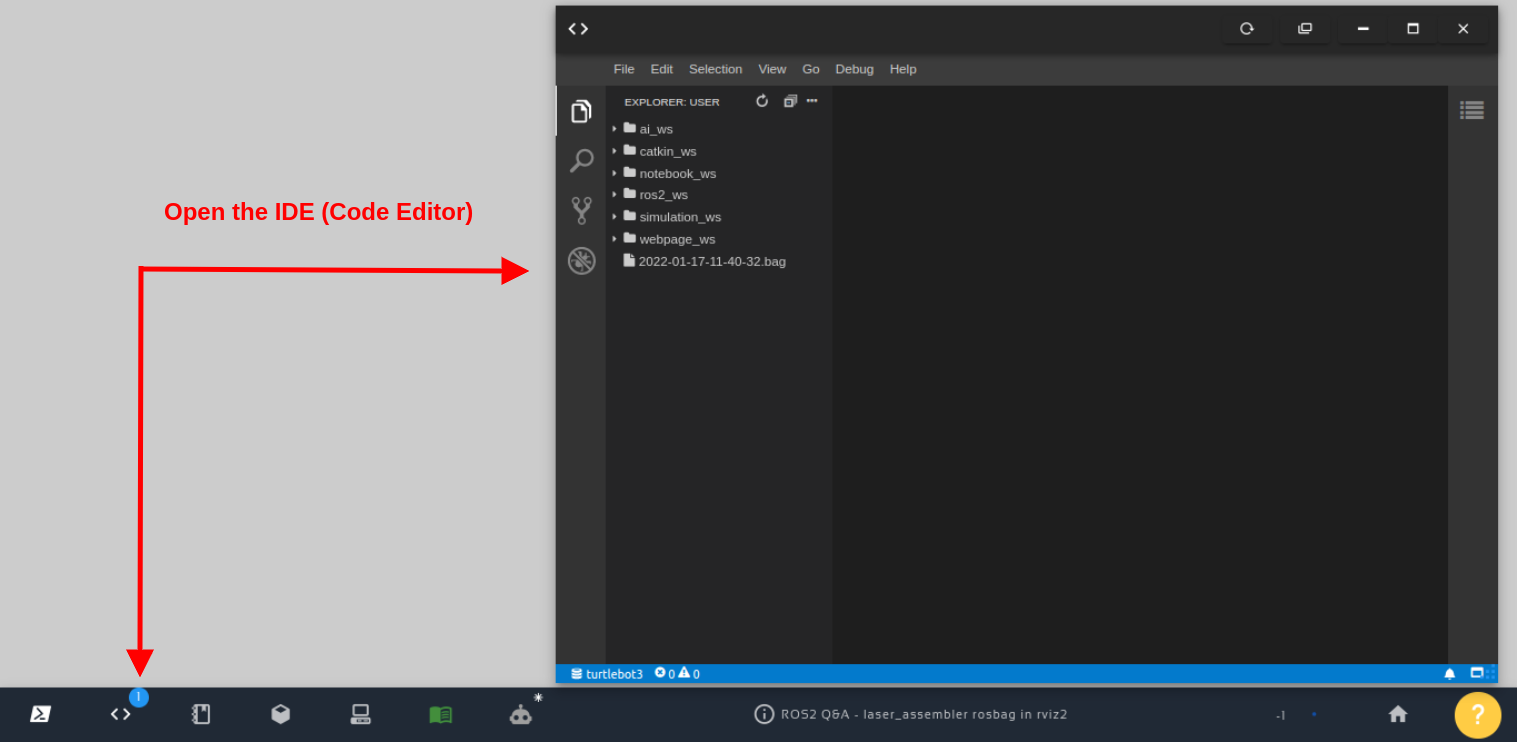
You can now open the ~/ros2_ws/src/my_app_node/src/my_app_node.cpp file using the Code Editor to paste some content on it. You can open the Code Editor by clicking on the second link of the bottom bar:
Once the Code Editor is open, you should be able to see the ros2_ws folder (ROS2 workspace) and navigate to the my_app_node.cpp file we just created.
After having the file open, let’s past the following content to it to read the value of the persistent.a_string variable:
#include "rclcpp/rclcpp.hpp"

class MyAppNode : public rclcpp::Node
{
public:
    MyAppNode() : Node("my_app_node")
    {
        parameters_client =
            std::make_shared(this, "/parameter_server");
        parameters_client->wait_for_service();
        auto parameters_future = parameters_client->get_parameters(
            {"persistent.a_string"},
            std::bind(&MyAppNode::callbackParamServer, this, std::placeholders::_1));
    }
    void callbackParamServer(std::shared_future<std::vector> future)
    {
        auto result = future.get();
        auto param = result.at(0);
        RCLCPP_INFO(this->get_logger(), "Got persistent parameter: %s", param.as_string().c_str());
    }
private:
    std::shared_ptr parameters_client;
};

int main(int argc, char * argv[])
{
  rclcpp::init(argc, argv);
  rclcpp::spin(std::make_shared());
  rclcpp::shutdown();
  return 0;
}
You can now save the file by pressing CTRL+S.
Let us now open the CMakeLists.txt file found at ~/ros2_ws/src/my_app_node. Below the existing dependency find_package(ament_cmake REQUIRED), add the following lines:
find_package(rclcpp REQUIRED)

add_executable(my_app_node
  src/my_app_node.cpp
)
ament_target_dependencies(my_app_node
  rclcpp
)

install(TARGETS
  my_app_node
  DESTINATION lib/${PROJECT_NAME}
)
We can now compile our package using the commands below:
cd ~/ros2_ws/
colcon build
source install/setup.bash
ros2 run my_app_node my_app_node
If everything went well, you should see the value of persistent.a_string printed.
Congratulations!!! You now know how to persist ROS 2 Parameters, and retrieve them programmatically using a ROS 2 Node.
We hope this post was really helpful to you. If you want a live version of this post with more details, please check the video in the next section.
Youtube video
So this is the post for today. Remember that we have the live version of this post on YouTube. If you liked the content, please consider subscribing to our youtube channel. We are publishing new content ~every day.
Keep pushing your ROS Learning.
Related Courses & Training
If you want to learn more about ROS and ROS2, we recommend the following courses:
- ROS2 Basics in 5 Days (Python): https://app.theconstructsim.com/#/Course/73
- ROS2 Basics in 5 Days (C++): https://app.theconstructsim.com/#/Course/61
- ROS2 Navigation (Galactic): https://app.theconstructsim.com/Course/109
- ROS2 Navigation training: https://www.theconstruct.ai/ros2-navigation-training/




0 Comments