URDF/Transmission + Gazebo Controllers
Hey ROS developers! In this post, we will make our robot able to be spawned into Gazebo simulator. Based on the YouTube video series, we’ll show in this format the steps to achieve the final result of the series!
In this post number #4, I’m gonna create the Transmissions and controllers to some of our joints using the same XACROs files we have been working with. Up to the end of the post, we’ll have part of our model controllers by gazebo controllers!
Step 1 – Simplifying the robot
It turns out we have a very complex robot, with 6 links and 5 joints. I want to make it simpler in order to show how to use gazebo controller plugin.
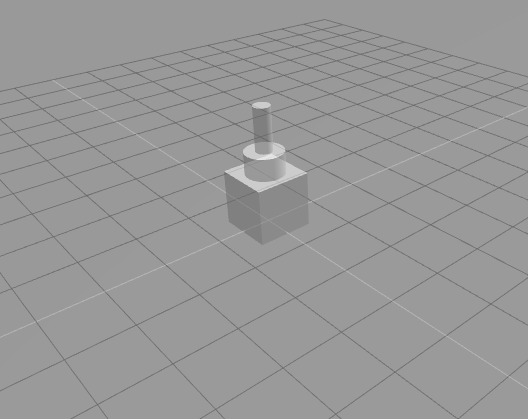
Let’s start opening the file mrm.xacro and comment leave only the first links of the robot (the rest, we will comment). It will look like below:
<?xml version="1.0" ?>

<robot name="mrm" xmlns:xacro="http://www.ros.org/wiki/xacro">

  <!-- BGN - Include -->
  <xacro:include filename="$(find mrm_description)/urdf/links_joints.xacro" />
  <xacro:include filename="$(find mrm_description)/urdf/robot_parameters.xacro" />
  <!-- END - Include -->

  <!-- BGN - Robot description -->
  <m_link_box name="${link_00_name}"
           origin_rpy="0 0 0" origin_xyz="0 0 0"
           mass="1024"
           ixx="170.667" ixy="0" ixz="0"
           iyy="170.667" iyz="0"
           izz="170.667"
           size="1 1 1" />

  <m_joint name="${link_00_name}__${link_01_name}" type="revolute"
           axis_xyz="0 0 1"
           origin_rpy="0 0 0" origin_xyz="0 0 0.5"
           parent="${link_00_name}" child="${link_01_name}" />

  <m_link_cylinder name="${link_01_name}"
           origin_rpy="0 0 0" origin_xyz="0 0 0.2"
           mass="157.633"
           ixx="13.235" ixy="0" ixz="0"
           iyy="13.235" iyz="0"
           izz="9.655"
           length="0.4" radius="0.35" />

  <m_joint name="${link_01_name}__${link_02_name}" type="revolute"
           axis_xyz="0 1 0"
           origin_rpy="0 0 0" origin_xyz="0 0 0.4"
           parent="${link_01_name}" child="${link_02_name}" />

  <m_link_cylinder name="${link_02_name}"
           origin_rpy="0 0 0" origin_xyz="0 0 0.4"
           mass="57.906"
           ixx="12.679" ixy="0" ixz="0"
           iyy="12.679" iyz="0"
           izz="0.651"
           radius="0.15" length="0.8" />

<!--
  <m_joint name="${link_02_name}__${link_03_name}" type="revolute"
           axis_xyz="0 1 0"
           origin_rpy="0 0 0" origin_xyz="0 0 0.8"
           parent="${link_02_name}" child="${link_03_name}" />

  <m_link_cylinder name="${link_03_name}"
           origin_rpy="0 0 0" origin_xyz="0 0 0.4"
           mass="57.906"
           ixx="12.679" ixy="0" ixz="0"
           iyy="12.679" iyz="0"
           izz="0.651"
           radius="0.15" length="0.8" />

  <m_joint name="${link_03_name}__${link_04_name}" type="revolute"
           axis_xyz="0 1 0"
           origin_rpy="0 0 0" origin_xyz="0 0 0.8"
           parent="${link_03_name}" child="${link_04_name}" />

  <m_link_cylinder name="${link_04_name}"
           origin_rpy="0 0 0" origin_xyz="0 0 0.4"
           mass="57.906"
           ixx="12.679" ixy="0" ixz="0"
           iyy="12.679" iyz="0"
           izz="0.651"
           radius="0.15" length="0.8" />

  <m_joint name="${link_04_name}__${link_05_name}" type="revolute"
           axis_xyz="0 0 1"
           origin_rpy="0 0 0" origin_xyz="0 0 0.8"
           parent="${link_04_name}" child="${link_05_name}" />

  <m_link_cylinder name="${link_05_name}"
           origin_rpy="0 0 0" origin_xyz="0 0 0.125"
           mass="18.056"
           ixx="0.479" ixy="0" ixz="0"
           iyy="0.479" iyz="0"
           izz="0.204"
           radius="0.15" length="0.25" />
-->
  <!-- END - Robot description -->

</robot>
Start an empty world simulation and launch the robot from a web shell:
roslaunch mrm_description spawn.launch
Great! These are the parts we are going to control!
Step 2 – Adding gazebo controller dependencies
We need to modify two of our package files, in order to include the dependencies. They are:
CMakeLists.txt
In the command find_package, let’s add some new values:
find_package(catkin REQUIRED COMPONENTS
  urdf
  controller_manager
  joint_state_controller
  robot_state_publisher
)
And in the package.xml file, make sure you have the following instructions:
  <build_depend>urdf</build_depend>
  <build_depend>controller_manager</build_depend>
  <build_depend>joint_state_controller</build_depend>
  <build_depend>robot_state_publisher</build_depend>

  <build_export_depend>urdf</build_export_depend>
  <build_export_depend>controller_manager</build_export_depend>
  <build_export_depend>joint_state_controller</build_export_depend>
  <build_export_depend>robot_state_publisher</build_export_depend>

  <exec_depend>urdf</exec_depend>
  <exec_depend>controller_manager</exec_depend>
  <exec_depend>joint_state_controller</exec_depend>
  <exec_depend>robot_state_publisher</exec_depend>
Step 3 – Adding transmissions to the robot model
Next thing, we need some transmissions elements in our robot model.
Let’s get back to the URDF file: mrm.xacro
  <m_link_box name="${link_00_name}"
           origin_rpy="0 0 0" origin_xyz="0 0 0"
           mass="1024"
           ixx="170.667" ixy="0" ixz="0"
           iyy="170.667" iyz="0"
           izz="170.667"
           size="1 1 1" />

  <m_joint name="${link_00_name}__${link_01_name}" type="revolute"
           axis_xyz="0 0 1"
           origin_rpy="0 0 0" origin_xyz="0 0 0.5"
           parent="${link_00_name}" child="${link_01_name}" />

  <transmission name="trans_${link_00_name}__${link_01_name}">
    <type>transmission_interface/SimpleTransmission</type>
    <joint name="${link_00_name}__${link_01_name}">
        <hardwareInterface>hardware_interface/EffortJointInterface</hardwareInterface>
    </joint>
    <actuator name="motor_${link_00_name}__${link_01_name}">
        <hardwareInterface>hardware_interface/EffortJointInterface</hardwareInterface>
        <mechanicalReduction>1</mechanicalReduction>
    </actuator>
  </transmission>

  <m_link_cylinder name="${link_01_name}"
           origin_rpy="0 0 0" origin_xyz="0 0 0.2"
           mass="157.633"
           ixx="13.235" ixy="0" ixz="0"
           iyy="13.235" iyz="0"
           izz="9.655"
           length="0.4" radius="0.35" />

  <m_joint name="${link_01_name}__${link_02_name}" type="revolute"
           axis_xyz="0 1 0"
           origin_rpy="0 0 0" origin_xyz="0 0 0.4"
           parent="${link_01_name}" child="${link_02_name}" />

  <transmission name="trans_${link_01_name}__${link_02_name}">
    <type>transmission_interface/SimpleTransmission</type>
    <joint name="${link_01_name}__${link_02_name}">
        <hardwareInterface>hardware_interface/EffortJointInterface</hardwareInterface>
    </joint>
    <actuator name="motor_${link_01_name}__${link_02_name}">
        <hardwareInterface>hardware_interface/EffortJointInterface</hardwareInterface>
        <mechanicalReduction>1</mechanicalReduction>
    </actuator>
  </transmission>

  <m_link_cylinder name="${link_02_name}"
           origin_rpy="0 0 0" origin_xyz="0 0 0.4"
           mass="57.906"
           ixx="12.679" ixy="0" ixz="0"
           iyy="12.679" iyz="0"
           izz="0.651"
           radius="0.15" length="0.8" />
You can notice we have added a new element with the transmission tag.
What are we describing there?
First, we have a transmission for each joint. Then we define the type of the transmission, which in this case is just a SimpleTransmission.
Then, the joint we are referencing with the transmission.
Further, the actuator type, which is an Effort Joint Interface, in this case. And the mechanical reduction.
We do this for both joints we have left (in this simplified version of the robot).
Step 4 – Setup gazebo controllers on URDF model
Still on the same file, let’s add to the end of the description the tags related to gazebo controller plugin.
Just simple as below, append to the end of the file, just before the </robot>:
<gazebo>
    <plugin name="gazebo_ros_control" filename="libgazebo_ros_control.so">
    </plugin>
</gazebo>
Step 5 – Describe controller YAML file
This is something necessary for the gazebo controller, we must define some control variables (PID) to apply to our transmissions.
In order to do that, let’s create a new file: ~/simulation_ws/src/mrm_description/config/joints.yaml
It goes like that:
# Publish all joint states -----------------------------------
joint_state_controller:
  type: joint_state_controller/JointStateController
  publish_rate: 50

# Position Controllers ---------------------------------------
joint1_position_controller:
  type: effort_controllers/JointPositionController
  joint: base_link__link_01
  pid: {p: 2000.0, i: 100, d: 500.0}
joint2_position_controller:
  type: effort_controllers/JointPositionController
  joint: link_01__link_02
  pid: {p: 50000.0, i: 100, d: 2000.0}
We are defining the joint_state_publisher as reference.
Then tuning each one of the transmissions we have defined in our model. We need again the name, type, joint name and the PID values
Step 6 – Launch Gazebo Controllers
Now, let’s modify our launch file.
It goes like:
<?xml version="1.0" encoding="UTF-8"?>
<launch>
    <group ns="/mrm">

        <!-- Robot model -->
        <param name="robot_description" command="$(find xacro)/xacro --inorder '$(find mrm_description)/urdf/mrm.xacro'" />
        <arg name="x" default="0" />
        <arg name="y" default="0" />
        <arg name="z" default="0.5" />

        <!-- Spawn the robot model -->
        <node name="mybot_spawn" pkg="gazebo_ros" type="spawn_model" output="screen"
            args="-urdf -param robot_description -model mrm -x $(arg x) -y $(arg y) -z $(arg z)" />

        <!-- Load controllers -->
        <rosparam command="load" file="$(find mrm_description)/config/joints.yaml" />

        <node name="controller_spawner" pkg="controller_manager" type="spawner"
              respawn="false" output="screen" ns="/mrm"
              args="--namespace=/mrm
              joint_state_controller
              joint1_position_controller
              joint2_position_controller
              --timeout 60">
        </node>
    </group>
</launch>
First main modification is the group tag, where we define a namespace (mrm) for our robot processes. Everything inside this tag inherits the namespace. It’s necessary for the controller plugin.
Then, in the secion Load controllers we have a new parameter, that loads the config.yml file we have just created.
Finally, a new node to run the controller process.
Step 7 – Testing!
Great! Now we have already configured the controllers, you can spawn the robot again! Same commands as before, but this time you will notice the last link won’t fall down! This is very important to achieve since the controllers are already actuating.
Check the shell, you can see the controllers being loaded in the logs!
process[mrm/mybot_spawn-1]: started with pid [4817]
process[mrm/controller_spawner-2]: started with pid [4822]
[INFO] [1567187158.002693, 0.000000]: Controller Spawner: Waiting for service /mrm/controller_manager/load_controller
the rosdep view is empty: call 'sudo rosdep init' and 'rosdep update'
SpawnModel script started
[INFO] [1567187165.292282, 0.000000]: Loading model XML from ros parameter
[INFO] [1567187165.303925, 0.000000]: Waiting for service /gazebo/spawn_urdf_model
[INFO] [1567187165.312998, 0.000000]: Calling service /gazebo/spawn_urdf_model
[INFO] [1567187165.504207, 904.010000]: Spawn status: SpawnModel: Successfullyspawned entity
[mrm/mybot_spawn-1] process has finished cleanly
log file: /home/user/.ros/log/cfa21f58-cb4b-11e9-9ca9-0a2504d14030/mrm-mybot_spawn-1*.log
[INFO] [1567187166.829017, 904.050000]: Controller Spawner: Waiting for service /mrm/controller_manager/switch_controller
[INFO] [1567187166.831181, 904.050000]: Controller Spawner: Waiting for service /mrm/controller_manager/unload_controller
[INFO] [1567187166.848968, 904.070000]: Loading controller: joint_state_controller
[INFO] [1567187167.000380, 904.220000]: Loading controller: joint1_position_controller
[INFO] [1567187167.268639, 904.500000]: Loading controller: joint2_position_controller
[INFO] [1567187167.345849, 904.570000]: Controller Spawner: Loaded controllers: joint_state_controller, joint1_position_controller, joint2_position_controller
[INFO] [1567187167.355672, 904.590000]: Started controllers: joint_state_controller, joint1_position_controller, joint2_position_controller
We have also new ROS topics related to the controllers:
user:~$ rostopic list
/clock
/gazebo/link_states
/gazebo/model_states
/gazebo/parameter_descriptions
/gazebo/parameter_updates
/gazebo/set_link_state
/gazebo/set_model_state
/mrm/joint1_position_controller/command
/mrm/joint1_position_controller/pid/parameter_descriptions
/mrm/joint1_position_controller/pid/parameter_updates
/mrm/joint1_position_controller/state
/mrm/joint2_position_controller/command
/mrm/joint2_position_controller/pid/parameter_descriptions
/mrm/joint2_position_controller/pid/parameter_updates
/mrm/joint2_position_controller/state
/mrm/joint_states
/rosout
/rosout_agg
As a final test, let’s send a reference to the second joint:
rostopic pub -1 /mrm/joint2_position_controller/command std_msgs/Float64 "data: 0.7"
You must have the robot like:
In order to put it back to the original position, execute the command below:
rostopic pub -1 /mrm/joint2_position_controller/command std_msgs/Float64 "data: 0.0"
Related courses
Step 8 – Conclusion
Great! If you missed any of the steps or something just didn’t work, you can check the original project just clicking on the link: http://www.rosject.io/l/c1ed2ee/
See you in the next post!





0 Comments