Hey ROS Developers!
In this 5th post of the series, we will expand the controllers to all the joints of our manipulator! Before finishing the post, you will be able to control and calibrate the controllers using graphical tools such as RQT Publisher and RQT Reconfigure. Let’s start!
Step 0 – Introduction
We need to do the same steps we have done in the previous post, but for many joints. Instead of repeating ourselves, let’s take advantage on xacro resources. We are going to use the MACRO we created before to configure the controllers!
Step 1 – Configuring controllers on MACRO
We have to change just a single MACRO, the one called m_joint, in order to apply controllers to all our robots. It is the necessary element, transmission, we have created manually to the first two joints in the previous post. The MACRO will look like below:
<xacro:macro name="m_joint" params="name type axis_xyz origin_rpy origin_xyz parent child limit_e limit_l limit_u limit_v">
    <joint name="${name}" type="${type}">
      <axis xyz="${axis_xyz}" />
      <limit effort="${limit_e}" lower="${limit_l}" upper="${limit_u}" velocity="${limit_v}" />
      <origin rpy="${origin_rpy}" xyz="${origin_xyz}" />
      <parent link="${parent}" />
      <child link="${child}" />
    </joint>
    <transmission name="trans_${name}">
      <type>transmission_interface/SimpleTransmission</type>
      <joint name="${name}">
        <hardwareInterface>hardware_interface/EffortJointInterface</hardwareInterface>
      </joint>
      <actuator name="motor_${name}">
        <hardwareInterface>hardware_interface/EffortJointInterface</hardwareInterface>
        <mechanicalReduction>1</mechanicalReduction>
      </actuator>
    </transmission>
  </xacro:macro>
Then.. we replace the transmissions by the macro and some new parameters. The m_joint tags of our mrm.xacro file will look like:
!Be careful, we are only showing the m_joint tags!
<m_joint name="${link_00_name}__${link_01_name}" type="revolute"
           axis_xyz="0 0 1"
           origin_rpy="0 0 0" origin_xyz="0 0 0.5"
           parent="base_link" child="link_01"
           limit_e="1000" limit_l="-3.14" limit_u="3.14" limit_v="0.5" />

<m_joint name="${link_01_name}__${link_02_name}" type="revolute"
           axis_xyz="0 1 0"
           origin_rpy="0 0 0" origin_xyz="0 0 0.4"
           parent="link_01" child="link_02"
           limit_e="1000" limit_l="0" limit_u="0.5" limit_v="0.5" />

<m_joint name="${link_02_name}__${link_03_name}" type="revolute"
           axis_xyz="0 1 0"
           origin_rpy="0 0 0" origin_xyz="0 0 0.8"
           parent="link_02" child="link_03"
           limit_e="1000" limit_l="0" limit_u="0.75" limit_v="0.5" />

<m_joint name="${link_03_name}__${link_04_name}" type="revolute"
           axis_xyz="0 1 0"
           origin_rpy="0 0 0" origin_xyz="0 0 0.8"
           parent="link_03" child="link_04"
           limit_e="1000" limit_l="0" limit_u="0.75" limit_v="0.5" />

<m_joint name="${link_04_name}__${link_05_name}" type="revolute"
           axis_xyz="0 0 1"
           origin_rpy="0 0 0" origin_xyz="0 0 0.8"
           parent="link_04" child="link_05"
           limit_e="1000" limit_l="-3.14" limit_u="3.14" limit_v="0.5" />
Step 2 – Configuring YAML and Launch files
Almost there.. we need to configure the new controllers. At this point, we are basically repeating the same processes for the first 2 joints. (No MACROs here)
# Publish all joint states -----------------------------------
joint_state_controller:
  type: joint_state_controller/JointStateController
  publish_rate: 50

# Position Controllers ---------------------------------------
joint1_position_controller:
  type: effort_controllers/JointPositionController
  joint: base_link__link_01
  pid: {p: 2000.0, i: 100, d: 500.0}
joint2_position_controller:
  type: effort_controllers/JointPositionController
  joint: link_01__link_02
  pid: {p: 50000.0, i: 100, d: 2000.0}
joint3_position_controller:
  type: effort_controllers/JointPositionController
  joint: link_02__link_03
  pid: {p: 20000.0, i: 50, d: 1000.0}
joint4_position_controller:
  type: effort_controllers/JointPositionController
  joint: link_03__link_04
  pid: {p: 2000.0, i: 50, d: 200.0}
joint5_position_controller:
  type: effort_controllers/JointPositionController
  joint: link_04__link_05
  pid: {p: 700.0, i: 50, d: 70.0}
And the launch file:
<?xml version="1.0" encoding="UTF-8"?>
<launch>

    <group ns="/mrm">

        <!-- Robot model -->
        <param name="robot_description" command="$(find xacro)/xacro --inorder '$(find mrm_description)/urdf/mrm.xacro'" />
        <arg name="x" default="0"/>
        <arg name="y" default="0"/>
        <arg name="z" default="0.5"/>

        <!-- Spawn the robot model -->
        <node name="mybot_spawn" pkg="gazebo_ros" type="spawn_model" output="screen"
              args="-urdf -param robot_description -model mrm -x $(arg x) -y $(arg y) -z $(arg z)" />

        <!-- Load controllers -->
        <rosparam command="load" file="$(find mrm_description)/config/joints.yaml" />

        <!-- Controllers -->
        <node name="controller_spawner" pkg="controller_manager" type="spawner"
            respawn="false" output="screen" ns="/mrm"
            args="--namespace=/mrm
            joint_state_controller
            joint1_position_controller
            joint2_position_controller
            joint3_position_controller
            joint4_position_controller
            joint5_position_controller
            --timeout 60">
        </node>

        <!-- rqt -->
        <node name="rqt_reconfigure" pkg="rqt_reconfigure" type="rqt_reconfigure" />
        <node name="rqt_publisher" pkg="rqt_publisher" type="rqt_publisher" />

    </group>

</launch>
Great! Let’s launch it!
Step 3 – Launch!
Run an empty simulation, like we did before, and spawn the robot using a terminal:
roslaunch mrm_description spawn.launch
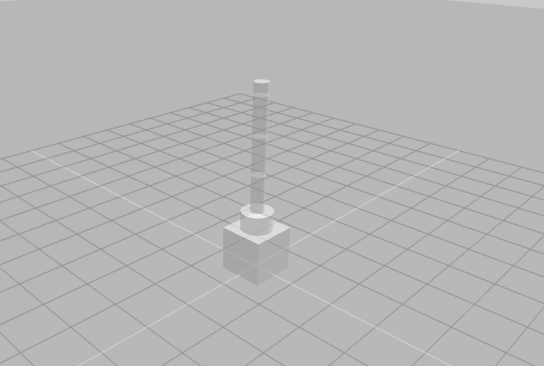
You must have the full robot just performing “freeze!”.
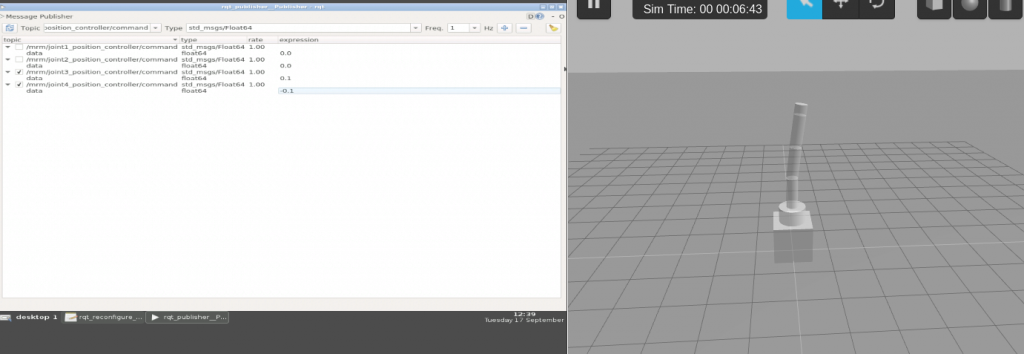
Open the Graphical Tools. Let’s check what we have there.
There you can check RQT Publisher. Add some topics and change the values, in order to see the robot moving!
The other window is the RQT Reconfigure, where you can change/tune the PID parameters of the controller!
Step 4 – Conclusion
We have finished the controllers for our robot. We didn’t include (yet) a tuning process in order to have a good performance on the movement of the robot.
Remember, if you lost any of the steps, you can always get a copy of the result: http://www.rosject.io/l/c89d265/
See you in the next posts!






0 Comments