![[ROS Projects] OpenAI with Moving Cube Robot in Gazebo Step-by-Step](https://www.theconstruct.ai/wp-content/uploads/2018/06/ROS-Projects-OpenAI-with-Moving-Cube-Robot-in-Gazebo-Step-by-Step.png "[ROS Projects] OpenAI with Moving Cube Robot in Gazebo Step-by-Step")

In this new ROS Project you are going to learn Step-by-Step how to create a moving cube and that it learns to move using OpenAI environment.
- Part 1: Creation of the URDF and Control Systems
- Part 2: Basics of Reinforcement learning and Connect to the various systems of the robot
- Part 3: Setting up all the basics needed for moving the cube and getting sensor data
- Part 4: The first script we need to do reinforcement learning with OpenAI
- Part 5: Create the Robot environment for OpenAI Gym for the moving cube
Part 1
This first video is for learning the creation of the URDF and control systems.
Moving Cube Git: https://bitbucket.org/theconstructcore/moving_cube/src/master/
Step 1. Create a project in ROS Development Studio(ROSDS)
We’ll use ROSDS through this project in order to avoid setting up the environment, manage packages and etc. You can create a free account here if you haven’t had an account yet.
Step 2. Create package
Since this is a simulation, let’s create a package called my_moving_cube_description under the simulation_ws.
cd ~/simulation_ws/src
catkin_create_pkg my_moving_cube_description rospy
We’ll start by building the URDF description of the robot. To do that, we’ll create a new folder called urdf under the my_moving_cube_description directory and create a file called my_moving_cube.urdf inside it with the following initial content. The robot tag indicates the name of the robot – my_moving_cube.
<robot name="my_moving_cube">
...
</robot>
Then let’s create the first link inside the robot. This includes 3 parts :
- inertial: It defines the physical property of the link. You can calculate the inertia of an object by using this tool: rosrun spawn_robot_tools_pkg inertial_calculator.py
- collision: It defines the collision property when the object interacts with other objects in the simulation.
- visual: It defines the visual property, how the object will visually show in the simulation.
    <link name="cube_body">
        <inertial>
            <origin xyz="0 0 0" rpy="0 0 0"/>
            <mass value="0.5" />
            <inertia ixx="0.00333333333333" ixy="0.0" ixz="0.0" iyy="0.00333333333333" iyz="0.0" izz="0.00333333333333"/>
        </inertial>
        <collision>
            <origin xyz="0 0 0" rpy="0 0 0"/>
            <geometry>
                <box size="0.2 0.2 0.2"/>
            </geometry>
        </collision>
	    <visual>
	      <geometry>
	        <box size="0.2 0.2 0.2"/>
	      </geometry>
	    </visual>
    </link>
You also need to define the material property after the link if you want to use it in gazebo. (NOTICE: the reference of the material property should have the same name as the link)
    <gazebo reference="cube_body">
        <kp>1000000.0</kp>
        <kd>1000000.0</kd>
        <mu1>1000000.0</mu1>
        <mu2>1000000.0</mu2>
        <material>Gazebo/Black</material>
    </gazebo>
Then we can create a spawn_moving_cube.launch file under the my_moving_cube_description/launch directory with the following content to spawn the cube.
<?xml version="1.0" encoding="UTF-8"?>
<launch>
    <include file="$(find spawn_robot_tools_pkg)/launch/spawn_robot_urdf.launch">
        <arg name="x" default="0.0" />
        <arg name="y" default="0.0" />
        <arg name="z" default="0.11" />
        <arg name="roll" default="0"/>
        <arg name="pitch" default="0"/>
        <arg name="yaw" default="0.0" />
        <arg name="urdf_robot_file" default="$(find my_moving_cube_description)/urdf/my_moving_cube.urdf" />
        <arg name="robot_name" default="my_moving_cube" />
    </include>
</launch>
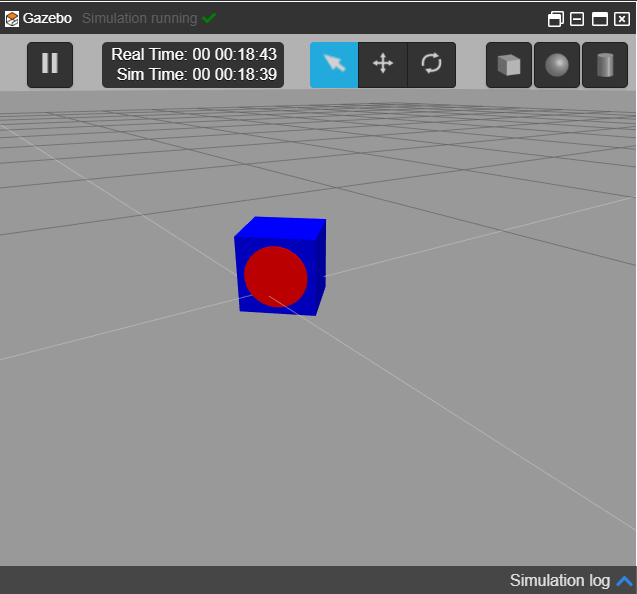
Now, go to simulations->–Empty– to launch an empty world. Then go to Tools->shell to run the command
roslaunch my_moving_cube_description spawn_moving_cube.launch
You should see the cube now appears in the empty world like this

Similarly, we can add another link called inertia_whell_roll
    <link name="inertia_wheel_roll">
        <inertial>
            <origin xyz="0 0 0" rpy="0 0 0"/>
            <mass value="0.5" />
            <inertia ixx="0.000804166666667" ixy="0.0" ixz="0.0" iyy="0.000804166666667" iyz="0.0" izz="0.0016"/>
        </inertial>
        <collision>
            <origin xyz="0 0 0" rpy="0 0 0"/>
            <geometry>
                <cylinder radius="0.08" length="0.01"/>
            </geometry>
        </collision>
	    <visual>
	      <geometry>
	        <cylinder radius="0.08" length="0.01"/>
	      </geometry>
	    </visual>
    </link>

    <gazebo reference="inertia_wheel_roll">
        <kp>1000.0</kp>
        <kd>1000.0</kd>
        <mu1>0.5</mu1>
        <mu2>0.5</mu2>
        <material>Gazebo/Red</material>
    </gazebo>
Then we also need to define the joint type which connects these two links
    <joint name="inertia_wheel_roll_joint" type="continuous">
        <origin xyz="0.1 0.0 0.0" rpy="0 1.57 0"/>
        <parent link="cube_body"/>
        <child  link="inertia_wheel_roll"/>
        <limit effort="200" velocity="1000.0"/>
        <axis xyz="0 0 1"/>
    </joint>
If you launch it again, you should see the red cylinder appear.
Step 3. Make the robot move
We need to include the controller package first in the urdf
    <gazebo>
        <plugin name="gazebo_ros_control" filename="libgazebo_ros_control.so">
            <robotNamespace>/my_moving_cube</robotNamespace>
        </plugin>
    </gazebo>
We’ll add the transmission part to actuate the robot.(NOTICE: the joint_name should be the same as the joint)
    <transmission name="inertia_wheel_roll_joint_trans">
      <type>transmission_interface/SimpleTransmission</type>
      <joint name="inertia_wheel_roll_joint">
        <hardwareInterface>hardware_interface/EffortJointInterface</hardwareInterface>
      </joint>
      <actuator name="inertia_wheel_roll_jointMotor">
        <hardwareInterface>hardware_interface/EffortJointInterface</hardwareInterface>
        <mechanicalReduction>1</mechanicalReduction>
      </actuator>
    </transmission>
Then we create a moving_cube.yaml file under the my_moving_cube_description/config to define parameters for the controller
# .yaml config file
#
# The PID gains and controller settings must be saved in a yaml file that gets loaded
# to the param server via the roslaunch file (moving_cube_control.launch).

my_moving_cube:
  # Publish all joint states -----------------------------------
  # Creates the /joint_states topic necessary in ROS
  joint_state_controller:
    type: joint_state_controller/JointStateController
    publish_rate: 30

  # Effort Controllers ---------------------------------------
  inertia_wheel_roll_joint_velocity_controller:
    type: effort_controllers/JointVelocityController
    joint: inertia_wheel_roll_joint
    pid: {p: 1.0, i: 0.0, d: 0.0}
In the end, you should create one new launch file called moving_cube control.launch under the launch folder to launch the controller
<?xml version="1.0" encoding="UTF-8"?>
<launch>

  <rosparam file="$(find my_moving_cube_description)/config/moving_cube.yaml"
            command="load"/>

  <node name="robot_state_publisher_moving_cube" pkg="robot_state_publisher" type="robot_state_publisher"
        respawn="false" output="screen">
            <param name="publish_frequency" type="double" value="30.0" />
            <param name="ignore_timestamp" type="bool" value="true" />
            <param name="tf_prefix" type="string" value="moving_cube" />
            <remap from="/joint_states" to="/moving_cube/joint_states" />
        </node>


  <node name="controller_spawner" pkg="controller_manager" type="spawner" respawn="false"
        output="screen" args="--namespace=/my_moving_cube
                              joint_state_controller
                              inertia_wheel_roll_joint_velocity_controller">
  </node>

</launch>
Let’s spawn the cube and launch the controller
roslaunch my_moving_cube_descriptiospawn_moving_cube.launch
roslaunch my_moving_cube_description moving_cube_control.launch
Then we can kick the robot and make it move by publishing one topic like this
rostopic pub /my_moving_cube/inertia_wheel_roll_joint_velocity_controller/command std_msgs/Float64 "data: 80.0"
Congratulations! Your cube robot moved a bit!
Edit by: Tony Huang
[irp posts=”9860″ name=”ROS Projects OpenAI with Moving Cube Robot in Gazebo Step-by-Step Part2″]


0 Comments