What will you learn in this post
- How to add pressure sensors in gazebo simulation using the DogBot robot.
- How to convert XACRO into SDF
List of resources used in this post
- The ROSject with the code used in this post.
- Git of DogBot simulation, in case you don’t want to use the ROSject.
- The question on Gazebo Answers
- A live version of this post on YouTube: https://youtu.be/RcrgC9o9A6A
Start the provided ROSject
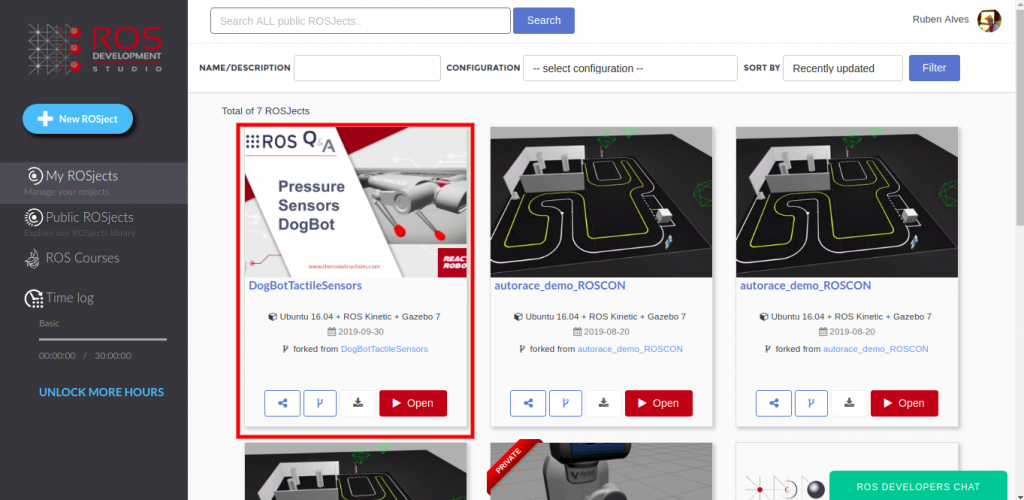
The first thing you need to do is to have a copy of the ROSject we mentioned above. Click on the link to get an automatic copy. You should now see a ROSject called DogBotTactileSensors on your list of ROSjects, something like the image below:
After clicking on the Open button to open the ROSject, you should have the ROSject opened in a remote computer launched on ROSDS.
Launching the simulation
Once the ROSject is open, you can launch a simulation. You can achieve that in two ways:
- Opening a web shell (clicking on Tools -> Web Shell) and typing: roslaunch dogbot_gazebo main.launch
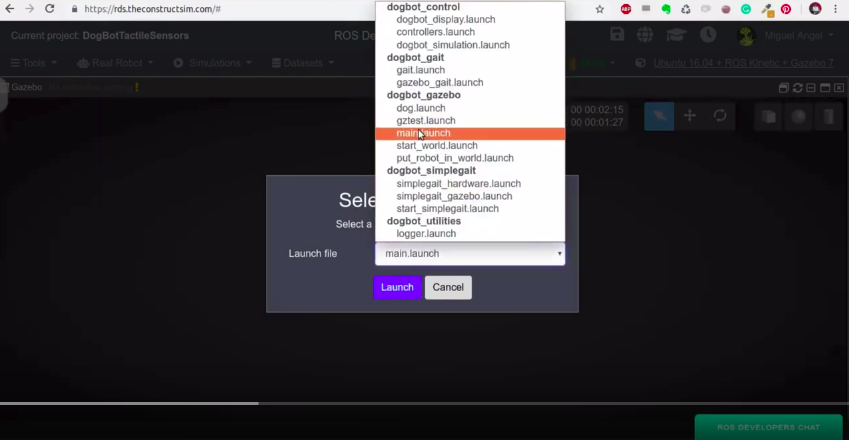
- Using the menu Simulations -> Choose Simulation -> Choose Launch File. In the end, you will have a menu with a list of launch files. You can select the main.launch file in the dogbot_gazebo package as shown in the image below:
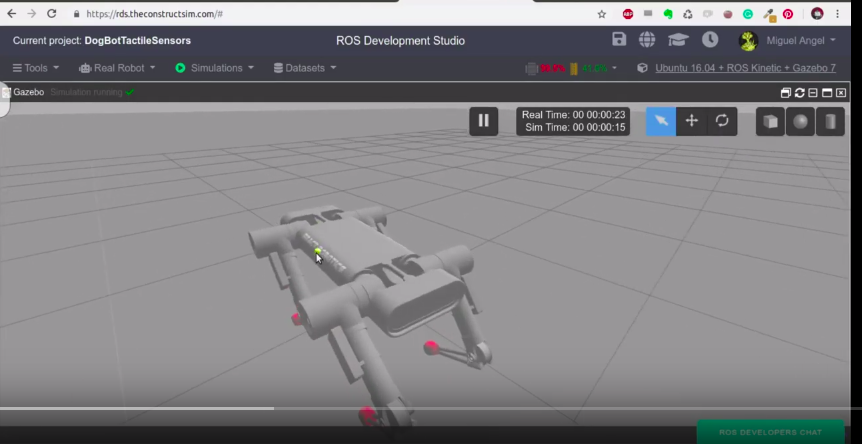
You should now have DogBot up and running in ROSDS:
In the simulation, you can see the robot has red “shoes” in its feet. There is where we put our pressure sensors.
Launching the simulation in your own local computer
The steps aforementioned are about how to launch the simulation in ROSDS (ROS Development Studio)
If you want to install in your local computer, you can just download the ROSject (or git clone) and execute requirements.sh script, which is located in the simulation_ws/src/dogbot_tc folder with the commands below:
cd simulation_ws/src/dogbot_tc

./requirements.sh
After that, you should be able to launch the simulation with:
- source /opt/ros/kinetic/setup.bash
- source simulation_ws/devel/setup.bash
- roslaunch dogbot_gazebo main.launch
Listing the ROS Topics
Once you have the simulation up and running, you can see the contact sensors with:
rostopic list | grep contact
We can see that the topics are working by subscribing to a contact topic, using the command below:
rostopic echo /dogbot/back_left_contactsensor_state -n1
If we look carefully at the data printed, we can see the frame_id “back_left_foot” and in the states section, you can see the objects the robot is in contact with and the forces applied.
Finding the code
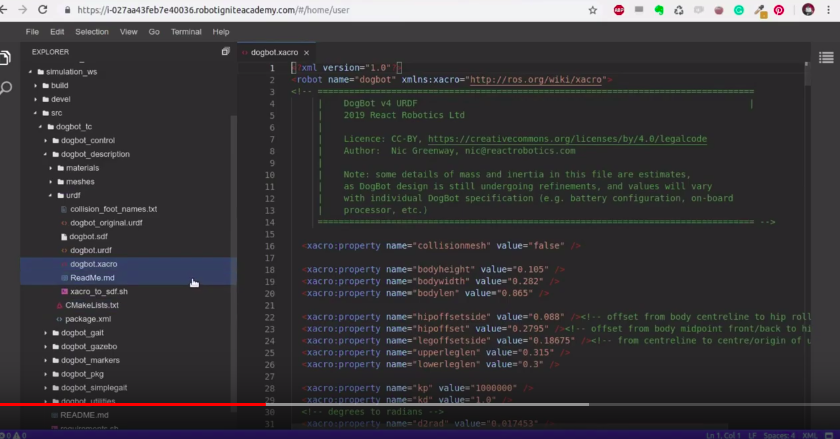
The code used to define the sensors is located in ~/simulation_ws/src/dogbot_tc/dogbot_description/urdf/dogbot.xacro
In ROSDS you can see it easily by using the Code Editor.
By looking at the code, if you find for “Contact Sensor” you will find it around line 350, inside the <gazebo> tag of the dogbot.xacro file.
Going deeper into the code
On the dogbot.xacro file, the sensor is defined in line 350 like below:
<sensor name="${prefix}_${suffix}_contactsensor_sensor" type="contact">
        <always_on>true</always_on>
        <contact>
          <collision>${prefix}_${suffix}_lowerleg_fixed_joint_lump__${prefix}_${suffix}_foot_collision_5</collision>
        </contact>
        <plugin name="${prefix}_${suffix}_foot_plugin" filename="libgazebo_ros_bumper.so">
          <bumperTopicName>${prefix}_${suffix}_contactsensor_state</bumperTopicName>
          <!--<frameName>${prefix}_${suffix}_foot</frameName>-->
          <frameName>world</frameName>
        </plugin>
      </sensor>
We can see the type=”contact”, and the gazebo plugin named libgazebo_ros_bumper.so.
One of the most important parts of the code is the contact part:
<contact>
  <collision>${prefix}_${suffix}_lowerleg_fixed_joint_lump__${prefix}_${suffix}_foot_collision_5</collision>
</contact>
Further details about the collision can be found in this video: https://youtu.be/RcrgC9o9A6A?t=269
Converting .xacro into .sdf file
Gazebo uses .sdf files to launch simulations, but the code we showed so far is a .xacro one (dogbot.xacro).
In order to convert .xacri into .sdf you can just:
cd ~/simulation_ws/src/dogbot_tc/dogbot_description/urdf

./xacro_to_sdf.sh
That script generates the dogbot.sdf file that is already in the ROSject. The content of the xacro_to_sdf.sh file is:
#!/usr/bin/env bash
echo "Cleaning sdf and urdf"
rm -rf dogbot.sdf dogbot.urdf
rosrun xacro xacro.py dogbot.xacro > dogbot.urdf
gz sdf -p dogbot.urdf > dogbot.sdf
echo "Generated SDF
Seeing the markers on RViz
You can see the contact sensors in RViz. For that you can run the following command in a webshell:
rosrun dogbot_markers arrows_rviz.py
In a different shell you run:
rosrun rviz rviz
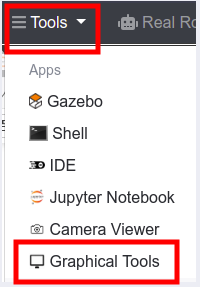
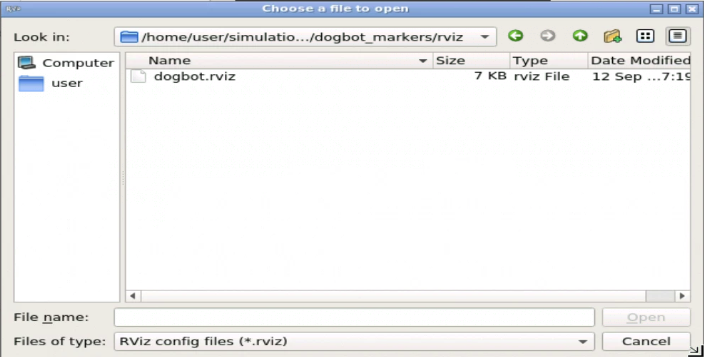
Open the Graphical Tools and select the rviz file inside the ~/simulation_ws/src/dogbot_tc/dogbot_markers/rviz folder. For that you first need to click Tools -> Graphical Tools, then select the rviz config file.
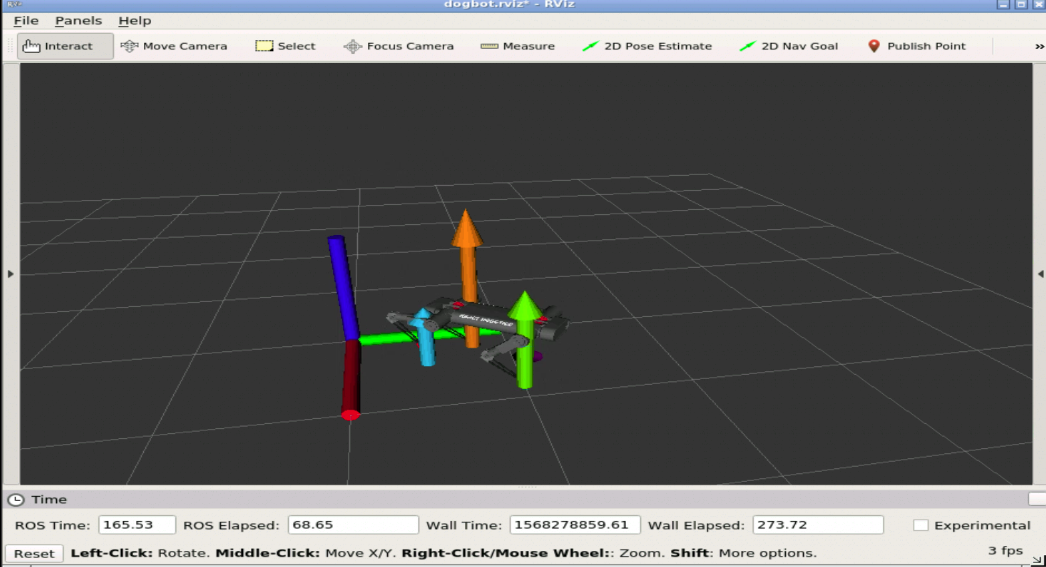
Here the pressure in each of the feet of Dogbit is represented by an arrow, which lengths and colors are proportional to the pressure registered.
If you want a deeper understanding of how the markers are created and published in RViz, please have a look at the post on adding pressure sensors in RViz.
How to move DogBot
rosrun teleop_twist_keyboard teleop_twist_keyboard.py cmd_vel:=/dogbot/cmd_vel
Hit K to make DogBot stop, and to lower the speed, hit Z on the keyboard until when hitting I ( go forwards ) has a sable step. Around 0.1 is ok.
A video version of this post
So this is the post for today. If you prefer, we also have a video version of this post available in the link below. We hope you liked the post and the video. If so, please feel free to subscribe to our channel, share this post and comment on the video section.
We would like to thank React Robotics for this amazing robot and thank you for reading through this post.
Keep pushing your ROS Learning.
Interested in learning more? Try out this course on URDF creation for Gazebo and ROS:
#dogbot #quadruped #pressuresensors #tactilesensors #Simulation #Gazebo #Robot





0 Comments