Gazebo is a leader in robot simulation. It is a tool relied upon by hundreds of thousands of users and developers around the world.
Perhaps you have heard “Gazebo simulation” many times, but you don’t know exactly what it is or how it works. In this post, you will learn what a Gazebo simulation is by practicing, as it pertains to ROS development.
You don’t need a ROS installation for this, as we will use the ROS Development Studio (ROSDS), an online platform that provides access to ROS1 & ROS2 computers and other powerful ROS tools within a browser!
Let’s go!
Step 1: Create a Project (ROSject) on ROSDS
Action first before the theory! Grab a copy of the project used for this post using the link below. If you don’t have an account on the ROSDS, you will be guided to create one.
Project link: http://www.rosject.io/l/c40d140/.
Once you have cloned the project, open it up and give it a moment to finish loading.
If you want to know how to install Gazebo in an existing ROS environment on your local computer, then please follow this tutorial:
[irp posts=”8194″ name=”All about Gazebo ROS (Gazebo 9)”]
Step 2: Bring up a Gazebo simulation
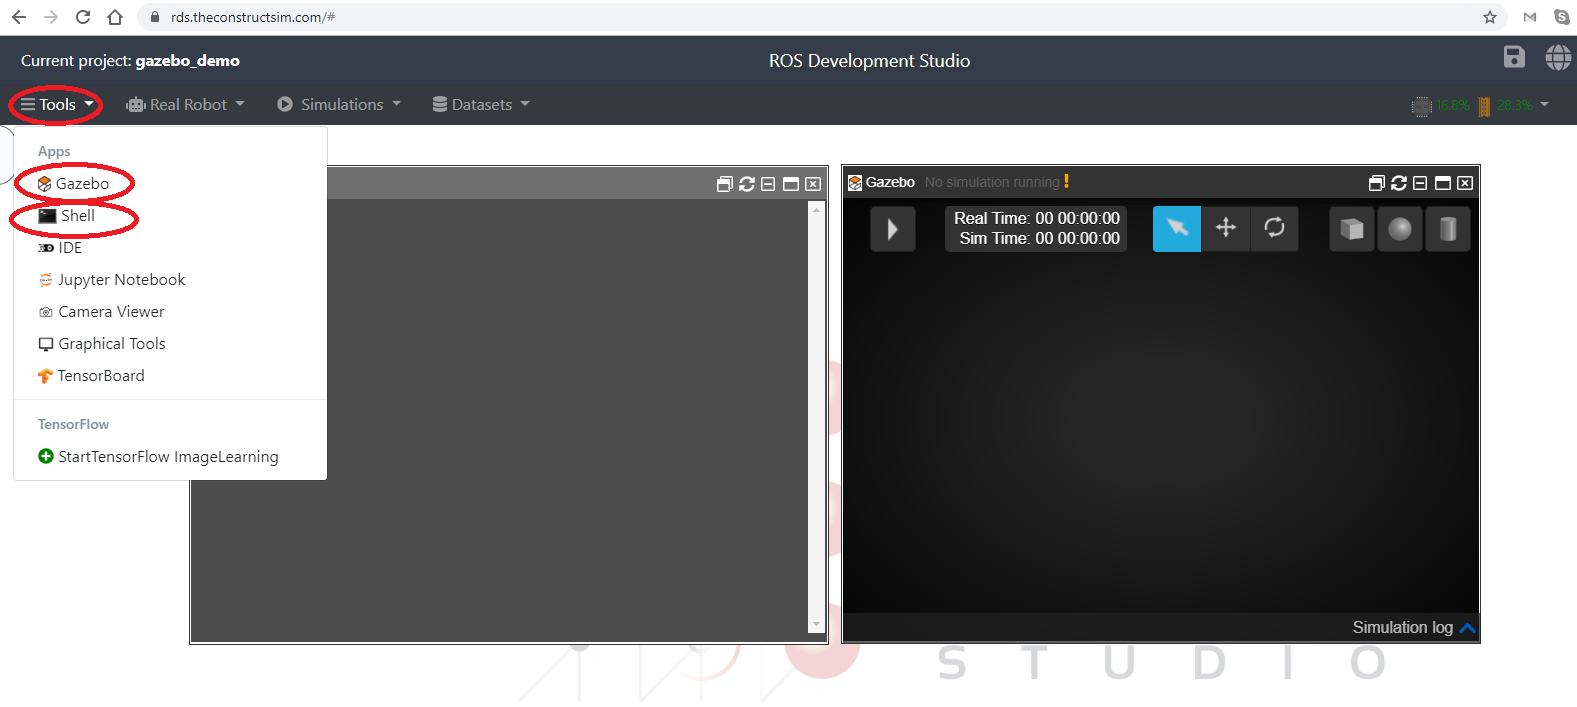
From the ROSDS Tools menu, pick the Shell and Gazebo tools. Yeah, we have a tool so named:). Place the tools side-by-side for best effect.
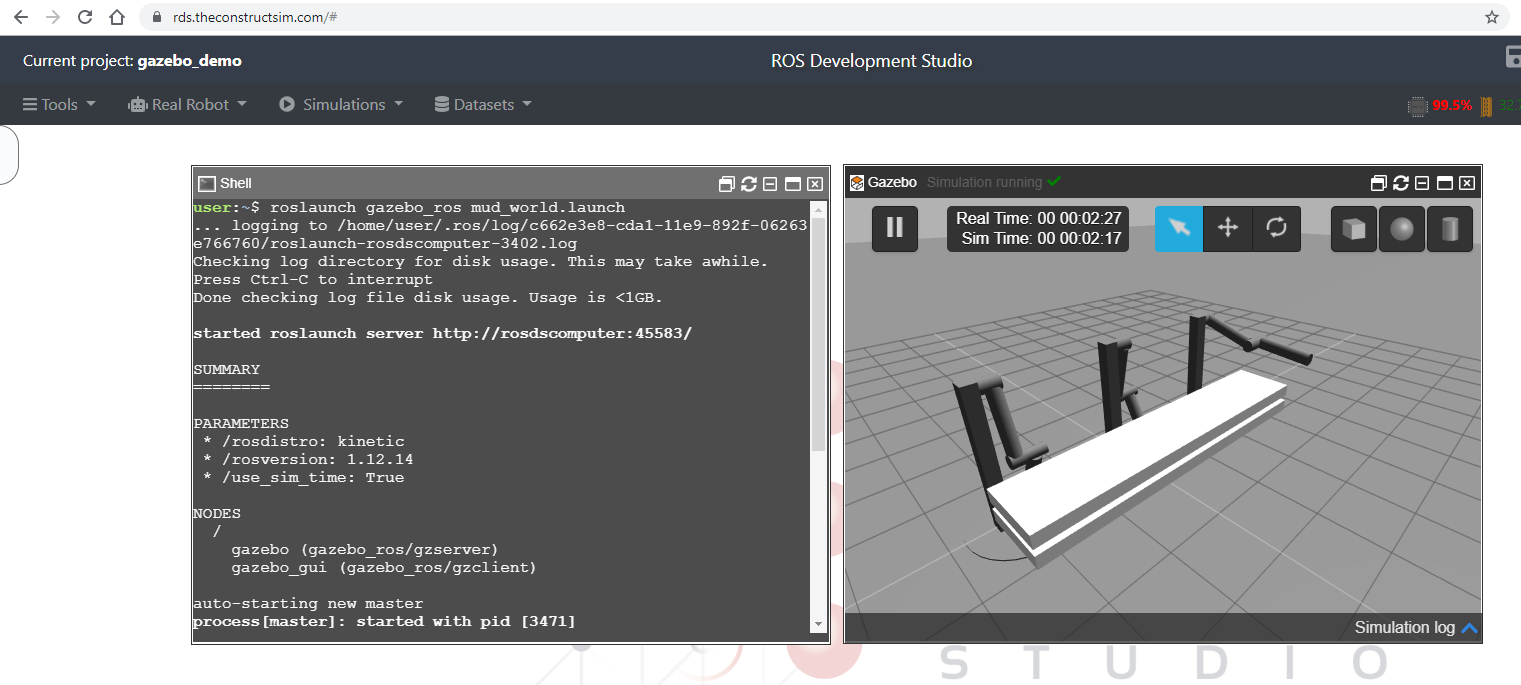
Type the following commands on the Shell to bring up a Gazebo simulation.
user:~$ roslaunch gazebo_ros mud_world.launch
You should now see something similar to this:
Step 3: What is Gazebo simulation in theory?
Well, I just showed you a Gazebo simulation in the step above, in practice. Now we are going to look what it’s in theory.
- A Gazebo simulation is a robot simulation made with Gazebo, a 3D simulator with the ability to accurately and efficiently simulate populations of robots in complex indoor and outdoor environments.
- It’s similar to game engines, but produces better simulations and offers a suite of sensors and interfaces for both users and programs.
- It has the following main components:
- World files – contain all the elements in a simulation, including robots, lights, sensors, and static objects. In the image above, the world is shown in the Gazebo app.
- Models – represent individual elements. The three robots and the object in front of them are models.
- gzserver – the “work horse” Gazebo program – it reads the world file to generate and populate a world.
- gzclient – connects to gzserver and visualizes the elements. In the shell output, under “NODES”, we have both
gzserverandgzclientlisted. - gzweb – web version of gzclient, using WebGL.
Step 4: Wrapping up
And that’s it! You know what a Gazebo simulation is in both practice and theory. This knowledge is the foundation for using and creating Gazebo simulations.
Extra: Video
Prefer to watch a video demonstrating the steps above? We have one for you below!
Related Resources and Further Learning
If you are a ROS beginner and want to learn ROS basics fast, we recommend you take any of the following courses on Robot Ignite Academy:
To learn more about Gazebo simulation, visit the full Gazebo Tutorials below:
Feedback
Did you like this post? Do you have questions about what is explained? Whatever the case, please leave a comment on the comments section below, so we can interact and learn from each other.
If you want to learn about other ROS topics, please let us know in the comments area and we will do a video or post about it
Edited by Bayode Aderinola & Yuhong Lin


0 Comments