Locomotion is one of the most challenging topics in robotics. Creating the hard-coded algorithms and the kinematics models is not an easy task. Therefore, its no surprise that AI has been used to try and make robots learn how to move by themselves. In this project you will learn step by step, how to create a Monopod robot simulation working in Gazebo and then set up everything to use OpenAI-Gym infrastructure. OpenAI-Gym allows you to separate learning algorithms from the physical/simulated robot, so that you can test different learning algorithms easily. It also allows you to compare your results with other people in the same conditions.
Part 1
In this first video of a new ROS Development Studio video series, you are going to learn step by step
how to create your own hopper simulation, and may be a real version if there is high support to this videos.
You will learn in this video how to create your ROS packages, modify a URDF given by Alexander W. Winkler, https://github.com/leggedrobotics/xpp to give it control and physics and add all the needed sensors like IMU, odometry and contact sensor.
Here are the steps to create the hopper robot as shown in the video:
Step 1
Head to Robot Development Studio and create a new project.
Provide a suitable project name and some useful description.
Open the project (this will take few seconds)
Once the project is loaded run the IDE from the tools menu. Also verify that the initial directory structure should look like following:
.
├────── ai_ws
├────── catkin_ws
│     ├─── build
│     ├─── devel
│     └───
├────── notebook_ws
│     ├─── default.ipynb
│     └─── images
└────── simulation_ws
      ├─── build
      ├─── devel
      └─── src
Note that we use simulation_ws to contain all the files related to simulations. Those files not related to simulations will go to catkin_ws (like python scripts, launch files etc)
Step 2
Now we create two catkin packages with names my_legged_robots_description and my_legged_robots_sims. We will add rospy as dependency for both of them.
Start a SHELL from tools menu and navigate to ~simulation_ws/src directory as follows
$ cd simulation_ws/src
Now we create the first catkin package with following command
$ catkin_create_pkg my_legged_robots_description rospy
Then create second catkin_package with the following command
$ catkin_create_pkg my_legged_robots_sims rospy
At this point we should have the following directory structure
.
├────── ai_ws
├────── catkin_ws
│     ├─── build
│     ├─── devel
│     └───
├────── notebook_ws
│     ├─── default.ipynb
│     └─── images
└────── simulation_ws
      ├─── build
      ├─── devel
      └─── src
         ├──── CMakeLists.txt
         ├──── my_legged_robots_description
         │    ├─── CMakeLists.txt
         │    ├─── package.xml
         │    └─── src
         └──── my_legged_robots_sims
              ├─── CMakeLists.txt
              ├─── package.xml
              └─── src
Step 3
Now we need to copy the mesh for the hopper robot from github. Use the following command to clone the github repository
Once the cloning is complete, we should have a new directory with name xpp inside the ~simulation_ws/src directory
This new directory contains the mesh models for various robots such as biped, quadruped etc. We only need the mesh for monoped so we will do following
- copy the meshes folder from ~simulation_ws/src/xpp/robots/xpp_hyq/ to ~simulation_ws/src/my_legged_robots_description/ directory
- copy the urdf folder from ~simulation_ws/src/xpp/robots/xpp_hyq/ to ~simulation_ws/src/my_legged_robots_sims/ directory
- delete the files in ~simulation_ws/src/my_legged_robots_sims/urdf/ directory except the file monoped.urdf
Step 4
Lets analyze the urdf file for the monoped.
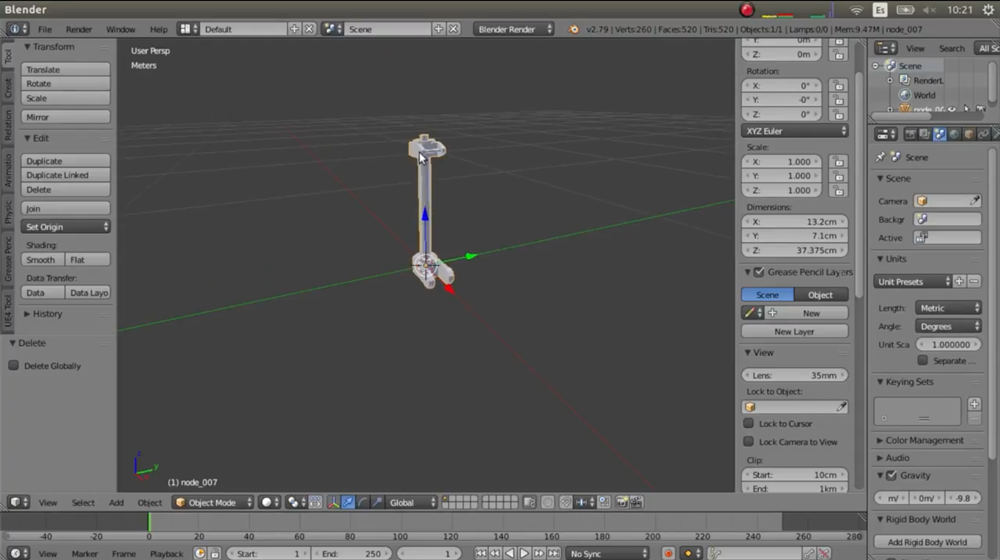
Open the monoped.urdf file in the IDE. The file contains 4 links and 3 joints. Moreover the links have only visual properties which means we can’t yet simulate it. However we can load it in rviz for display.
For simulation ability we need to define inertia and collision properties into the monoped.urdf file.
We will add these properties to the monoped.urdf file. Now before we make any changes, its a good idea that we create a copy of monoped.urdf with name monoped_controlled.urdf
Here is the monoped_controlled.urdf file content after editing
<robot name="monoped">
    <link name="base">
        <inertial>
            <origin xyz="0 0 0" rpy="0 0 0"/>
            <mass value="0.18" />
            <inertia ixx="0.0002835" ixy="0.0" ixz="0.0" iyy="0.0002835" iyz="0.0" izz="0.000324"/>
        </inertial>
        <collision>
            <origin xyz="0 0 0" rpy="0 0 0"/>
            <geometry>
                <box size="0.20 0.20 0.30"/>
            </geometry>
        </collision>
	    <visual>
	      <geometry>
	        <box size="0.20 0.20 0.30"/>
	      </geometry>
	      <material name="red">
	        <color rgba="1.0 0 0 1.0"/>
	      </material>
	    </visual>
    </link>

    <gazebo reference="base">
        <kp>1000.0</kp>
        <kd>1000.0</kd>
        <mu1>0.5</mu1>
        <mu2>0.5</mu2>
        <material>Gazebo/Red</material>
    </gazebo>

    <link name="hipassembly">
        <inertial>
            <origin xyz="0 0 0" rpy="0 0 0"/>
            <mass value="0.18" />
            <inertia ixx="0.0002835" ixy="0.0" ixz="0.0" iyy="0.0002835" iyz="0.0" izz="0.000324"/>
        </inertial>
        <collision>
            <origin rpy="0.0 0.0 0.0" xyz="0.0 0.0 0.0"/>
	      <geometry>
	        <mesh filename="package://my_legged_robots_description/meshes/leg/hipassembly.dae" scale="1 1 1"/>
	      </geometry>
        </collision>
	    <visual>
	      <origin rpy="0.0 0.0 0.0" xyz="0.0 0.0 0.0"/>
	      <geometry>
	        <mesh filename="package://my_legged_robots_description/meshes/leg/hipassembly.dae" scale="1 1 1"/>
	      </geometry>
	      <material name="white"/>
	    </visual>
    </link>

    <gazebo reference="hipassembly">
        <kp>1000.0</kp>
        <kd>1000.0</kd>
        <mu1>0.5</mu1>
        <mu2>0.5</mu2>
        <material>Gazebo/Blue</material>
    </gazebo>


    <link name="upperleg">
        <inertial>
            <origin xyz="0 0 0" rpy="0 0 0"/>
            <mass value="0.18" />
            <inertia ixx="0.0002835" ixy="0.0" ixz="0.0" iyy="0.0002835" iyz="0.0" izz="0.000324"/>
        </inertial>
        <collision>
            <origin rpy="0.0 0.0 0.0" xyz="0.0 0.0 0.0"/>
	      <geometry>
	        <mesh filename="package://my_legged_robots_description/meshes/leg/upperleg.dae" scale="1 1 1"/>
	      </geometry>
        </collision>
	    <visual>
	      <origin rpy="0.0 0.0 0.0" xyz="0.0 0.0 0.0"/>
	      <geometry>
	        <mesh filename="package://my_legged_robots_description/meshes/leg/upperleg.dae" scale="1 1 1"/>
	      </geometry>
	      <material name="blue"/>
	    </visual>
    </link>

    <gazebo reference="upperleg">
        <kp>1000.0</kp>
        <kd>1000.0</kd>
        <mu1>0.5</mu1>
        <mu2>0.5</mu2>
        <material>Gazebo/Blue</material>
    </gazebo>


    <link name="lowerleg">
        <inertial>
            <origin xyz="0 0 0" rpy="0 0 0"/>
            <mass value="0.18" />
            <inertia ixx="0.0002835" ixy="0.0" ixz="0.0" iyy="0.0002835" iyz="0.0" izz="0.000324"/>
        </inertial>
        <collision>
            <origin rpy="0.0 0.0 0.0" xyz="0.0 0.0 0.0"/>
	      <geometry>
	        <mesh filename="package://my_legged_robots_description/meshes/leg/lowerleg.dae" scale="1 1 1"/>
	      </geometry>
        </collision>
	    <visual>
	      <geometry>
	        <mesh filename="package://my_legged_robots_description/meshes/leg/lowerleg.dae" scale="1 1 1"/>
	      </geometry>
	      <material name="blue"/>
	    </visual>
    </link>

    <gazebo reference="lowerleg">
        <kp>1000.0</kp>
        <kd>1000.0</kd>
        <mu1>0.5</mu1>
        <mu2>0.5</mu2>
        <material>Gazebo/Blue</material>
    </gazebo>

    <link name="lowerleg_contactsensor_link">
 	    <inertial >
            <origin xyz="0 0 0" rpy="0 0 0"/>
            <mass value="0.01" />
            <inertia ixx="1.28e-06" ixy="0.0" ixz="0.0" iyy="1.28e-06" iyz="0.0" izz="1.28e-06"/>
        </inertial>
        <collision>
            <origin xyz="0 0 0" rpy="0 0 0"/>
            <geometry>
                <sphere radius="0.020"/>
            </geometry>
        </collision>
        <visual>
            <origin rpy="0.0 0 0" xyz="0 0 0"/>
            <geometry>
                <sphere radius="0.020"/>
            </geometry>
            <material name="red">
	            <color rgba="1.0 0 0 1.0"/>
	        </material>
        </visual>
	</link>

    <gazebo reference="lowerleg_contactsensor_link">
        <kp>1000.0</kp>
        <kd>1000.0</kd>
        <mu1>10.0</mu1>
        <mu2>10.0</mu2>
        <material>Gazebo/Red</material>
    </gazebo>

    <joint name="lowerleg_contactsensor_link_joint" type="fixed">
        <parent link="lowerleg"/>
        <child link="lowerleg_contactsensor_link"/>
        <origin xyz="0.35 0 0" rpy="0 0 0"/>
    </joint>


    <joint name="haa_joint" type="revolute">
        <origin xyz="0.0 0.0 -0.15000" rpy="2.0344439357957036 1.5707962290814481 -1.1071487177940917"/>
        <parent link="base"/>
        <child  link="hipassembly"/>
        <limit effort="200" lower="-1.6" upper="1.6" velocity="10.0"/>
        <axis xyz="0 0 1"/>
    </joint>
    <joint name="hfe_joint" type="revolute">
        <origin xyz="0.08000 0.00000 0.00000" rpy="1.5707963705062866 -0.0 0.0"/>
        <parent link="hipassembly"/>
        <child  link="upperleg"/>
        <limit effort="200" lower="-1.6" upper="1.6" velocity="10.0"/>
        <axis xyz="0 0 1"/>
    </joint>
    <joint name="kfe_joint" type="revolute">
        <origin xyz="0.35000 0.00000 0.00000" rpy="0.0 0.0 0.0"/>
        <parent link="upperleg"/>
        <child  link="lowerleg"/>
        <limit effort="200" lower="-1.6" upper="1.6" velocity="10.0"/>
        <axis xyz="0 0 1"/>
    </joint>

</robot>
In addition to the inertia and collision tags we have added a few tags.
First is the gazebo tag, this tag is required to simulate the block in gazebo, it contains information about the material hardness (whether the material is easily deformable or not) and friction values (static and dynamic).
The Second tag that was added is a link tag with name lowerleg_contactsensor_link. This link will help us detect the contact with ground in later part of this project.
Another added tag is a joint tag by name lowerleg_contactsensor_link_joint, this combined with previous link tag completes the contact sensor positioning on the robot.
Note : In the above code the values used for various inertia is calculated using inertial_calculator tool ( it is a part of ROS). Moreover, to simplify calculation of inertia of different blocks with different shapes, a bounding box approximation is applied i.e. we compute the inertia with respect to the dimensions of the bounding box. Though such value might not be perfect, it is reasonably good to work with.
Step 5
Now we will simulate this robot.
To do so first we need to create a world file. Create a directory named worlds inside ~simulation_ws/src/my_legged_robots_sims/ directory.
Using the IDE create a file low_gravity.world inside worlds directory. This is our world file. Write the following content to it:
<sdf version="1.4">
<world name="default">
    <include>
        <uri>model://sun</uri>
    </include>
    <gravity>0 0 0.0</gravity>
    <include>
        <uri>model://ground_plane</uri>
    </include>
</world>
</sdf>
In this file the tag gravity helps us to manipulate the gravity inside the gazebo world.
Next, to launch the world we need to create a launch file main.launch. Before creating this file we create a launch directory inside ~simulation_ws/src/my_legged_robots_sims/ directory.
Using the IDE we add the following code to main.launch file
<?xml version="1.0" encoding="UTF-8"?>
<launch>
    <arg name="robot" default="machines"/>
    <arg name="debug" default="false"/>
    <arg name="gui" default="true"/>
    <arg name="headless" default="false"/>
    <arg name="pause" default="false"/>  <!-- Start Gazebo with a blank world -->
    <include file="$(find gazebo_ros)/launch/empty_world.launch">
        <arg name="world_name" value="$(find my_legged_robots_sims)/worlds/low_gravity.world"/>
        <arg name="debug" value="$(arg debug)" />
        <arg name="gui" value="$(arg gui)" />
        <arg name="paused" value="$(arg pause)"/>
        <arg name="use_sim_time" value="true"/>
        <arg name="headless" value="$(arg headless)"/>
        <env name="GAZEBO_MODEL_PATH" value="$(find my_legged_robots_sims)/models:$(optenv GAZEBO_MODEL_PATH)"/>
    </include>
</launch>

<?xml version="1.0" encoding="UTF-8"?>
<launch>
 <include file="$(find spawn_robot_tools_pkg)/launch/spawn_robot_urdf.launch">
  <arg name="x" default="0.0" />
  <arg name="y" default="0.0" />
  <arg name="z" default="1.0" />
  <arg name="roll" default="0"/>
  <arg name="pitch" default="0"/>
  <arg name="yaw" default="0.0" />
  <arg name="urdf_robot_file" default="$(find my_legged_robots_sims)/urdf/monoped_controlled.urdf" />
  <arg name="robot_name" default="monoped" />
 </include>
</launch>
Notice in line 9 we have provided the name of our world file low_gravity.world.
This launch file will only launch an empty world in gazebo with zero gravity. To launch it click on the Simulation menu and select Select launch file option and choose the main.launch item.
To spawn the monoped we need to create another launch file inside the ~simulation_ws/src/my_legged_robots_sims/launch/ directory.
Use IDE to create a new file named spawn_monoped.launch and add following content:
<?xml version="1.0" encoding="UTF-8"?>
<launch>
    <include file="$(find spawn_robot_tools_pkg)/launch/spawn_robot_urdf.launch">
        <arg name="x" default="0.0" />
        <arg name="y" default="0.0" />
        <arg name="z" default="1.0" />
        <arg name="roll" default="0"/>
        <arg name="pitch" default="0"/>
        <arg name="yaw" default="0.0" />
        <arg name="urdf_robot_file" default="$(find my_legged_robots_sims)/urdf/monoped_controlled.urdf" />
        <arg name="robot_name" default="monoped" />
    </include>
</launch>
To run it, start a SHELL from tools menu and execute following command.
$ roslaunch my_legged_robots_sims spawn_monoped.launch
You should see the monoped load in the gazebo world.
We can change the gravity settings in low_gravity.world file and relaunch the robot to see the effect of gravity. Since we have not actuated the robot the robot will fall under the influence of gravity, which is totally fine. This finishes the steps to create the hopper robot using Robot Development Studio as shown in the video.
Checkout the URDF robot creation course in RobotIgniteAcademy: https://goo.gl/NJHwq3
[irp posts=”8194″ name=”All about Gazebo 9 with ROS”]
Part 2
In this second video of a new ROS Development Studio video series, you are going to continue to learn step by step
how to create your own hopper simulation, and may be a real version if there is high support to this videos.
You will learn in this video
- how to create your ROS packages,
- modify a URDF given by Alexander W. Winkler, https://github.com/leggedrobotics/xpp to give it control and physics
- and add all the needed sensors like IMU, odometry and contact sensor.
All the code of the project will be uploaded to this public repo, don’t hesitate to make improvements and add more content:
https://bitbucket.org/theconstructcore/hopper/src/master/
Checkout the URDF robot creation course in RobotIgniteAcademy: www.robotigniteacademy.com


0 Comments
Trackbacks/Pingbacks