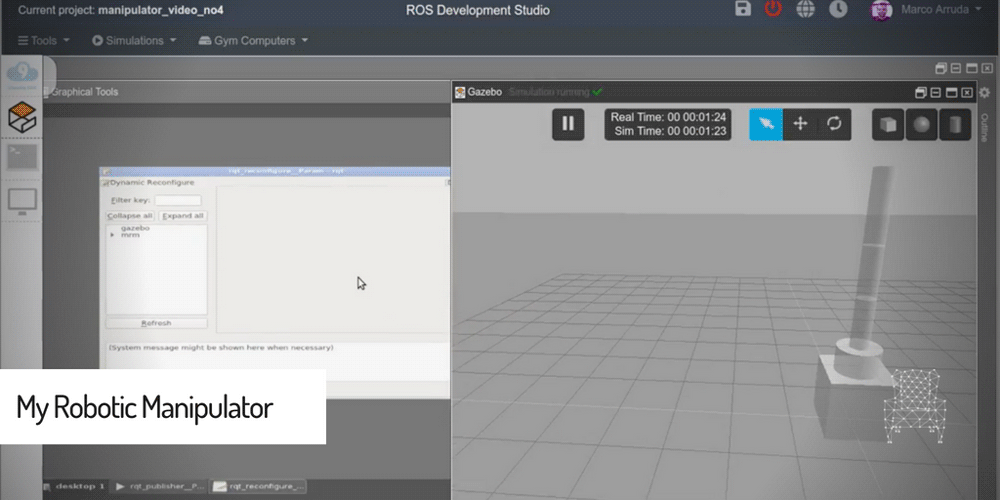
This is a series of posts. If you didn’t follow up, you can find the previous post here. In this 5th video of the robotic manipulator series, we will expand the ROS controllers to all joints of our robot using XACRO. At the end of the video we’ll have a full controlled robot through ROS topics. We are also going to use RQT Publisher and RQT Reconfigure to do some experiments with the robot.
Step 0. Create a project in ROS Development Studio(ROSDS)
ROSDS helps you follow our tutorial in a fast pace without dealing without setting up an environment locally. If you haven’t had an account yet, you can create a free account here. We’ll start the project for the previous video – manipulator_video_no4.
Step 1. Configure controller
In order to use controllers for our robot. The first step is we need to add transmission definitions for each joint in the links_joints.xarco and add limitation for each joint in the mrm.xarco file. The most important thing is to add the gazebo plugin in the mrm.xarco file.
...
<xacro:macro name="m_joint" params="name type axis_xyz origin_rpy origin_xyz parent child limit_e limit_l limit_u limit_v">
    <joint name="${name}" type="${type}">
      <axis xyz="${axis_xyz}" />
      <limit effort="${limit_e}" lower="${limit_l}" upper="${limit_u}" velocity="${limit_v}" />
      <origin rpy="${origin_rpy}" xyz="${origin_xyz}" />
      <parent link="${parent}" />
      <child link="${child}" />
    </joint>
    <transmission name="trans_${name}">
      <type>transmission_interface/SimpleTransmission</type>
      <joint name="${name}">
        <hardwareInterface>hardware_interface/EffortJointInterface</hardwareInterface>
      </joint>
      <actuator name="motor_${name}">
        <hardwareInterface>hardware_interface/EffortJointInterface</hardwareInterface>
        <mechanicalReduction>1</mechanicalReduction>
      </actuator>
    </transmission>
  </xacro:macro>
...
...
<m_joint name="${link_01_name}__${link_02_name}" type="revolute"
           axis_xyz="0 1 0"
           origin_rpy="0 0 0" origin_xyz="0 0 0.4"
           parent="link_01" child="link_02"
           limit_e="1000" limit_l="0" limit_u="0.5" limit_v="0.5" />

  <m_link_cylinder name="${link_02_name}"
              origin_rpy="0 0 0" origin_xyz="0 0 0.4"
              mass="57.906"
              ixx="12.679" ixy="0" ixz="0"
              iyy="12.679" iyz="0"
              izz="0.651"
              radius="0.15" length="0.8" />

  <m_joint name="${link_02_name}__${link_03_name}" type="revolute"
           axis_xyz="0 1 0"
           origin_rpy="0 0 0" origin_xyz="0 0 0.8"
           parent="link_02" child="link_03"
           limit_e="1000" limit_l="0" limit_u="0.75" limit_v="0.5" />

  <m_link_cylinder name="${link_03_name}"
              origin_rpy="0 0 0" origin_xyz="0 0 0.4"
              mass="57.906"
              ixx="12.679" ixy="0" ixz="0"
              iyy="12.679" iyz="0"
              izz="0.651"
              radius="0.15" length="0.8" />

  <m_joint name="${link_03_name}__${link_04_name}" type="revolute"
           axis_xyz="0 1 0"
           origin_rpy="0 0 0" origin_xyz="0 0 0.8"
           parent="link_03" child="link_04"
           limit_e="1000" limit_l="0" limit_u="0.75" limit_v="0.5" />

  <m_link_cylinder name="${link_04_name}"
              origin_rpy="0 0 0" origin_xyz="0 0 0.4"
              mass="57.906"
              ixx="12.679" ixy="0" ixz="0"
              iyy="12.679" iyz="0"
              izz="0.651"
              radius="0.15" length="0.8" />

  <m_joint name="${link_04_name}__${link_05_name}" type="revolute"
           axis_xyz="0 0 1"
           origin_rpy="0 0 0" origin_xyz="0 0 0.8"
           parent="link_04" child="link_05"
           limit_e="1000" limit_l="-3.14" limit_u="3.14" limit_v="0.5" />

  <gazebo>
    <plugin name="gazebo_ros_control" filename="libgazebo_ros_control.so">
    </plugin>
  </gazebo>
...
Then we create a file called joints.yaml file in the config folder which defines the parameters for controllers.
# Publish all joint states -----------------------------------
joint_state_controller:
  type: joint_state_controller/JointStateController
  publish_rate: 50

# Position Controllers ---------------------------------------
joint1_position_controller:
  type: effort_controllers/JointPositionController
  joint: base_link__link_01
  pid: {p: 2000.0, i: 100, d: 500.0}
joint2_position_controller:
  type: effort_controllers/JointPositionController
  joint: link_01__link_02
  pid: {p: 50000.0, i: 100, d: 2000.0}
joint3_position_controller:
  type: effort_controllers/JointPositionController
  joint: link_02__link_03
  pid: {p: 20000.0, i: 50, d: 1000.0}
joint4_position_controller:
  type: effort_controllers/JointPositionController
  joint: link_03__link_04
  pid: {p: 2000.0, i: 50, d: 200.0}
joint5_position_controller:
  type: effort_controllers/JointPositionController
  joint: link_04__link_05
  pid: {p: 700.0, i: 50, d: 70.0}
This file defines the type of the controller and the pid parameters for each controller.
The last step is to modify the launch file in order to launch the gazebo plugin for the controller in the spawn.launch file.
<?xml version="1.0" encoding="UTF-8"?>
<launch>

    <group ns="/mrm">

        <!-- Robot model -->
        <param name="robot_description" command="$(find xacro)/xacro --inorder '$(find mrm_description)/urdf/mrm.xacro'" />
        <arg name="x" default="0"/>
        <arg name="y" default="0"/>
        <arg name="z" default="0.5"/>

        <!-- Spawn the robot model -->
        <node name="mybot_spawn" pkg="gazebo_ros" type="spawn_model" output="screen"
              args="-urdf -param robot_description -model mrm -x $(arg x) -y $(arg y) -z $(arg z)" />

        <!-- Load controllers -->
        <rosparam command="load" file="$(find mrm_description)/config/joints.yaml" />

        <!-- Controllers -->
        <node name="controller_spawner" pkg="controller_manager" type="spawner"
            respawn="false" output="screen" ns="/mrm"
            args="--namespace=/mrm
            joint_state_controller
            joint1_position_controller
            joint2_position_controller
            joint3_position_controller
            joint4_position_controller
            joint5_position_controller
            --timeout 60">
        </node>

        <!-- rqt -->
        <node name="rqt_reconfigure" pkg="rqt_reconfigure" type="rqt_reconfigure" />
        <node name="rqt_publisher" pkg="rqt_publisher" type="rqt_publisher" />

    </group>

</launch>
Then you can open an empty simulation from Simulations->Empty and launch it with the following command
roslaunch mrm_description spawn.launch
After you see the robot appear in the simulation, you can open the graphical tool from Tools->graphical tool
By using the rqt tool, you can send parameter to topics control the joint movement(e.g mrm/joint4_position_controller/command/dara) to move the robot.
The PID parameters are not well tuned yet, we’ll do it in the next post. But the robot is moving(with some oscillation) now.
Want to learn more?
If you want to learn more about how to create manipulator simulation in ROS, please check our Robot Creation with URDF ROS and ROS Control 101 course.
Edit by: Tony Huang
RELATED LINKS & RESOURCES
- Robot Ignite Academy
- ROS Courses:
- ROS Development Studio (RDS)
- Project repository: https://bitbucket.org/theconstructcore/my-robotic-manipulator
Did you like the video? If you did please give us a thumbs up and remember to subscribe to our channel and press the bell for a new video every day. Either you like it or not, please share your thoughts and questions in the comments area. See you!
[irp posts=”9549″ name=”My Robotic Manipulator – #Part 4 – ROS + URDF/Transmission + Gazebo Controllers”]


0 Comments