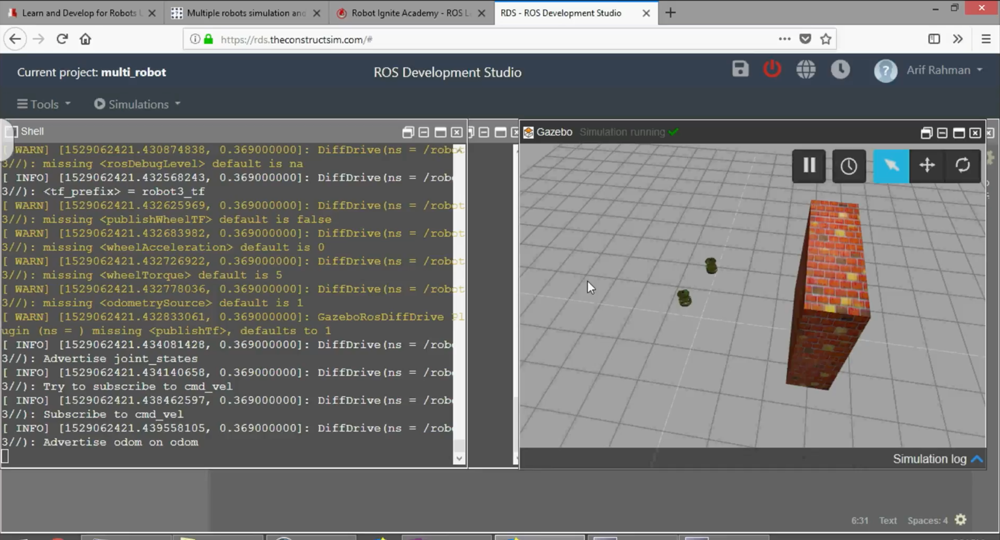
In this video, we are going to see how can we launch multiple robots in a single Gazebo simulation.
We will be introduced to the concept of namespace and tf_prefix, which are essential to make sure that the robots will be able to work correctly. We will create a series of launch files that will enable us to easily add robots into our Gazebo simulation.
This is a video based on the following post on ROS Answers: https://answers.ros.org/question/41433/multiple-robots-simulation-and-navigation/
NOTICE: most of the code would be the same in the ROS Answer, however, we’ll make some change to make sure it is compatible with ROS kinetic. Please use the code below.
Step 1. Create a project in ROS Development Studio(ROSDS)
ROSDS helps you follow our tutorial in a fast pace without dealing without setting up an environment locally. If you haven’t had an account yet, you can create a free account here.
Step 2. Create a package
We’ll create a package to put our source code for the project with the following command
cd ~/catkin_ws/src
catkin_create_pkg multi_robot rospy gazebo_ros
Then we’ll create a folder called launch under the package directory and create 3 launch files that we need.
<launch>
    <arg name="robot_name"/>
    <arg name="init_pose"/>

    <node name="spawn_minibot_model" pkg="gazebo_ros" type="spawn_model"
     args="$(arg init_pose) -urdf -param /robot_description -model $(arg robot_name)"
     respawn="false" output="screen" />

    <node pkg="robot_state_publisher" type="state_publisher"
          name="robot_state_publisher" output="screen"/>

    <!-- The odometry estimator, throttling, fake laser etc. go here -->
    <!-- All the stuff as from usual robot launch file -->
</launch>
This launch file will launch one robot in the simulation.
<launch>
  <!-- No namespace here as we will share this description.
       Access with slash at the beginning -->
  <param name="robot_description"
    command="$(find xacro)/xacro.py $(find turtlebot_description)/robots/kobuki_hexagons_asus_xtion_pro.urdf.xacro" />

  <!-- BEGIN ROBOT 1-->
  <group ns="robot1">
    <param name="tf_prefix" value="robot1_tf" />
    <include file="$(find multi_robot)/launch/one_robot.launch" >
      <arg name="init_pose" value="-x 1 -y 1 -z 0" />
      <arg name="robot_name"  value="Robot1" />
    </include>
  </group>

  <!-- BEGIN ROBOT 2-->
  <group ns="robot2">
    <param name="tf_prefix" value="robot2_tf" />
    <include file="$(find multi_robot)/launch/one_robot.launch" >
      <arg name="init_pose" value="-x -1 -y 1 -z 0" />
      <arg name="robot_name"  value="Robot2" />
    </include>
  </group>
</launch>
Please notice that it should have a different namespace and tf_prefix for each robot.
<launch>
  <param name="/use_sim_time" value="true" />

  <!-- start world -->
  <node name="gazebo" pkg="gazebo_ros" type="gazebo"
   args="$(find turtlebot_gazebo)/worlds/empty_wall.world" respawn="false" output="screen" />

  <!-- start gui -->
  <!-- <node name="gazebo_gui" pkg="gazebo" type="gui" respawn="false" output="screen"/> -->

  <!-- include our robots -->
  <include file="$(find multi_robot)/launch/robots.launch"/>
</launch>
You can launch the simulation with the following command
roslaunch multi_robot main.launch
Then you have to open the gazebo window from Tools->Gazebo
You should see 2 robots are spawned in the simulation. You can spawn more by changing the robots.launch if you want.
Step 3. Move the robot
Open another terminal, if you type rostopic list , you’ll see there are 2 cmd_vel topics for the robots. The simplest way to control them is with the teleop_twist. We can run it and remap the cmd_vel with the robot you want to control. For example
rosrun teleop_twist_keyboard teleop_twist_keyboard.py /cmd_vel:=/robot1/cmd_vel
Now you can control the robot you want.
Edit by: Tony Huang
// RELATED LINKS
▸ Original question: https://answers.ros.org/question/41433/multiple-robots-simulation-and-navigation/
▸ ROS Development Studio (RDS)
▸ Robot Ignite Academy
—
Feedback
—
Did you like this video? Do you have questions about what is explained? Whatever the case, please leave a comment on the comments section below, so we can interact and learn from each other.
If you want to learn about other ROS topics, please let us know on the comments area and we will do a video about it.


When we follow this tutorial by video on our local machine, we never get the topic /robot1/cmd_vel Do you know why this may happen? Second, can you make a follow up video on how to set up the navigation stack for multiple robots? We still found this tutorial really helpful. Thank you!!
Awesome tutorial it is. This was my first project on ROS and everything was explained so clearly in video that I easily launched and navigated multiple robots while following steps described in this video. Thank you so much Sir Arif Rahman.
Sir I request you to post another tutorial in which you tell new robot developers, like me, ‘How to control robots in ROS from IoT data’.
Actually I want to control robots in ROS by my hand’s movement. I can place my hand’s linear velocity’s data on web using NodeMCU but I have no idea of how to use that data to control robots in ROS.
Thankyou so much once again 🙂
How to install the package multi_robot, and where do we get it from ?
Ignore this, I think it was a silly doubt and I have corrected it.
How can we use the joint_state_publisher with two robots?
I tried to use the namespaces but it doesn’t work