What we are going to learn
- How to use RVIZ2 step by step
- How to add the TFs of a simulation
- How to add the TFs of a real robot
- How to connect to a real robot through our robot lab
- Start the ros1 bridge to be able to see TF data from ROS1 in ROS2
List of resources used in this post
- Use the project: https://app.theconstructsim.com/#/l/47f74f81/
- ROS Development Studio (ROSDS) —▸ http://rosds.online
- ROS2 Tutorials –▸
- ROS2 Basics in 5 Days (Python): https://app.theconstructsim.com/#/Course/73
- ROS2 Basics in 5 Days (C++): https://app.theconstructsim.com/#/Course/61
Welcome
Hi, and Welcome to this new series of posts.
In this series, we are going to explain how to add elements to RViz2. We will start with TF, then we will continue with Robots Description, then Cameras, PointClouds, Lasers, and so on.
In this first post, we are going to see how to add TFs in RViz2.
Opening the rosject
In order to learn how to add TFs in RViz2, we need to have ROS installed. We already prepared a rosject ready for that: https://app.theconstructsim.com/#/l/47f74f81/. You can download the rosject on your own computer if you want to work locally, but just by copying the rosject (clicking the link), you will have a setup already prepared for you.
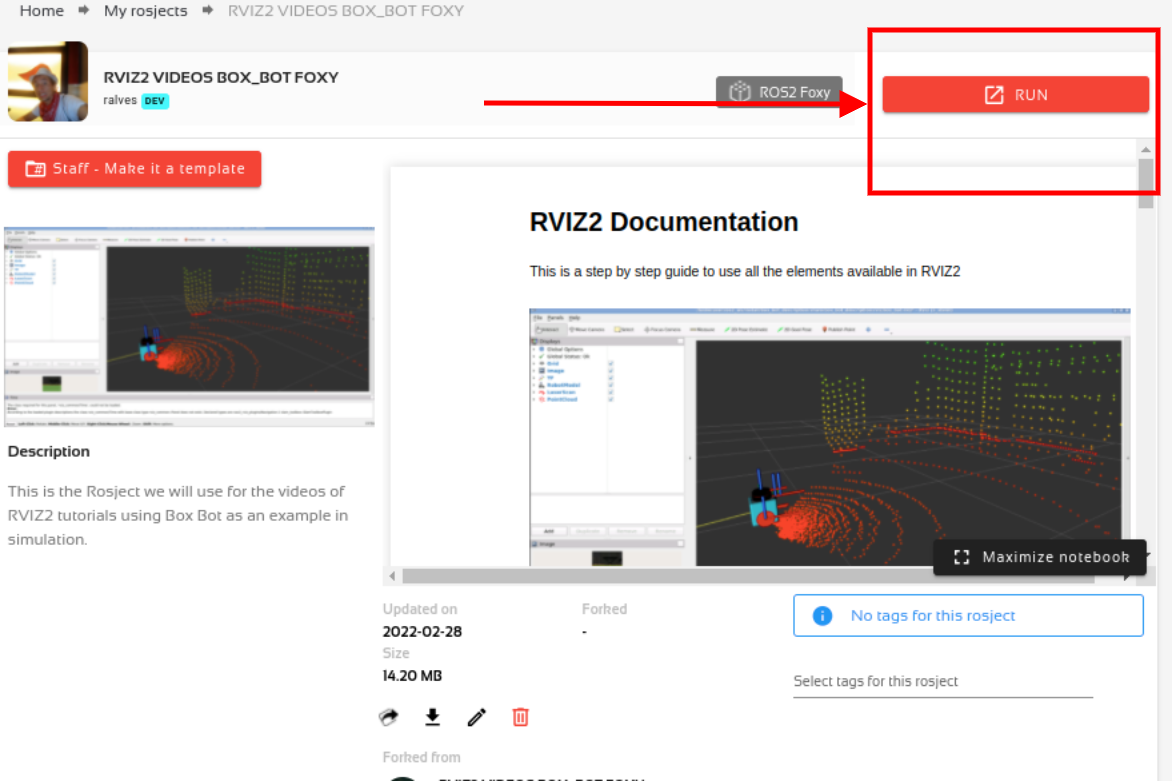
After the rosject has been successfully copied to your own area, you should see a Run button. Just click that button to launch the rosject.
Running the rosject
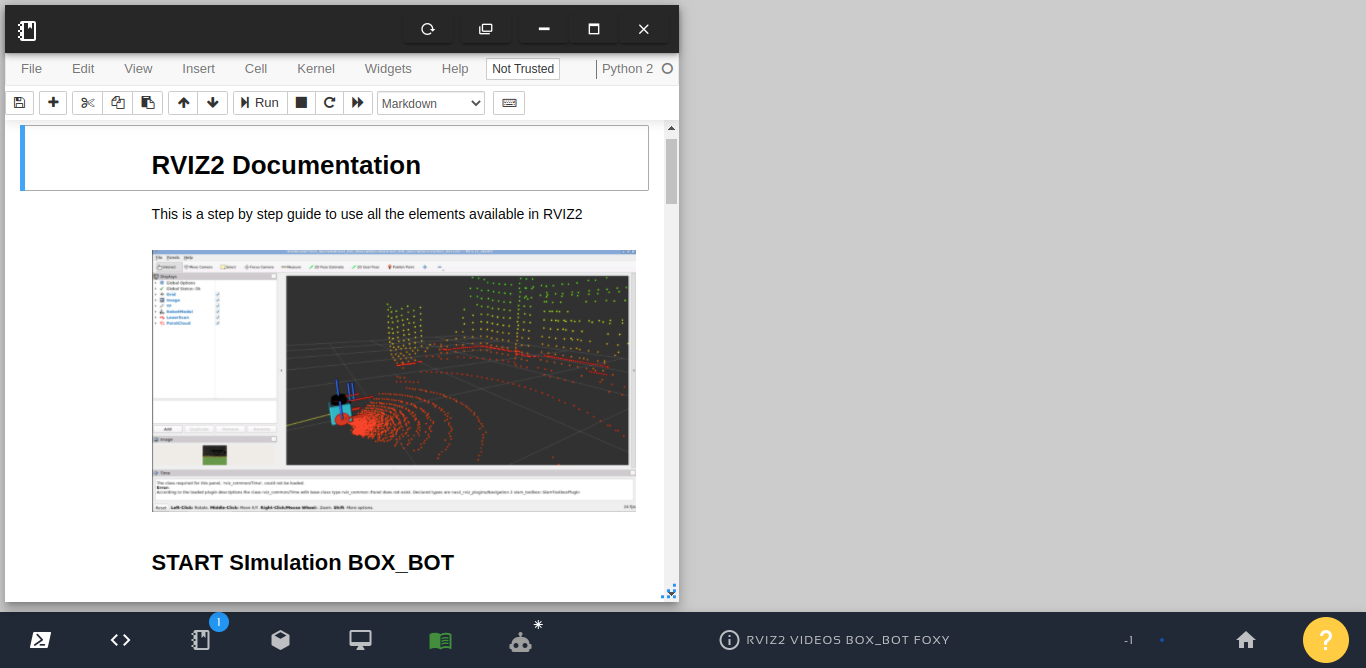
After you have clicked the Run button, the rosject should load and you should see a notebook that is open automatically:
The notebook contains the instructions to launch a simulation.
Launching the BOX_BOT simulation
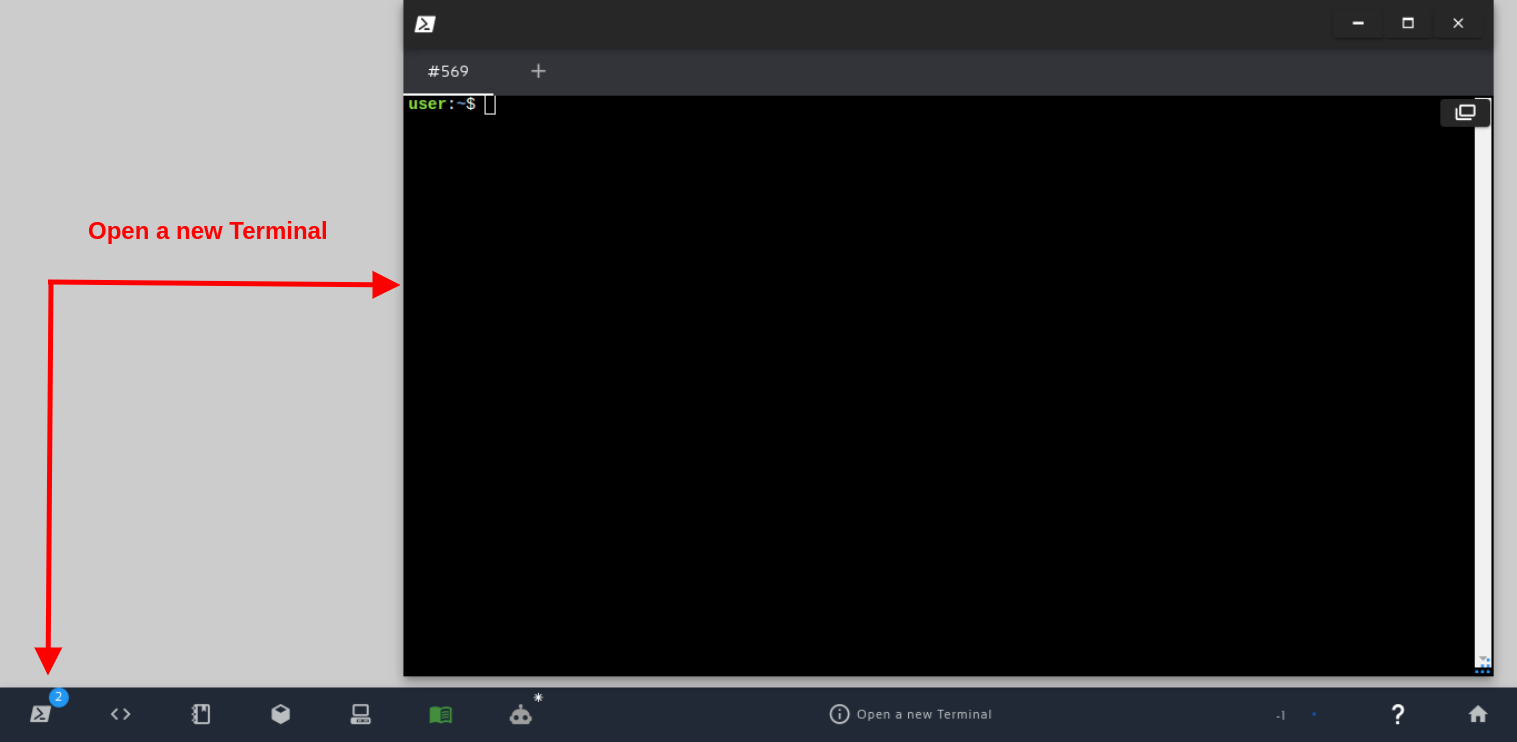
In order to launch the simulation, let’s start by opening a new terminal:
After having the first terminal open, let’s run the following commands to launch a simulation:
cd ~/ros2_ws/
colcon build --packages-select box_bot_description box_bot_gazebo ;

source install/setup.bash ;

ros2 launch box_bot_gazebo start_world_launch.py
The commands we just executed only launch the world, but there is no robot on it yet.
Now, in a second terminal, let’s spawn the robot with the commands below:
cd ~/ros2_ws/

source install/setup.bash

ros2 launch box_bot_gazebo spawn_robot_ros2.launch.py
Now that the robot has been successfully spawned, let’s now open RViz2. For that, let’s run the following commands in a third terminal.
cd ~/ros2_ws/

source install/setup.bash

rviz2
See the simulation
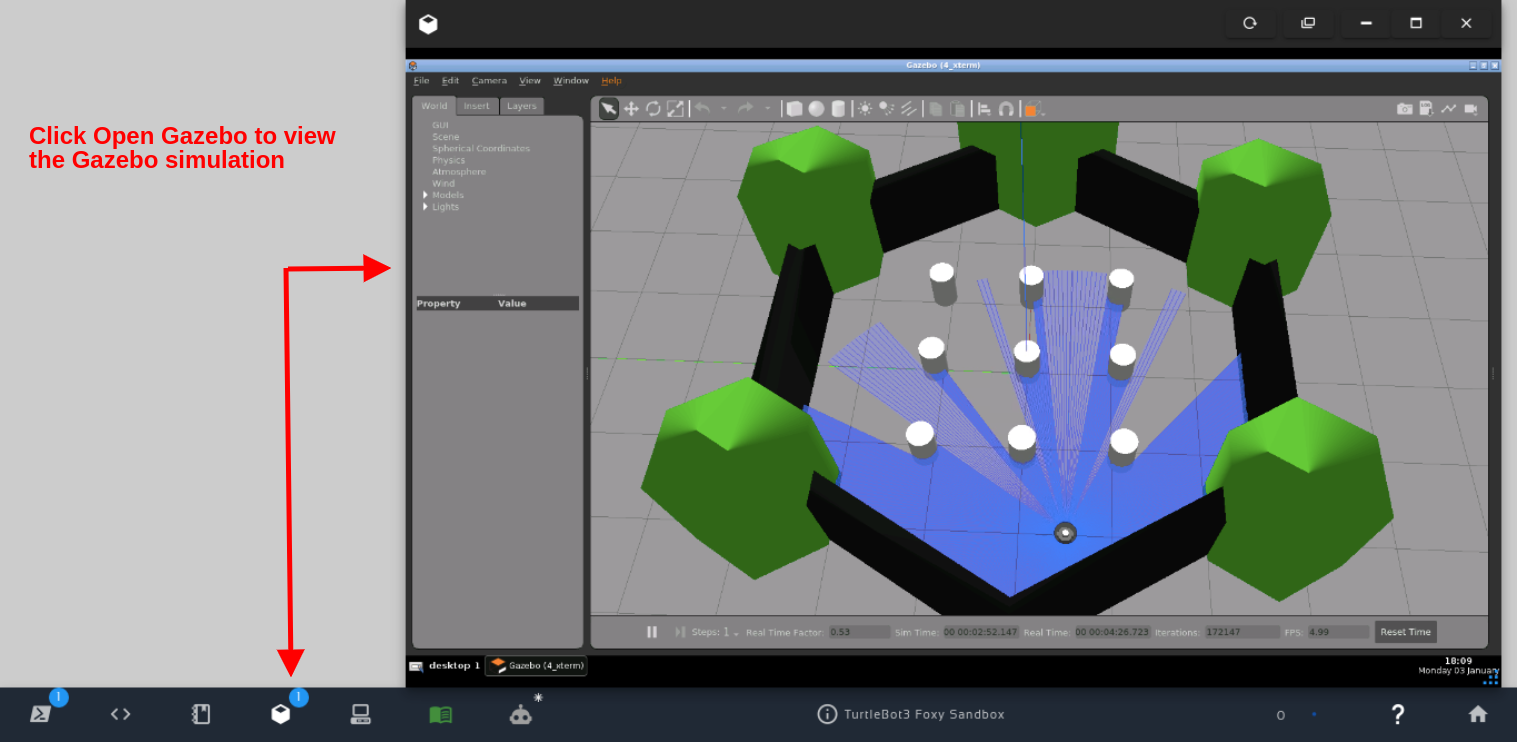
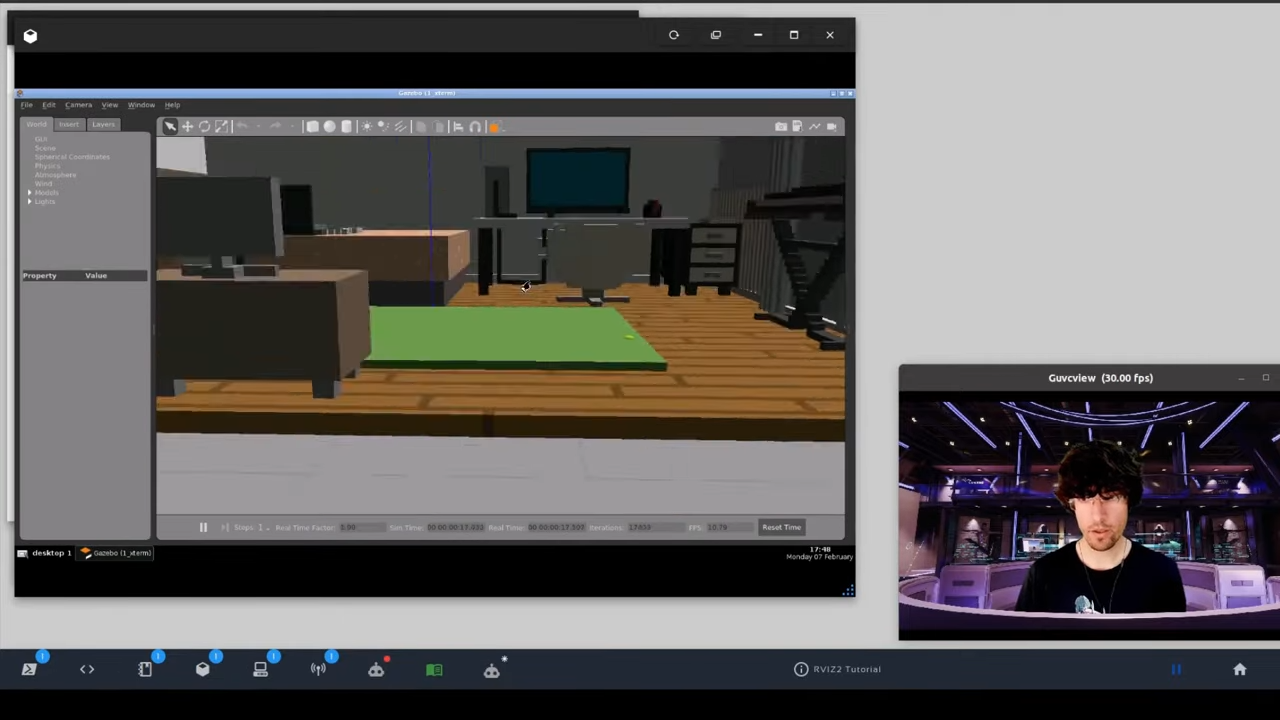
In order to see the simulation, you can click on the Open Gazebo button:
Open Gazebo by clicking Open Gazebo
The final image you get should be similar to the following:
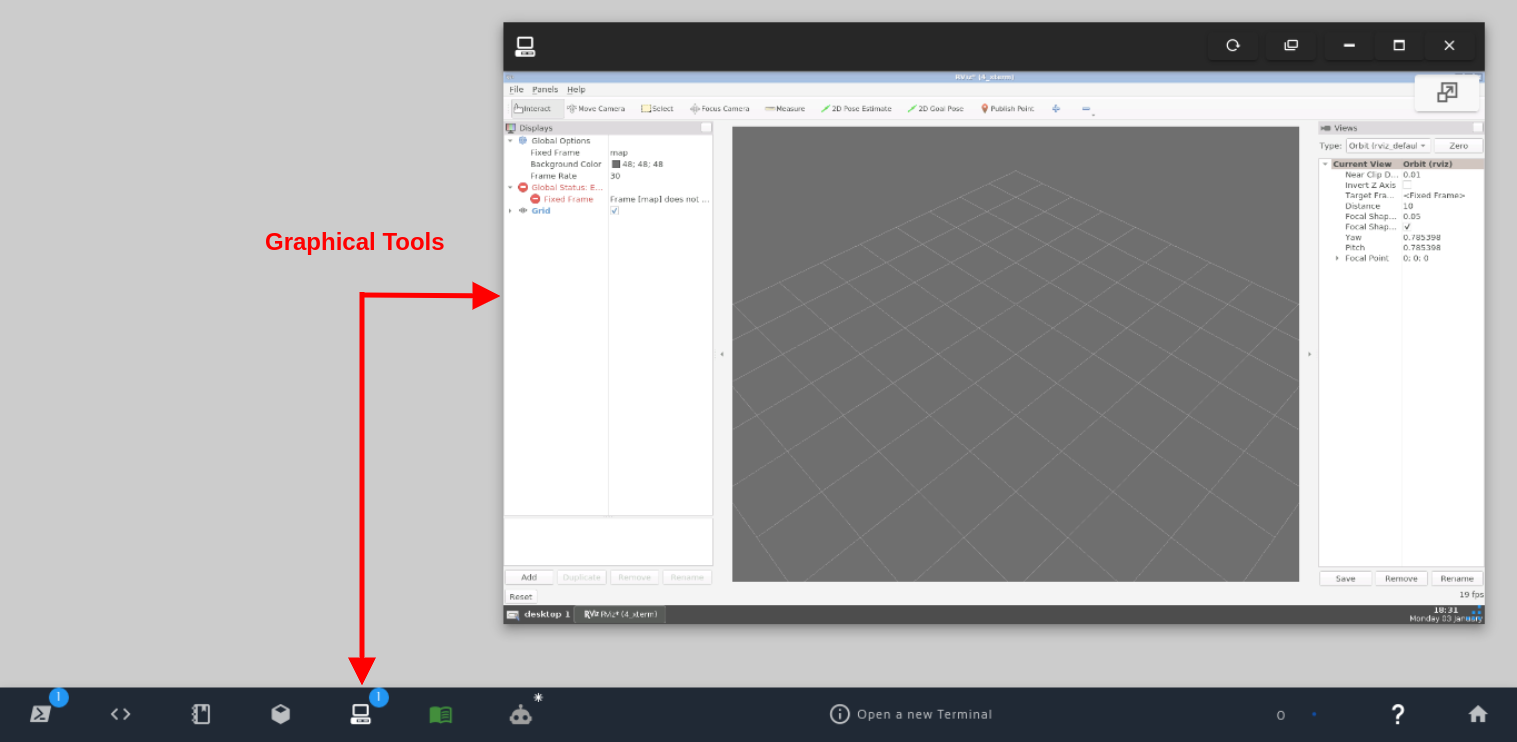
See rviz2 in the Graphical Tools
In order to see rviz2 (RViz2), you have to click the Open Graphical Tools button, in case the graphical window did not open automatically:
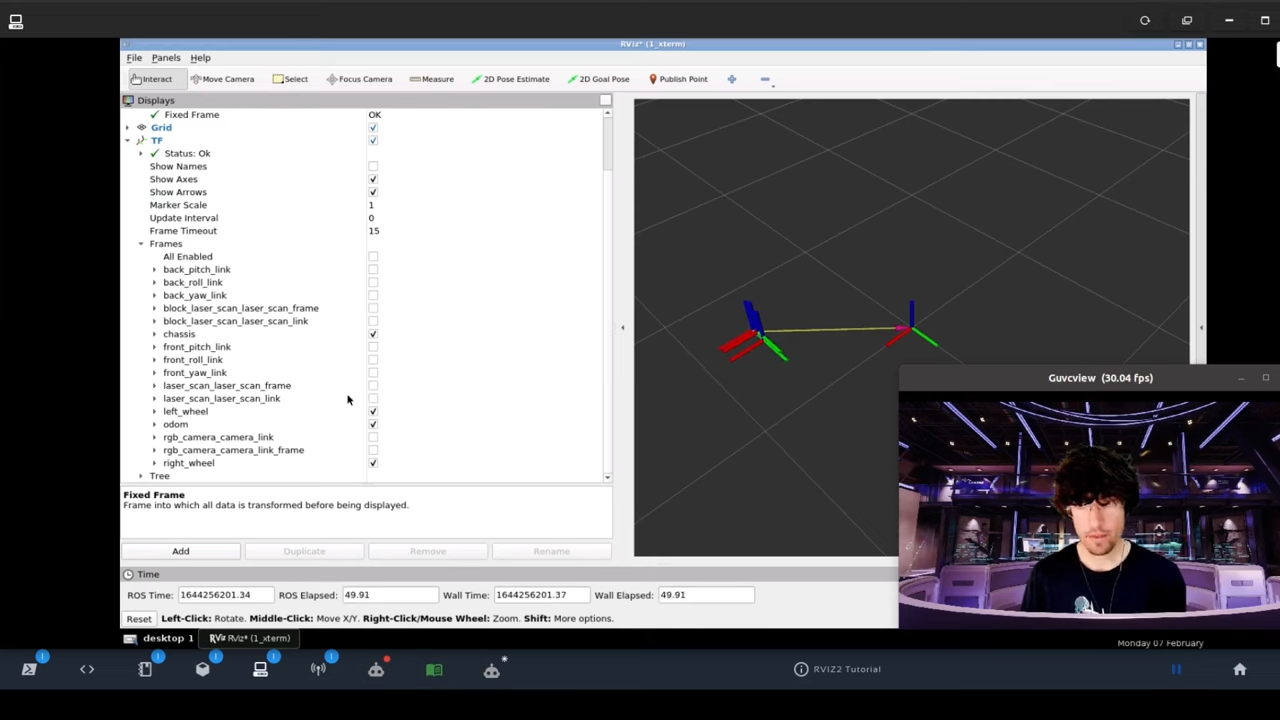
Now that you can see rviz2, let’s set the fixed frame on the top left to /odom (Odometry), then let’s click the Add button on the bottom left and add a TF.
Once TF is added, let’s disable the “All Enabled” option to avoid getting confused with all those TFs that are shown. Let’s shown only specific frames: chassis, left_wheel, odom, right_wheel. In the end, our rviz2 should look similar to the following:
We must also click Show Names to show the frame names in RViz2.
Moving the robot with teleop
In order to see the frames of the robot moving in rviz2, let’s run the Keyboard Teleop in a fourth terminal using the following commands:
cd ~/ros2_ws/

source install/setup.bash

ros2 run teleop_twist_keyboard teleop_twist_keyboard
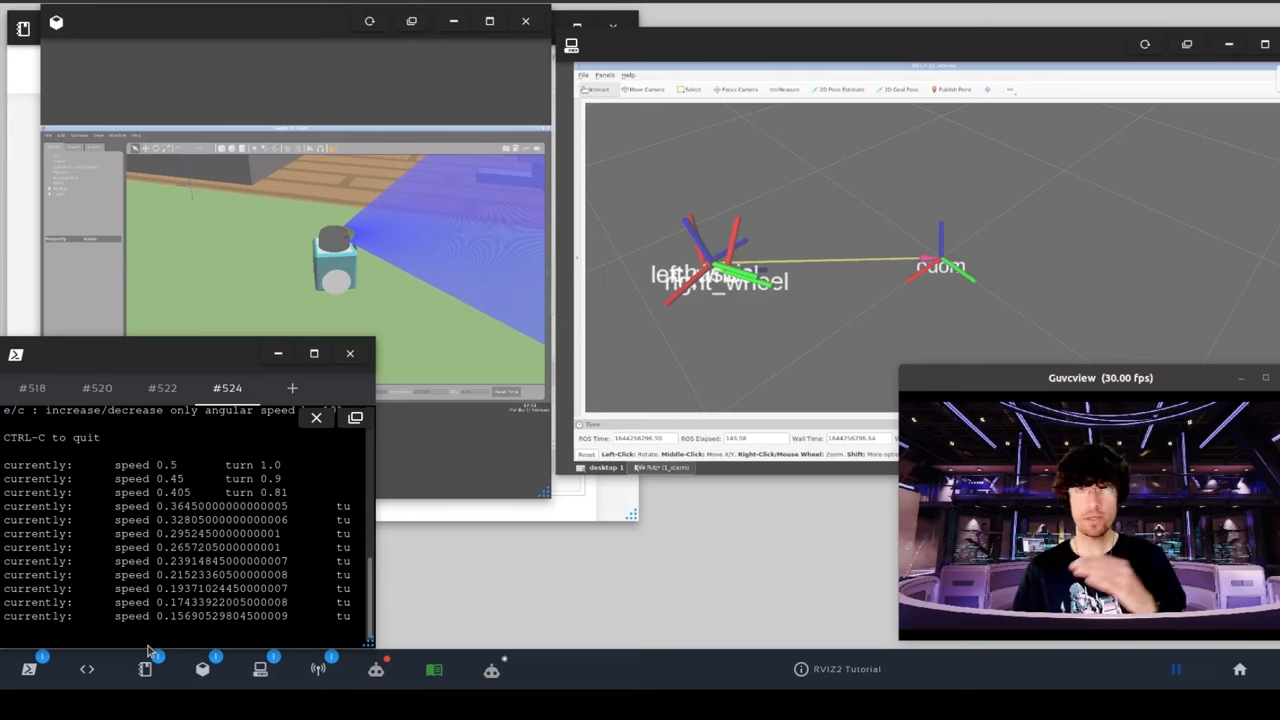
If you now press the keys to move the robot around, you should be able to see the robot moving in the simulation, and you should also see the TFs moving in RViz2.
Connecting to a real robot
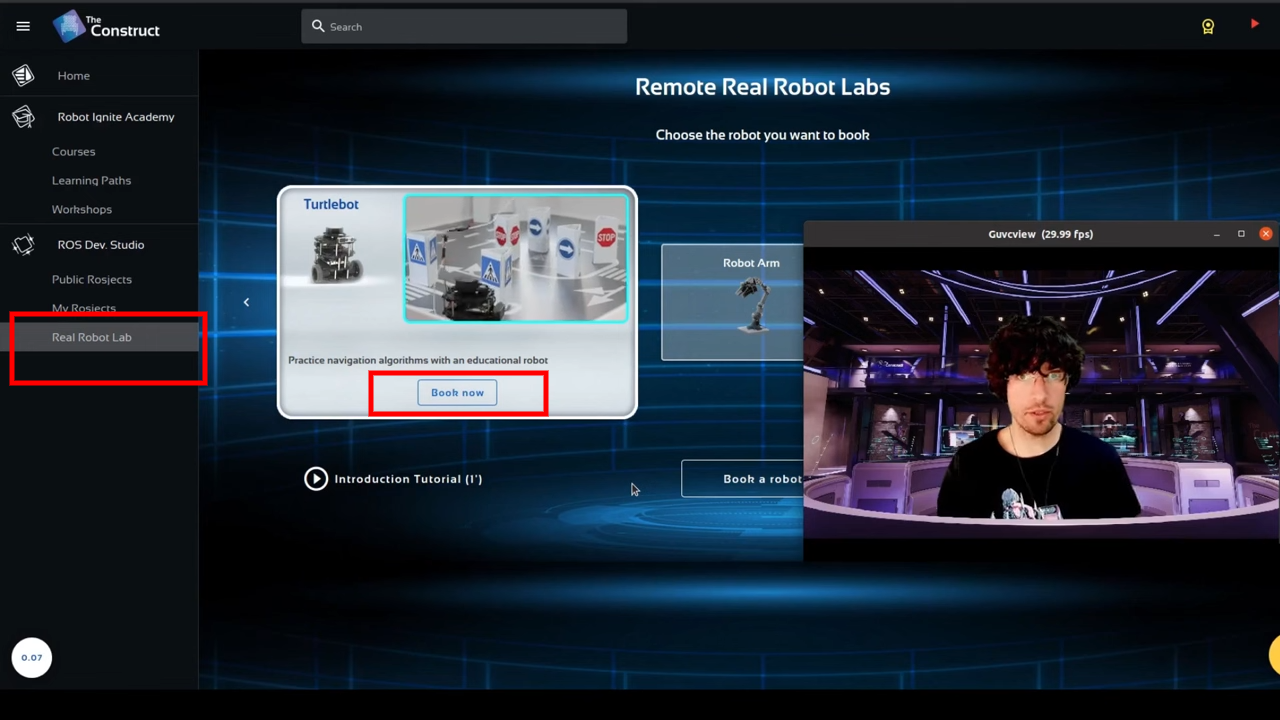
In order to see the TFs of a real robot, let’s click on the Real Robot Lab button that is available when you are not on the “Desktop” page of The Construct. After clicking Real Robot Lab, please select a robot and click Book Now. It’s free.
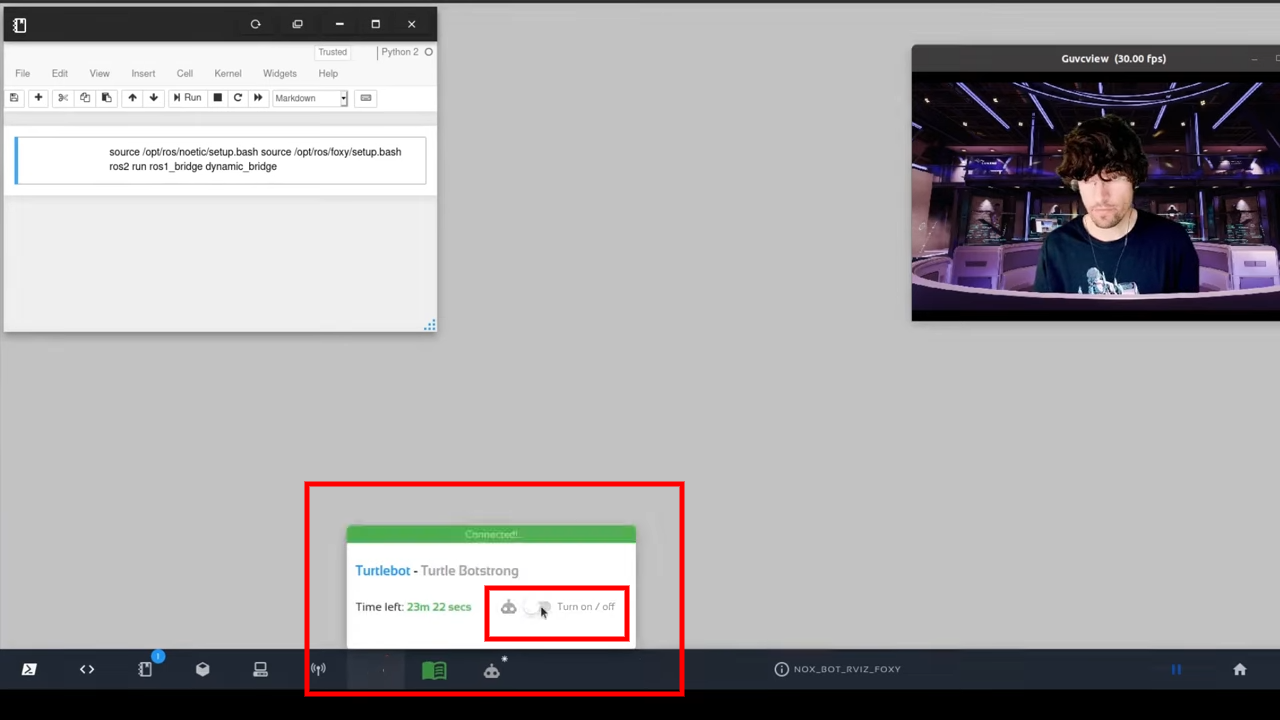
When you have the robot available for you, open the rosject and click on the button to connect to the real robot.
After the connection is successfully established, you should have something similar to the following:
Launch ros1_bridge
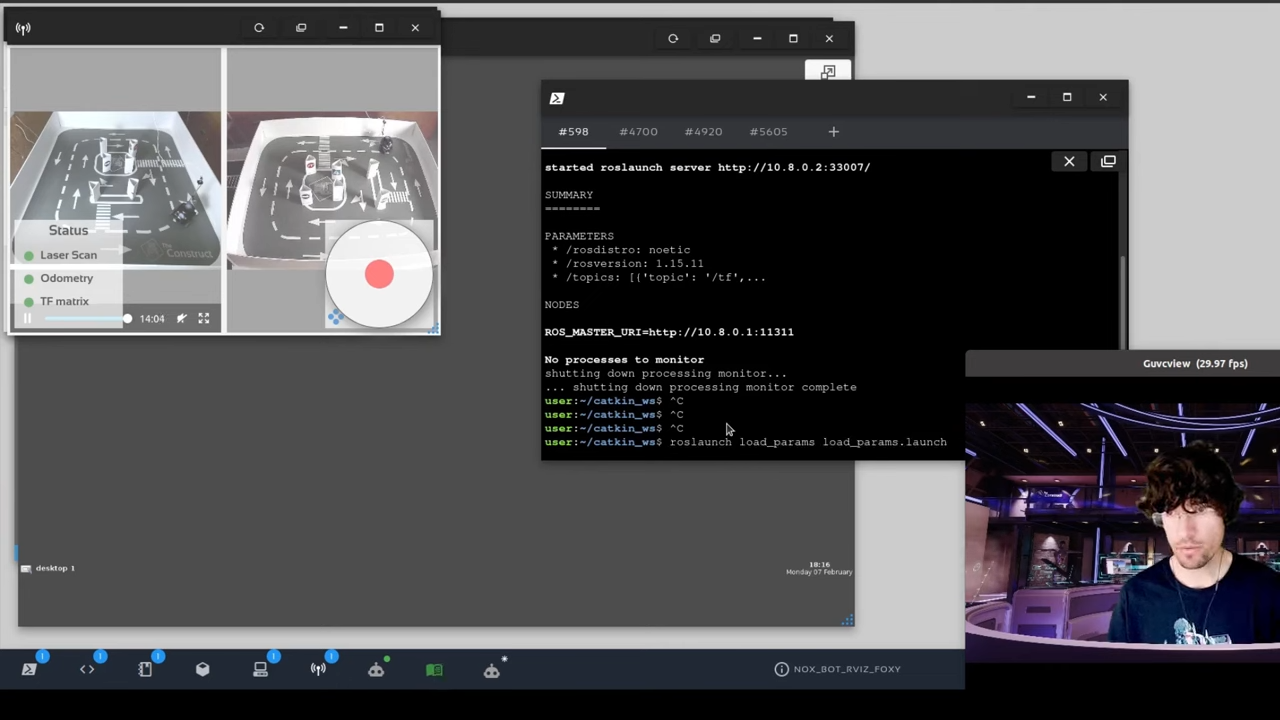
Before loading ros1_bridge, let’s load the parameters that we want to do the bridge.
Open a terminal and type the following:
cd ~/catkin_ws

roslaunch load_params load_params.launch
The command above loads basically the instructions saying: Hey, ros1, publish these specific topics because I want them to be available on ROS2.
Now, let’s run the parameter_bridge in a second terminal:
cd ~/ros2_ws/

source /opt/ros/foxy/setup.bash

source install/setup.bash

ros2 run ros1_bridge parameter_bridge
Now that ros1_bridge is running, we should be able to easily see ros2 topics in a third terminal:
cd ~/ros2_ws/

source install/setup.bash

ros2 topic list
You should see some topics listed, and the one we are most interested in today is the /tf topic.
If we now just open rviz2:
rviz2
we should now do the same procedure that we did previously, in order to see the TF data in RViz. Please refer to the section See rviz2 in the Graphical Tools already explained above (set /odom as the Fixed frame, and add the TF panel).
Moving the robot with ROS1
Now that we are connected to our robot and we have RViz2 setup ready, we can move the robot either with ROS1 or ROS2.
Let’s move it with ROS1, by running the following commands in a fourth terminal:
source ~/catkin_ws/devel/setup.bash

rosrun teleop_twist_keyboard teleop_twist_keyboard.py
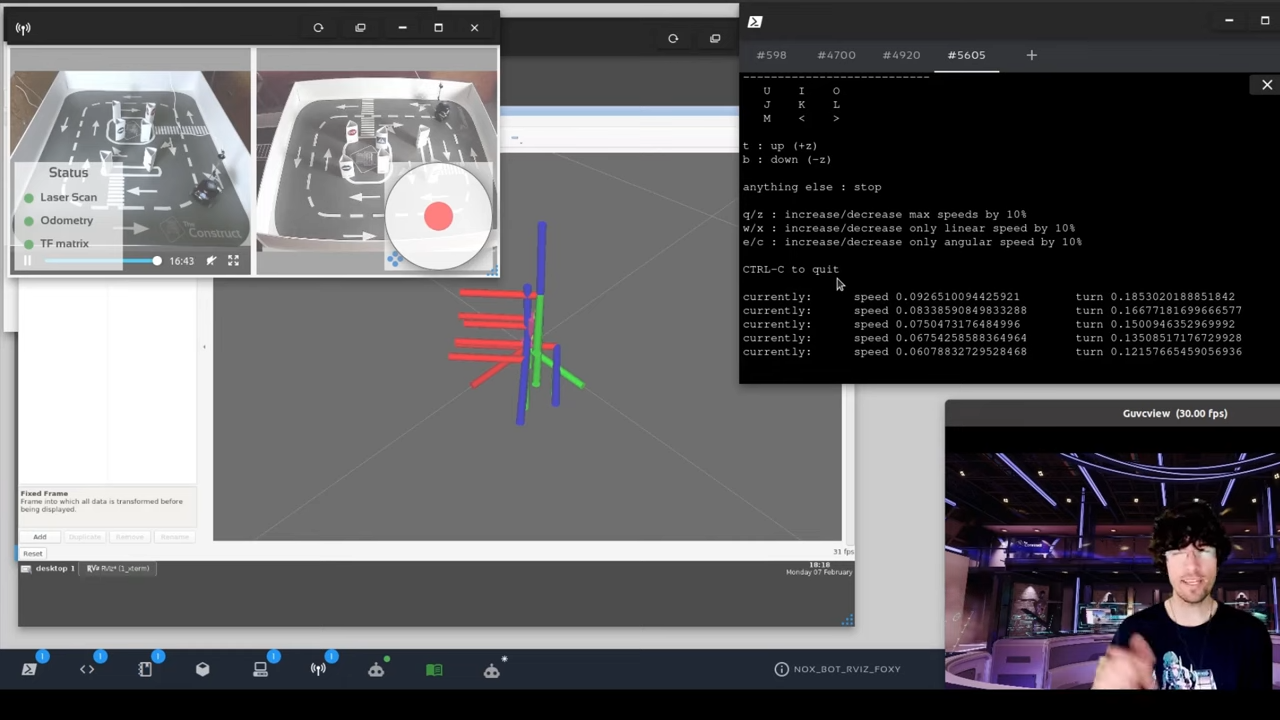
If you now move the robot by following the instructions, you should see the reflections in the camera of the Real Robot, and also in the RViz2:
Congratulations. You now know how to see TF data in RViz2.
Youtube video
So this is the post for today. Remember that we have the live version of this post on YouTube. If you liked the content, please consider subscribing to our youtube channel. We are publishing new content ~every day.
Keep pushing your ROS Learning.
Related Courses & Training
If you want to learn more about ROS and ROS2, we recommend the following courses:
- ROS2 Basics in 5 Days (Python): https://app.theconstructsim.com/#/Course/73
- ROS2 Basics in 5 Days (C++): https://app.theconstructsim.com/#/Course/61




0 Comments