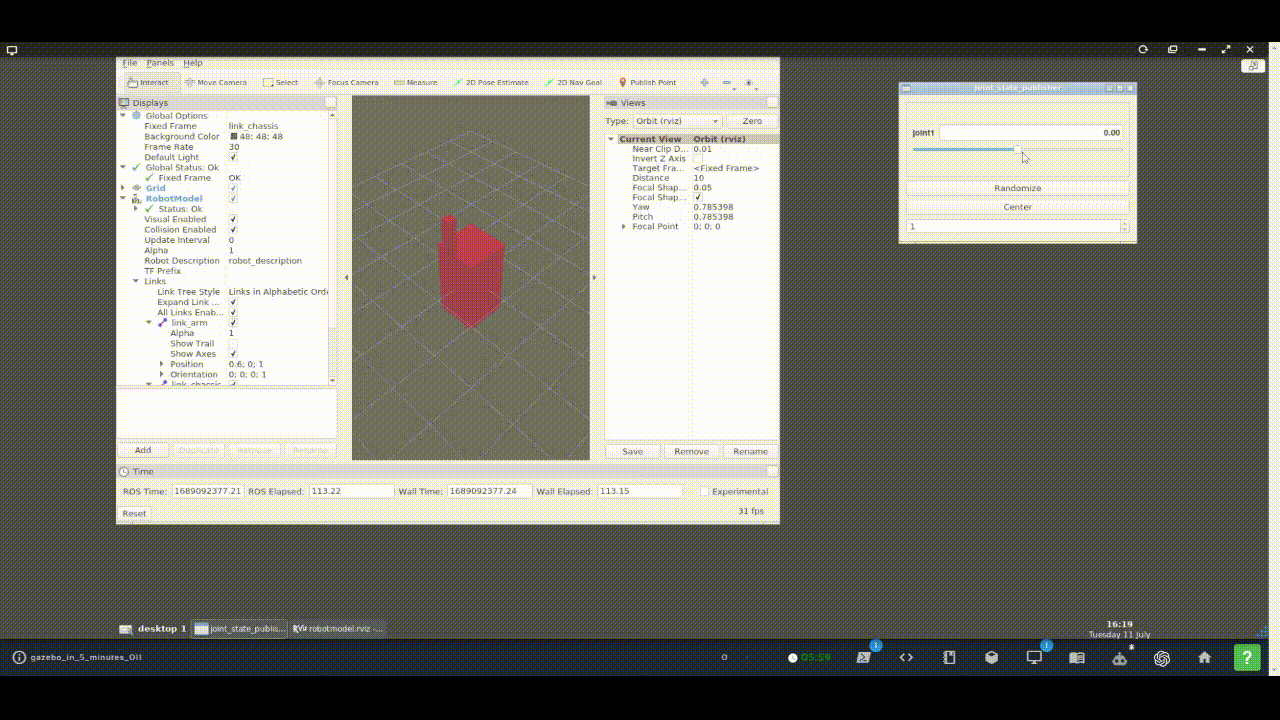
In this post, you will learn how to use the joint_state_publisher node. At the end of the post, you will be able to debug your robot model joints using a graphical interface. Let’s go!
Step 1: Fire up a system with ROS installation
“Hey, do you mean I have to install ROS first?” Absolutely not! Just log in to The Construct to get access to virtual machines pre-installed with ROS.
Once logged in, click here to copy the ROS project (rosject) we’ll use for this post. Once copied, click the Run button to open the rosject.
You might also want to try this on a local PC if you have ROS installed. However, please note that we don’t support local PCs and you will have to fix any errors you run into on your own. The rest of the instruction assumes that you are working on The Construct; please adapt them to your local PC and ROS installation.
PS: we are using ROS Kinetic. You should be able to replicate the same on any ROS 1 distro, with minor changes.
Step 2: Identify the joints in your robot
For this post, we are using the following robot model, which you’ll find by opening the IDE and locating the file as shown in the image below.
The joint in question here is highlighted in the code above.
Step 3: Use the joint_state_publisher node with the rviz node
The launch file is in simulation_ws/src/my_robot_description/launch/rviz.launch. The lines where the joint_state_publisher node is started is highlighted below.
In this post, you’ll learn how to launch RViz using a configuration file. You will learn how to close and open RViz as many times you need without having to configure or customize it all over again.
Step 1: Fire up a system with ROS installation
“Hey, do you mean I have to install ROS first?” Absolutely not! Just log in to The Construct to get access to virtual machines pre-installed with ROS.
Once logged in, click here to copy the ROS project (rosject) we’ll use for this post. Once copied, click the Run button to open the rosject.
You might also want to try this on a local PC if you have ROS installed. However, please note that we don’t support local PCs and you will have to fix any errors you run into on your own. The rest of the instruction assumes that you are working on The Construct; please adapt them to your local PC and ROS installation.
PS: we are using ROS Kinetic. You should be able to replicate the same on any ROS 1 distro, with minor changes.
Step 2: Run RViz without loading a configuration file
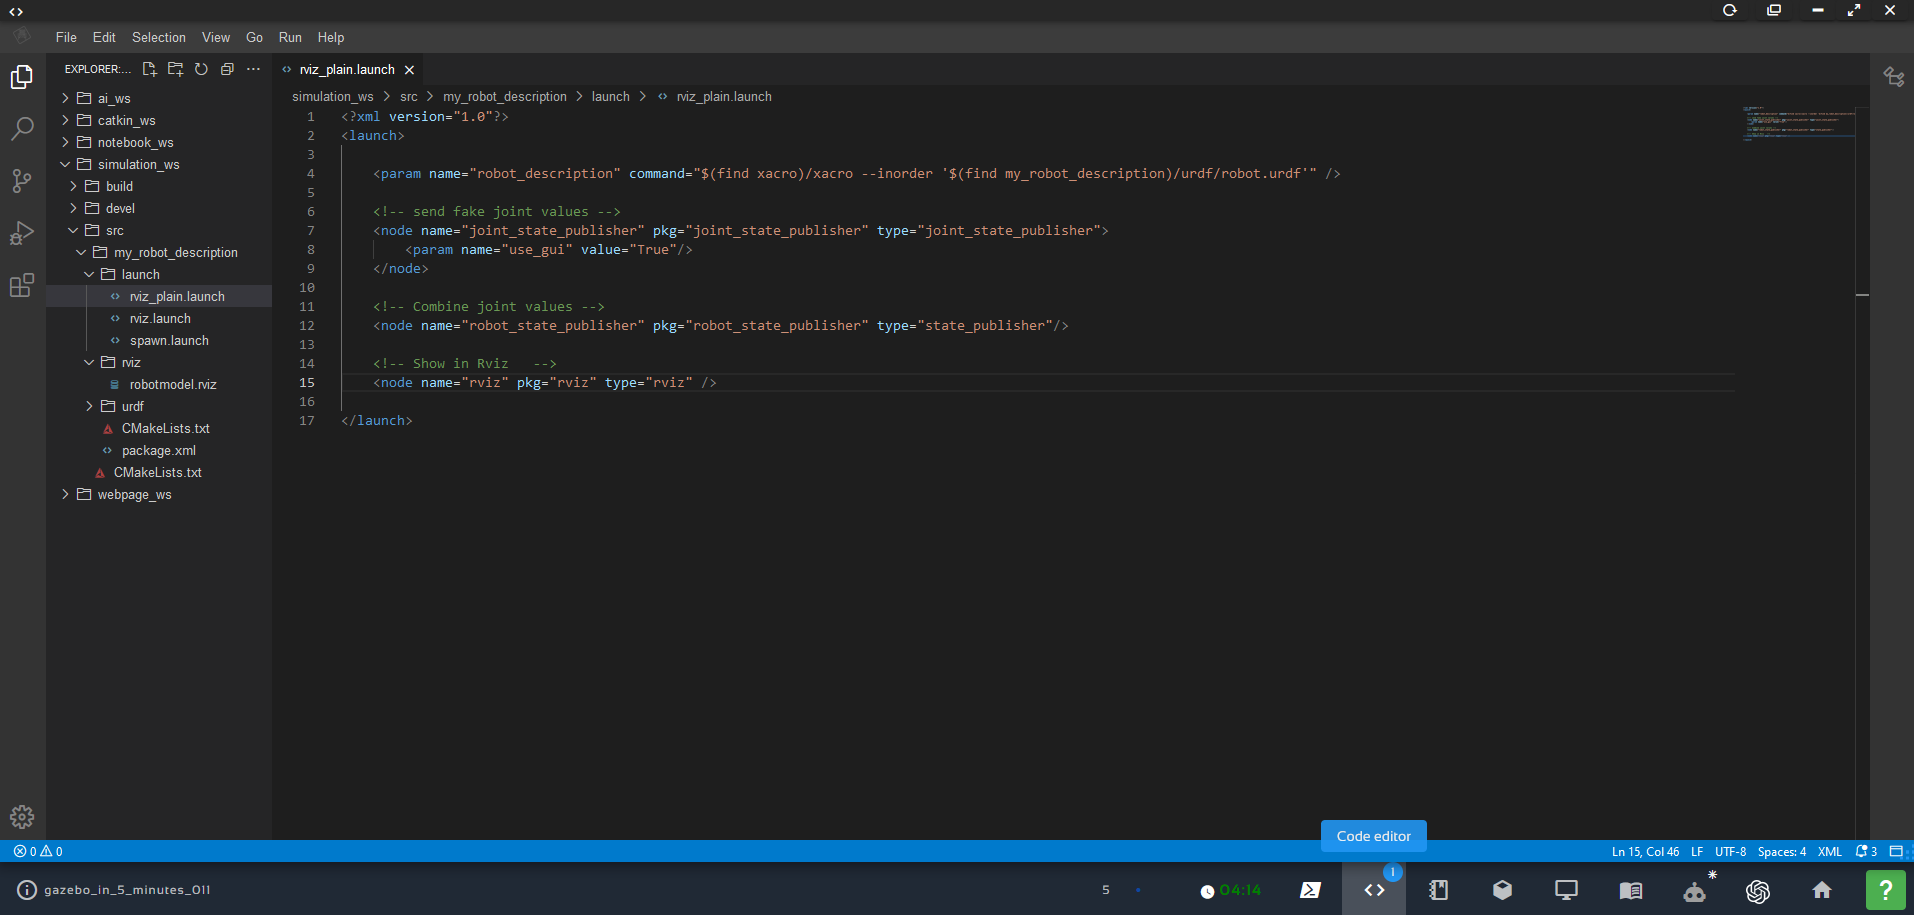
Open the Code Editor and create a new file rviz_plain.launch in the location shown in the image below:
Next, launch the rviz_plain.launch file. Open a Web Shell and type the command that follows.
roslaunch my_robot_description rviz_plain.launch
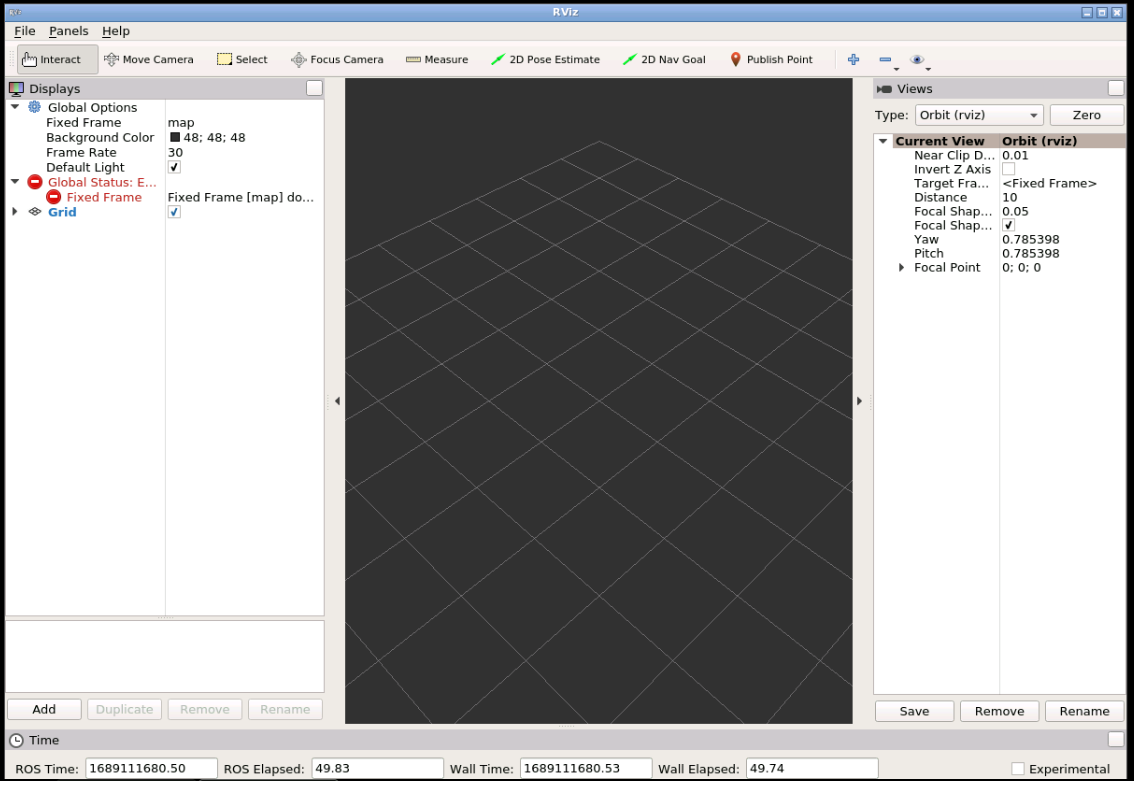
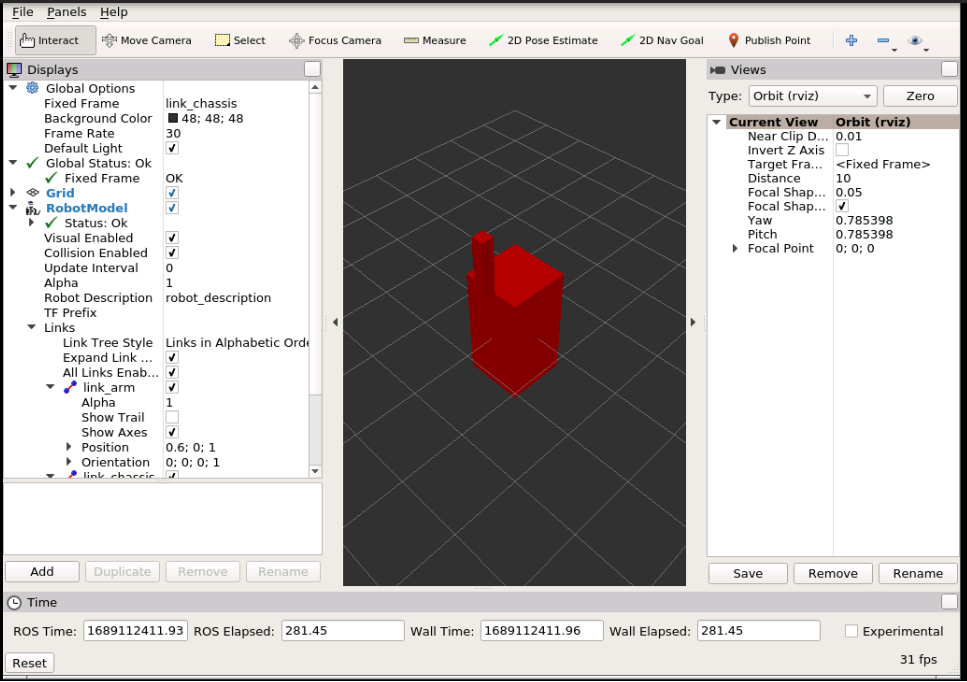
Now you should see the rviz window, with no display added. We would need to add the display one by one and then configure them. But this is not necessary, since we have a configuration file saved already. Let’s load it next.
Step 3: Run RViz in a launch file and pass the configuration
Stop the current program in the web shell using Ctrl + C and run the following command instead.
roslaunch my_robot_description rviz.launch
Now you should see a different rviz screen, generated from the configuration!
Can you spot some differences in the two launch files? Here is the rviz.launch file.
Do you now understand how to launch rviz using a configuration file? If not, please go over the post again, more carefully this time.
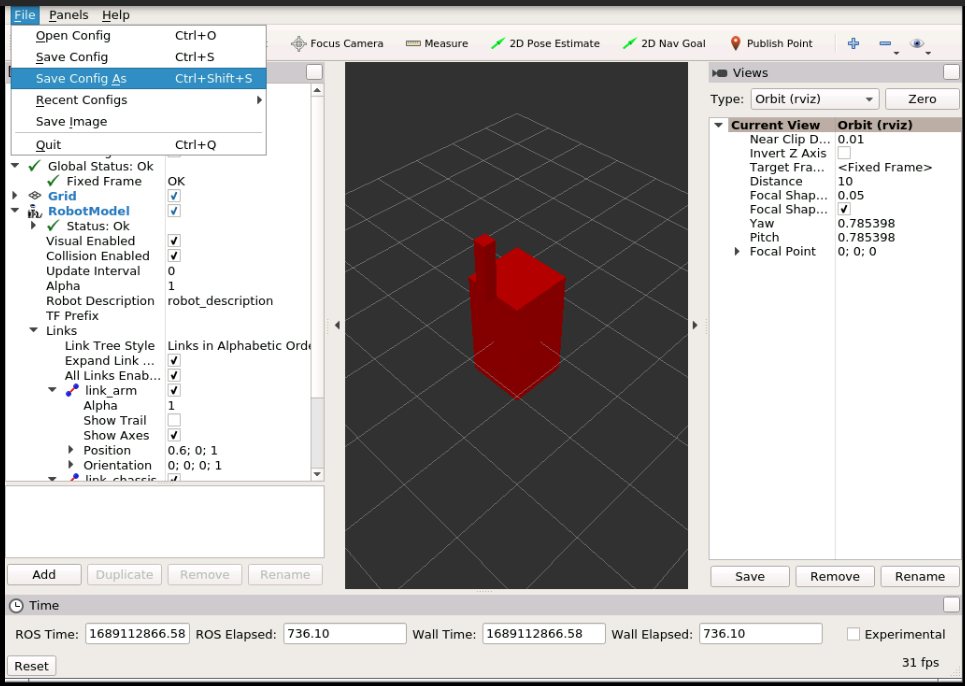
You can create a configuration file by using the File -> Save Config As... command on the rviz window. Use File -> Save Config to update the current config.
Step 5 (optional): watch the video
Feedback
Did you like this video? Whatever the case, please leave a comment in the comments section below, so we can interact and learn from each other.
If you want to learn about other ROS topics, please let us know on the comments area, and we will do a video about it.
In order to load gazebo using ROS, you need to have Gazebo and ROS installed. If you don’t want to install everything, we highly recommend using ROSDS (ROS Development Studio) which gives you access to an online environment with ROS already installed. Indeed, we are going to use that tool for easiness. You can follow the same steps on your computer as well if you don’t want to use ROSDS.
To use ROSDS, you can just create an account and start using it.
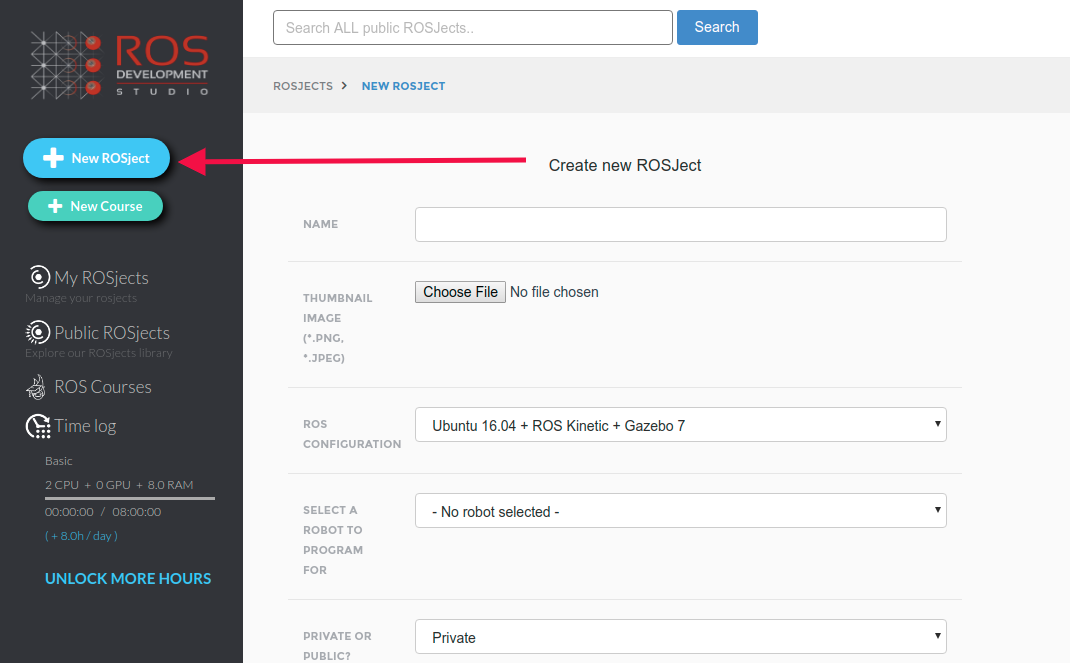
Once you have your account created, you have to create a ROSject by clicking on the New ROSject button:
Creating a new ROSject in ROSDS
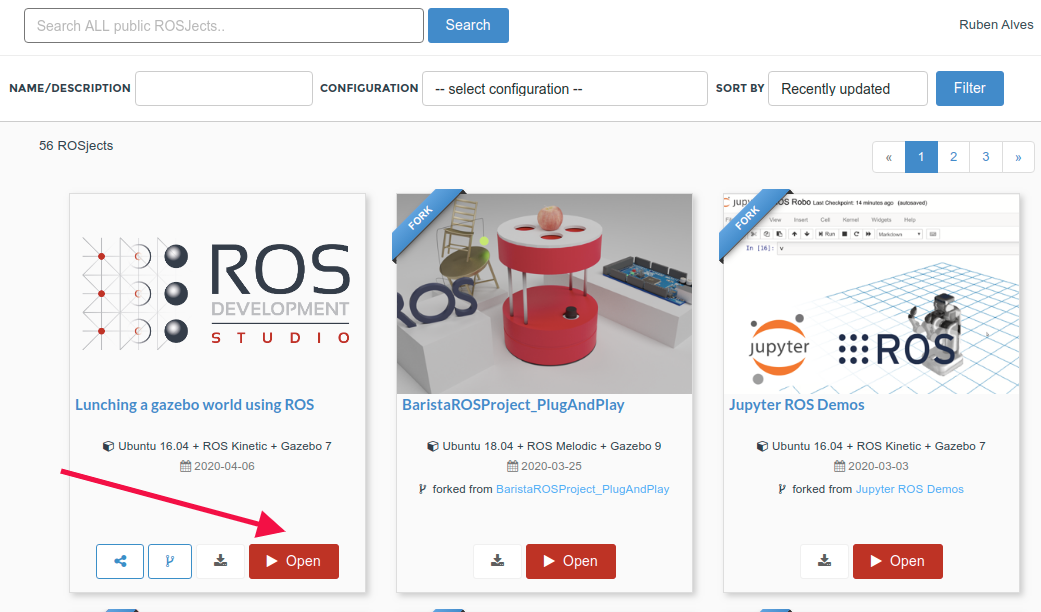
Once you have the ROSject, you can open it by clicking Open:
Opening a ROSject in ROSDS
Creating the ROS Package
In order to run anything using ROS, we need a ROS package, so, let’s create one. For that, you are going to need a terminal/shell. In ROSDS, you can have a terminal by clicking Tools -> Shell.
Let’s first create the workspace. In this case, let’s call it ~/simulation_ws
mkdir ~/simulation_ws/src -p
Now let’s then compile our empty workspace
source /opt/ros/kinetic/setup.bash
source /usr/share/gazebo/setup.sh

cd ~/simulation_ws/

catkin_make
Now let’s create our ROS package. Let’s call it my_simulations:
source ~/simulation_ws/devel/setup.bash

cd ~/simulation_ws/src

catkin_create_pkg my_simulations
Now, let’s create a launch and a world folder inside the my_simulations package.
cd my_simulations

mkdir launch world
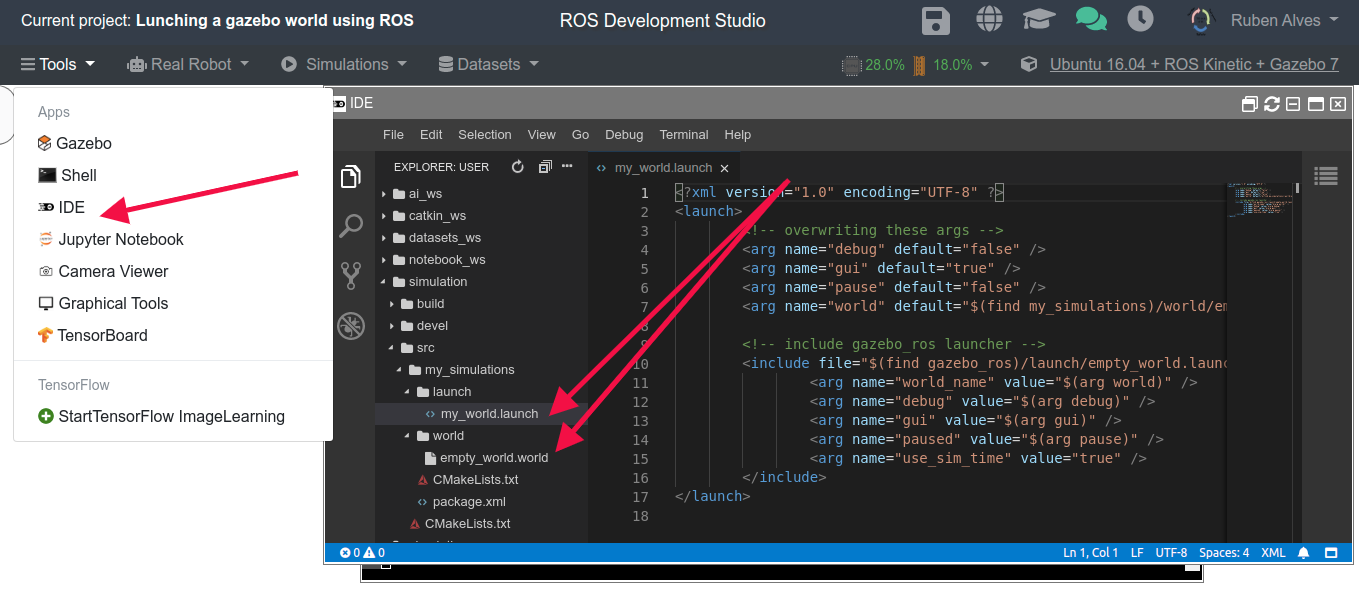
Now, inside the launch folder, let’s create a file named my_world.launch:
Inside the my1stmodel folder, let’s create two files, one named model.config and another named model.sdf.
cd models/my1stmodel/
touch model.config model.sdf
These two files, model.config and model.sdf, are required for every gazebo model. You can find those files in the ground_plane model provided by gazebo, for example.
Let’s paste the following content on our my1stmodel/model.config
<?xml version="1.0"?>
<model>
<name>My first model</name>
<version>1.0</version>
<sdf version="1.5">model.sdf</sdf>
<author>
<name>Your name</name>
<email>your@email.com</email>
</author>
<description>
My first model for gazebo
</description>
</model>
And in our models/my1stmodel/model.sdf, let’s add the following:
If you are in ROSDS and chose to run the simulation manually, then you have to manually open the Gazebo Web (gzweb) by clicking on Tools -> Gazebo.
Congratulations. You have successfully launched your first custom Gazebo World using ROS.
Youtube video
If you didn’t understand well all the steps explained here or need more understanding of the files we created, remember that we have the live version of this post on YouTube. Also, if you liked the content, please consider subscribing to our youtube channel. We are publishing new content ~every day.
Robot Ignite Academy, the place to learn to program robots using only a web browser
ROS Development Studio (the environment used in the video), another powerful online tool for pushing your ROS learning in a practical way
Preparing the environment
In order to spawn a gazebo model in a simulation using ROS, you need to have Gazebo and ROS installed. If you don’t want to install everything, we highly recommend using ROSDS (ROS Development Studio) which gives you access to an online environment with ROS already installed. Indeed, we are going to use that tool for easiness. You can follow the same steps on your computer as well if you don’t want to use ROSDS.
To use ROSDS, you can just create an account and start using it.
Once you have your account created, you have to create a ROSject by clicking on the New ROSject button:
Once you have the ROSject, you can open it by clicking Open:
Spawning a two-wheeled robot in a gazebo simulation
When you open a ROSject, you are able to open web shell, code editor, etc.
Let’s start opening a web shell by clicking Tools -> Shell in ROSDS. Once you have the shell, let’s clone the repository that contains the robot:
cd ~/simulation_ws/src/
git clone https://bitbucket.org/theconstructcore/two-wheeled-robot-simulation
If you see, the repository we just cloned, you will find the file m2wr_description/launch/spawn.launch which contains the code used to spawn the robot. The code is as follows:
A quick look into this file shows that the file loaded in gazebo will be the m2wr_description/urdf/m2wr.xacro, in the positions xyz = 0, 0, 0.5.
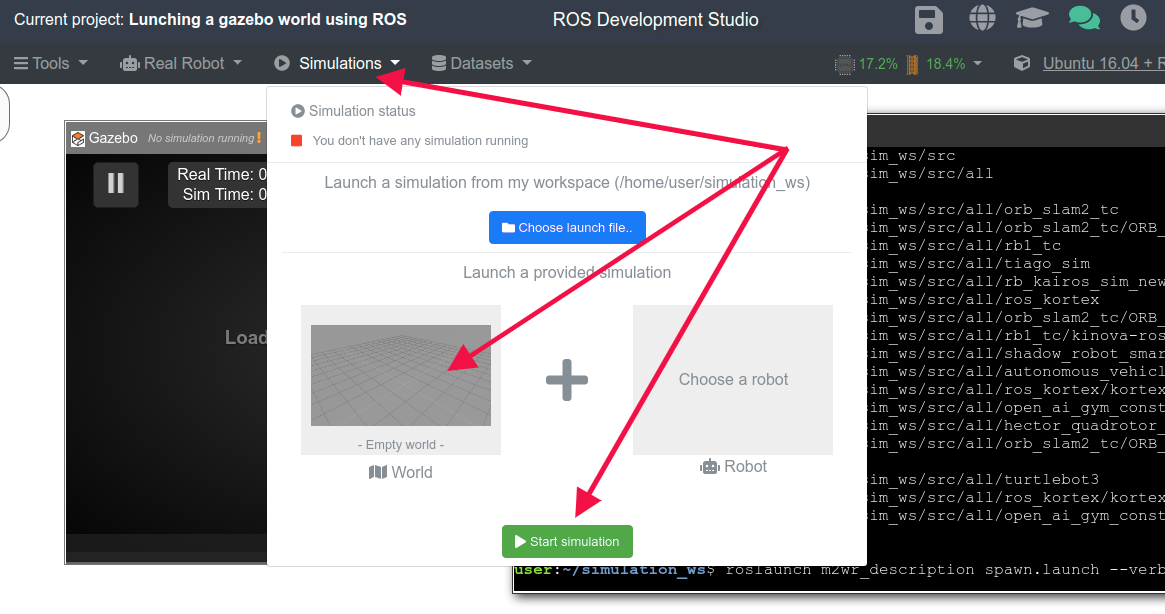
Now, to actually spawn the robot, you can first load an empty world by clicking Simulations -> Empty World -> Start Simulation.
Starting an empty simulation in ROSDS
With the empty simulation running, we can now spawn our robot into the current simulation. For that, let’s first compile the workspace to make sure the package we cloned is ok:
cd ~/simulation_ws/
catkin_make
source devel/setup.bash
rospack profile
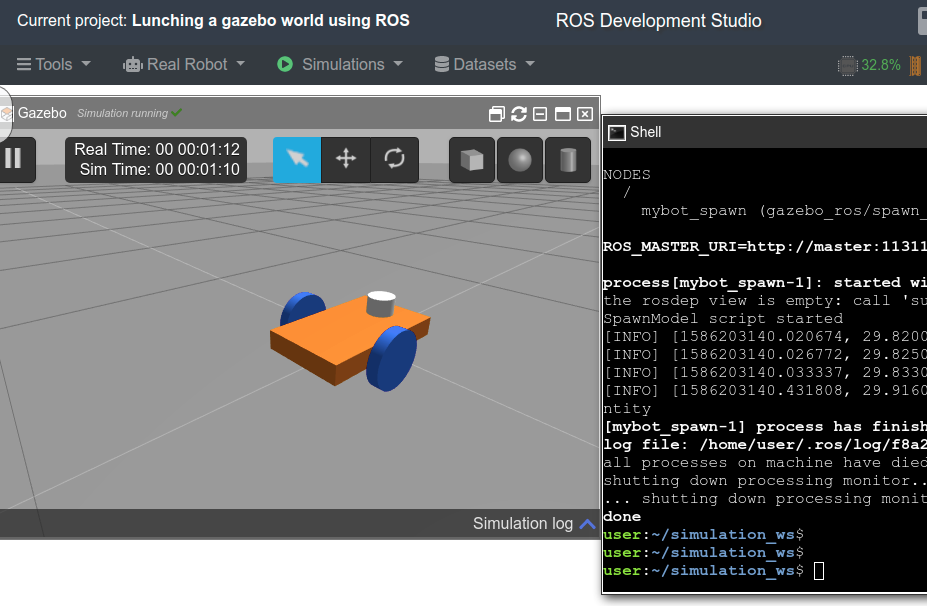
Now let’s spawn our robot:
roslaunch m2wr_description spawn.launch
If everything went as expected, you should have the two-wheeledrobot in the simulation:
A two-whelled robot running in ROSDS
Congratulations!!! You just learned how to spawn a robot in a gazebo simulation.
Youtube video
If you didn’t understand well all the steps explained here or need more understanding of the files we created, remember that we have the live version of this post on YouTube. Also, if you liked the content, please consider subscribing to our youtube channel. We are publishing new content ~every day.
Learn how to add a gazebo model to a running gazebo simulation
List of resources used in this post:
Robot Ignite Academy, the place to learn to program robots using only a web browser
ROS Development Studio (the environment used in the video), another powerful online tool for pushing your ROS learning in a practical way
Gazebo models repository where you can find different models to be spawned
Including our model in the .world file
In this post, we are assuming you already have created a ROS package called my_simulations and the following files: ~/simulation_ws/src/my_simulations/launch/my_world.launch and ~/simulation_ws/src/my_simulations/world/empty_world.world.
If you check the my_world.world file, from the previous post we have the following content:
<?xml version="1.0" ?>

<sdf version="1.5">
	<world name="default">
		<!-- A global light source -->
		<include>
			<uri>model://sun</uri>
		</include>

		<!-- A ground plane -->
		<include>
			<uri>model://ground_plane</uri>
		</include>
	</world>
</sdf>
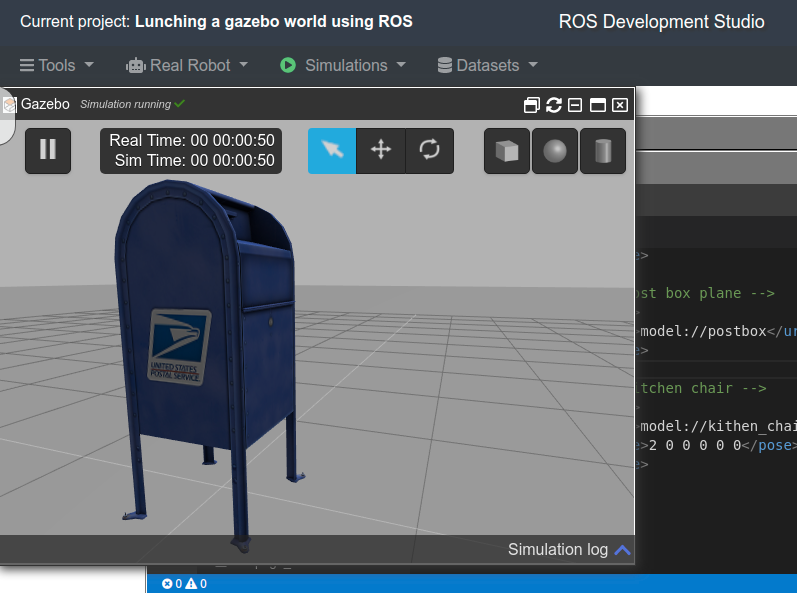
Let’s add a postbox model. Remember that you can find many Gazebo moels on the Gazebo models repository.
The final content of ~/simulation_ws/src/my_simulations/world/empty_world.world after adding the postbox would be:
<?xml version="1.0" ?>

<sdf version="1.5">
	<world name="default">
		<!-- A global light source -->
		<include>
			<uri>model://sun</uri>
		</include>

		<!-- A ground plane -->
		<include>
			<uri>model://ground_plane</uri>
		</include>

                <!-- A post box plane -->
		<include>
			<uri>model://postbox</uri>
		</include>

	</world>
</sdf>
This adds a model called postbox in the initial position (x=0, y=0, z=0). If you want it in a different position, you can add a <pose> like in the example below:
If you are in ROSDS and chose to run the simulation manually, then you have to manually open the Gazebo Web (gzweb) by clicking on Tools -> Gazebo.
Congratulations. You have successfully loaded a custom model in a Gazebo World using ROS.
Youtube video
If you didn’t understand well all the steps explained here or needs more understanding of the files we created, remember that we have the live version of this post on YouTube. Also, if you liked the content, please consider subscribing to our youtube channel. We are publishing new content ~every day.
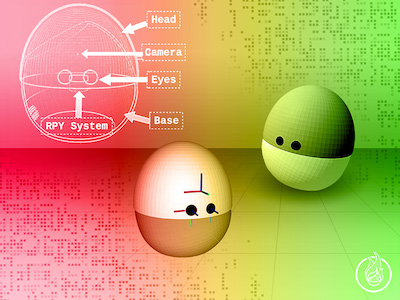
![[Gazebo in 5 minutes] 011 – How to use the joint_state_publisher](https://www.theconstruct.ai/wp-content/uploads/2018/12/Gazebo-in-5-mins-011-How-to-use-joint_state_publisher.png)


![[Gazebo in 5 mins] 010 – How to launch RViz using a configuration file](https://www.theconstruct.ai/wp-content/uploads/2018/11/How-to-launch-RViz-using-a-configuration-file.png)
![[Gazebo in 5 minutes] 004 – How to create a gazebo model using SDF](https://www.theconstruct.ai/wp-content/uploads/2018/10/Gazebo-in-5-minutes-004-How-to-create-a-gazebo-model-using-SDF.png)
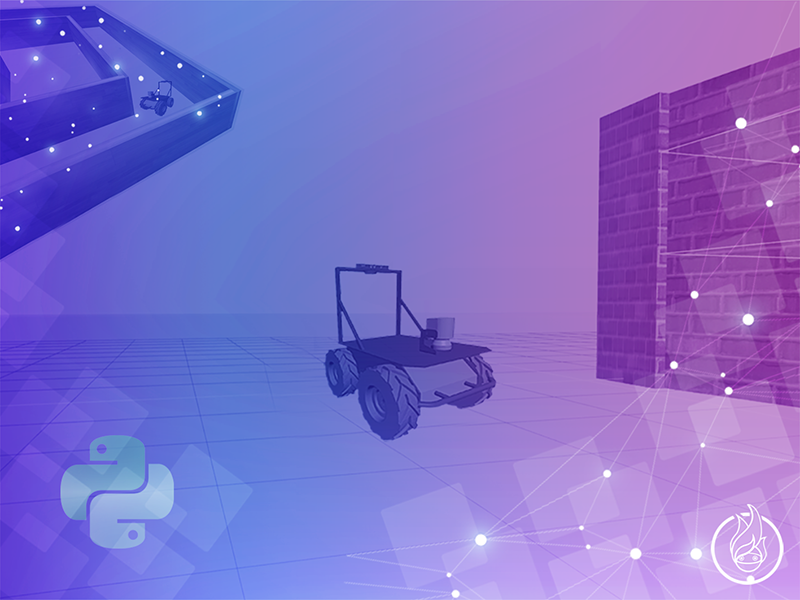
![[Gazebo in 5 minutes] 003 – How to spawn a robot in gazebo](https://www.theconstruct.ai/wp-content/uploads/2018/09/How-to-spawn-a-robot-in-gazebo.png)
![[Gazebo in 5 minutes] 002 – How to add gazebo models to a simulation](https://www.theconstruct.ai/wp-content/uploads/2018/09/Gazebo-in-5-minutes-002-How-to-add-gazebo-models-to-a-simulation.png)