![[Gazebo in 5 mins] – How To Launch Your First Gazebo World Using ROS](https://www.theconstruct.ai/wp-content/uploads/2018/09/Gazebo-in-5-mins-How-To-Launch-Your-First-Gazebo-World-Using-ROS.png)
[Gazebo in 5 mins] – How To Launch Your First Gazebo World Using ROS
What you will learn
- Learn how to launch an empty world in the gazebo simulator using ROS commands.
List of resources used in this post:
- Robot Ignite Academy, the place to learn to program robots using only a web browser
- ROS Development Studio (the environment used in the video), another powerful online tool for pushing your ROS learning in a practical way
Preparing the environment
In order to load gazebo using ROS, you need to have Gazebo and ROS installed. If you don’t want to install everything, we highly recommend using ROSDS (ROS Development Studio) which gives you access to an online environment with ROS already installed. Indeed, we are going to use that tool for easiness. You can follow the same steps on your computer as well if you don’t want to use ROSDS.
To use ROSDS, you can just create an account and start using it.
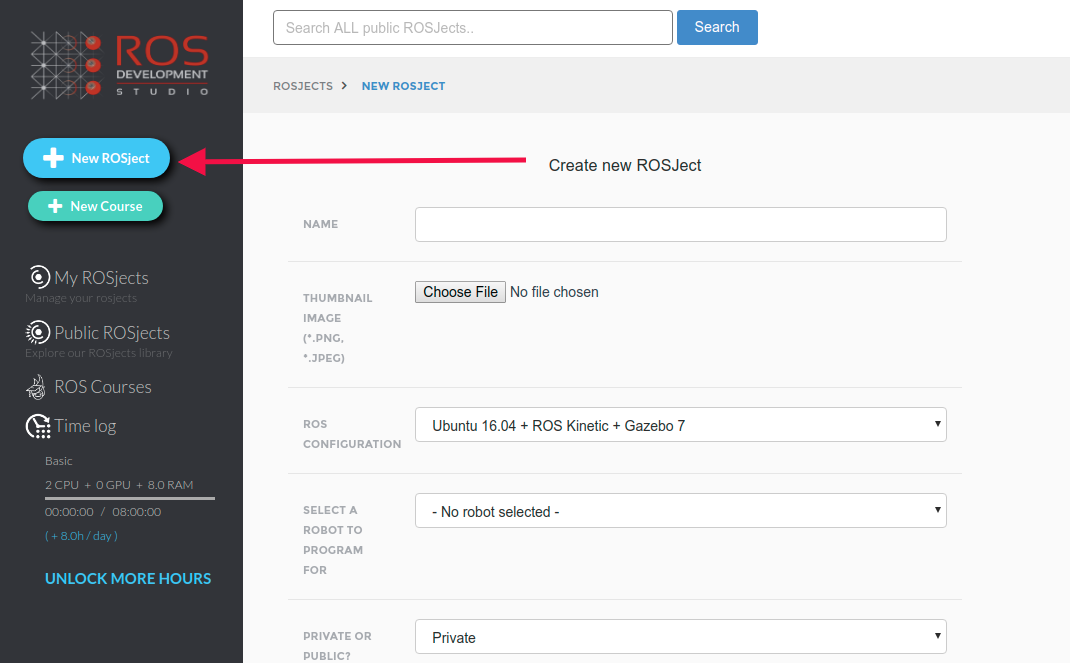
Once you have your account created, you have to create a ROSject by clicking on the New ROSject button:
Creating a new ROSject in ROSDS
Once you have the ROSject, you can open it by clicking Open:
Opening a ROSject in ROSDS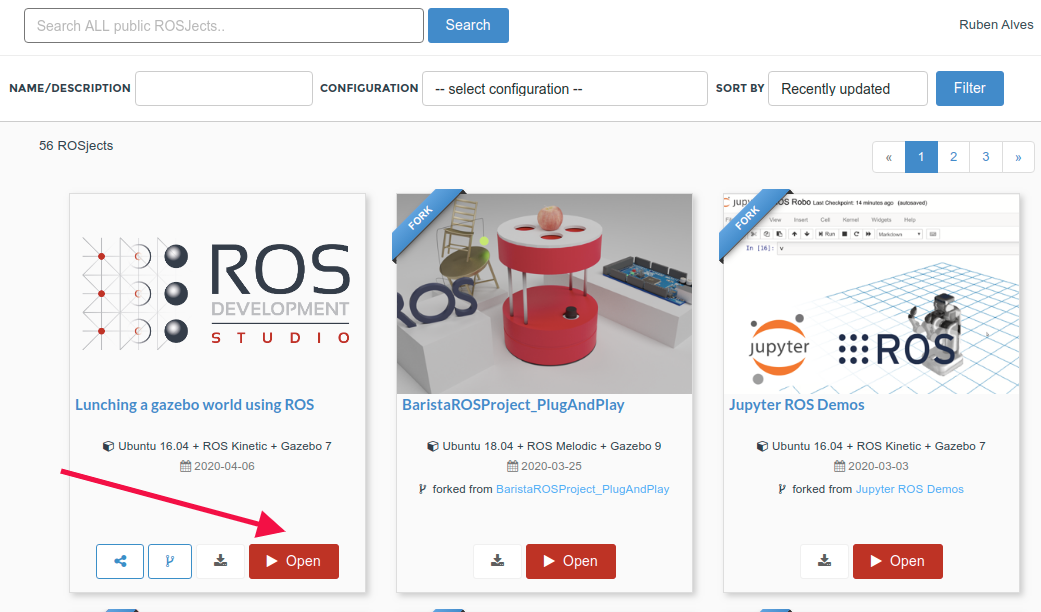
Creating the ROS Package
In order to run anything using ROS, we need a ROS package, so, let’s create one. For that, you are going to need a terminal/shell. In ROSDS, you can have a terminal by clicking Tools -> Shell.
Let’s first create the workspace. In this case, let’s call it ~/simulation_ws
mkdir ~/simulation_ws/src -p
Now let’s then compile our empty workspace
source /opt/ros/kinetic/setup.bash
source /usr/share/gazebo/setup.sh

cd ~/simulation_ws/

catkin_make
Now let’s create our ROS package. Let’s call it my_simulations:
source ~/simulation_ws/devel/setup.bash

cd ~/simulation_ws/src

catkin_create_pkg my_simulations
Now, let’s create a launch and a world folder inside the my_simulations package.
cd my_simulations

mkdir launch world
Now, inside the launch folder, let’s create a file named my_world.launch:
touch launch/my_world.launch
In that file, let’s put the following content:
<?xml version="1.0" encoding="UTF-8" ?>
<launch>
        <!-- overwriting these args -->
        <arg name="debug" default="false" />
        <arg name="gui" default="true" />
        <arg name="pause" default="false" />
        <arg name="world" default="$(find my_simulations)/world/empty_world.world" />

        <!-- include gazebo_ros launcher -->
        <include file="$(find gazebo_ros)/launch/empty_world.launch">
                <arg name="world_name" value="$(arg world)" />
                <arg name="debug" value="$(arg debug)" />
                <arg name="gui" value="$(arg gui)" />
                <arg name="paused" value="$(arg pause)" />
                <arg name="use_sim_time" value="true" />
        </include>
</launch>
In order to put the content on that file, you can do it using the code editor. For that, click on Tools -> IDE
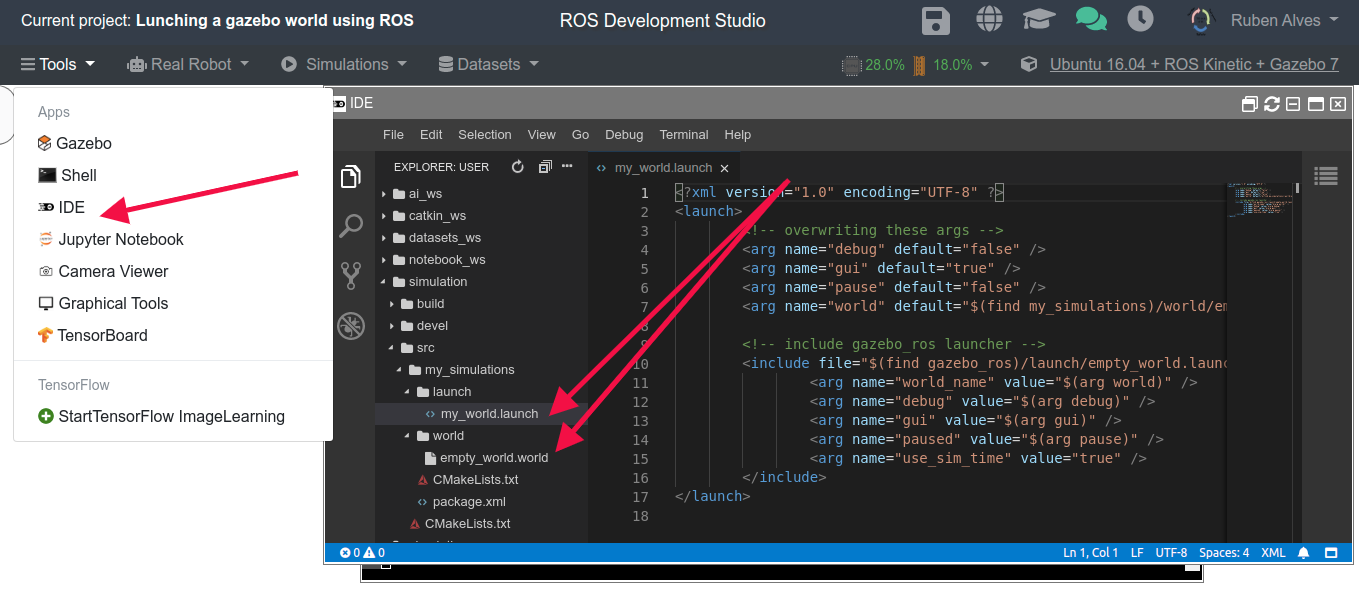
Tools -> IDE. Opening the Code Editor on ROSDS
Now, let’s create a file named empty_world.world in the world folder:
touch world/empty_world.world
In that file, let’s add the following content:
<?xml version="1.0" ?>

<sdf version="1.5">
	<world name="default">
		<!-- A global light source -->
		<include>
			<uri>model://sun</uri>
		</include>

		<!-- A ground plane -->
		<include>
			<uri>model://ground_plane</uri>
		</include>
	</world>
</sdf>
If you followed the instructions correctly, you should have the following structure:
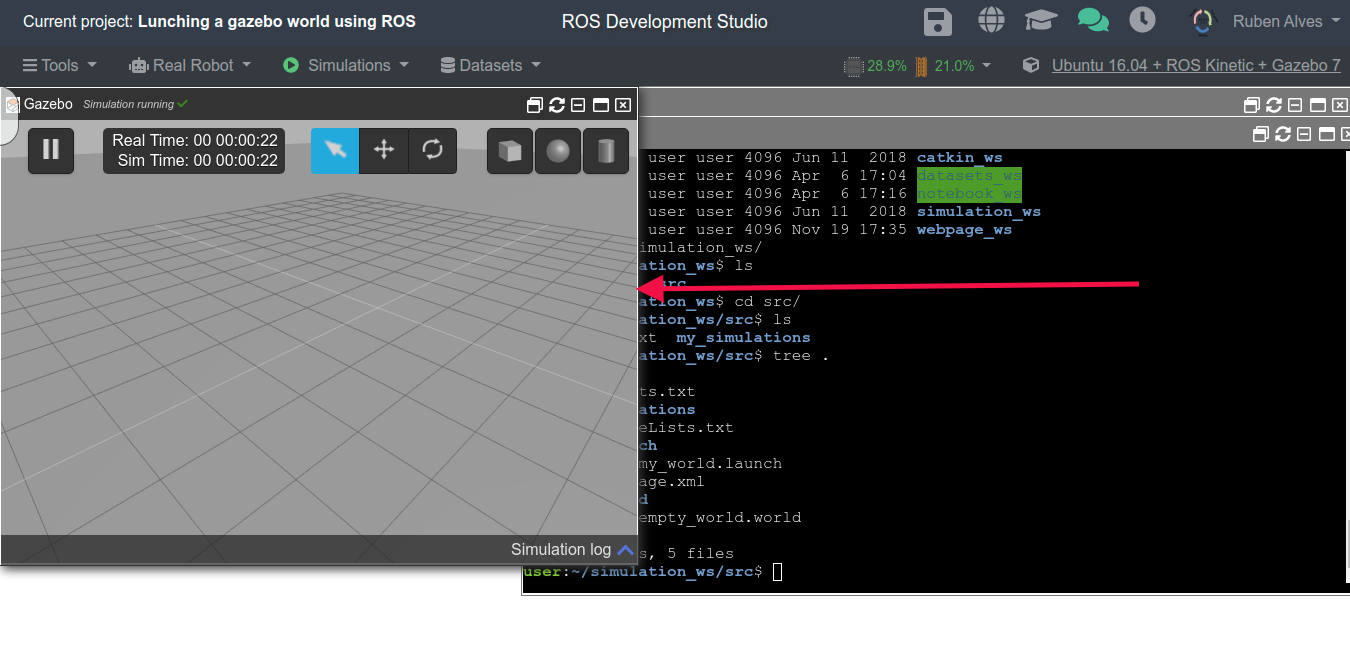
user:~/simulation_ws/src$ tree .
.
|-- CMakeLists.txt -> /opt/ros/kinetic/share/catkin/cmake/toplevel.cmake
`-- my_simulations
    |-- CMakeLists.txt
    |-- launch
    |   `-- my_world.launch
    |-- package.xml
    `-- world
        `-- empty_world.world

3 directories, 5 files
Loading the Gazebo world using ROS
Now that we have our ROS package set, we can run our packages in two ways:
Option one: Click Simulation -> Choose File, then select my_world.launch. This should automatically load the web version of gazebo, called gzweb.
Option two: If you are running the tests on your computer, or you want to manually run the simulation, you can just:
source ~/simulation_ws/devel/setup.bash
roslaunch my_simulations my_world.launch --screen
The output should be something like:
user:~/simulation_ws/src$ roslaunch my_simulations my_world.launch --screen
... logging to /home/user/.ros/log/1b7241b4-782c-11ea-a2f3-161ed25550cd/roslaunch-rosdscomputer-7087.log
Checking log directory for disk usage. This may take awhile.
Press Ctrl-C to interrupt
Done checking log file disk usage. Usage is <1GB.

started roslaunch server http://rosdscomputer:40747/

SUMMARY
========

PARAMETERS
 * /rosdistro: kinetic
 * /rosversion: 1.12.14
 * /use_sim_time: True

NODES
  /
    gazebo (gazebo_ros/gzserver)
    gazebo_gui (gazebo_ros/gzclient)

auto-starting new master
process[master]: started with pid [7108]
ROS_MASTER_URI=http://master:11311

setting /run_id to 1b7241b4-782c-11ea-a2f3-161ed25550cd
process[rosout-1]: started with pid [7126]
started core service [/rosout]
process[gazebo-2]: started with pid [7140]
process[gazebo_gui-3]: started with pid [7158]
[ INFO] [1586194149.892774702]: Finished loading Gazebo ROS API Plugin.
[ INFO] [1586194149.894694146]: waitForService: Service [/gazebo/set_physics_properties] has not been advertised, waiting...
GZCLIENT disabled by The Construct
[ INFO] [1586194150.663164508, 0.021000000]: waitForService: Service [/gazebo/set_physics_properties] is now available.
[ INFO] [1586194150.694158392, 0.050000000]: Physics dynamic reconfigure ready.
If you are in ROSDS and chose to run the simulation manually, then you have to manually open the Gazebo Web (gzweb) by clicking on Tools -> Gazebo.
Congratulations. You have successfully launched your first Gazebo World using ROS.
Youtube video
If you didn’t understand all the steps explained here or needs more understanding of the files we created, remember that we have the live version of this post on YouTube. Also, if you liked the content, please consider subscribing to our youtube channel. We are publishing new content ~every day.
Keep pushing your ROS Learning.
![[Gazebo in 5 mins] 009 – How to create a robot using URDF – Part 2 – Joints](https://www.theconstruct.ai/wp-content/uploads/2018/11/Gazebo-in-5-mins-009-How-to-create-a-robot-using-URDF-Part-2-Joints.png)
![[Gazebo in 5 minutes] 008 – How to visualize a robot URDF using RVIZ](https://www.theconstruct.ai/wp-content/uploads/2018/11/Gazebo-in-5-minutes-008-How-to-visualize-a-robot-URDF-using-RVIZ.png)
![[Gazebo in 5 minutes] 007 – How to create a robot using URDF #Part 1 – Links](https://www.theconstruct.ai/wp-content/uploads/2018/10/Gazebo-in-5-minutes-007-How-to-create-a-robot-using-URDF-Part-1-Links.png)
![[Gazebo in 5 minutes] 006 – How to use an image file as texture for gazebo model](https://www.theconstruct.ai/wp-content/uploads/2018/10/Gazebo-in-5-minutes-006-How-to-use-an-image-file-as-texture-for-gazebo-model-1.png)