Exploring ROS with a 2 Wheeled Robot #5 – Obstacle Avoidance
Obstacle Avoidance
In this tutorial, we will learn what is an obstacle avoidance algorithm and how it works. Let’s go!
STEP 1
First thing, let’s open our ROSject finished in the previous post. If you don’t have it, just copy my own version from here: http://www.rosject.io/l/96491bc/
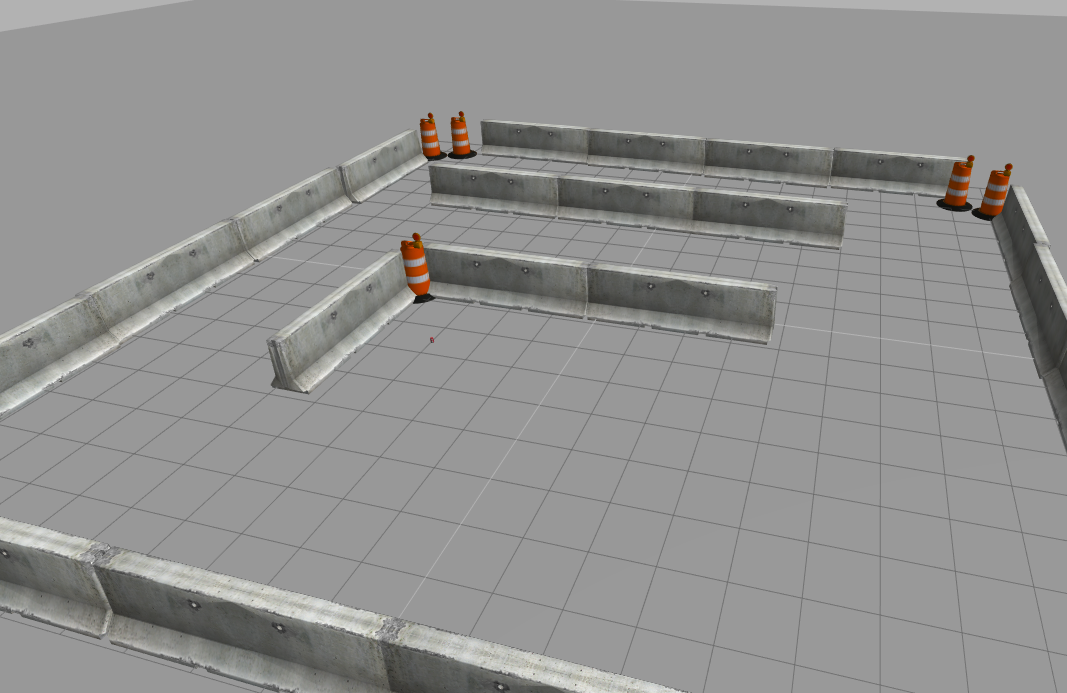
I start launching the new world (with obstacles) we created for this chapter. The file content is right here, you must copy and paste to the file ~/simulation_ws/src/my_worlds/worlds/world2.launch
And modify the launch file (~/simulation_ws/src/my_worlds/launch_world.launch)) in order to be like below:
<?xml version="1.0" encoding="UTF-8"?>

<launch>
  <arg name="robot" default="machines"/>
  <arg name="debug" default="false"/>
  <arg name="gui" default="true"/>
  <arg name="headless" default="false"/>
  <arg name="pause" default="false"/>
  <arg name="world" default="world02" />
  <include file="$(find gazebo_ros)/launch/empty_world.launch">
    <arg name="world_name" value="$(find my_worlds)/worlds/world01.world"/>
    <arg name="debug" value="$(arg debug)" />
    <arg name="gui" value="$(arg gui)" />
    <arg name="paused" value="$(arg pause)"/>
    <arg name="use_sim_time" value="true"/>
    <arg name="headless" value="$(arg headless)"/>
    <env name="GAZEBO_MODEL_PATH" value="$(find simulation_gazebo)/models:$(optenv GAZEBO_MODEL_PATH)"/>
  </include>
</launch>
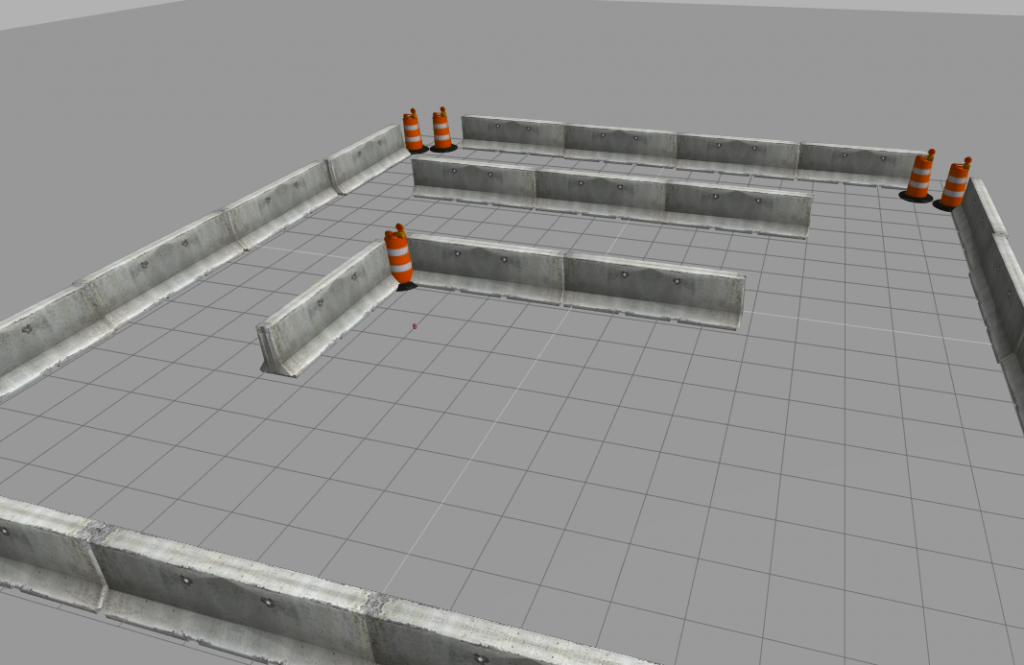
Launch the world from ROSDS simulation launcher, as we did in the previous chapter/post. You must have the simulation below running:
STEP 2
Spawn the robot from a web shell, but this time passing some arguments, in order to avoid the wall (otherwise the robot will be spawned just over one of the obstacles right way):
roslaunch m2wr_description spawn.launch y:=8
This is the environment we start it from!
Since we will code with Python, let’s create one more script into the motion_plan package. It goes at ~/catkin_ws/src/motion_plan/scripts/obstacle_avoidance.py. !! Don’t forget to assign the necessary permission to it [chmod +x <name_of_the_file.py>] !!
Let’s go step-by-step!
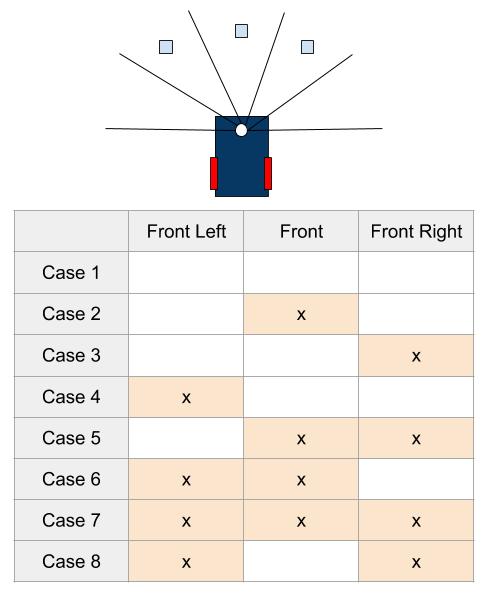
We defined, in the previous chapter, 5 regions of the laser scan and we are going to use the same here. They are:
- Right
- Front-Right
- Front
- Front-Left
- Left
For the sake of simplicity, we only use the 3 ones in the middle to do the obstacle avoidance algorithm.
STEP 3
In our code, let’s start importing the necessary libraries:
#! /usr/bin/env python

import rospy

from sensor_msgs.msg import LaserScan
from geometry_msgs.msg import Twist
Then, we define a global for the publisher in charge of setting the robot speed:
pub = None
At the end of the file, we define the main function and call it to initialize everything:
def main():
    global pub

    rospy.init_node('reading_laser')

    pub = rospy.Publisher('/cmd_vel', Twist, queue_size=1)

    sub = rospy.Subscriber('/m2wr/laser/scan', LaserScan, clbk_laser)

    rospy.spin()

if __name__ == '__main__':
    main()
STEP 4
Now, between the libraries and the main method, we define the method that receives the laser readings through the subscriber. The 5 regions are defined in a dictionary of Python.
def clbk_laser(msg):
    regions = {
        'right':  min(min(msg.ranges[0:143]), 10),
        'fright': min(min(msg.ranges[144:287]), 10),
        'front':  min(min(msg.ranges[288:431]), 10),
        'fleft':  min(min(msg.ranges[432:575]), 10),
        'left':   min(min(msg.ranges[576:713]), 10),
    }

    take_action(regions)
At the end of the laser reading, we call the method take_action. Let’s define it:
def take_action(regions):
    msg = Twist()
    linear_x = 0
    angular_z = 0

    state_description = ''

    if regions['front'] > 1 and regions['fleft'] > 1 and regions['fright'] > 1:
        state_description = 'case 1 - nothing'
        linear_x = 0.6
        angular_z = 0
    elif regions['front'] < 1 and regions['fleft'] > 1 and regions['fright'] > 1:
        state_description = 'case 2 - front'
        linear_x = 0
        angular_z = -0.3
    elif regions['front'] > 1 and regions['fleft'] > 1 and regions['fright'] < 1:
        state_description = 'case 3 - fright'
        linear_x = 0
        angular_z = -0.3
    elif regions['front'] > 1 and regions['fleft'] < 1 and regions['fright'] > 1:
        state_description = 'case 4 - fleft'
        linear_x = 0
        angular_z = 0.3
    elif regions['front'] < 1 and regions['fleft'] > 1 and regions['fright'] < 1:
        state_description = 'case 5 - front and fright'
        linear_x = 0
        angular_z = -0.3
    elif regions['front'] < 1 and regions['fleft'] < 1 and regions['fright'] > 1:
        state_description = 'case 6 - front and fleft'
        linear_x = 0
        angular_z = 0.3
    elif regions['front'] < 1 and regions['fleft'] < 1 and regions['fright'] < 1:
        state_description = 'case 7 - front and fleft and fright'
        linear_x = 0
        angular_z = -0.3
    elif regions['front'] > 1 and regions['fleft'] < 1 and regions['fright'] < 1:
        state_description = 'case 8 - fleft and fright'
        linear_x = 0
        angular_z = -0.3
    else:
        state_description = 'unknown case'
        rospy.loginfo(regions)

    rospy.loginfo(state_description)
    msg.linear.x = linear_x
    msg.angular.z = angular_z
    pub.publish(msg)
This one is a bit long, but the logic of it is not that complex. Let’s group the if-cases and analyze their behavior:
If there is nothing in any of the 3 areas of the laser, the robot just goes ahead, in a straight line.
state_description = 'case 1 - nothing'
linear_x = 0.6
angular_z = 0
For the case “2”, “7” and “8”, there is something in front or all the regions. We just defined to turn left on these cases (positive angular value).
So, for the cases “3” and “5”, when there is something on the right side, we turn to the left again.
Finally, cases “4” and “6”, just turn to the right (negative angular value)
At the end of the function, we just log some data for debugging purposes, set the twist message and publish it.
Run the script and see the robot avoiding the obstacles!
I hope everything went well in your ROSject. If not, remember you can always leave a comment or contact us using any of our channels. If you need, you can also copy the final ROSject we generated from this post!
In this next post we are going create an algorithm to go from a point to another using the odometry data to localize the robot!
Cheers!


