![[ROS Q&A] 119 – ROS Mapping Tutorial. How To Provide a Map](https://www.theconstruct.ai/wp-content/uploads/2018/05/ROS-Mapping-Tutorial.-How-To-Provide-a-Map.png)
[ROS Q&A] 119 – ROS Mapping Tutorial. How To Provide a Map
In this ROS Mapping tutorial video we will see how to provide a previously created and saved map through topics, either using the command line or a ROS launch file.
The topic explained into this video is part of the ROS Navigation in 5 Days Course that you can find in the Robot Ignite Academy. You will find the links to both the academy and the Navigation Course right below.
Follow the steps to recreate the project as shown in the video
- Go to Robot Ignite Academy. You will need to signup if you have not registered already.
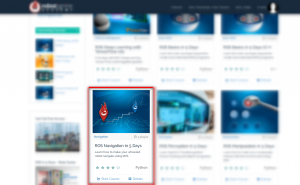
- In the home page, choose the course ROS Navigation in 5 Days
Once the course page opens select start course option
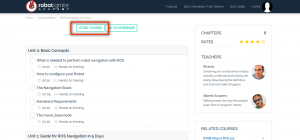
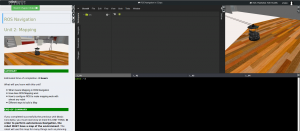
You should be greeted with the workspace like following (it will take a while to load the full page)
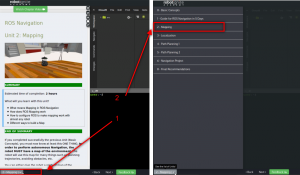
- Open the Units menu from bottom left of the screen and select the Unit 2: Mapping
- Start the gmapping package by executing the following command in a SHELL (there are four SHELL in the bottom of the screen)
$ roslaunch turtlebot_navigation_gazebo gmapping_demo.launch
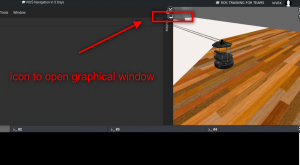
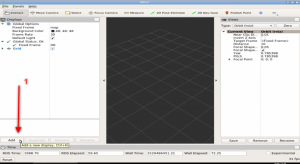
- We will need a RVIZ windown to see the map visualization. Open a graphical interface window (see image)
- Enter the following command in another SHELL to start the RVIZ visualization
$ rosrun rviz rviz
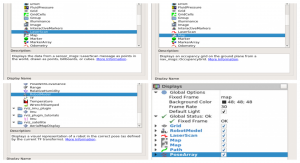
The above command will load the RVIZ in the graphical interface window as shown. We will add displays to the RVIZ window (as shown in image)
- RobotModel
- LaserScan
- Map
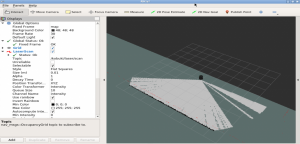
- Make the following settings
- Map : set
Topicto/map - Laser : set
Topicto/kobuki/laser/scan
- Map : set
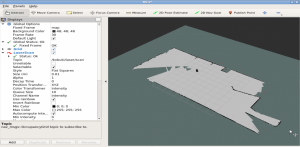
Once the above settings are made, you should start to see the visualization in the RVIZ window
- Now that mapping package is working, we will move the robot around to capture more data. To do so we will use the keyboard teleoperation, execute the following commands in a SHELL
$ roslaunch turtlebot_teleop keyboard_teleop.launch
Use the keys I(forward), J(left), L(right), M(backwards) to move the robot around. As you move the robot around the MAP in rviz should grow
- To save the current map, execute the following command in a new SHELL
$ cd ~catkin_ws/src $ mkdir maps $ cd maps $ rosrun map_server map_saver -f my_map $ ls
You should see two new files created inside the ~/catkin_ws/src/maps directory
- my_map.pgm
- my_map.yaml
Now we can load this map to the map_server with the following command
$ rosrun map_server map_server my_map.yaml
The above command will start a map node with the map data in it. There is an alternate way to provide this map with the launch file. To provide the map using a launch file lets create a new package called provide_map. Execute the following commands in a SHELL
$ cd ~catkin_ws/src
$ catkin_create_pkg provide_map
$ cd provide_map
$ mkdir launch
$ mv ../maps . cd launch
$ touch provide_map.launch
The above commands create a new package by name provide_map and create a directory named launch inside the new package, it copies the maps directory (where we saved the maps) to inside the package and lastly creates a launch file provide_map.launch. Put the following content inside the launch file
<launch>
  <arg name="map_file" value="/home/user/catkin_ws/src/provide_map/maps/my_map.yaml">
  </arg>
  <node pkg="map_server" type="map_server" name="map_server" args="$(arg map_file)">
  </node>
</launch>
To test everythin works well we can run this launch file. Close the running instance of RVIZ and in the same SHELL use the following commands
$ roslaunch provide_map provide_map.launch
You should see the RVIZ window load with map. With this we finish this part.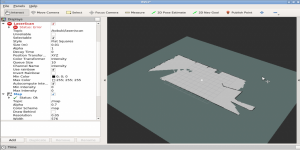
// RELATED LINKS
▸ Robot Ignite Academy: https://goo.gl/e7AQtb
▸ ROS Navigation in 5 Days online course: https://goo.gl/U5MGrs

