Moviendo el Turtlebot3 a posiciones deseadas en Gazebo – Spanish ROS Tutorial

Moviendo el Turtlebot3 a posiciones deseadas en Gazebo – Spanish ROS Tutorial

This tutorial is created by Rosbotics Ambassador 017 Jose

Rosbotics Ambassador Program ((https://www.theconstruct.ai/rosbotics-ambassador/)

Lo que vamos a aprender

  1. Subscribirse al tópico /odom y asi conocer la posición estimada del robot.
  2. Publicar en el tópico /cmd_vel, para así mover al robot de acuerdo con la posición estimada.

Lista de recursos usados en esta publicación

  1. Usa este rosject: https://app.theconstructsim.com/l/5fc977f5/
  2. The Construct: https://app.theconstructsim.com/
  3. Cursos ROS: ROS2 Basics in 5 Days (Python): https://app.theconstructsim.com/courses/132

Resumen

ROS (Robot Operating System) se está convirtiendo en el “framework” estándar para programar robots. En este tutorial emplearemos los conceptos de tópicos y nodos para mover el robot “Turtlebot3” hacia múltiples posiciones deseadas. Hacemos uso de los mensajes del tópico /odom para conocer la posición estimada del robot y publicar en el tópico /cmd_vel para mover el robot a las posiciones deseadas. Todo esto es simulado en un mundo de Gazebo. Ten encuesta que se usará ROS2 Humble para este tutorial.

PASO 1: Abriendo el rosject

Para seguir este tutorial, necesitamos tener instalado ROS2 HUMBLE en nuestro sistema, y lo ideal sería tener un ros2_ws (Espacio de Trabajo ROS2). Para facilitarte la vida, ya hemos preparado un rosject para eso: https://app.theconstructsim.com/l/5fc977f5/.

Simplemente copiando el rosject (haciendo clic en el enlace de arriba), tendrás una configuración ya preparada para ti.

Después de haber copiado el rosject a tu propia área de trabajo, deberías ver el botón RUN. Haz clic en ese botón para lanzar el rosject (abajo tienes un ejemplo de rosject).
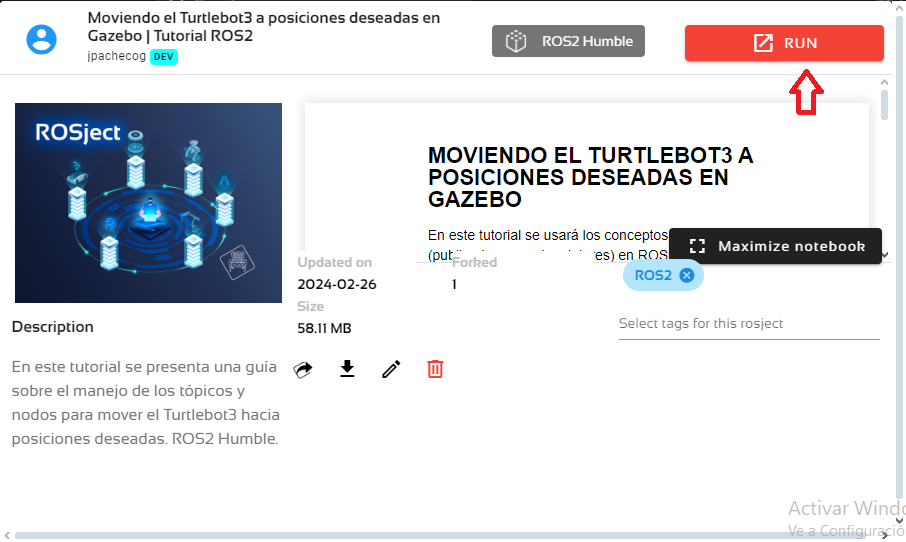
Rosject

Tras pulsar el botón RUN, deberías tener cargado el rosject. Ahora, pasemos a la siguiente sección para ponernos manos a la obra.

PASO 2: Desarrollo del paquete

El robot a usar es el Turtlebot3.
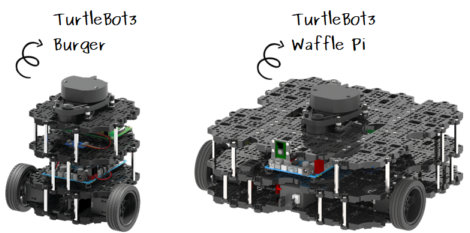
Rosject

Estrategia de control

El Turtlebot3 se moverá por una serie de posiciones en un orden específico, es decir, se moverá de su posición inicial a la 1ra posición deseada, una vez alcanzada, se moverá a la 2da posición y así sucesivamente. Para lograr esto, necesitamos de una estrategia.

Tengamos en cuenta que el robot conocerá las posiciones que debe alcanzar y su posición actual estimada gracias al tópico /odom, del cual aprovecharemos la posición en X, posición Y, y la rotación en Z.
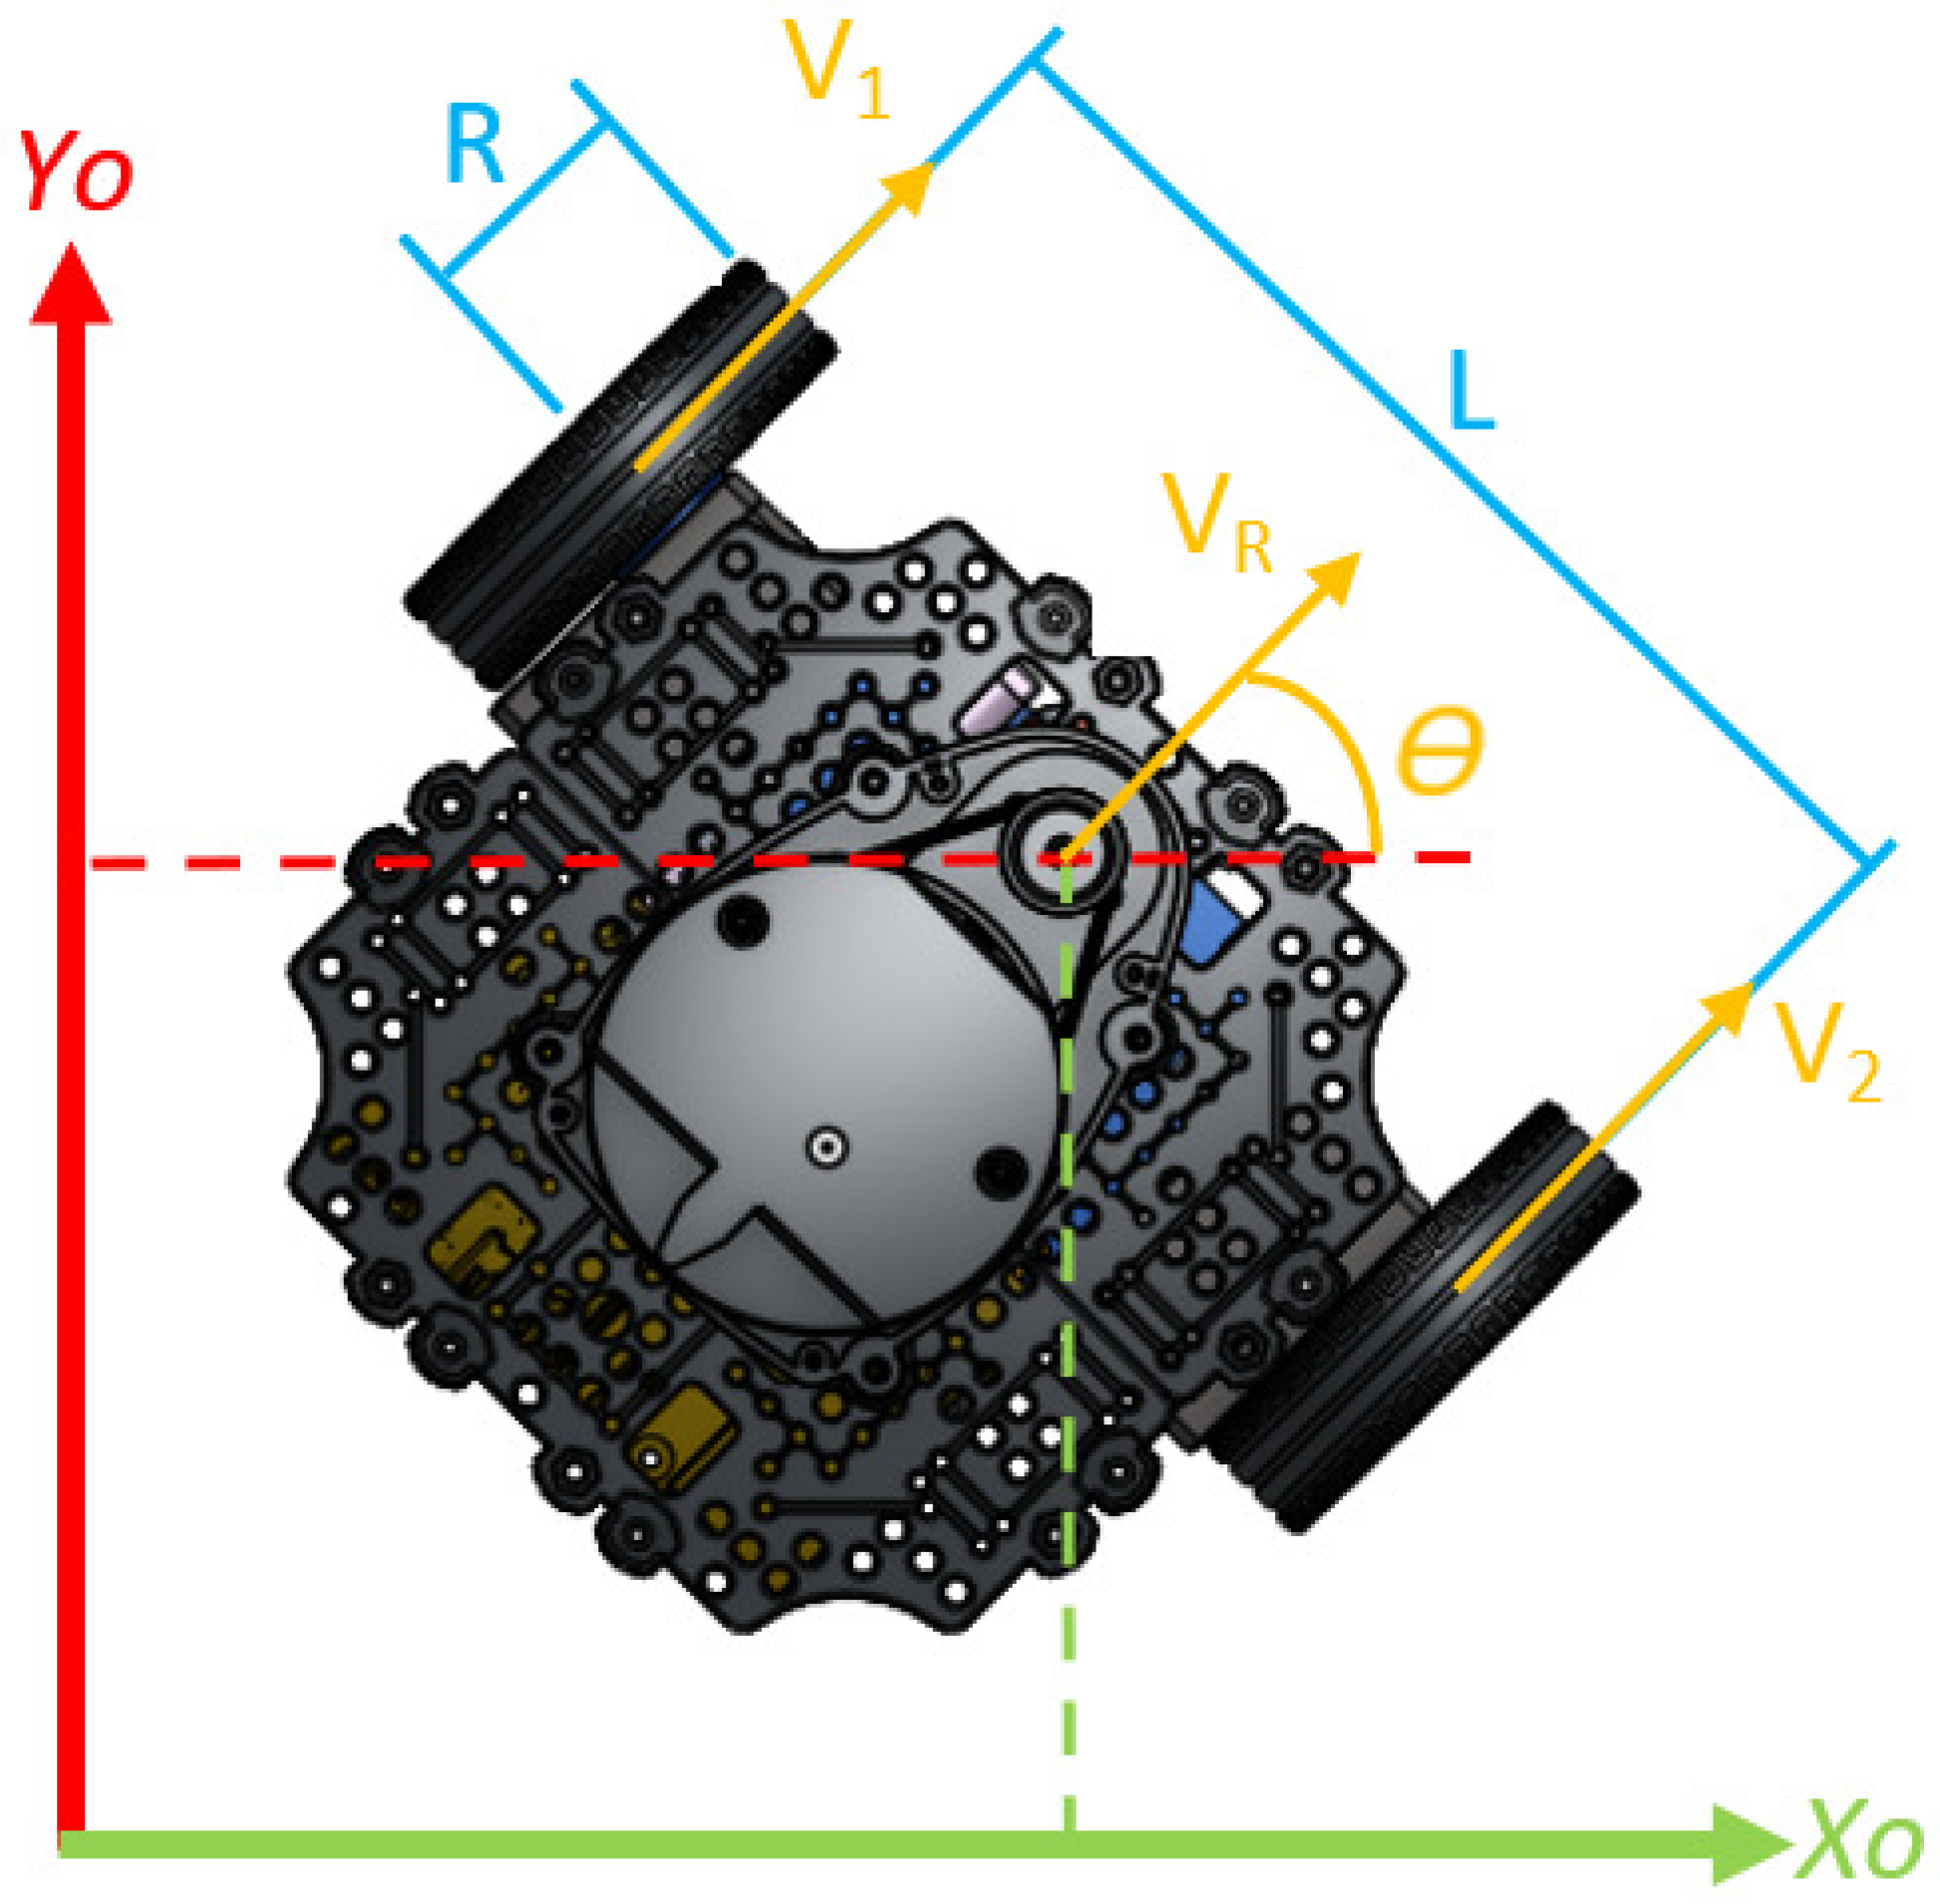
Posicion robot

Con ello, para alcanzar cada posición el Turtlebot3 realizará 2 movimientos: Primero, girar hasta que quede mirando a la posición deseada; Segundo, avanzar de manera recta hasta llegar a la posición.

Movimiento robot

Adicionalmente, debemos tener en cuenta el robot no se moverá en una línea recta de manera perfecta, por lo que se requiere compensar esa desviación conforme avanza. Esto se puede realizar añadiendo una velocidad angular cuando la orientación cambie demasiado.

Creación del paquete

Primero creamos un paquete en python para realizar un nodo-publicador-subscriptor que mueva al Turtlebot3 de la forma deseada. Necesitamos añadir las dependencias necesarias. Para ello ejecutamos en un terminal lo siguiente:

cd ~/ros2_ws/src
ros2 pkg create --build-type ament_python turtlebot3_tutorial --dependencies std_msgs geometry_msgs

Creación del nodo

Creamos el archivo que contendrá el nodo.

cd ~/ros2_ws/src/turtlebot3_tutorial/turtlebot3_tutorial
touch turtlebot3_node.py

Copiamos el siguiente código dentro del archivo.

import rclpy
from rclpy.node import Node
from geometry_msgs.msg import Twist
from nav_msgs.msg import Odometry
from rclpy.qos import ReliabilityPolicy, QoSProfile
import numpy as np
import math
​
class Robot(Node):
​
    def __init__(self):
        super().__init__('turtlebot3_node')
        # Posiciones estimadas
        self.pos_x = 0
        self.pos_y = 0
        self.roll = 0
        self.pitch = 0
        self.yaw = 0
​
        # Velocidad de desplazamiento
        self.vel_linear_x = 0.2
        self.vel_angular_z = 0.4
​
        # Máximo error
        self.linear_error = 0.08
        self.angular_error = 0.05   
​
        # Posiciones deseadas
        self.posiciones = [[1,1], [0,2], [0, 0]]
        self.index = 0
        self.pos_x_d, self.pos_y_d = self.posiciones[self.index]
        self.angulo_d = 0
​
        # Fase
        self.fase = 1 
​
        # Subscriptor
        self.subscriber = self.create_subscription(
            Odometry,
            '/odom',
            self.listener_callback,
            QoSProfile(depth=10, reliability=ReliabilityPolicy.RELIABLE))
​
        # Publicador
        self.publisher_ = self.create_publisher(Twist, 'cmd_vel', 10)
        self.vel = Twist()
        timer_period = 0.1
        self.timer = self.create_timer(timer_period, self.timer_callback)
​
    def timer_callback(self):
​
        if (self.index < len(self.posiciones)): 
            self.pos_x_d, self.pos_y_d = self.posiciones[self.index]
 
            if (self.fase == 1):
                # Calcular ángulo de rotación
                self.angulo_d = math.atan2(self.pos_y_d - self.pos_y, self.pos_x_d - self.pos_x) 
                if ( abs(self.yaw - self.angulo_d) > self.angular_error ):
                    self.vel.linear.x = 0.0
                    self.vel.angular.z = self.vel_angular_z if self.yaw < self.angulo_d else -self.vel_angular_z 
                else: 
                    self.vel.linear.x = 0.0 
                    self.vel.angular.z = 0.0 
                    self.fase += 1 
            if (self.fase == 2): 
                if ( math.sqrt((self.pos_x - self.pos_x_d)**2 + (self.pos_y - self.pos_y_d)**2) > self.linear_error ):
                    self.vel.linear.x = self.vel_linear_x
                    if ( abs(self.yaw - self.angulo_d) > self.angular_error):
                        self.vel.angular.z = self.vel_angular_z if self.yaw < self.angulo_d else -self.vel_angular_z
                    else:
                        self.vel.angular.z = 0.0
                else:
                    self.vel.linear.x = 0.0
                    self.vel.angular.z = 0.0
                    self.fase = 1
                    # Siguiente posición deseada
                    self.index += 1

        self.publisher_.publish(self.vel)
​
    def listener_callback(self, msg):
        self.pos_x = msg.pose.pose.position.x
        self.pos_y = msg.pose.pose.position.y
        quaternion = [msg.pose.pose.orientation.x,
                      msg.pose.pose.orientation.y,
                      msg.pose.pose.orientation.z,
                      msg.pose.pose.orientation.w]
        self.roll, self.pitch, self.yaw = self.euler_from_quaternion(quaternion)
​
        self.get_logger().info('Pos_x: "%f"' % self.pos_x)
        self.get_logger().info('Pos_y: "%f"' % self.pos_y)
        self.get_logger().info('Ori_z: "%f"' % self.yaw)
        self.get_logger().info('-------------------------')
​
    def euler_from_quaternion(self, quaternion):
        """
        Converts quaternion (w in last place) to euler roll, pitch, yaw
        quaternion = [x, y, z, w]
        Below should be replaced when porting for ROS2 Python tf_conversions is done.
        """
        x = quaternion[0]
        y = quaternion[1]
        z = quaternion[2]
        w = quaternion[3]
​
        sinr_cosp = 2 * (w * x + y * z)
        cosr_cosp = 1 - 2 * (x * x + y * y)
        roll = np.arctan2(sinr_cosp, cosr_cosp)
​
        sinp = 2 * (w * y - z * x)
        pitch = np.arcsin(sinp)
​
        siny_cosp = 2 * (w * z + x * y)
        cosy_cosp = 1 - 2 * (y * y + z * z)
        yaw = np.arctan2(siny_cosp, cosy_cosp)
​
        return roll, pitch, yaw
            
def main(args=None):
    # initialize the ROS communication
    rclpy.init(args=args)
    robot = Robot()
    
    rclpy.spin(robot)
​
    robot.destroy_node()
    rclpy.shutdown()
​
if __name__ == '__main__':
    main()

Repasemos las partes más importantes del código:

  • Aquí iniciamos el subscriptor del tópico /odom y el publicador al tópico /cmd_vel
        # Subscriptor
        self.subscriber = self.create_subscription(
            Odometry,
            '/odom',
            self.listener_callback,
            QoSProfile(depth=10, reliability=ReliabilityPolicy.RELIABLE))
​
        # Publicador
        self.publisher_ = self.create_publisher(Twist, 'cmd_vel', 10)
        self.vel = Twist()
        timer_period = 0.1
        self.timer = self.create_timer(timer_period, self.timer_callback)
  • En el método listener_callback recibimos las posiciones estimadas del robot y las acondicionamos para emplearlas en la lógica de control.
    def listener_callback(self, msg):
        self.pos_x = msg.pose.pose.position.x
        self.pos_y = msg.pose.pose.position.y
        quaternion = [msg.pose.pose.orientation.x,
                      msg.pose.pose.orientation.y,
                      msg.pose.pose.orientation.z,
                      msg.pose.pose.orientation.w]
        self.roll, self.pitch, self.yaw = self.euler_from_quaternion(quaternion)

        self.get_logger().info('Pos_x: "%f"' % self.pos_x)
        self.get_logger().info('Pos_y: "%f"' % self.pos_y)
        self.get_logger().info('Ori_z: "%f"' % self.yaw)
        self.get_logger().info('-------------------------')
  • Debido a que en el tópico /odom la orientación es expresada en cuaterniones, el método euler_from_quaternion es necesario para convertir la orientación del robot de cuaterniones a la notación roll-pitch-yaw. Esto nos permite obtener la rotación del robot alrededor del eje z (yaw).
    def euler_from_quaternion(self, quaternion):
        """
        Converts quaternion (w in last place) to euler roll, pitch, yaw
        quaternion = [x, y, z, w]
        Below should be replaced when porting for ROS2 Python tf_conversions is done.
        """
        x = quaternion[0]
        y = quaternion[1]
        z = quaternion[2]
        w = quaternion[3]

        sinr_cosp = 2 * (w * x + y * z)
        cosr_cosp = 1 - 2 * (x * x + y * y)
        roll = np.arctan2(sinr_cosp, cosr_cosp)

        sinp = 2 * (w * y - z * x)
        pitch = np.arcsin(sinp)

        siny_cosp = 2 * (w * z + x * y)
        cosy_cosp = 1 - 2 * (y * y + z * z)
        yaw = np.arctan2(siny_cosp, cosy_cosp)

        return roll, pitch, yaw
  • Este es el método definido en el timer y contiene la estrategia de control explicada anteriormente. Se ejecuta cada 0.1s y actualiza la velocidad del robot de acuerdo con la posición estimada.
   def timer_callback(self):

        if (self.index < len(self.posiciones)): 
            self.pos_x_d, self.pos_y_d = self.posiciones[self.index]
 
            if (self.fase == 1):
                # Calcular ángulo de rotación
                self.angulo_d = math.atan2(self.pos_y_d - self.pos_y, self.pos_x_d - self.pos_x) 
                if ( abs(self.yaw - self.angulo_d) > self.angular_error ):
                    self.vel.linear.x = 0.0
                    self.vel.angular.z = self.vel_angular_z if self.yaw < self.angulo_d else -self.vel_angular_z 
                else: 
                    self.vel.linear.x = 0.0 
                    self.vel.angular.z = 0.0 
                    self.fase += 1 
            if (self.fase == 2): 
                if ( math.sqrt((self.pos_x - self.pos_x_d)**2 + (self.pos_y - self.pos_y_d)**2) > self.linear_error ):
                    self.vel.linear.x = self.vel_linear_x
                    if ( abs(self.yaw - self.angulo_d) > self.angular_error):
                        self.vel.angular.z = self.vel_angular_z if self.yaw < self.angulo_d else -self.vel_angular_z
                    else:
                        self.vel.angular.z = 0.0
                else:
                    self.vel.linear.x = 0.0
                    self.vel.angular.z = 0.0
                    self.fase = 1
                    # Siguiente posición deseada
                    self.index += 1

        self.publisher_.publish(self.vel)

Creación del launch

Una vez que el nodo esta listo creamos el archivo launch con lo siguiente:

cd ~/ros2_ws/src/turtlebot3_tutorial
mkdir launch
cd launch
touch turtlebot3_launch.launch.py
chmod +x turtlebot3_launch.launch.py

Copiamos el siguiente código dentro del archivo que acabamos de crear:

from launch import LaunchDescription
from launch_ros.actions import Node
​
def generate_launch_description():
    return LaunchDescription([
        Node(
            package='turtlebot3_tutorial',
            executable='turtlebot3_node',
            output='screen'),
    ])

Una vez hecho lo anterior, editamos el archivo setup.py para añadir nuestro nodo.

from setuptools import setup
import os # <-- Añadir
from glob import glob # <-- Añadir
​
package_name = 'turtlebot3_tutorial'
​
setup(
    name=package_name,
    version='0.0.0',
    packages=[package_name],
    data_files=[
        ('share/ament_index/resource_index/packages',
            ['resource/' + package_name]),
        ('share/' + package_name, ['package.xml']),
        (os.path.join('share', package_name), glob('launch/*.launch.py')) # <-- Añadir
    ],
    install_requires=['setuptools'],
    zip_safe=True,
    maintainer='user',
    maintainer_email='user@todo.todo',
    description='TODO: Package description',
    license='TODO: License declaration',
    tests_require=['pytest'],
    entry_points={
        'console_scripts': [
            'turtlebot3_node = turtlebot3_tutorial.turtlebot3_node:main' # <-- Añadir de acuerdo al nombre de tu paquete y script
        ],
    },
)

Compilación del paquete

Por último, compilamos el paquete antes de ejecutar la simulación.

cd ~/ros2_ws
pip install setuptools==58.2.0
colcon build --packages-select turtlebot3_tutorial
source install/setup.bash

PASO 3: Simulando en Gazebo

Finalmente simularemos el comportamiento en gazebo, para ello primero iniciamos la simulación del Turtlebot3, cuyo paquete ya esta en este rosject. Esta se puede obtener desde este link.

export TURTLEBOT3_MODEL=waffle
ros2 launch turtlebot3_gazebo empty_world.launch.py
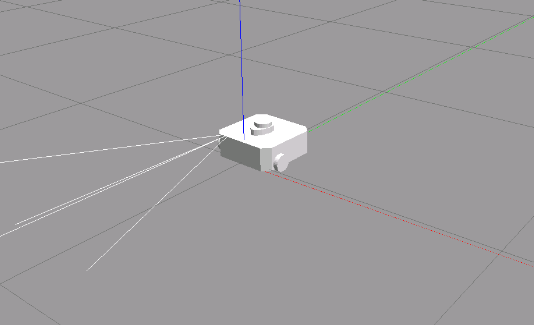
Simulación en Gazebo del Turtlebot3 moviendose

Una vez que se inicio la simulación, ya podemos iniciar el nodo que creamos.

ros2 launch turtlebot3_tutorial turtlebot3_launch.launch.py

Y listo! Ya podemos observar al robot moviendose por todas las posiciones deseadas en el orden especificado.
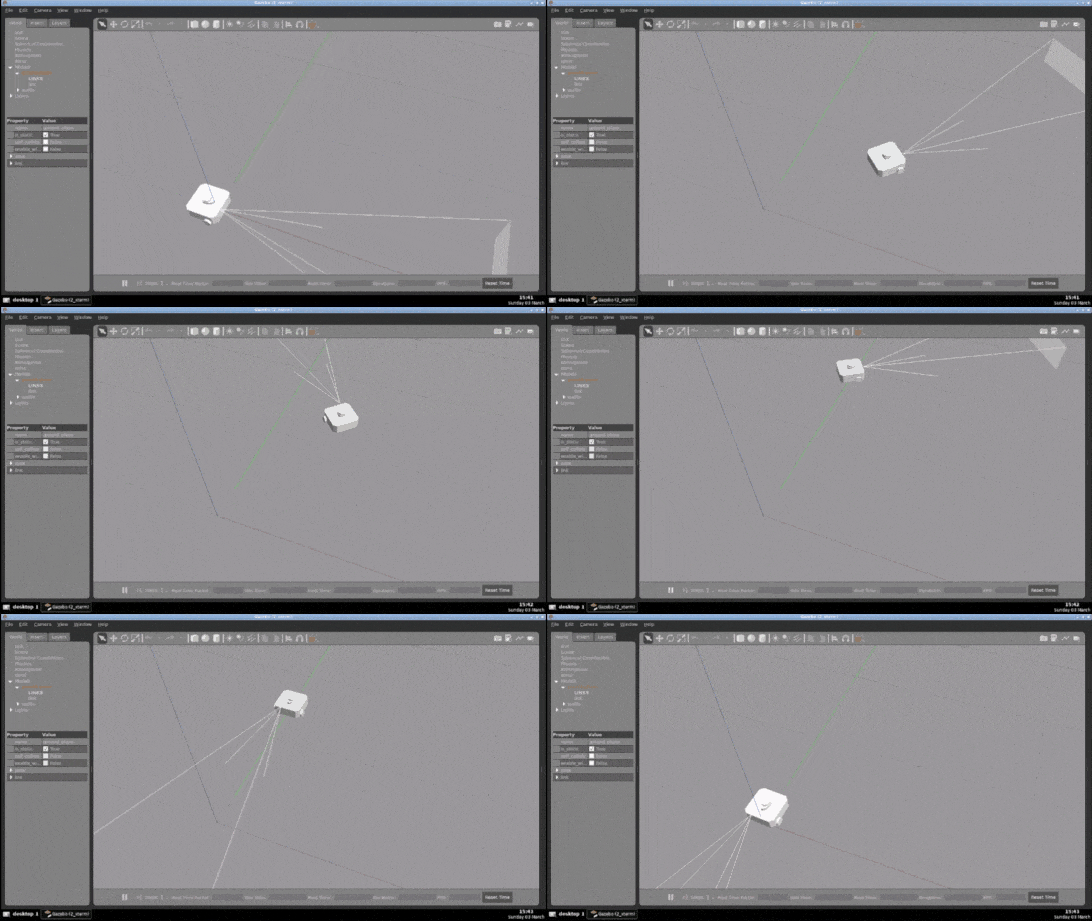
Simulación en Gazebo del Turtlebot3 moviendose


Video Tutorial

How to Publish and Subscribe to a topic from a launch file

How to Publish and Subscribe to a topic from a launch file

In this post, you will learn how to publish and subscribe to a topic from a launch file. This post is a response to this question posted on Gazebo Answers.

Step 1: Fire up a system with ROS installation

“Hey, do you mean I have to install ROS first?” Absolutely not! Just log in to The Construct to get access to virtual machines pre-installed with ROS.

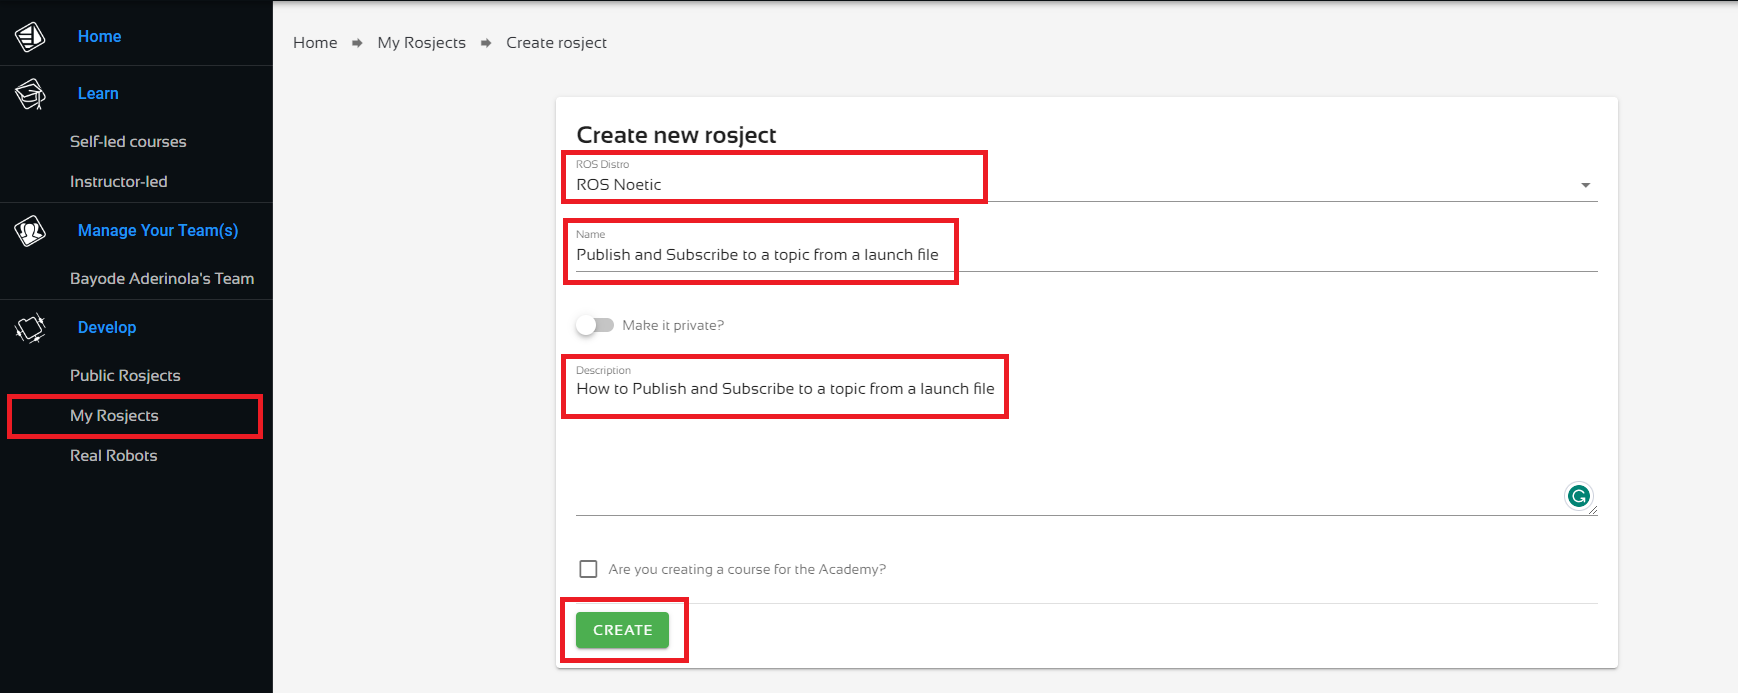
Once logged in, click on My Rosjects, then Create a New Rosject, supply the information as shown in the image below, and click Create. Then RUN the rosject.

Create a new Rosject

You might also want to try this on a local PC if you have ROS installed. However, please note that we don’t support local PCs and you will have to fix any errors you run into on your own. The rest of the instruction assumes that you are working on The Construct; please adapt them to your local PC and ROS installation.

PS: we are using ROS Noetic. You should be able to replicate the same on any ROS 1 distro.

Step 2: Create a package to demonstrate how to publish and subscribe to a topic from a launch file

Open Code Editor
Open a web shell

Open a web shell and run the following commands to create the package.

cd catkin_ws/src
source /opt/ros/noetic/setup.bash
catkin_create_pkg test_rostopic

Next, we create the launch directory and the launch files.

cd test_rostopic
mkdir launch
cd launch
touch test_pub.launch
touch test_echo.launch

Nice done! Now head over to the Code Editor to make changes to the launch files. Check the image below for how to open the Code Editor.

Open the Code Editor

Locate the launch folder in the code editor: catkin_ws > src > test_rostopic > launch and open the two launch files.

Paste the following lines into the test_pub.launch file. This is equivalent to rostopic pub /test_topic std_msgs/String "data: 'Hello there!'"

<launch>
    <arg name="topic_name" default="/test_topic" />
    <arg name="message" default="Hello there!" />
    <node pkg="rostopic" type="rostopic" name="rostopic_pub_node" output="screen" args="pub $(arg topic_name) std_msgs/String 'data: $(arg message)'" />
</launch>

Next, your test_echo.launch should be made up of the following lines. This is equivalent to rostopic echo /test_topic.

<launch>
    <arg name="topic_name" default="/test_topic" />
    <node pkg="rostopic" type="rostopic" name="rostopic_echo_node" output="screen" args="echo $(arg topic_name)" />
</launch>

Fantastic! Now, let’s compile the package.

cd ~/catkin_ws
catkin_make
source devel/setup.bash

Success! We’ll test it in the next step.

PS: if your code did not compile correctly, please go over the instructions and ensure you have created the files in the exact locations specified.

Step 3: Test the package to demonstrate how to publish and subscribe to a topic from a launch file

Start the test_pub.launch file in the current terminal.

roslaunch test_rostopic test_pub.launch

When done, open another terminal and run the test_echo.launch file.

roslaunch test_rostopic test_echo.launch

Now you should see something similar to the following on the terminal where test_echo.launch is running:

process[rostopic_echo_node-1]: started with pid [xxxx]
data: "Hello there!"
---

Sweet! So we are able to publish with one launch file and echo what we publish in another launch file. And…we are done here, congrats!

Take home: try combining both into a single launch file. After trying, check the solution in this gist.

Step 4: Check your learning

Do you understand how to publish and subscribe to a topic from a launch file? If you don’t know it yet, please go over the post again, more carefully this time.

(Extra) Step 5: Watch the video to understand how to publish and subscribe to a topic from a launch file

Here you go:

Feedback

Did you like this post? Do you have any questions about how to publish and subscribe to a topic from a launch file? Please leave a comment in the comments section below, so we can interact and learn from each other.

If you want to learn about other ROS topics, please let us know in the comments area and we will do a video or post about it.

How to write a ROS publisher and subscriber with a custom message

How to write a ROS publisher and subscriber with a custom message

In this post, you will learn how to write a ROS publisher and subscriber with a custom message, by following the Writing a Publisher and Subscriber with a Custom Message (Python) tutorial. This post is a response to this question posted on Gazebo Answers.

Step 1: Fire up a system with ROS installation

“Hey, do you mean I have to install ROS first?” Absolutely not! Just log in to The Construct to get access to virtual machines pre-installed with ROS.

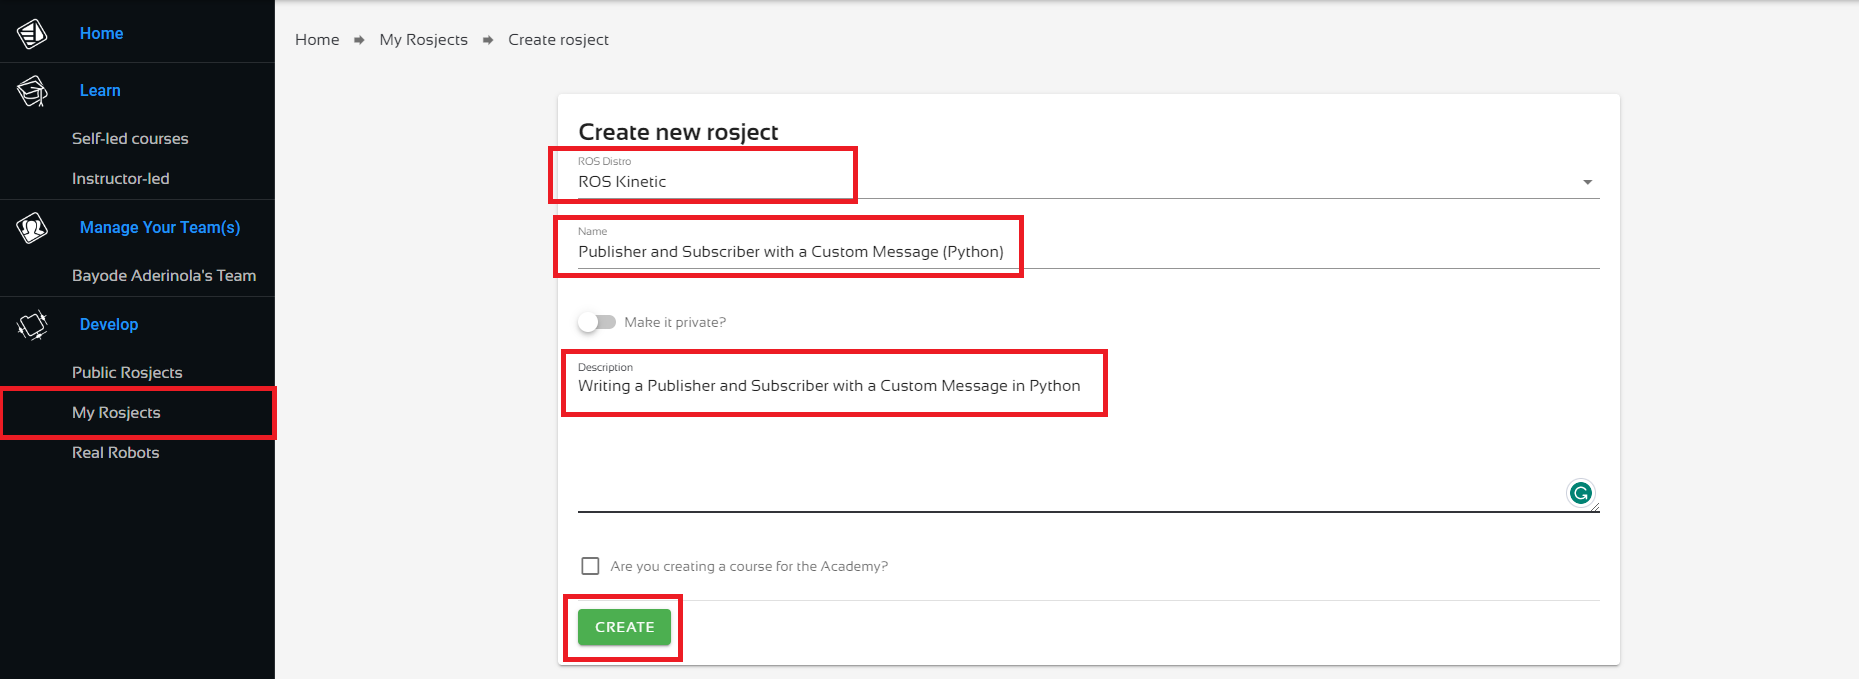
Once logged in, click on My Rosjects, then Create a New Rosject, supply the information as shown in the image below, and click Create. Then RUN the rosject.

Create a new Rosject

You might also want to try this on a local PC if you have ROS installed. However, please note that we don’t support local PCs and you will have to fix any errors you run into on your own. The rest of the instruction assumes that you are working on The Construct; please adapt them to your local PC and ROS installation.

PS:

  • We are using ROS Kinetic here because that’s what the user on ROS Answers used.
  • We could put the publisher and the subscriber in a single package, but we’ll create two packages as the user did.
  • We could put the custom message in any of the two packages, but we’ll put it in the subscriber, just like the user.

Step 2: Create the first package that contains the subscriber and the custom message

Open Code Editor
Open a web shell

Create the package and custom message

Open a web shell and run the following commands to create the package. When creating a custom message, you need extra dependencies message_generation and message_runtime, in addition to the main ROS API, rospy (for Python) in this case, and the types needed for the message, in this case std_msgs.

cd catkin_ws/src
source /opt/ros/kinetic/setup.bash
catkin_create_pkg quadrotor_receive rospy std_msgs message_generation message_runtime

Next, we create the message file, Person.msg. Run the following command in the same terminal you just used.

cd quadrotor_receive
mkdir msg
cd msg
touch Person.msg

Nice done! Now head over to the Code Editor to make changes to the Person.msg file. Check the image below for how to open the Code Editor.

Open the Code Editor

Locate the file in the code editor: catkin_ws > src > quadrotor_receive > msg > Person.msg and paste in the following code.

string name
int32 age

Edit package files

Replace CMakeLists.txt with the one below (where the following changes have been made).

  • Removed message_runtime from the find_package function.
  • Uncommented the add_message_files function, and added Person.msg below FILES.
  • Uncommented the generate_messages function, and left it intact.
  • Uncommented the line CATKIN_DEPENDS in the catkin_package function.
  • Removed all commented lines to keep the file short and sweet.
cmake_minimum_required(VERSION 3.0.2)
project(quadrotor_receive)

## Find catkin macros and libraries
## if COMPONENTS list like find_package(catkin REQUIRED COMPONENTS xyz)
## is used, also find other catkin packages
find_package(catkin REQUIRED COMPONENTS
  message_runtime
  rospy
  std_msgs
)

## Generate messages in the 'msg' folder
add_message_files(
  FILES
  Person.msg
  # Message2.msg
)

## Generate added messages and services with any dependencies listed here
generate_messages(
  DEPENDENCIES
  std_msgs
)

###################################
## catkin specific configuration ##
###################################
## The catkin_package macro generates cmake config files for your package
## Declare things to be passed to dependent projects
## INCLUDE_DIRS: uncomment this if your package contains header files
## LIBRARIES: libraries you create in this project that dependent projects also need
## CATKIN_DEPENDS: catkin_packages dependent projects also need
## DEPENDS: system dependencies of this project that dependent projects also need
catkin_package(
#  INCLUDE_DIRS include
#  LIBRARIES quadrotor_receive
CATKIN_DEPENDS message_generation message_runtime rospy std_msgs
#  DEPENDS system_lib
)

###########
## Build ##
###########

## Specify additional locations of header files
## Your package locations should be listed before other locations
include_directories(
# include
  ${catkin_INCLUDE_DIRS}
)

Next, add a single line to package.xml so that it looks like the one below. Can you identify the line that was added?

<?xml version="1.0"?>
<package format="2">
  <name>quadrotor_receive</name>
  <version>0.0.0</version>
  <description>The quadrotor_receive package</description>

  <!-- One maintainer tag required, multiple allowed, one person per tag -->
  <!-- Example:  -->
  <!-- <maintainer email="jane.doe@example.com">Jane Doe</maintainer> -->
  <maintainer email="user@todo.todo">user</maintainer>


  <!-- One license tag required, multiple allowed, one license per tag -->
  <!-- Commonly used license strings: -->
  <!--   BSD, MIT, Boost Software License, GPLv2, GPLv3, LGPLv2.1, LGPLv3 -->
  <license>TODO</license>

  <!--   <doc_depend>doxygen</doc_depend> -->
  <buildtool_depend>catkin</buildtool_depend>
  <build_depend>message_generation</build_depend>
  <build_depend>rospy</build_depend>
  <build_depend>std_msgs</build_depend>
  <build_export_depend>rospy</build_export_depend>
  <build_export_depend>std_msgs</build_export_depend>
  <build_export_depend>message_generation</build_export_depend>
  <exec_depend>message_runtime</exec_depend>
  <exec_depend>rospy</exec_depend>
  <exec_depend>std_msgs</exec_depend>


  <!-- The export tag contains other, unspecified, tags -->
  <export>
    <!-- Other tools can request additional information be placed here -->

  </export>
</package>

Finally, let’s create the receiver Python node, just as the ROS Answers user created it. Run the following in the same terminal as before. Notice that we’re making the Python script executable.

cd ~/catkin_ws/src/quadrotor_receive/src
touch custom_listener.py
chmod +x custom_listener.py

Open custom_listener.py in the IDE and paste in the following code.

#!/usr/bin/env python

import rospy
from quadrotor_receive.msg import Person 

def callback(data):
    rospy.loginfo("%s is age: %d" % (data.name, data.age))

def listener():

    rospy.init_node('custom_listener', anonymous=True)
    rospy.Subscriber("custom_chatter", Person , callback)

    # spin() simply keeps python from exiting until this node is stopped
    rospy.spin()

if __name__=='__main__':
    listener()

So much for all the hard work – let’s see if it works. Time to compile the code. In the same web shell, run the following commands:

Compile and test

cd ~/catkin_ws
catkin_make
source devel/setup.bash

Success! We have successfully created a package with a custom message. Let’s see if we can find the message. You should get an output similar to the one below.

user:~/catkin_ws$ rosmsg show quadrotor_receive/Person
string name
int32 age

Let’s also test receiver node at this point. Though there’s nothing to receive yet, it should not throw any error. First, we need to start roscore.

roscore

Then try to run your subscriber in another terminal. Leave it running!

rosrun quadrotor_receive custom_listener.py

PS: if your code did not compile correctly, please go over the instructions and ensure you have created the files in the exact locations specified.

Step 3: Create the second package that contains the publisher

Create a new folder package. This should be easy-peasy, as most of the work has been done in the previous step. Do the following in a new terminal.

cd ~/catkin_ws/src/
catkin_create_pkg transmit_thrust rospy

Next, create the custom_talker.py node.

cd transmit_thrust/src
touch custom_talker.py
chmod +x custom_talker.py

Open up custom_talker.py in the IDE and paste in the following.

#!/usr/bin/env python
import rospy
from quadrotor_receive.msg import Person

def talker():
    pub = rospy.Publisher('custom_chatter', Person)
    rospy.init_node('custom_talker', anonymous=True)
    r = rospy.Rate(10) #10hz
    msg = Person()
    msg.name = "ROS User"
    msg.age = 4

    while not rospy.is_shutdown():
        rospy.loginfo(msg)
        pub.publish(msg)
        r.sleep()

if __name__ == '__main__':
    try:
        talker()
    except rospy.ROSInterruptException: pass

Please note that:

  • We are importing the custom message from the quadrotor_receive package.
  • We are creating a publisher for the same topic we created a subscriber for in the quadrotor_receive package.

Nothing more is needed. Let’s compile our new package.

cd ~/catkin_ws
catkin_make
source devel/setup.bash

That done, let’s start the custom talker node.

rosrun transmit_thrust custom_talker.py

You should see some output similar to these on the terminal.

[INFO] [1680728823.955004]: name: "ROS User"
age: 4
[INFO] [1680728824.055152]: name: "ROS User"

And…on the terminal where you have the listener tunning, you should see something similar to:

[INFO] [1680728823.956347]: ROS User is age: 4
[INFO] [1680728824.056833]: ROS User is age: 4

And we are done here!

Step 4: Check your learning

Do you understand how to write a ROS publisher and subscriber with a custom message? If you don’t know it yet, please go over the post again, more carefully this time.

(Extra) Step 5: Watch the video to understand how to write a ROS publisher and subscriber with a custom message

Here you go:

Feedback

Did you like this post? Do you have any questions about how to write a ROS publisher and subscriber with a custom message? Please leave a comment in the comments section below, so we can interact and learn from each other.

If you want to learn about other ROS topics, please let us know in the comments area and we will do a video or post about it.

[ROS Q&A] 155 – How to use callback function in ROS Subscriber

[ROS Q&A] 155 – How to use callback function in ROS Subscriber


This video tries to answer the following question found in the ROS Answers forum: https://answers.ros.org/question/303105/how-to-use-callback-with-python/

In the video, we’ll show how to handle and work with callback functions in a ROS Subscriber.

RELATED LINKS

Robot Ignite Academy
ROS Basics Course (Python)
ROS Development Studio (ROSDS)
Original question

We love feedback!

Did you like this video? Do you have questions about what is explained? Whatever the case, please leave a comment on the comments section below, so we can interact and learn from each other.

If you want to learn about other ROS topics, please let us know on the comments area and we will do a video about it.

[ROS in 5 mins] 021 – What is a ROS Subscriber

[ROS in 5 mins] 021 – What is a ROS Subscriber


Hello ROS Developers!

In today’s video we are going to see what is ROS Subscriber and how to see a list of them in a ROS Topic.

Before we start, if you are new to ROS and want to Learn ROS Fast, I highly recommend you to take any of the following courses on Robot Ignite Academy:

We love feedback, so, whether you like the video or not, please leave a comment on the comments section below so that we can interact and learn from each other.

Step1. Create a project in Robot Ignite Academy(RIA)

We have the best online ROS course available in RIA. It helps you learn ROS in the easiest way without setting up ROS environment locally. The only thing you need is a browser! Create an account here and start to browse the trial course for free now! We’ll use the ROS Basics in 5 Days course unit 0 as an example today.

Step2. What is ROS Subscriber?

Let’s start by visualizing the relationship between nodes with

rqt_graph

You can see that the nodes are communicating using the topics. A node can be a publisher publishing some topic or a subscriber to some topic. A topic can even have as many subscribers as you want.

For example, if you use the following command

rostopic echo /camera/rgb/image_raw __name:=subscriber1 > /dev/null

You can add a new subscriber called subscriber1 to the /camera/rgb/image_raw topic and you can add more subscribers if you want.


Edit by: Tony Huang

Pin It on Pinterest