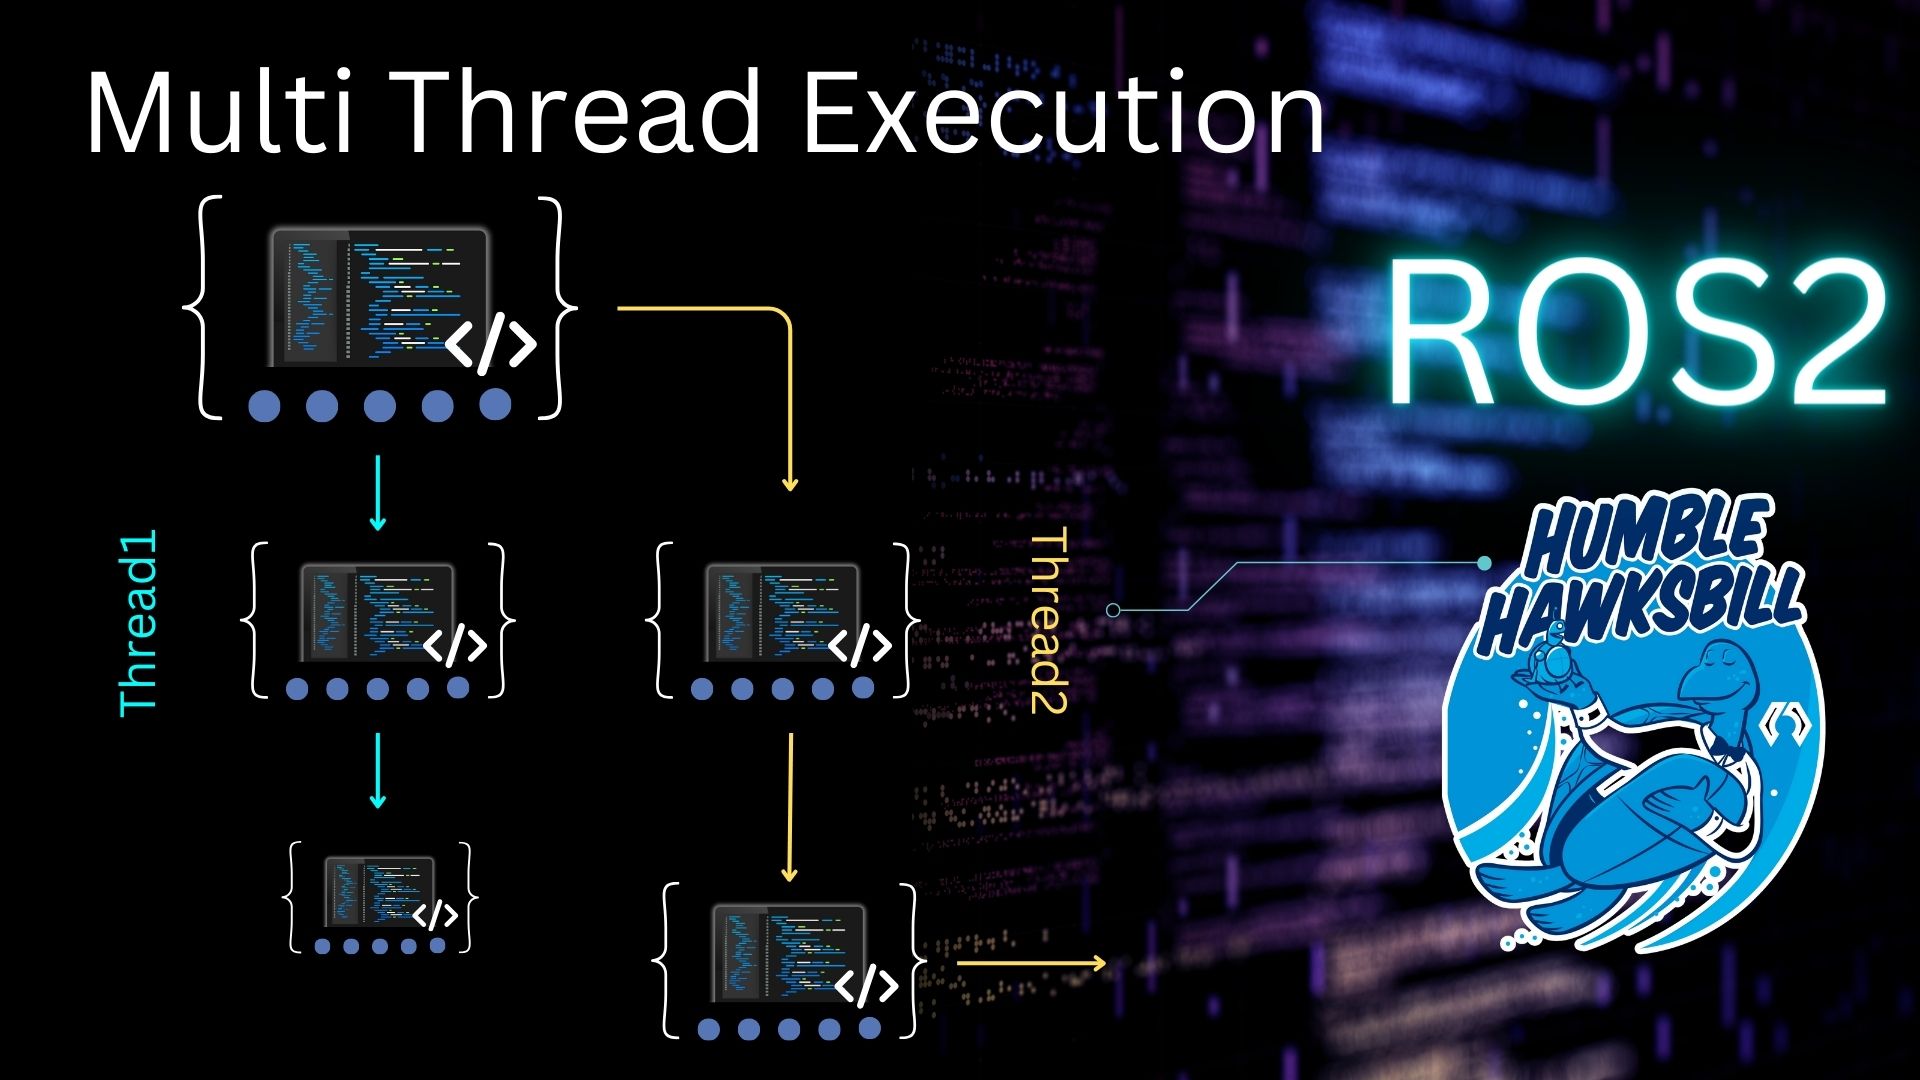
Speed Up Data Processing with Multi-Threaded Execution

Speed Up Data Processing with Multi-Threaded Execution

What you will learn:

How to use multi-threading in ROS2 to execute multiple instances of a callback simultaneously to process received data in parallel and prevent the data queue from overfilling.

Prerequisite:

Basic understanding of publishers, subscribers, and callback functions.

If you want to learn more advanced ROS 2 topics, like callbacks, parameters, QoS in ROS2, DDS in ROS2 and more, in a practical, hands-on way, check out the course Intermediate ROS 2: https://app.theconstruct.ai/courses/113


Disclaimer

Before we start I’d like to clarify that this may not be the best way to handle the problem of when the rate of data received is faster than the time spent in the callback function as it depends on the specifics of your application. It is usually recommended to keep callbacks as fast and simple as possible and to feed your data to your classes rather than do all processing in the callback. However, the concepts in this tutorial are useful to know and worth understanding!

Opening the rosject

In order to follow this tutorial, we need to have ROS2 installed in our system, and ideally a ros2_ws (ROS2 Workspace). To make your life easier, we have already prepared a rosject for that: https://app.theconstruct.ai/l/6111a6de/

Just by copying the rosject (clicking the link above), you will have a setup already prepared for you.

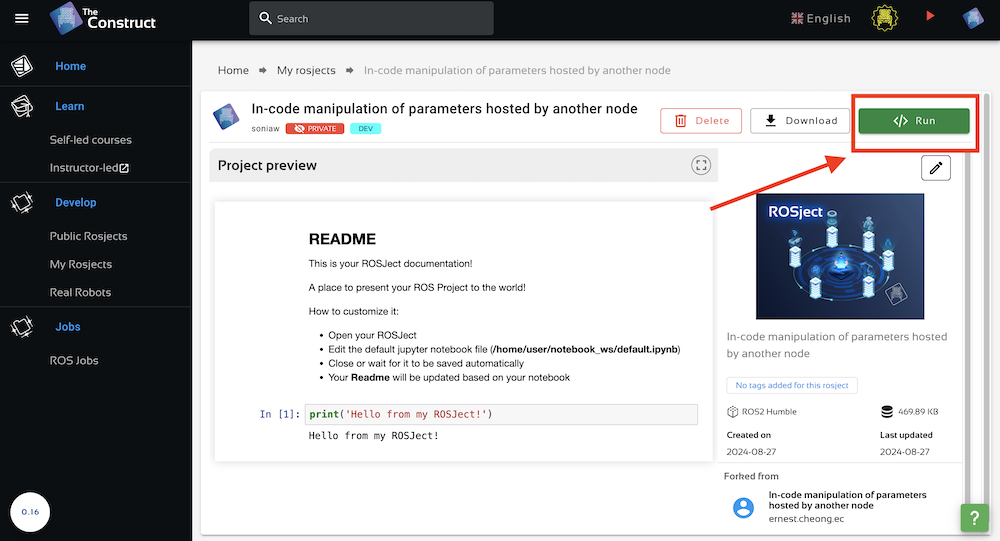
After the rosject has been successfully copied to your own area, you should see a Run button. Just click that button to launch the rosject.

After pressing the Run button, you should have the rosject loaded. Now, let’s head to the next section to get some real practice.

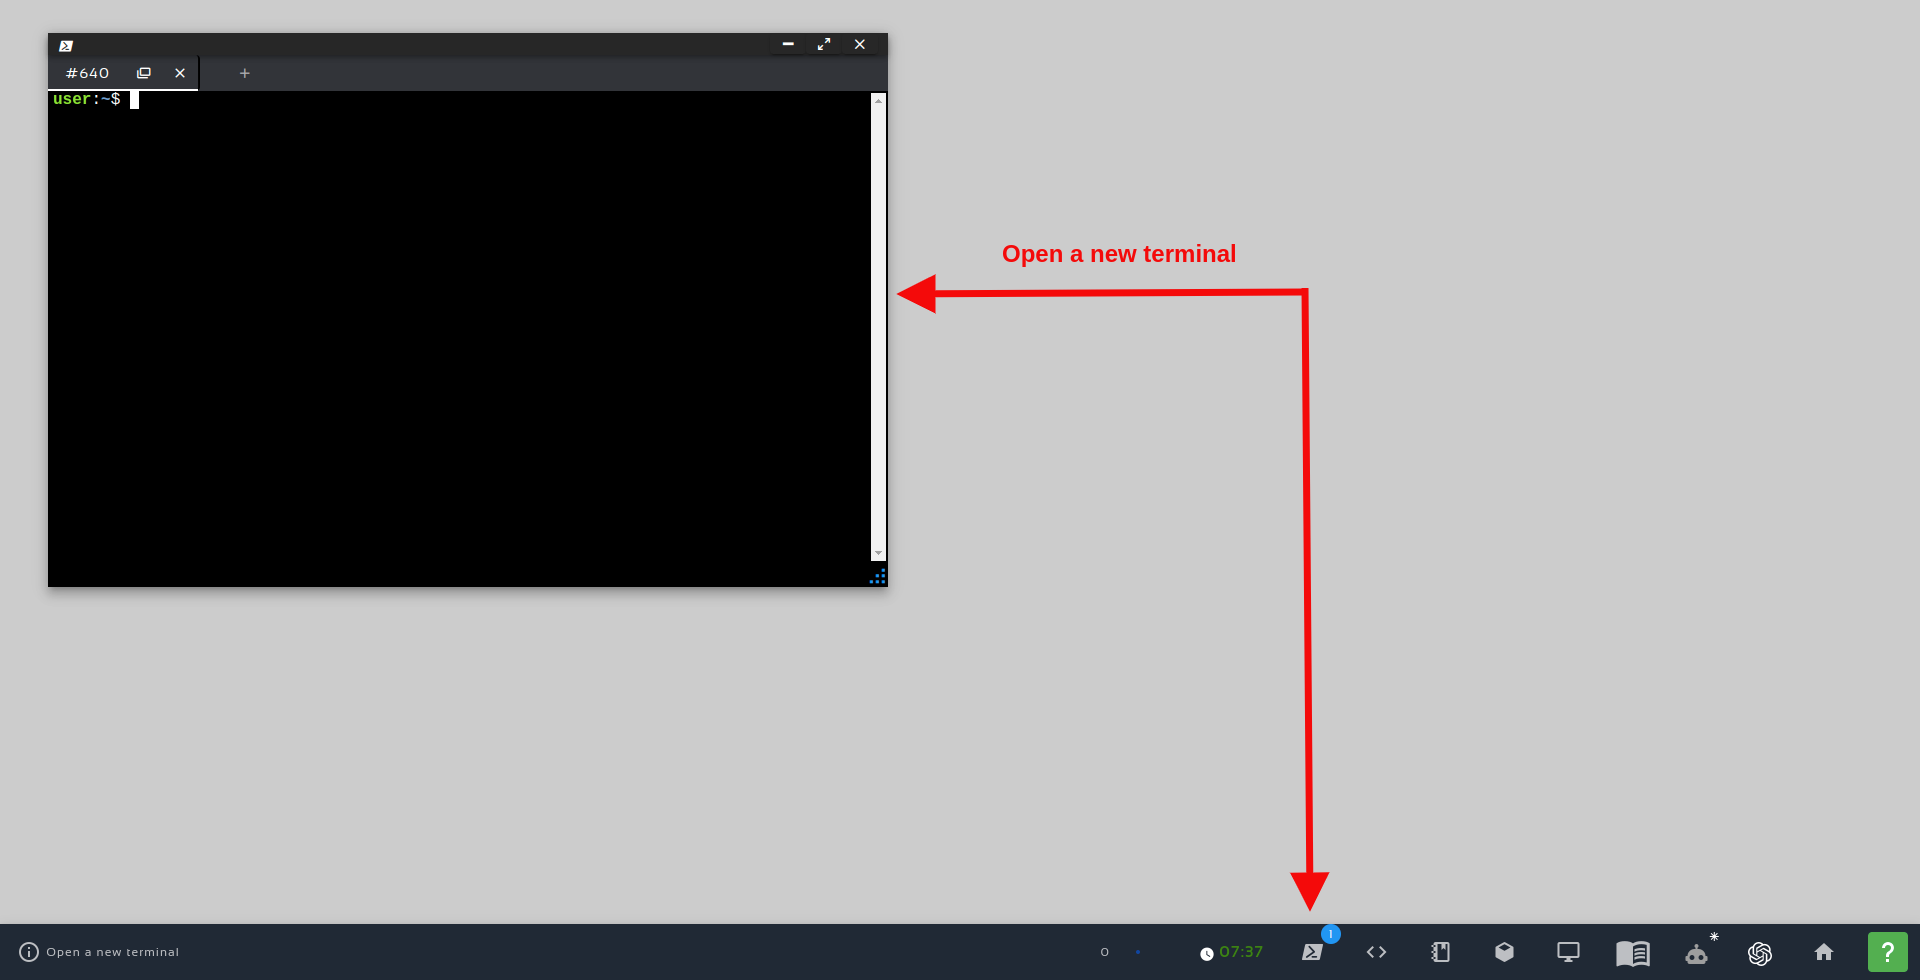
In order to interact with ROS2, we need a terminal.

Let’s open a terminal by clicking the Open a new terminal button.

Create a ROS2 python package with a simple publisher and subscriber

cd ~/ros2_ws/src/
ros2 pkg create multithreaded_py_pkg --build-type ament_python --dependencies rclpy

Specify the directory as a Python package by creating an empty __init__.py file. Then add python subscriber and publisher nodes:

cd multithreaded_py_pkg
mkdir scripts
touch scripts/__init__.py
touch scripts/minimal_sub.py scripts/minimal_pub.py

Here is a simple publisher node (to paste in minimal_pub.py):

  • It publishes “Hello World: 1”, “Hello World: 2” and so on every half a second using a timer callback, incrementing the number by one each time.
  • Here we used the String() data type for simplicity but it could easily be an image from a camera
#!/usr/bin/env python3

import rclpy
from rclpy.node import Node

from std_msgs.msg import String

class MinimalPublisher(Node):

    def __init__(self):
        super().__init__('minimal_publisher')
        self.publisher_ = self.create_publisher(String, 'topic', 10)
        timer_period = 0.5  # seconds
        self.timer = self.create_timer(timer_period, self.timer_callback)
        self.i = 0

    def timer_callback(self):
        msg = String()
        msg.data = 'Hello World: %d' % self.i
        self.publisher_.publish(msg)
        self.get_logger().info('Publishing: "%s"' % msg.data)
        self.i += 1

def main(args=None):
    rclpy.init(args=args)

    minimal_publisher = MinimalPublisher()

    rclpy.spin(minimal_publisher)

    minimal_publisher.destroy_node()
    rclpy.shutdown()

if __name__ == '__main__':
    main()

Here is a simple subscriber node (to paste in minimal_sub.py):

  • It subscribes to the messages sent by the publisher we created, but sleeps for 2 seconds in each callback to simulate processing the data inside the callback
  • Can guess as to what will happen when we launch the publisher and subscriber?
#!/usr/bin/env python3

import rclpy
from rclpy.node import Node

from std_msgs.msg import String

import time

class MinimalSubscriber(Node):

    def __init__(self):
        super().__init__('minimal_subscriber')

        self.subscription = self.create_subscription(
            String,
            'topic',
            self.listener_callback,
            10)
        self.subscription  # prevent unused variable warning

    def listener_callback(self, msg):
        self.get_logger().info('I heard: "%s"' % msg.data)
        time.sleep(2.0)
        

def main(args=None):
    rclpy.init(args=args)

    minimal_subscriber = MinimalSubscriber()
    
    rclpy.spin(minimal_subscriber)
    
    minimal_subscriber.destroy_node()
    rclpy.shutdown()

if __name__ == '__main__':
    main()

Configure the package and test

Modify setup.py

State the entry points:

entry_points={
        'console_scripts': [
            'minimal_pub_executable = scripts.minimal_pub:main',
            'minimal_sub_executable = scripts.minimal_sub:main'
        ],

So your setup.py should look something like this:

from setuptools import find_packages, setup

package_name = 'multithreaded_py_pkg'

setup(
    name=package_name,
    version='0.0.0',
    packages=find_packages(exclude=['test']),
    data_files=[
        ('share/ament_index/resource_index/packages',
            ['resource/' + package_name]),
        ('share/' + package_name, ['package.xml']),
    ],
    install_requires=['setuptools'],
    zip_safe=True,
    maintainer='user',
    maintainer_email='user@todo.todo',
    description='TODO: Package description',
    license='TODO: License declaration',
    tests_require=['pytest'],
    entry_points={
        'console_scripts': [
            'minimal_pub_executable = scripts.minimal_pub:main',
            'minimal_sub_executable = scripts.minimal_sub:main'
        ],
    },
)

Compile the package

cd ~/ros2_ws/
colcon build --packages-select multithreaded_py_pkg

Run the node

In one terminal, start the subscriber:

source ~/ros2_ws/install/setup.bash
ros2 run multithreaded_py_pkg minimal_sub_executable

In another terminal, start the publisher:

source ~/ros2_ws/install/setup.bash
ros2 run multithreaded_py_pkg minimal_pub_executable

After awhile you should get something like this on the publisher’s side:

[INFO] [1711201052.213651723] [minimal_publisher]: Publishing: "Hello World: 0"
[INFO] [1711201052.692100911] [minimal_publisher]: Publishing: "Hello World: 1"
[INFO] [1711201053.192267050] [minimal_publisher]: Publishing: "Hello World: 2"
[INFO] [1711201053.692179012] [minimal_publisher]: Publishing: "Hello World: 3"
[INFO] [1711201054.192910371] [minimal_publisher]: Publishing: "Hello World: 4"
[INFO] [1711201054.692213964] [minimal_publisher]: Publishing: "Hello World: 5"
[INFO] [1711201055.192285741] [minimal_publisher]: Publishing: "Hello World: 6"
[INFO] [1711201055.692159941] [minimal_publisher]: Publishing: "Hello World: 7"
[INFO] [1711201056.192324184] [minimal_publisher]: Publishing: "Hello World: 8"
[INFO] [1711201056.692108815] [minimal_publisher]: Publishing: "Hello World: 9"
[INFO] [1711201057.192262238] [minimal_publisher]: Publishing: "Hello World: 10"
[INFO] [1711201057.692280665] [minimal_publisher]: Publishing: "Hello World: 11"
[INFO] [1711201058.192159660] [minimal_publisher]: Publishing: "Hello World: 12"
[INFO] [1711201058.692317751] [minimal_publisher]: Publishing: "Hello World: 13"
[INFO] [1711201059.192241851] [minimal_publisher]: Publishing: "Hello World: 14"
[INFO] [1711201059.692214363] [minimal_publisher]: Publishing: "Hello World: 15"
[INFO] [1711201060.192314571] [minimal_publisher]: Publishing: "Hello World: 16"
[INFO] [1711201060.692367678] [minimal_publisher]: Publishing: "Hello World: 17"
[INFO] [1711201061.192353913] [minimal_publisher]: Publishing: "Hello World: 18"
[INFO] [1711201061.692429832] [minimal_publisher]: Publishing: "Hello World: 19"
[INFO] [1711201062.192177421] [minimal_publisher]: Publishing: "Hello World: 20"

And this on the subscriber’s side:

[INFO] [1711202061.202686531] [minimal_subscriber]: I heard: "Hello World: 0"
[INFO] [1711202063.206075512] [minimal_subscriber]: I heard: "Hello World: 1"
[INFO] [1711202065.209073951] [minimal_subscriber]: I heard: "Hello World: 2"
[INFO] [1711202067.212279267] [minimal_subscriber]: I heard: "Hello World: 3"
[INFO] [1711202069.213966244] [minimal_subscriber]: I heard: "Hello World: 7"
[INFO] [1711202071.216851195] [minimal_subscriber]: I heard: "Hello World: 11"
[INFO] [1711202073.219905422] [minimal_subscriber]: I heard: "Hello World: 12"

So what happened? Not only is the data delayed as we would expect, but because the data queue is overfilling, we lose data as well and not all published messages are shown on the subscriber’s side.

To fix this by way of multi-threading, we need to understand a little bit about Executors and Callback Groups.

Executors and Callback Groups

Executors

An Executor in ROS2 uses one or more threads of the underlying operating system to invoke callbacks on incoming messages and events:

  • A SingleThreadedExecutor executes callbacks in a single thread, one at a time, and thus the previous callback must always finish before a new one can begin execution.
  • A MultiThreadedExecutor, on the other hand, is capable of executing several callbacks simultaneously. You can create a configurable number of threads to allow for processing multiple messages or events in parallel.

ROS2 nodes invoke the SingleThreadedExecutor when using rclpy.spin. Thus if we want to execute multiple callbacks simultaneously, we will need to use the MultiThreadedExecutor.

With a MultiThreadedExecutor you can select how many threads you need, which is typically one per callback to guarantee that each one can be executed simultaneously.

If you want to know how many threads you can have in your system, you can try this in a Python interpreter:

python3
>>> import multiprocessing
>>> multiprocessing.cpu_count()

Callback groups

Topic subscribers, timers, service servers, action servers all have an argument where you can set the callback group their callbacks will be in.

ROS2 nodes have two types of callback groups:

  • ReentrantCallbackGroup: Callbacks of this group may be executed in parallel.
  • MutuallyExclusiveCallbackGroup: Callbacks of this group must not be executed in parallel.

If nothing is specified, their callbacks will be assigned to the default MutuallyExclusiveCallbackGroup from the node.

You can run different callbacks simultaneously, and execute different instances of the same callback simultaneously. In this tutorial, we will be doing the latter.

More information and examples about Executors and Callback Groups can be found on the ROS2 wiki.

Fixing the issue using multi-threading

Thus we need a MultiThreadedExecutor with the subscription callback in a ReentrantCallbackGroup.

Replace the code in minimal_sub.py with the following (the highlighted lines are areas of change or addition):

  • Note that we have not specified the number of threads e.g. executor = MultiThreadedExecutor(num_threads=4) so it defaults to the CPU count.
  • Note that the node is not managed directly by the rclpy.spin, but by the executor object.
#!/usr/bin/env python3

import rclpy
from rclpy.node import Node

from std_msgs.msg import String

import time

from rclpy.executors import MultiThreadedExecutor
from rclpy.callback_groups import ReentrantCallbackGroup

class MinimalSubscriber(Node):

    def __init__(self):
        super().__init__('minimal_subscriber')

        self.reentrant_callback_group = ReentrantCallbackGroup()

        self.subscription = self.create_subscription(
            String,
            'topic',
            self.listener_callback,
            10,
            callback_group=self.reentrant_callback_group)
        self.subscription  # prevent unused variable warning

    def listener_callback(self, msg):
        self.get_logger().info('I heard: "%s"' % msg.data)
        time.sleep(2.0)
        

def main(args=None):
    rclpy.init(args=args)

    minimal_subscriber = MinimalSubscriber()

    # Use MultiThreadedExecutor
    executor = MultiThreadedExecutor()
    executor.add_node(minimal_subscriber)
    
    try:
        executor.spin()
    except KeyboardInterrupt:
        minimal_subscriber.destroy_node()
        rclpy.shutdown()

if __name__ == '__main__':
    main()

Compile and run the subscriber then publisher.

You should get something like this on the publisher’s side:

[INFO] [1711208685.497376531] [minimal_publisher]: Publishing: "Hello World: 0"
[INFO] [1711208685.979489812] [minimal_publisher]: Publishing: "Hello World: 1"
[INFO] [1711208686.479769383] [minimal_publisher]: Publishing: "Hello World: 2"
[INFO] [1711208686.979284800] [minimal_publisher]: Publishing: "Hello World: 3"
[INFO] [1711208687.479271344] [minimal_publisher]: Publishing: "Hello World: 4"
[INFO] [1711208687.979414332] [minimal_publisher]: Publishing: "Hello World: 5"
[INFO] [1711208688.479397837] [minimal_publisher]: Publishing: "Hello World: 6"
[INFO] [1711208688.979379973] [minimal_publisher]: Publishing: "Hello World: 7"
[INFO] [1711208689.479369576] [minimal_publisher]: Publishing: "Hello World: 8"
[INFO] [1711208689.979201123] [minimal_publisher]: Publishing: "Hello World: 9"
[INFO] [1711208690.479440648] [minimal_publisher]: Publishing: "Hello World: 10"
[INFO] [1711208690.979274539] [minimal_publisher]: Publishing: "Hello World: 11"
[INFO] [1711208691.479435731] [minimal_publisher]: Publishing: "Hello World: 12"
[INFO] [1711208691.979353466] [minimal_publisher]: Publishing: "Hello World: 13"

And this on the subscriber’s side:

[INFO] [1711208685.498698985] [minimal_subscriber]: I heard: "Hello World: 0"
[INFO] [1711208685.980588672] [minimal_subscriber]: I heard: "Hello World: 1"
[INFO] [1711208686.480816203] [minimal_subscriber]: I heard: "Hello World: 2"
[INFO] [1711208686.980613803] [minimal_subscriber]: I heard: "Hello World: 3"
[INFO] [1711208687.480707978] [minimal_subscriber]: I heard: "Hello World: 4"
[INFO] [1711208687.980819846] [minimal_subscriber]: I heard: "Hello World: 5"
[INFO] [1711208688.480733017] [minimal_subscriber]: I heard: "Hello World: 6"
[INFO] [1711208688.980382320] [minimal_subscriber]: I heard: "Hello World: 7"
[INFO] [1711208689.480969703] [minimal_subscriber]: I heard: "Hello World: 8"
[INFO] [1711208689.980889272] [minimal_subscriber]: I heard: "Hello World: 9"
[INFO] [1711208690.480743475] [minimal_subscriber]: I heard: "Hello World: 10"
[INFO] [1711208690.980555923] [minimal_subscriber]: I heard: "Hello World: 11"
[INFO] [1711208691.481019225] [minimal_subscriber]: I heard: "Hello World: 12"
[INFO] [1711208691.980809084] [minimal_subscriber]: I heard: "Hello World: 13"

This means that it is working successfully and you are running multiple instances of the subscriber callback in parallel!

Congratulations. You now have a basic understanding of callback.

To learn more advanced topics about ROS 2, have a look at the course below:

We hope this post was really helpful to you.

This tutorial is created by Robotics Ambassador Ernest.

Video Tutorial

How to create custom interfaces using a field type that is a msg from a package | English ROS2 Tutorial

How to create custom interfaces using a field type that is a msg from a package | English ROS2 Tutorial

What you will learn:

How to create custom interfaces using a field type that is a msg from a package, and not just a primitive built-in-type.

Prerequisite:

Basic understanding of the basics of creating custom interfaces with the built-in field types (including best practices such as creating a package dedicated to your interface definitions).

If you want to learn ROS 2 Python in a practical, hands-on way, check out the course ROS 2 Basics in 5 Days: https://app.theconstruct.ai/courses/132

In this course, you’ll cover the foundational concepts needed to start working with ROS 2, as well as more advanced topics, all while engaging in hands-on practice.


Opening the rosject

In order to follow this tutorial, we need to have ROS2 installed in our system, and ideally a ros2_ws (ROS2 Workspace). To make your life easier, we have already prepared a rosject for that: /https://app.theconstruct.ai/l/5f773d8c/

Just by copying the rosject (clicking the link above), you will have a setup already prepared for you.

After the rosject has been successfully copied to your own area, you should see a Run button. Just click that button to launch the rosject ( see this example).

After pressing the Run button, you should have the rosject loaded. Now, let’s head to the next section to get some real practice.

In order to interact with ROS2, we need a terminal.

Let’s open a terminal by clicking the Open a new terminal button.

Open a new Terminal

Recreating the error: Creating the custom srv

Create a new package named custom_interfaces. This package, however, has to be a CMake package (default when using ros2 pkg create). Currently, there is no way to generate custom interfaces in a pure Python package. However, you can create a custom interface in a CMake package and then use it in a Python node.

cd ~/ros2_ws/src/
ros2 pkg create custom_interfaces

Next, remove the include and src directories and create a directory named srv inside your package. Inside this directory, create the srv file TurnCamera.srv:

cd ~/ros2_ws/src/custom_interfaces
rm -rf include
rm -rf src
mkdir srv
touch srv/TurnCamera.srv

Paste this inside TurnCamera.srv:

float32 deg_turn
---
sensor_msgs/Image camera_image

Then add the following lines to the CMakeLists.txt file:

find_package(rosidl_default_generators REQUIRED)
find_package(sensor_msgs REQUIRED)

rosidl_generate_interfaces(${PROJECT_NAME}
  "srv/TurnCamera.srv"
)

And also the following lines to the package.xml file within the <package> element:

<buildtool_depend>rosidl_default_generators</buildtool_depend>
<exec_depend>rosidl_default_runtime</exec_depend>
<member_of_group>rosidl_interface_packages</member_of_group>

Finally compile the package by running this in the terminal:

cd ~/ros2_ws
colcon build --packages-select custom_interfaces

You should get this error:

Starting >>> custom_interfaces
--- stderr: custom_interfaces
In file included from /home/user/ros2_ws/build/custom_interfaces/rosidl_typesupport_cpp/custom_interfaces/srv/turn_camera__type_support.cpp:7:
/home/user/ros2_ws/build/custom_interfaces/rosidl_generator_cpp/custom_interfaces/srv/detail/turn_camera__struct.hpp:134:10: fatal error: sensor_msgs/msg/detail/image__struct.hpp: No suchfile or directory
  134 | #include "sensor_msgs/msg/detail/image__struct.hpp"
      |          ^~~~~~~~~~~~~~~~~~~~~~~~~~~~~~~~~~~~~~~~~~
compilation terminated.
gmake[2]: *** [CMakeFiles/custom_interfaces__rosidl_typesupport_cpp.dir/build.make:86: CMakeFiles/custom_interfaces__rosidl_typesupport_cpp.dir/rosidl_typesupport_cpp/custom_interfaces/srv/turn_camera__type_support.cpp.o] Error 1
gmake[1]: *** [CMakeFiles/Makefile2:414: CMakeFiles/custom_interfaces__rosidl_typesupport_cpp.dir/all] Error 2
gmake: *** [Makefile:146: all] Error 2
---
Failed   <<< custom_interfaces [20.3s, exited with code 2]

Summary: 0 packages finished [20.8s]
  1 package failed: custom_interfaces
  1 package had stderr output: custom_interfaces

Fixing the error: Adding a dependency

So what was the issue?

Well the OP did not pass the dependencies to rosidl_generate_interfaces by specifying other packages that their custom interface used. In this case, they did not specify the dependency on sensor_msgs which their custom srv TurnCamera.srv used.

They added the find_package line (in green) but did not add the DEPENDENCIES line (in red) in the CMakeLists.txt file. Both lines are necessary when using a msg from another package as a field type:

find_package(rosidl_default_generators REQUIRED)
find_package(sensor_msgs REQUIRED) # Add packages that the custom interfaces depend on

rosidl_generate_interfaces(${PROJECT_NAME}
  "srv/TurnCamera.srv"
  DEPENDENCIES sensor_msgs # Add packages that the custom interfaces depend on
)

After adding this line, recompile and source the workspace:

cd ~/ros2_ws
colcon build --packages-select custom_interfaces
source install/setup.bash

It should work now!

Starting >>> custom_interfaces
Finished <<< custom_interfaces [21.1s]

Summary: 1 package finished [21.5s]

You can verify that your custom srv has been created successfully by running these two commands:

ros2 interface list | grep custom

ros2 interface show custom_interfaces/srv/TurnCamera

You should get these results respectively:

custom_interfaces/srv/TurnCamera

float32 deg_turn
---
sensor_msgs/Image camera_image
        std_msgs/Header header #
                builtin_interfaces/Time stamp
                        int32 sec
                        uint32 nanosec
                string frame_id
                                     # Header frame_id should be optical frame of camera
                                     # origin of frame should be optical center of cameara
                                     # +x should point to the right in the image
                                     # +y should point down in the image
                                     # +z should point into to plane of the image
                                     # If the frame_id here and the frame_id of the CameraInfo
                                     # message associated with the image conflict
                                     # the behavior is undefined
        uint32 height                #
        uint32 width                 #
        string encoding       #
                              # taken from the list of strings in include/sensor_msgs/image_encodings.hpp
        uint8 is_bigendian    #
        uint32 step           #
        uint8[] data          #

The same principles should apply for custom msgs and actions with field types that are msgs from packages rather than simply the primitive built-in-types.

Congratulations. You now know how to create ROS 2 Custom Interface.

To learn more advanced topics about ROS 2, have a look at the course below:

We hope this post was really helpful to you.

This tutorial is created by Robotics Ambassador Ernest.
Video Tutorial

Comment créer des bibliothèques avec ROS2 C++ – French ROS Tutorial

Comment créer des bibliothèques avec ROS2 C++ – French ROS Tutorial

This tutorial is created by Robotics Ambassador 023 Enzo

Rosbotics Ambassador Program https://www.theconstruct.ai/rosbotics-ambassador/)
Cours: ROS2 Basics in 5 Days C++: https://app.theconstructsim.com/courses/133

Introduction

Le but de ce tutoriel est d’apprendre à créer et utiliser des bibliothèques dans les packages ROS2 C++. Lors du développement d’un projet, il est essentiel de garder son code structuré pour assurer un développement efficace. L’utilisation de bibliothèque (ou library) est indispensable pour cela car cela permet de regrouper les codes sources en fonction de leurs usages et donc de séparer des fonctionnalités distinctes. La création de bibliothèques est donc essentielle pour rendre votre code plus structuré, modulaire et réutilisable. Nous allons donc voir ensemble comment déclarer et faire appel une library dans les packages ROS2 C++. Nous allons dans un premier temps voir comment simplement utiliser un header dans un package ROS2 puis nous déclarerons la même bibliothèque dans un package indépendant et utiliserons celle ci dans un autre package.

Pré-requis

Pour lancer et tester le code, vous devez lancer la simulation du turtlebot3 sur gazebo. Pour faire cela, entez les commandes suivantes dans le terminal:

(more…)

پیکیج کیسے بنایا جاۓ ؟ ROS2 | Urdu ROS2 Tutorial

پیکیج کیسے بنایا جاۓ ؟ ROS2 | Urdu ROS2 Tutorial


:اس پوسٹ میں استعمال ہونے والے وسائل کی فہرست

  1. Use this rosject: https://app.theconstructsim.com/l/5bda8c95/
  2. The Construct: https://app.theconstructsim.com/
  3. ROS2 Courses –▸
    1. ROS2 Basics in 5 Days Humble (Python): https://app.theconstructsim.com/Course/132


Video Tutorial

Làm sao để sử dụng gói ROS Localization trong tích hợp cảm biến(sensor fusion) cùng với Turtlebot 3 – Vietnamese ROS Tutorial

Làm sao để sử dụng gói ROS Localization trong tích hợp cảm biến(sensor fusion) cùng với Turtlebot 3 – Vietnamese ROS Tutorial

Những điều bạn sẽ được biết trong blog này:

  1. Cách cài đặt IMU tools, Turtlebot 3 simulation, Robot Localization package ở ROS2 foxy
  2. Chạy một ví dụ về gazebo và Rviz cùng turtlebot3
  3. Chỉnh sửa file urdf để thêm các cảm biến cần thiết vào turtlebot3

Danh sách nguồn tài liệu bổ trợ trong post này

  1. Sử dụng rosject: **https://app.theconstructsim.com/rosjects/750453**
  2. The Construct**: https://app.theconstructsim.com/**
  3. Khóa học về ROS2 →
    1. Introduction to Gazebo Sim with ROS2: https://app.theconstructsim.com/courses/introduction-to-gazebo-ignition-with-ros2-170/
    2. URDF for Robot Modeling in ROS2: https://app.theconstructsim.com/courses/83
    3. TF ROS2: https://app.theconstructsim.com/courses/217

Tổng quan

Trong bài toán định vị (localization) ở robot, chúng ta cần sự trợ giúp từ các cảm biến như IMU, GPS, và Odometry. Bằng cách kết hợp các tín hiệu từ các cảm biến lại với nhau(sensor fusion) một lượng thông tin bổ ích sẽ giúp cho robot định vị được tọa độ chính xác trong các môi trường khác nhau. Trong project này, mình sẽ giới thiệu tới các bạn Robot Localization package một công cụ hữu ích để tích hợp sensor fusion cùng với turtlebot 3. Ở project này, mức độ đòi hỏi các bạn cần có một số kiến thức cơ bản như urdf, frames,… để có thể chỉnh sửa và thay đổi các file sẵn có. Hy vọng blog này sẽ mang lại cái nhìn tổng quan về chủ đề sensor fusion và localization ở robotics.

Khởi động rosject

The Construct đã tạo ra một công cụ rất hữu ích là rosject, nơi các bạn dễ dàng truy cập và khởi tạo các project cùng với ROS ở các phiên bản khác nhau:

**https://app.theconstructsim.com/rosjects/750453**

Như hình bên dưới là một rosject hoàn chỉnh, bạn chỉ việc nhấn vào nút RUN để khởi động rosject.

Sau khi nhấn vào nút RUN bạn sẽ thấy rosject được chạy trên màn hình. Ở đây, rosject cung cấp cho bạn cả terminal để có thể nhập các câu lệnh:

https://flic.kr/p/2pBd9pz

Bây giờ cùng nhau đến bước tiếp theo trong ví dụ này nhé.

Cài đặt các package cần thiết

Đầu tiên các bạn cần cài đặt các package cần thiết để có thể thực hiện project này, sau khi vào môi trường làm việc catkin là ros2_ws các bạn làm theo bằng cách thực hiện các câu lệnh sau đây:

cd ros2_ws/src

git clone https://github.com/Eric-nguyen1402/turtlebot3_localization_ws.git

sudo apt update

cd ..

sudo rosdep install --from-paths src --ignore-src -r -y

Sau bước này thì các bạn sẽ cần một ít thời gian để có thể cài đặt thành công các gói cần thiết cho chương trình.

https://flic.kr/p/2pBfpkb

Tiếp theo sử dụng câu lệnh sau để build môi trường catkin

colcon build --symlink-install

https://flic.kr/p/2pBfpjV

Mình sẽ giải thích lý do tại sao các bạn lại phải sử dụng đường link github phía bên trên. Vì ở trong project này mình muốn tổng hợp và sử dụng những packages cần thiết và chỉnh sửa một số nội dung file nên mình đã gom thành một package lớn bao gồm các packages nhỏ để tiện cho việc chạy chương trình.

https://flic.kr/p/2pBe84i

Mô phỏng trên Gazebo cùng robot

Sau khi đã cài đặt đầy đủ các package cần thiết. Bước tiếp theo bạn cần chọn model robot cho project của bạn. mình sử dụng waffle trong project này:

source ~/ros2_ws/install/setup.bash

export TURTLEBOT3_MODEL=waffle

Sau đó để sử dụng môi trường gazebo và robot, bạn cần truy xuất môi trường gazebo và chạy ros launch package:

export GAZEBO_MODEL_PATH=$GAZEBO_MODEL_PATH:~/ros2_ws/src/turtlebot3_simulations/turtlebot3_gazebo/models/

ros2 launch turtlebot3_gazebo turtlebot3_world.launch.py

Cửa sổ Gazebo sẽ xuất hiện như trên cùng với robot waffle.

https://flic.kr/p/2pBe83G

Chạy Robot Localization package

Như bạn thấy môi trường và robot đã có, điểm quan trọng trong project lần này là biết cách áp dụng các cảm biến như IMU, Odometry, GPS,.. cùng với robot trong nhiệm vụ tổng hợp các tiến hiệu từ các cảm biến khác để giải quyết bài toán định vị cho robot. Ở cửa sổ thứ 2, các bạn thực hiện câu lệnh sau đây:

source ~/ros2_ws/install/setup.bash

ros2 launch robot_localization ekf.launch.py

https://flic.kr/p/2pBe83w

Tạo và mô phỏng robot cùng cảm biến trên Rviz

Sau khi đã có môi trường cho robot hoạt động là gazebo, có các cảm biến được tích hợp trên robot, nhiệm vụ là làm sao để có thể xác định và sử dụng các cảm biến để phục vụ cho bài toán định vị trên robot. Ở đây trên Rviz sẽ mô phỏng và cho thấy các trục tọa độ của từng thành phần được gắn vào robot. Trong các thư mục được cài đặt mình cũng đã chỉnh sửa phần mô phỏng để cho thấy sự thay đổi khi sử dụng gói Robot Localization:

source ~/ros2_ws/install/setup.bash

rviz2 -d ~/ros2_ws/src/turtlebot3_localization_ws/turtlebot3_simulations/turtlebot3_gazebo/rviz/tb3_gazebo_robot_localization.rviz

https://flic.kr/p/2pBeMz2

Các bạn lưu ý là ở đây odom sẽ là frame chính của chúng ta, sau khi mô phỏng trên RViz thành công bây giờ các bjan có thể tận dụng các cảm biến đưuọc cài đặt sẵn trên robot và phục vụ cho project của các bạn như SLAM,…

Thêm một chút gợi ý nho nhỏ cho các bạn để kiểm tra rằng mình đã có các topic và frame được liên kết với nhau chưa. Đầu tiên mình sử dụng:ros2 topic list và kết quả xuất hiện các topic như GPS, IMU, Odometry.

https://flic.kr/p/2pB8KvY

Bên cạnh đó, ROS cung cấp câu lệnh để kiểm tra sự kết nối giữa các frame được khai báo: ros2 run tf2_tools view_frames.py

Sau đó file sẽ được lưu dưới dạng pdf và bạn chỉ việc mở lên để kiểm tra bằng câu lệnh sau:

evince frames.pdf

https://flic.kr/p/2pBfpiH

Để có được kết quả như trên, thì chủ yếu mình đã chỉnh sửa và thêm vào IMU và GPS tại urdf file. Các bạn có thể mở gói turtlebot3_description để chỉnh sửa tùy theo project của mình.

https://flic.kr/p/2pBeMA4

Hy vọng qua blog này các bạn đã có thêm một số kiến thức cũng như công cụ hỗ trợ cho các dự án liên quan tới robotics sử dụng ROS. Bên cạnh đó, các bạn có thể theo dõi các blog khác cũng như các khóa học liên quan trên The Construct nhé.


Video Tutorial

Pin It on Pinterest