THIS CONTENT IS OUTDATED. PLEASE DO NOT FOLLOW IT THROUGH. WE ARE UPGRADING THIS CONTENT FOR THE NEW VERSION OF ROSDS IN THE NEXT WEEKS. STAY TUNED.
Intro
First of all, we want to explain what does “Establish a real robot connection” means.
- It means that we connect the ROS Development Studio (ROSDS ) remote Server that you launch each time you open a ROSject, with another device.
- This device can be Another remote server, a robots computer or your own computer.
- The only limitation for the moment is that these devices have to use Ubuntu distribution you guarantee that it will work.
- Establish a connection means to be able to ping that device and be able to see from both devices all the topics, services, and ROS related elements, no matter if they are published in the ROSDS or the other device.
Once that explained, let’s see the two steps you have to follow to get this connection up and running.
How to start the Real Robot Connection
To do it you have to follow these three steps:
- Install the rosds_real_robot_connection in the device you want to connect to ROSDS. Here you have the Git.
- Turn On the Real Robot Connection from the Robots side.
- Establish the connection from ROSDS side.
1. Install rosds_real_robot_connection
The first thing you need is the IP_DEVICE and user_name_in_device of your device. To get it you can use two systems:
- Connect physically to your Device and execute the following command in a terminal:
ifconfig–> Extract the IP_DEVICE from inet addr:XXX.XXX.X.XXXwhoami–> It will give you the user_name_in_device.
- Use an IP scanning app in your phone, like Fing, and search for the name of your device in the list given, where you will find its IP. This is useful when you don’t have access to the device directly or it doesn’t have a screen connected.
Now that you have the IP_DEVICE and the username.
- Access the device ( Robots CPU, your computer or another remote server ). You can do this through several methods.
- Through SSH:
ssh user_name_in_device@IP_DEVICE - Through RemoteDesktop: we recommend using Remina. Just set up the user, password, and IP.
- Through SSH:
- Execute the following commands to install everything:
ssh user_name_in_device@IP_DEVICE
git clone https://bitbucket.org/theconstructcore/rosds_real_robot_connection.gitcd rosds_real_robot_connection
sudo ./realrobot_setup.shsudo reboot
And that it if all went well you will have the device real robot connection server ready to go. To test that its operational just execute this command once the first reboot has been done:
- systemctl status rosds_connector.service
You should get a message similar to this:
ubuntu@ip-172-31-36-185:~$ systemctl status rosds_connector.service
● rosds_connector.service – ROSDS Connector
Loaded: loaded (/etc/systemd/system/rosds_connector.service; enabled; vendor preset: enabled)
Active: active (running) since Wed 2019-09-11 09:36:39 UTC; 24s ago
Main PID: 837 (start.sh)
Tasks: 8 (limit: 4478)
CGroup: /system.slice/rosds_connector.service
├─ 837 /bin/bash /usr/share/rosds_connector/start.sh ubuntu
└─1599 node /usr/share/rosds_connector/bin/wwwSep 11 09:36:39 ip-172-31-36-185 systemd[1]: Started ROSDS Connector.
Sep 11 09:36:43 ip-172-31-36-185 nodejs-example[837]: Now using node v10.15.3 (npm v6.4.1)
Turn On the Real Robot Connection from the Robots side
Now you have to follow these simple steps:
- Open a web browser. We recommend google chrome.
- Type in the URL:
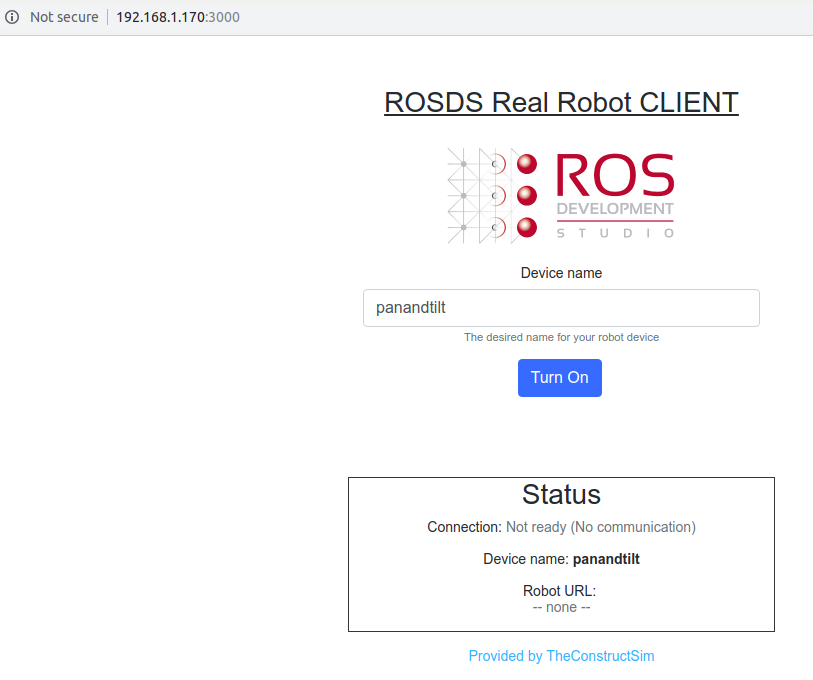
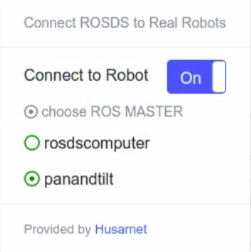
IP_DEVICE:3000 - Here is an example of what you should get if the IP_DEVICE=192.168.1.170 and the user_name_in_device=panandtilt
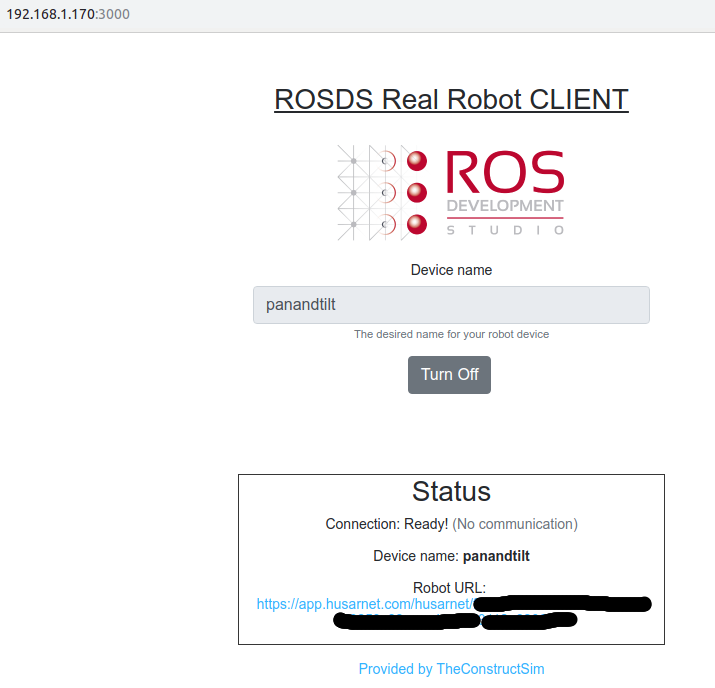
- Now you have to click on Turn ON. This will generate the Robot URL that you need to make the connection in ROSDS.
- To TURN OFF the connection from the device side, just click on the TURN OFF button. This will sever the link and ROSDS won’t be able to connect anymore until you turn it ON again and update the connection with the new Robot URL generated.
Establish the connection from ROSDS side
For this last step, you need from the previous step:
- Robot URL
- Device Name
Follow these steps:
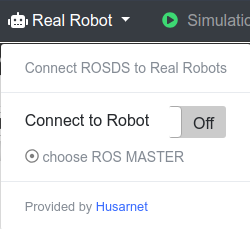
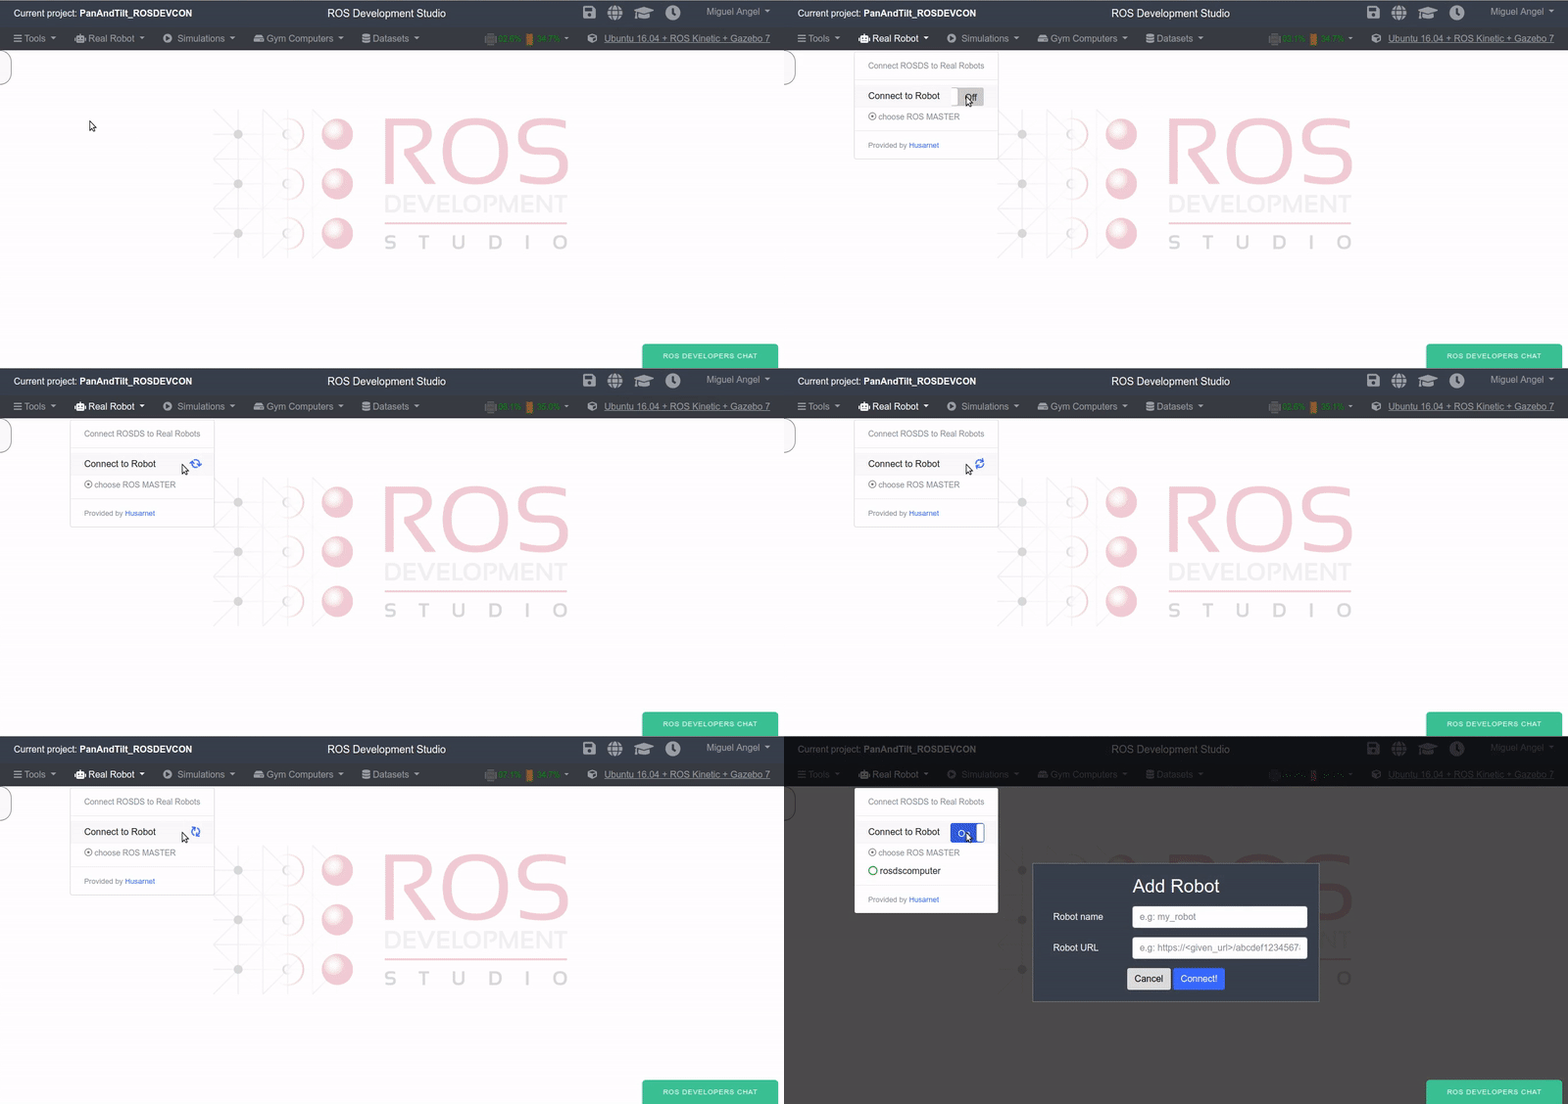
- You have to click the RealRobot tab, Connect to Robot ON, and after a few minutes, you will be greeted with the configuration window.
- Place in the corresponding form input the Robot URL and the Device Name.
- Click on CONNECT.
- After around 5-30 seconds the connection will have been established.
- Now the CONNECTION is ESTABLISHED. By default, the new device is the ROS_MASTER. If you need to change it to ROSDS computer just select it.
Test that everything is working
If you want to be sure that everything is working, we indicate some simple tests you can perform to be sure that your Real Robot Connection is working perfectly:
1. Basic RealRobot connection Testing
Here we test only the raw connection, ROS is not tested here:
- You should be able to ping the device from rosdscomputer and ping rosdscomputer from the device.
- Inside the Device:
ping6 rosdscomputer- Output:
PING rosdscomputer(rosdscomputer) 56 data bytes
64 bytes from rosdscomputer: icmp_seq=1 ttl=3 time=49.0 ms
- Output:
- Inside ROSDS web shell:
ping6 devicename- Output:
PING panandtilt(panandtilt) 56 data bytes 64 bytes from panandtilt: icmp_seq=1 ttl=3 time=48.7 ms
- Output:
- Inside the Device:
- You should be able to do an SSH the Device from ROSDS if you have the password of the device of course:
- Inside ROSDS: ssh
devicename@IP_DEVICE
- Inside ROSDS: ssh
Basic ROS Test
Now we can test if ROS is working:
- Remember that you have to decide who is the ROS_MASTER, and therefore where you will have to launch the ROSCORE.
- Inside the Device:
rostopic pub /device_test std_msgs/String "data: 'I am The Device'" -r1- Output:
ERROR: Unable to communicate with master!. - Of course, you have to launch the ROSCORE first inside the device if that’s the one you had set up as ROSMASTER!
- Inside the Device:
roscore - Output2: Nothing. That means that the rostopic publish is working.
- Output:
- Inside ROSDS web shell:
rostopic echo /device_test- You should see the message:
I am The Device
- You should see the message:
And now let’s test the other way round:
- Inside ROSDS web shell:
rostopic pub /rosds_test std_msgs/String "data: 'I am ROSDS'" -r1 - Inside the Device:
rostopic echo /rosds_test
Connect through ssh from ROSDS:
You can also connect through ROSDS to your connected robot. You just have to:
- Install the following in the robots computer:
sudo apt-get install openssh-server
sudo netstat -lntp | grep 22
Doing this you will install ssh server and check that its running.
- To connect through ROSDS you need the name of the user in the robots pc, for example “finn”, and the hostname given in the real robot connection config , for example “jacke”. Then the command you need to write in the web shell is:
ssh finn@jacke
This will ask you the password for that user. And that it!
Real Life Example
You have a whole video series that explains how to use this to move a pan and tilt for face recognition using a Raspberry Pi that at the end we will connect through ROSDS.
Here you can find the ROSject: http://www.rosject.io/l/ae3e51b/
Here you have the Git
Here you will find a video series where everything is explained:
Fifth Episode: Real Robot Connection Face Tracking
Third Episode: Create Simulation



Message: nice post, it is awesome and unique
I have followed all instructions per “Pan & Tilt Real Robot Connection Face Tracking | S3.Ep.5” video. When I start my connection via the ROSDS Real Robot CLIENT it is not generating a URL. Any tips for debugging?
Ferforje ustası
The Dog House gerçekten kazandırıyor. Bedava slot oynama fırsatı ile başladım, yüksek kazançlı slotlar sayesinde keşfettim! 🎰 🍒